Method 1: Install using a plugin
- Go to your dashboard.
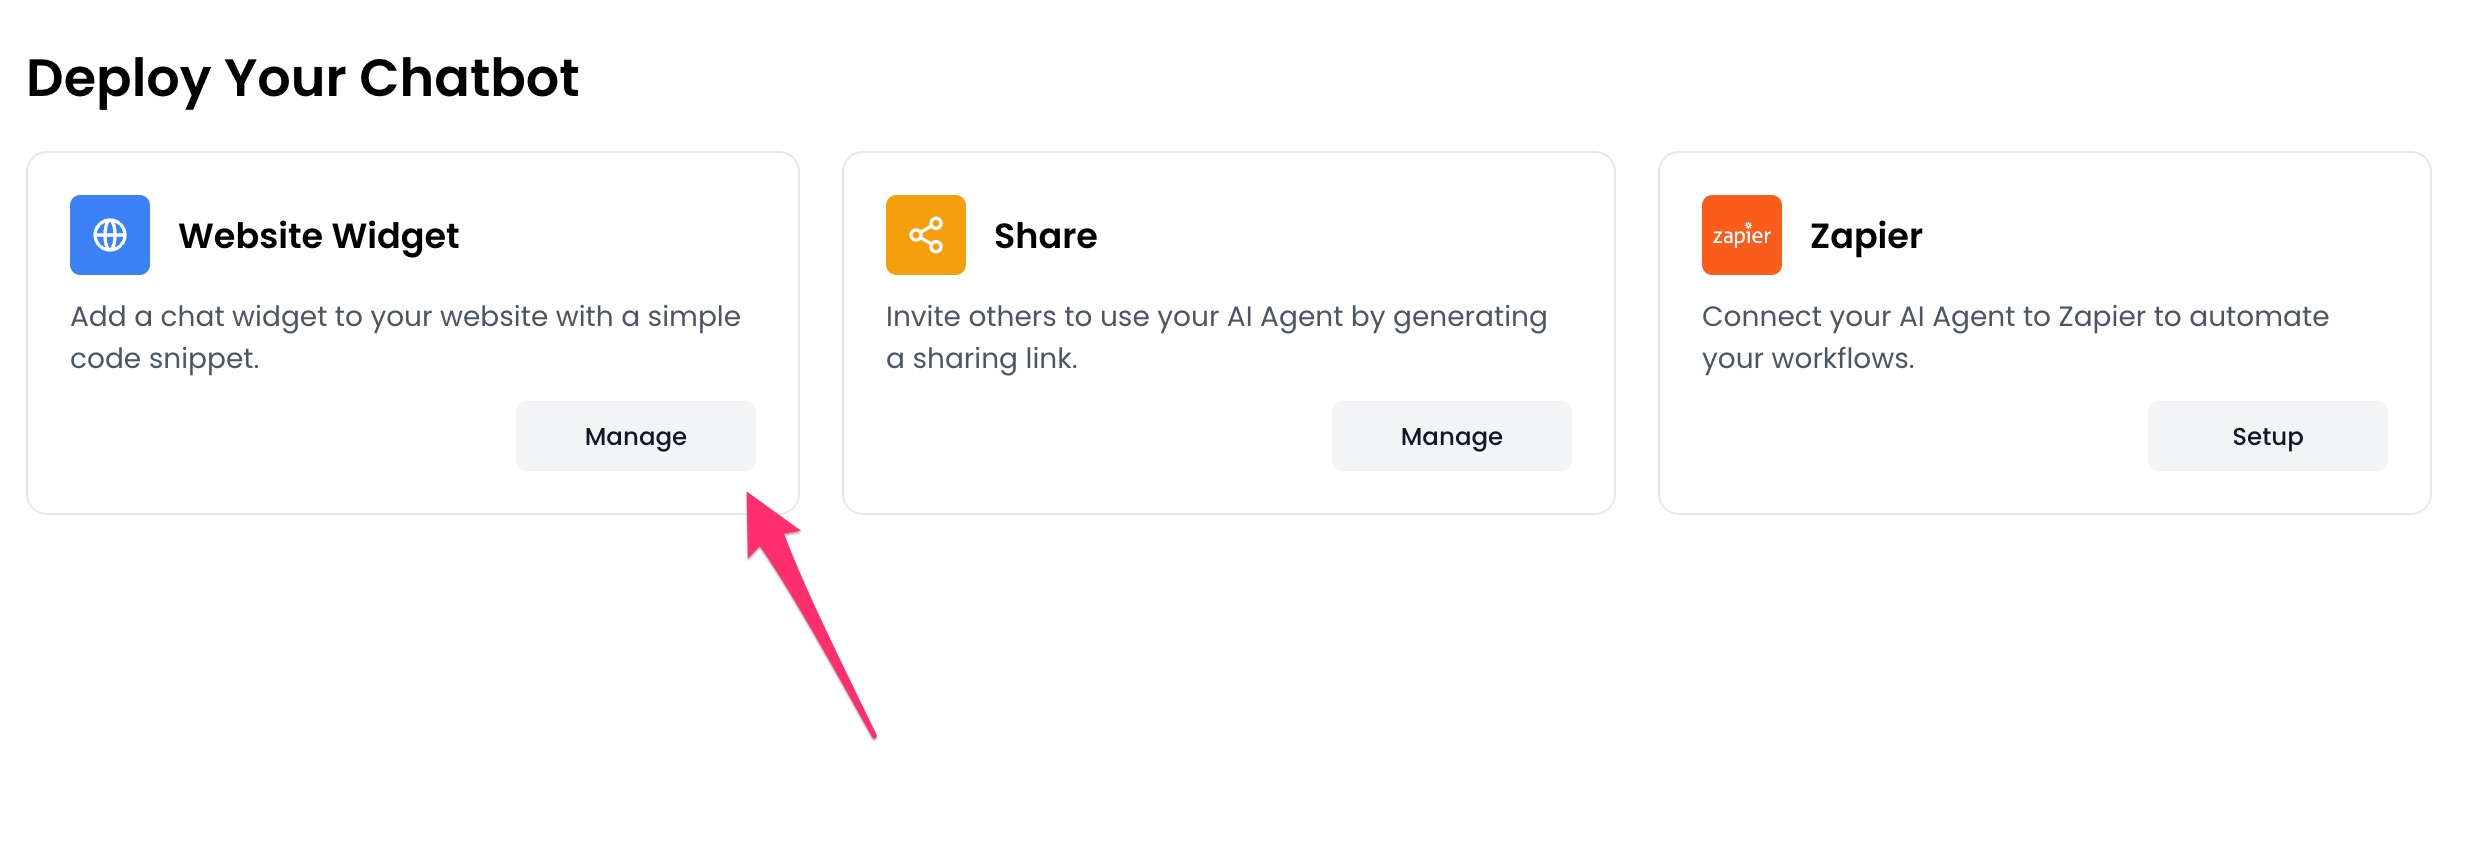
- Click
Deploybutton in the sidebar menu.

- Click the
Managebutton under theWebsite Widgetoption.
- Design the appearance of the widget by clicking the
Open widget designerbutton.

- Select the display mode for your chatbot, such as “Floating Chat”, “Inline”, or “Fullscreen”.
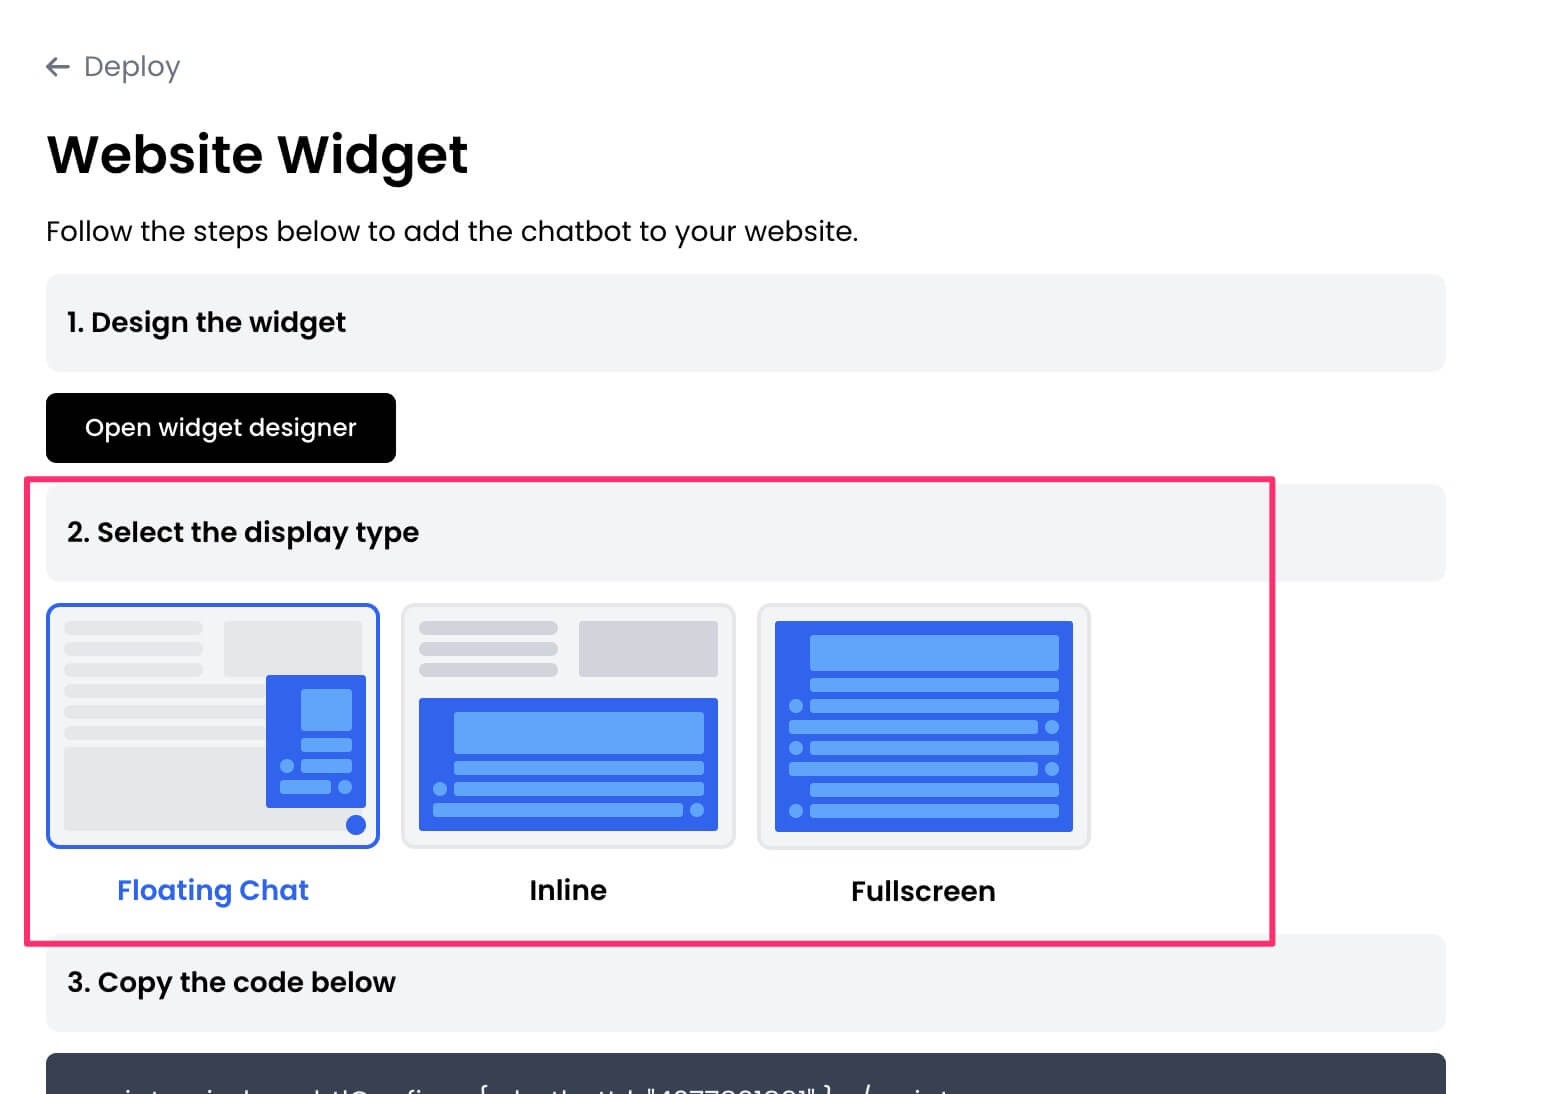
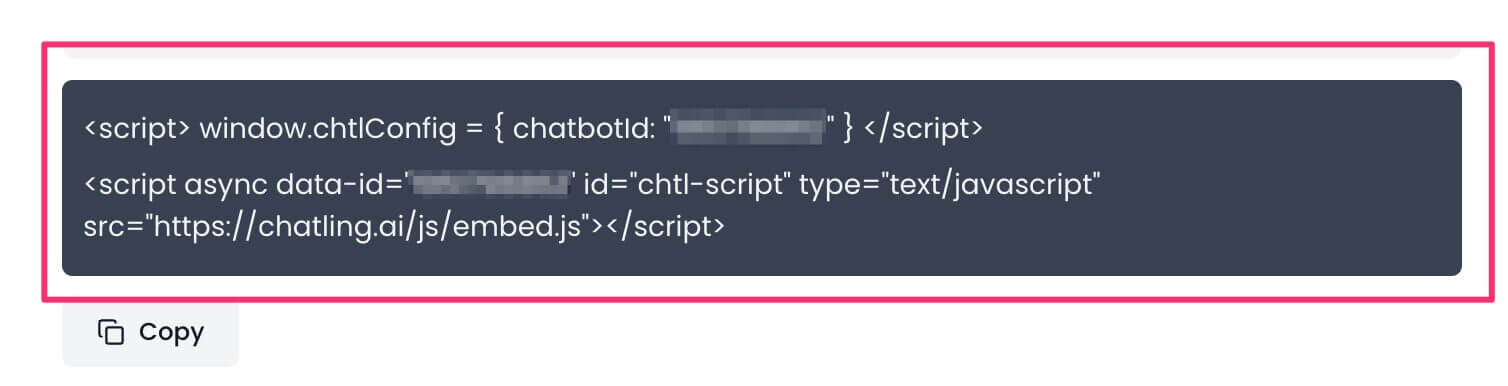
- Copy the widget code.
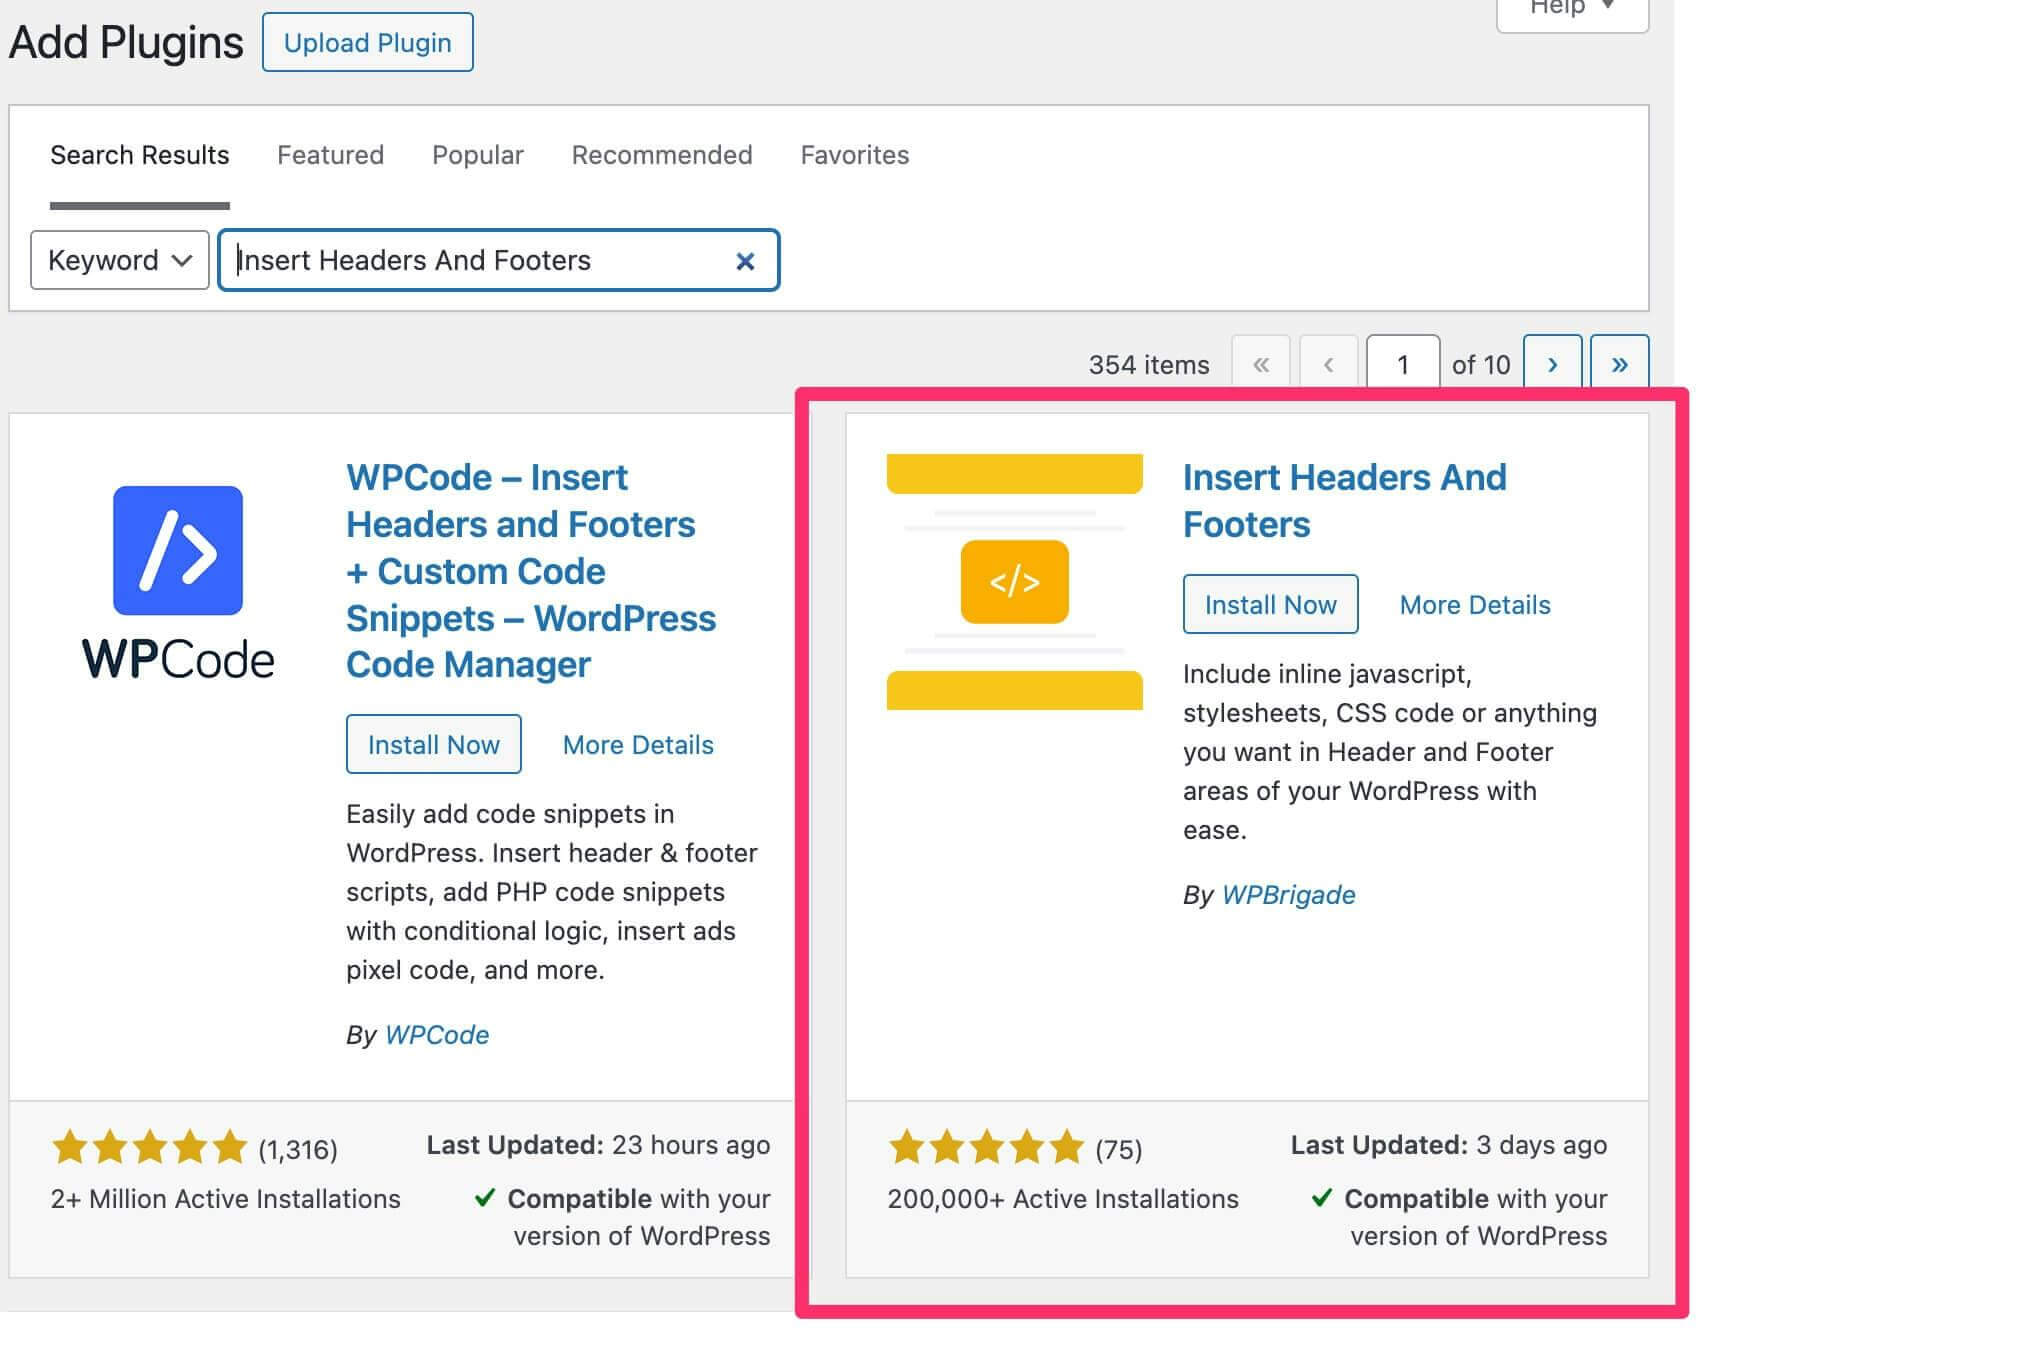
- In your WordPress dashboard, go to
Plugins>Add new plugin.

- Search for the
Insert Headers And Footersplugin and install the one by WPBrigade.
- Once installed, activate the plugin.
-
Go to
Settings>WP Headers and Footersfrom the sidebar.

- Paste the chatbot widget code in the header section.
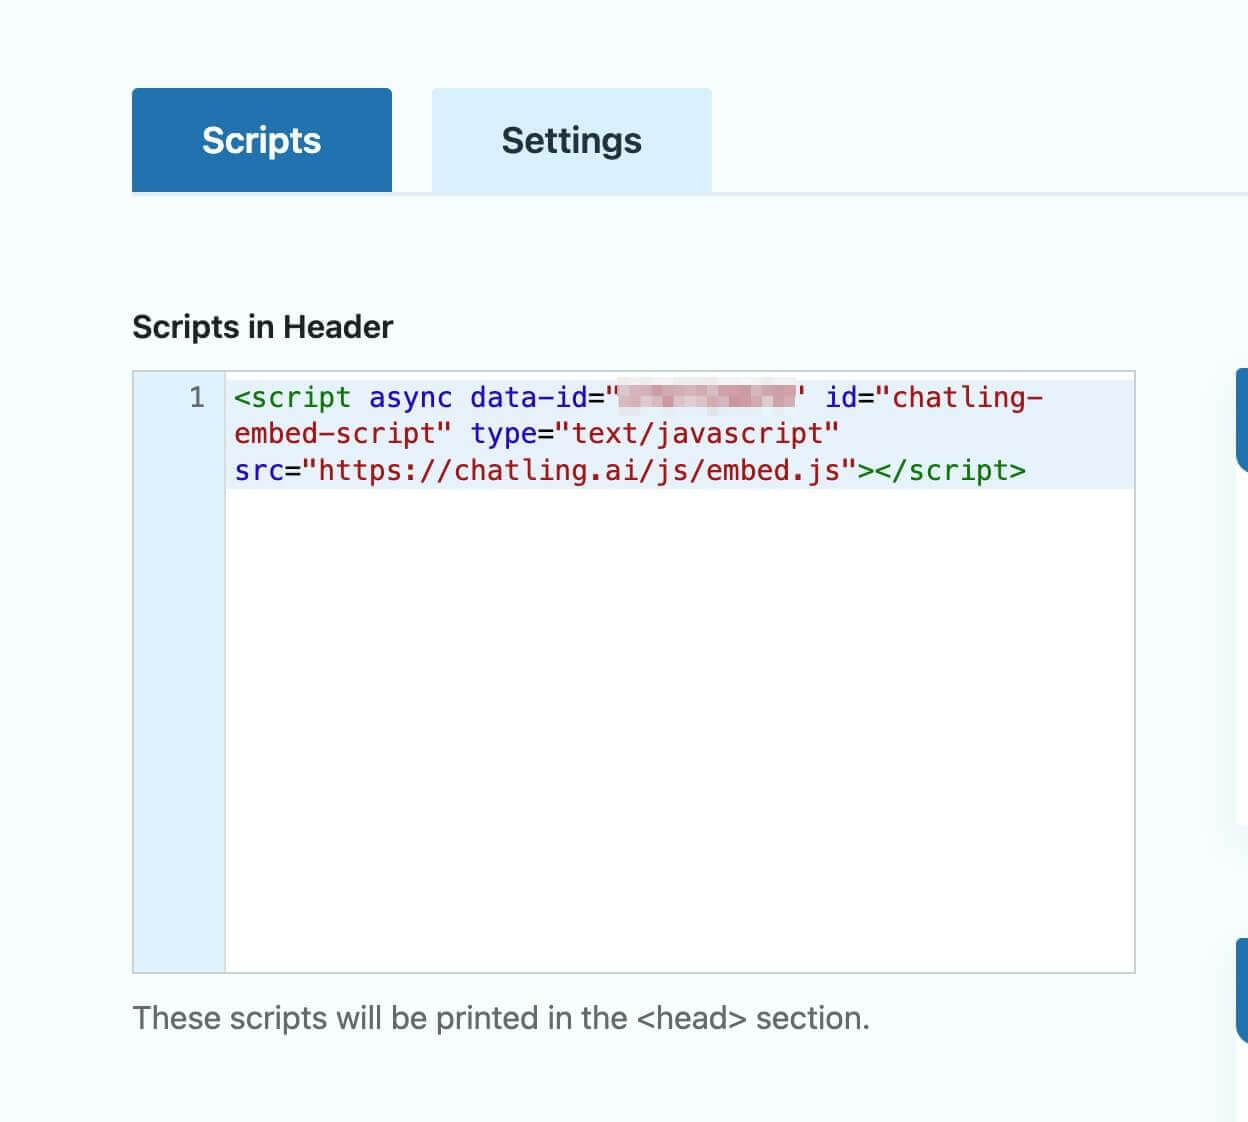
- Click
Save Changes.
Method 2: Install using the theme editor
- Follow steps 1-6 from Method 1 to copy the widget code.
- Open your WordPress dashboard.
-
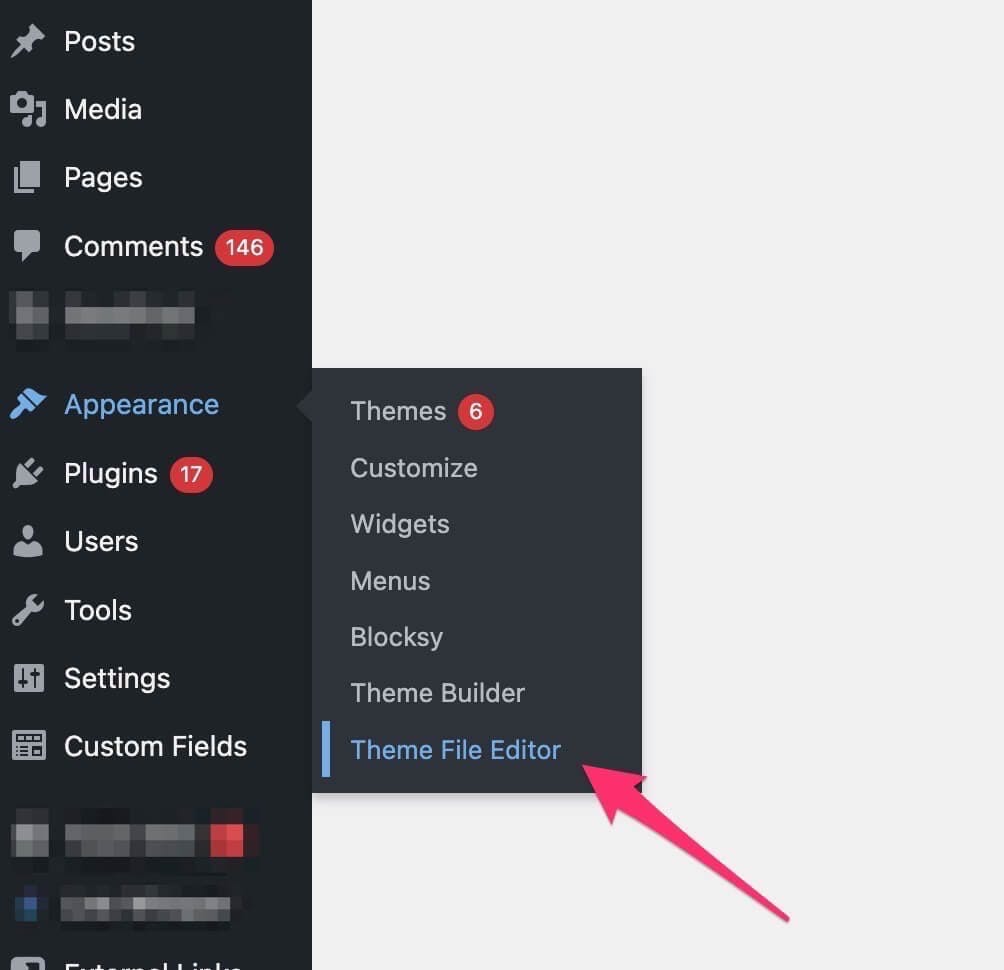
From the sidebar menu, select
Appearance>Theme File Editor.
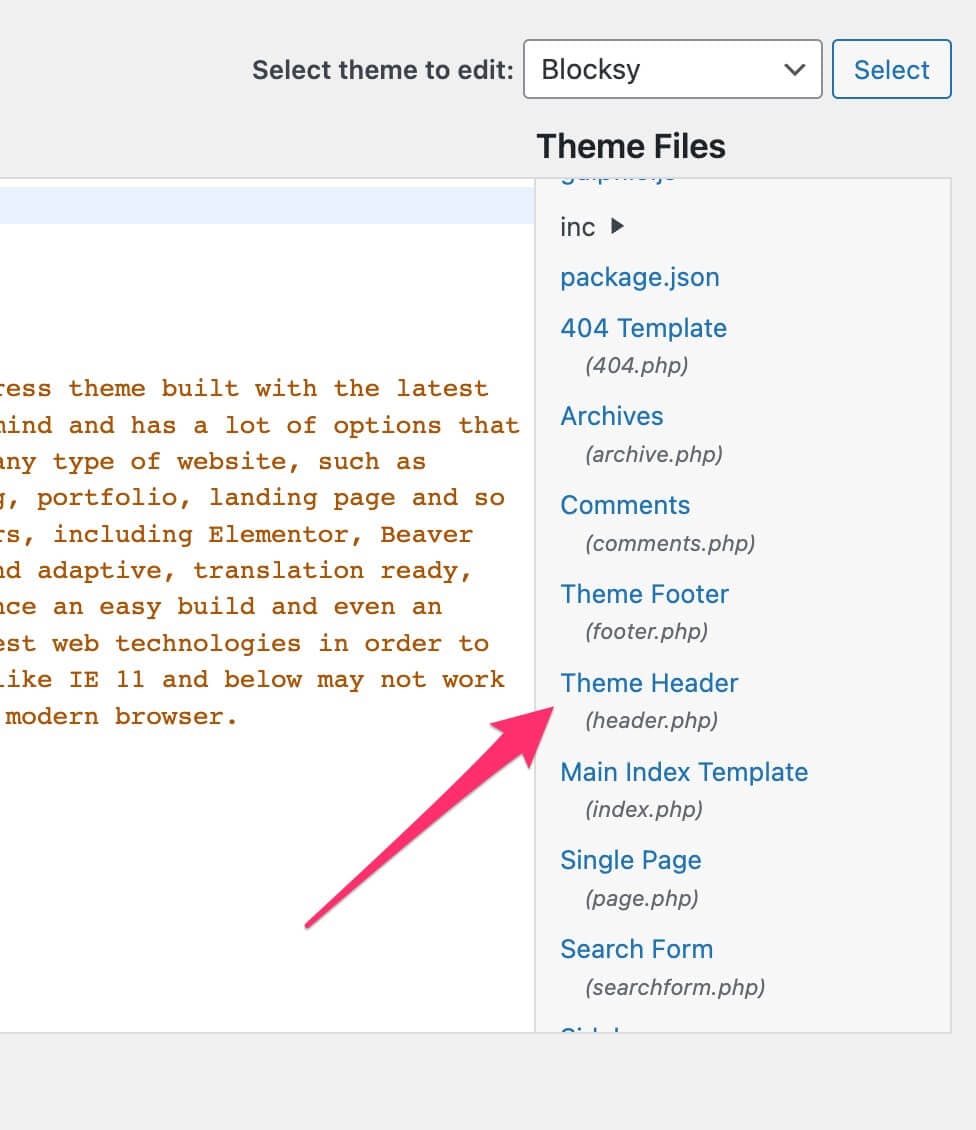
- Under the
Theme Filessection (right side of the screen), search and open theheader.phpfile.
- Paste the widget code before the closing
</head>tag.
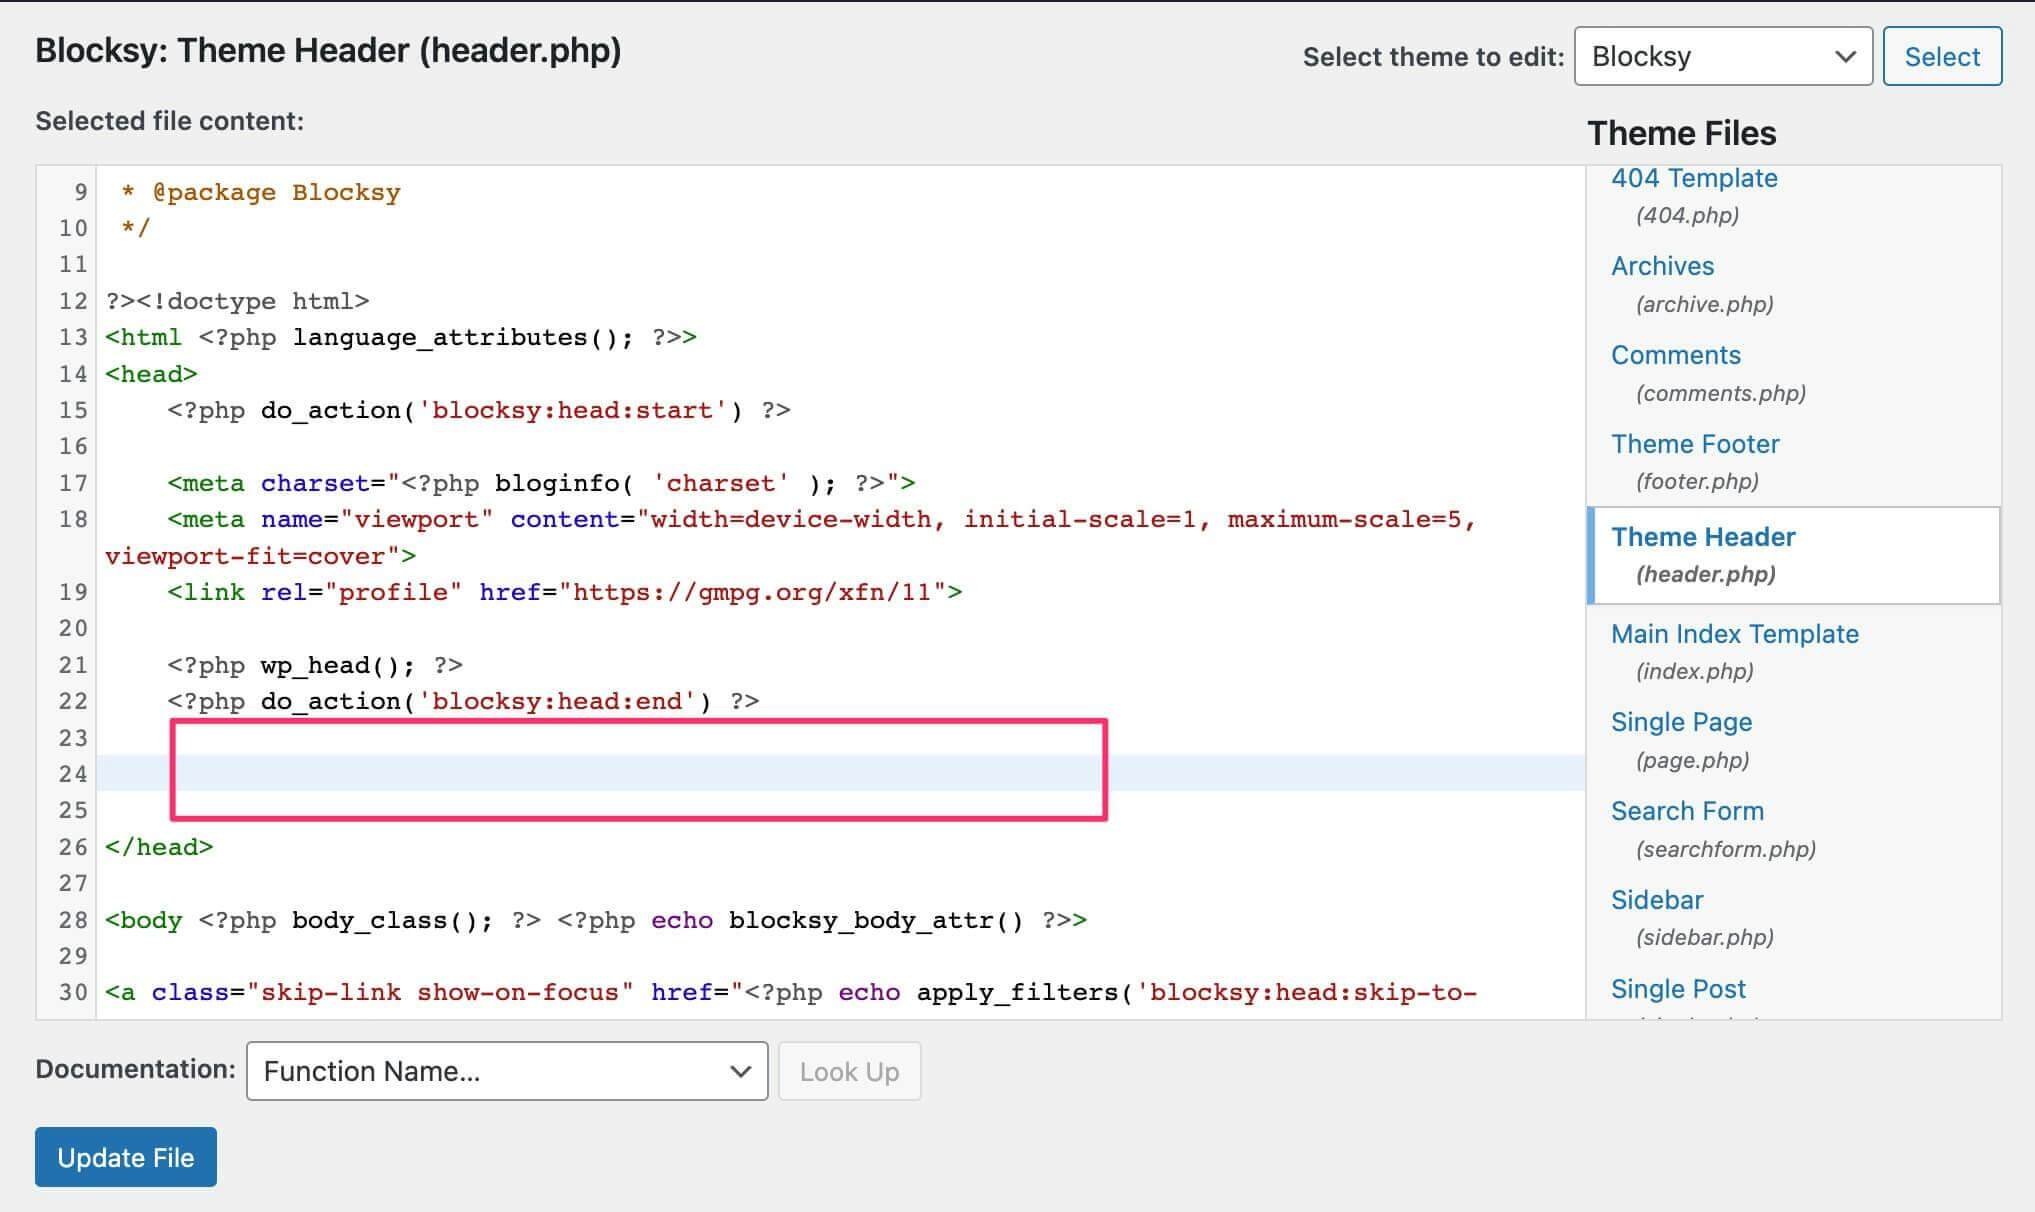
- Click
Update Fileto save.