> ## Documentation Index
> Fetch the complete documentation index at: https://docs.chatling.ai/llms.txt
> Use this file to discover all available pages before exploring further.
# Wix
> Learn how to add Chatling to your Wix website
1. Go to your dashboard.
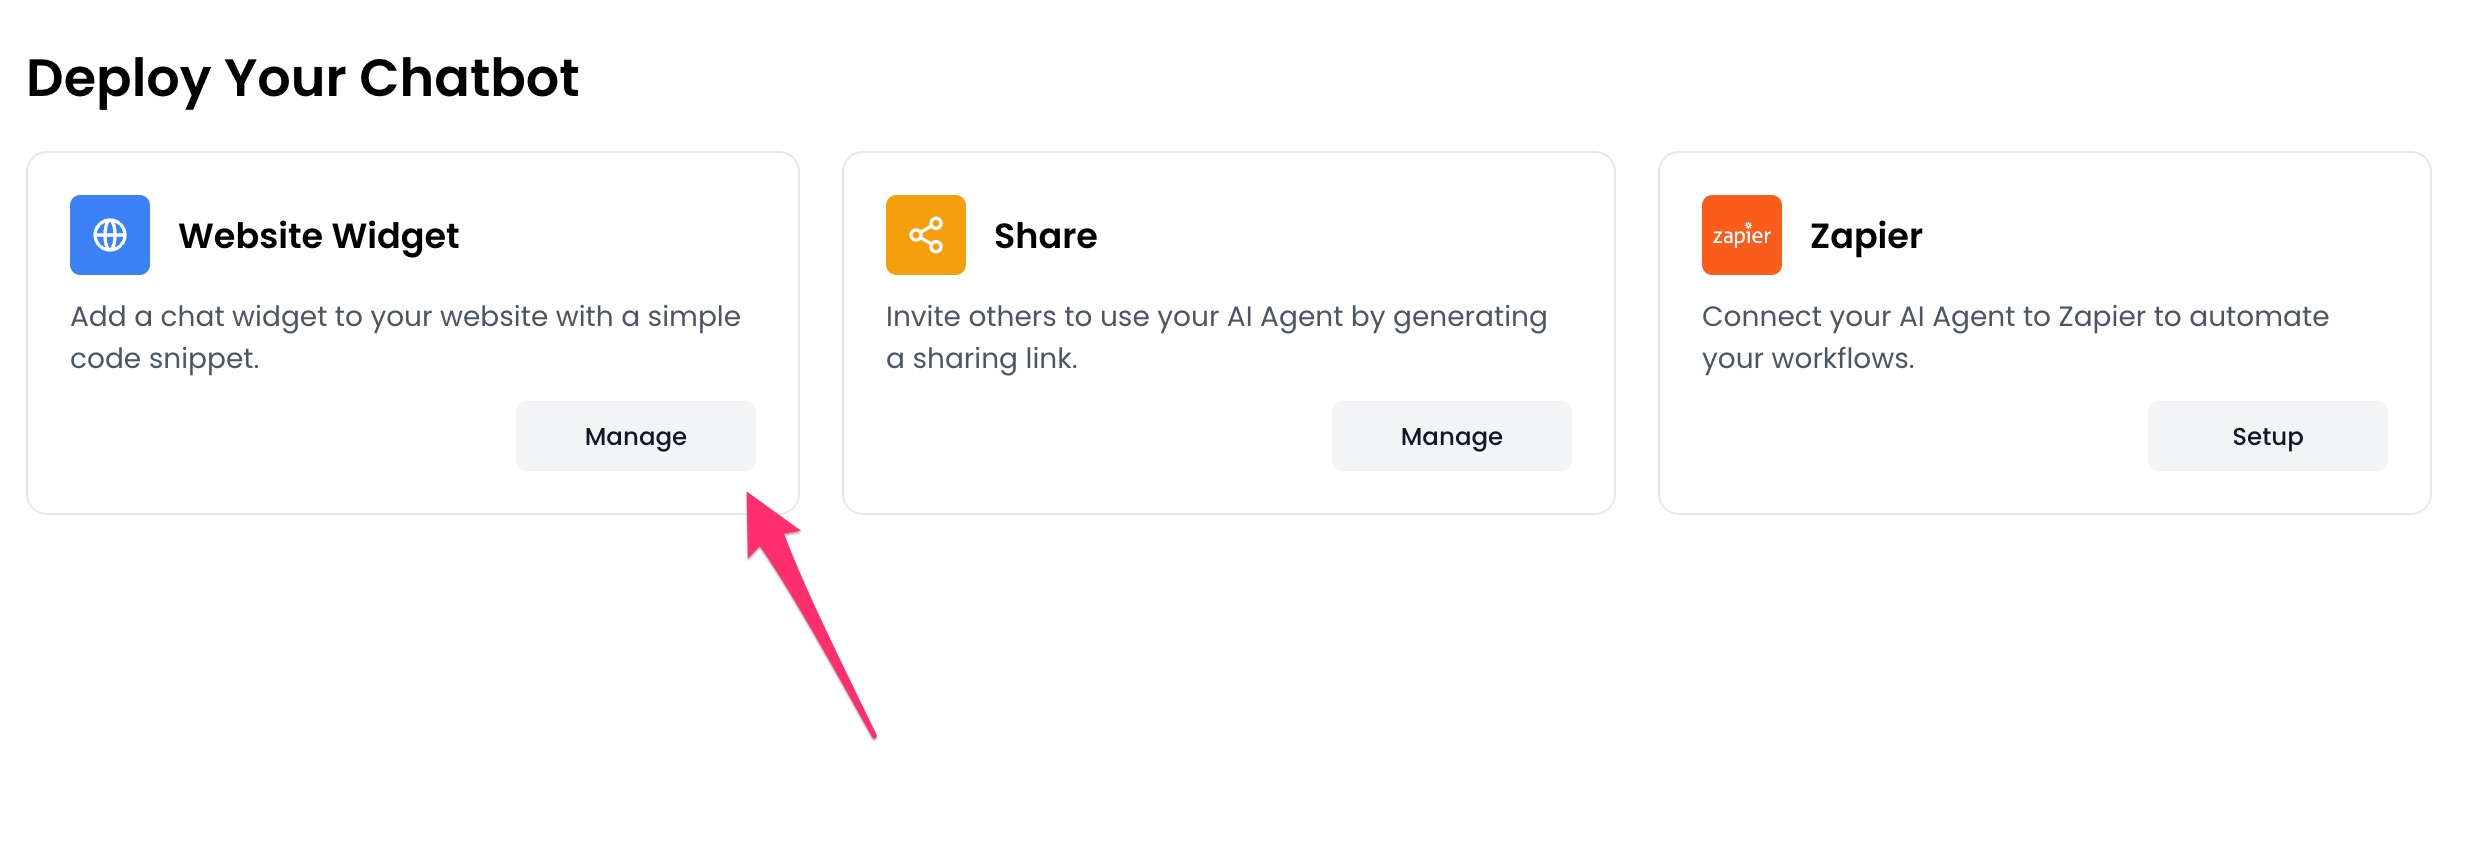
2. Click `Deploy` button in the sidebar menu.
 3. Click the `Manage` button under the `Website Widget` option.
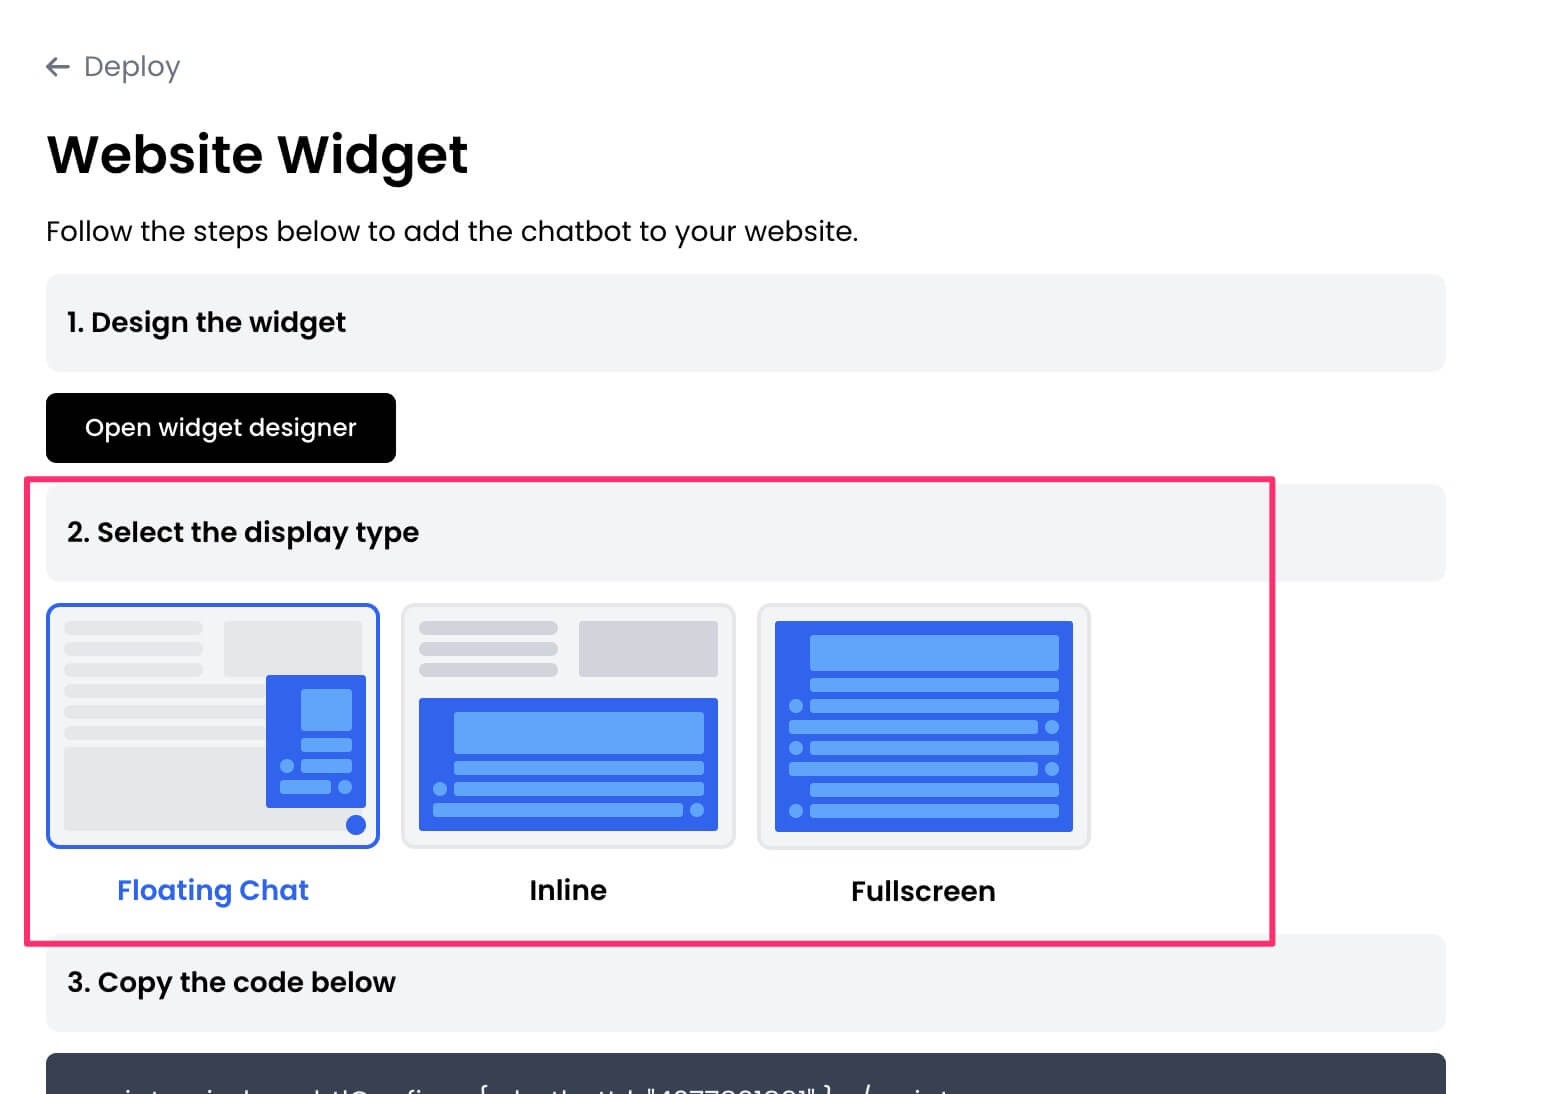
 4. Design the appearance of the widget by clicking the `Open widget designer` button.
 5. Select the display mode for your chatbot, such as "Floating Chat", "Inline", or "Fullscreen".
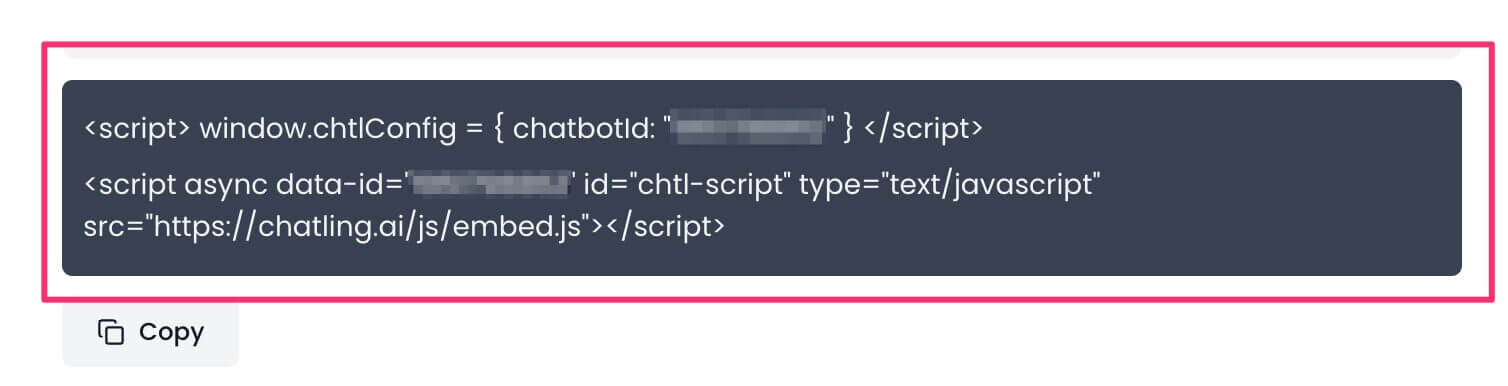
 6. Copy the widget code.
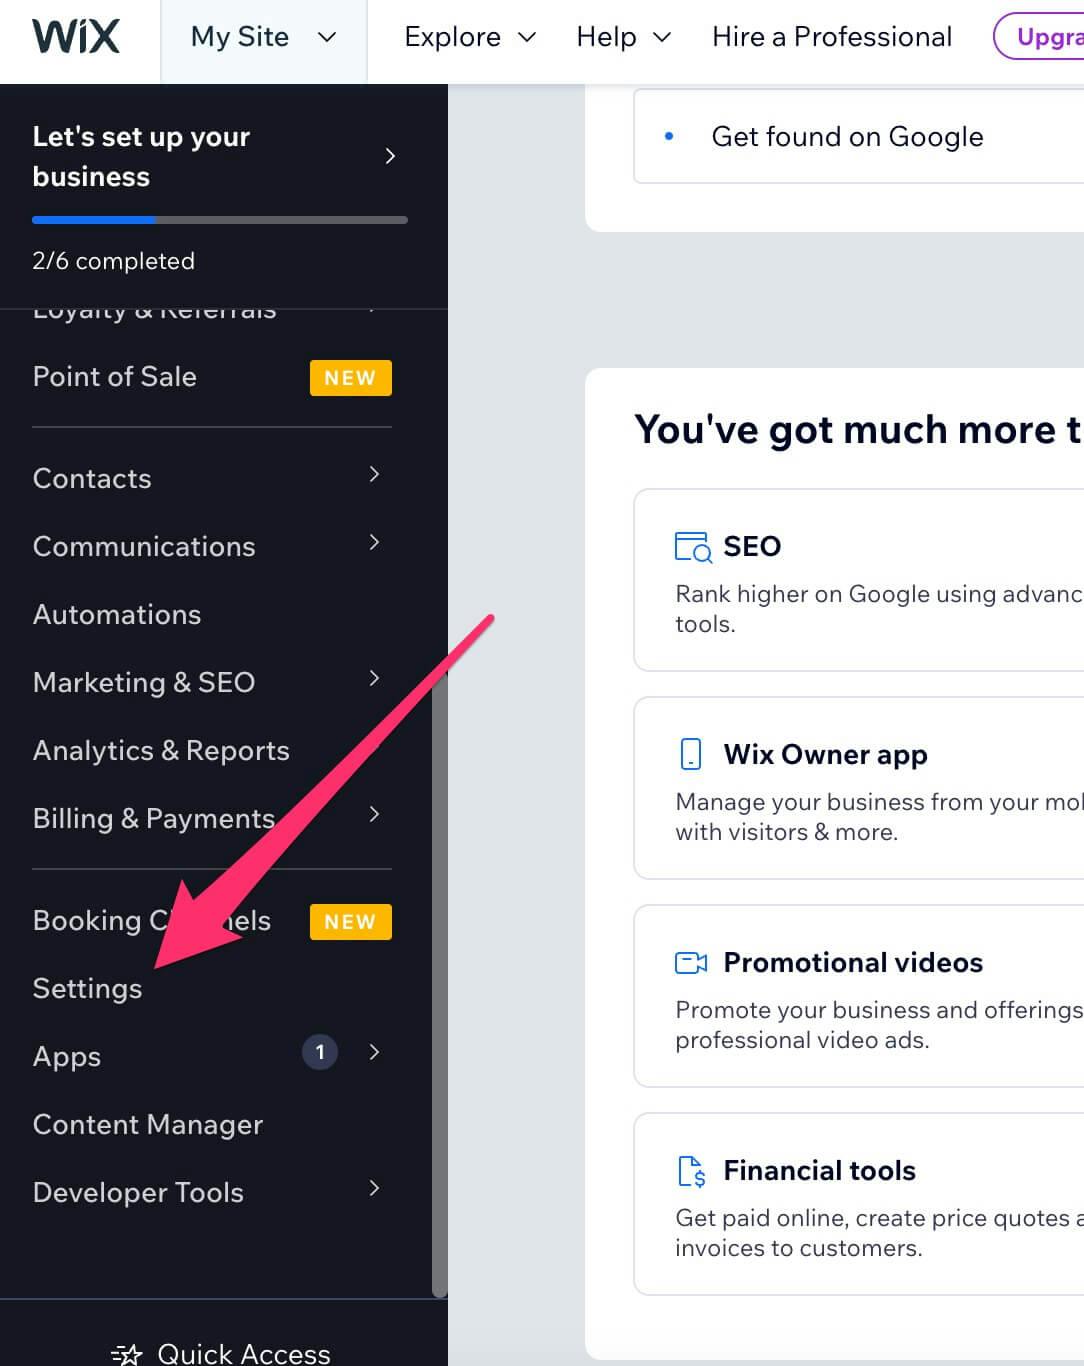
 7. Go to your Wix dashboard and click `Settings` from the sidebar menu.
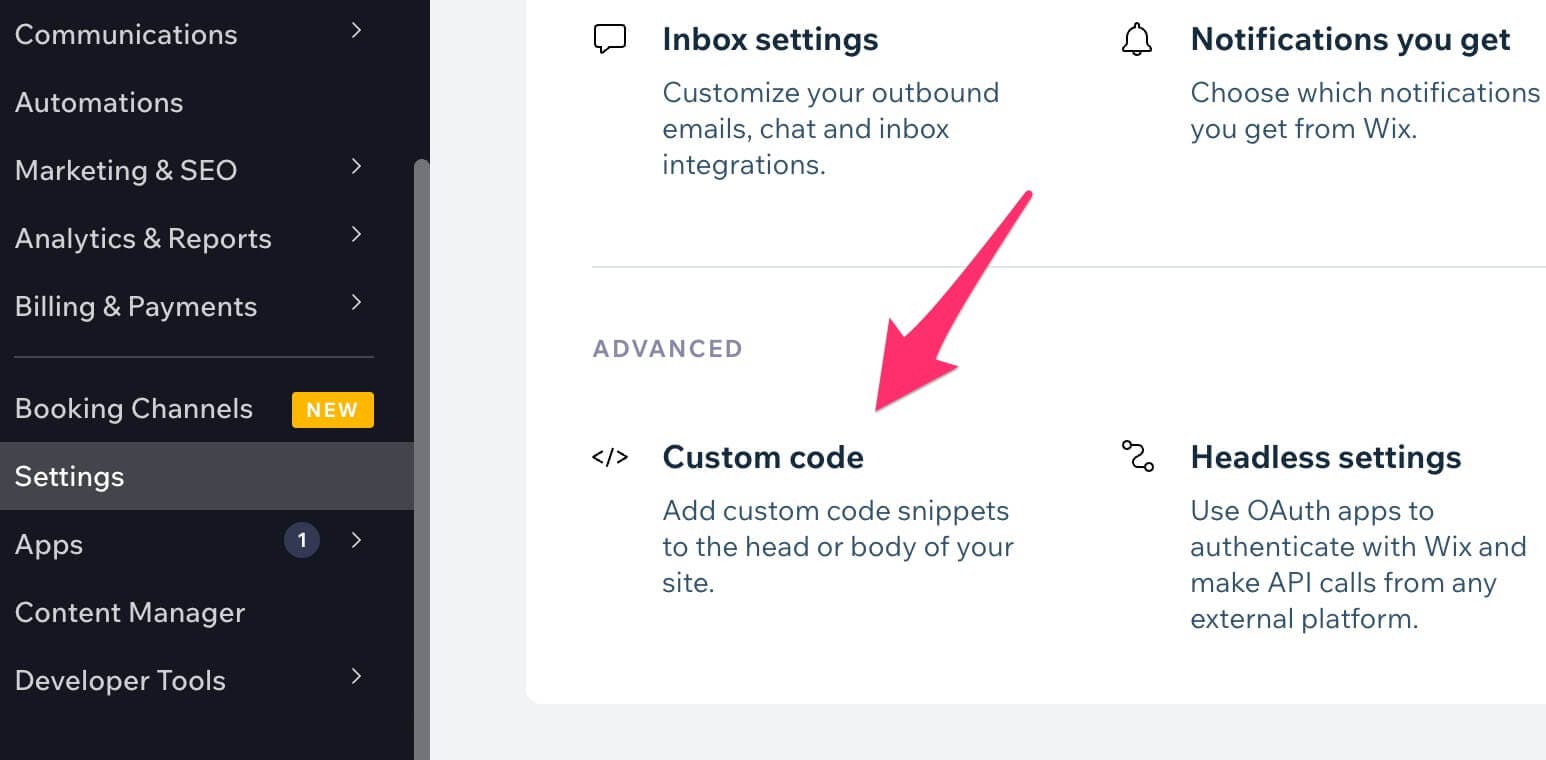
 8. Scroll down to the Advanced section and click `Custom code`.
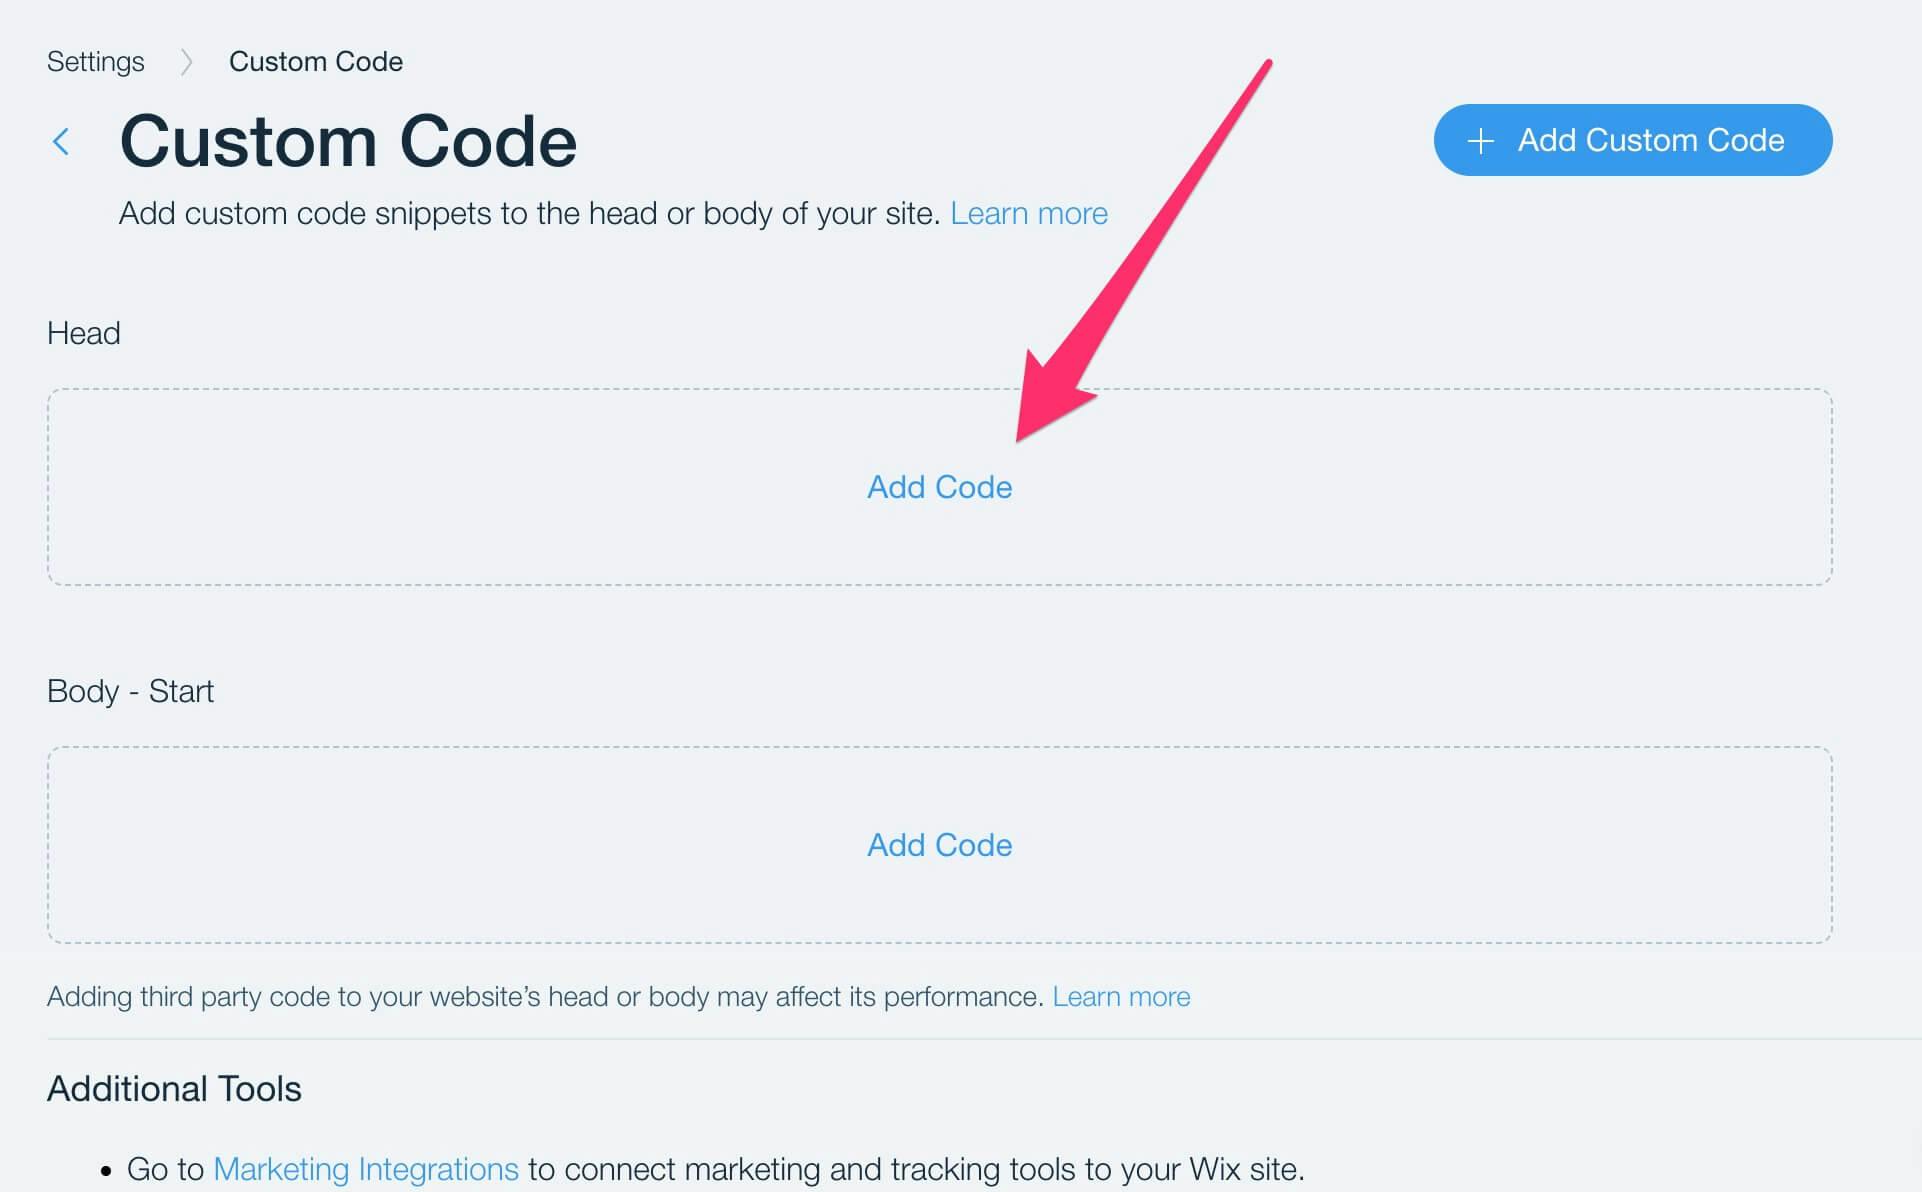
 9. Under the Head section, click `Add Code`.
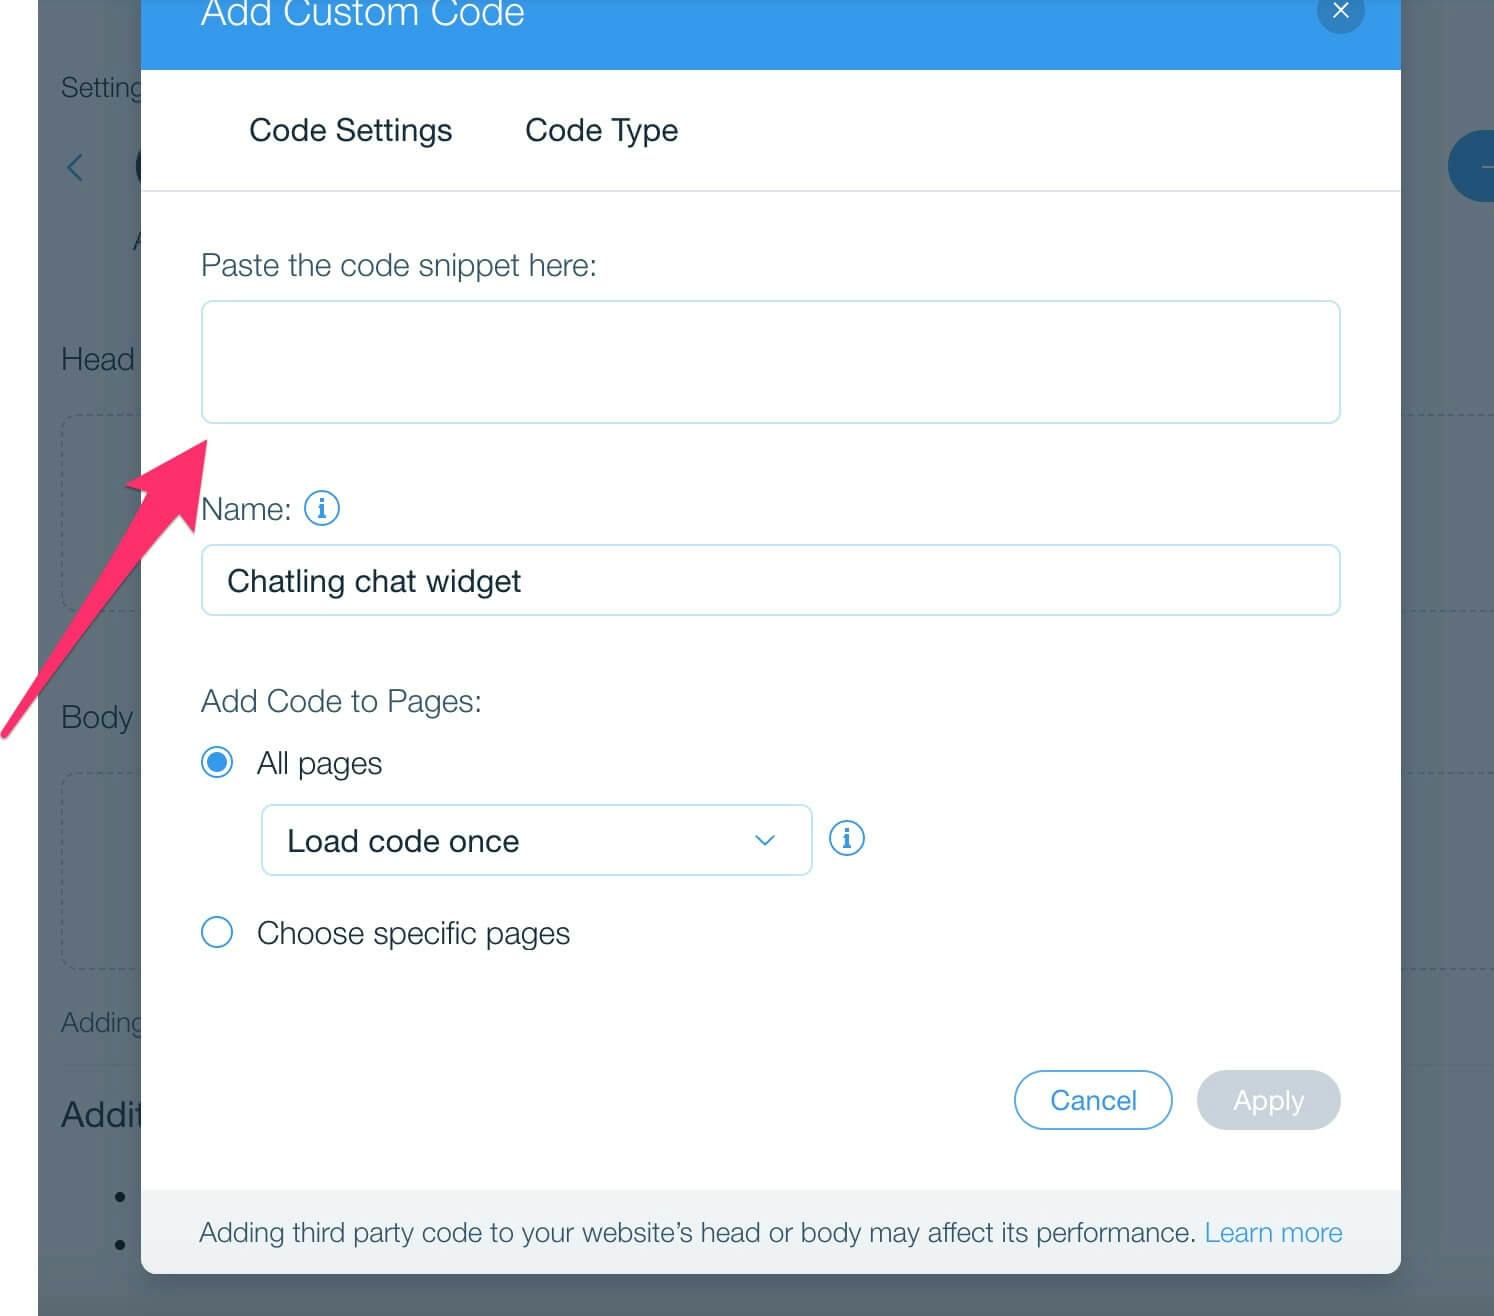
 10. Paste the widget code into the text box that appears and click `Apply`.
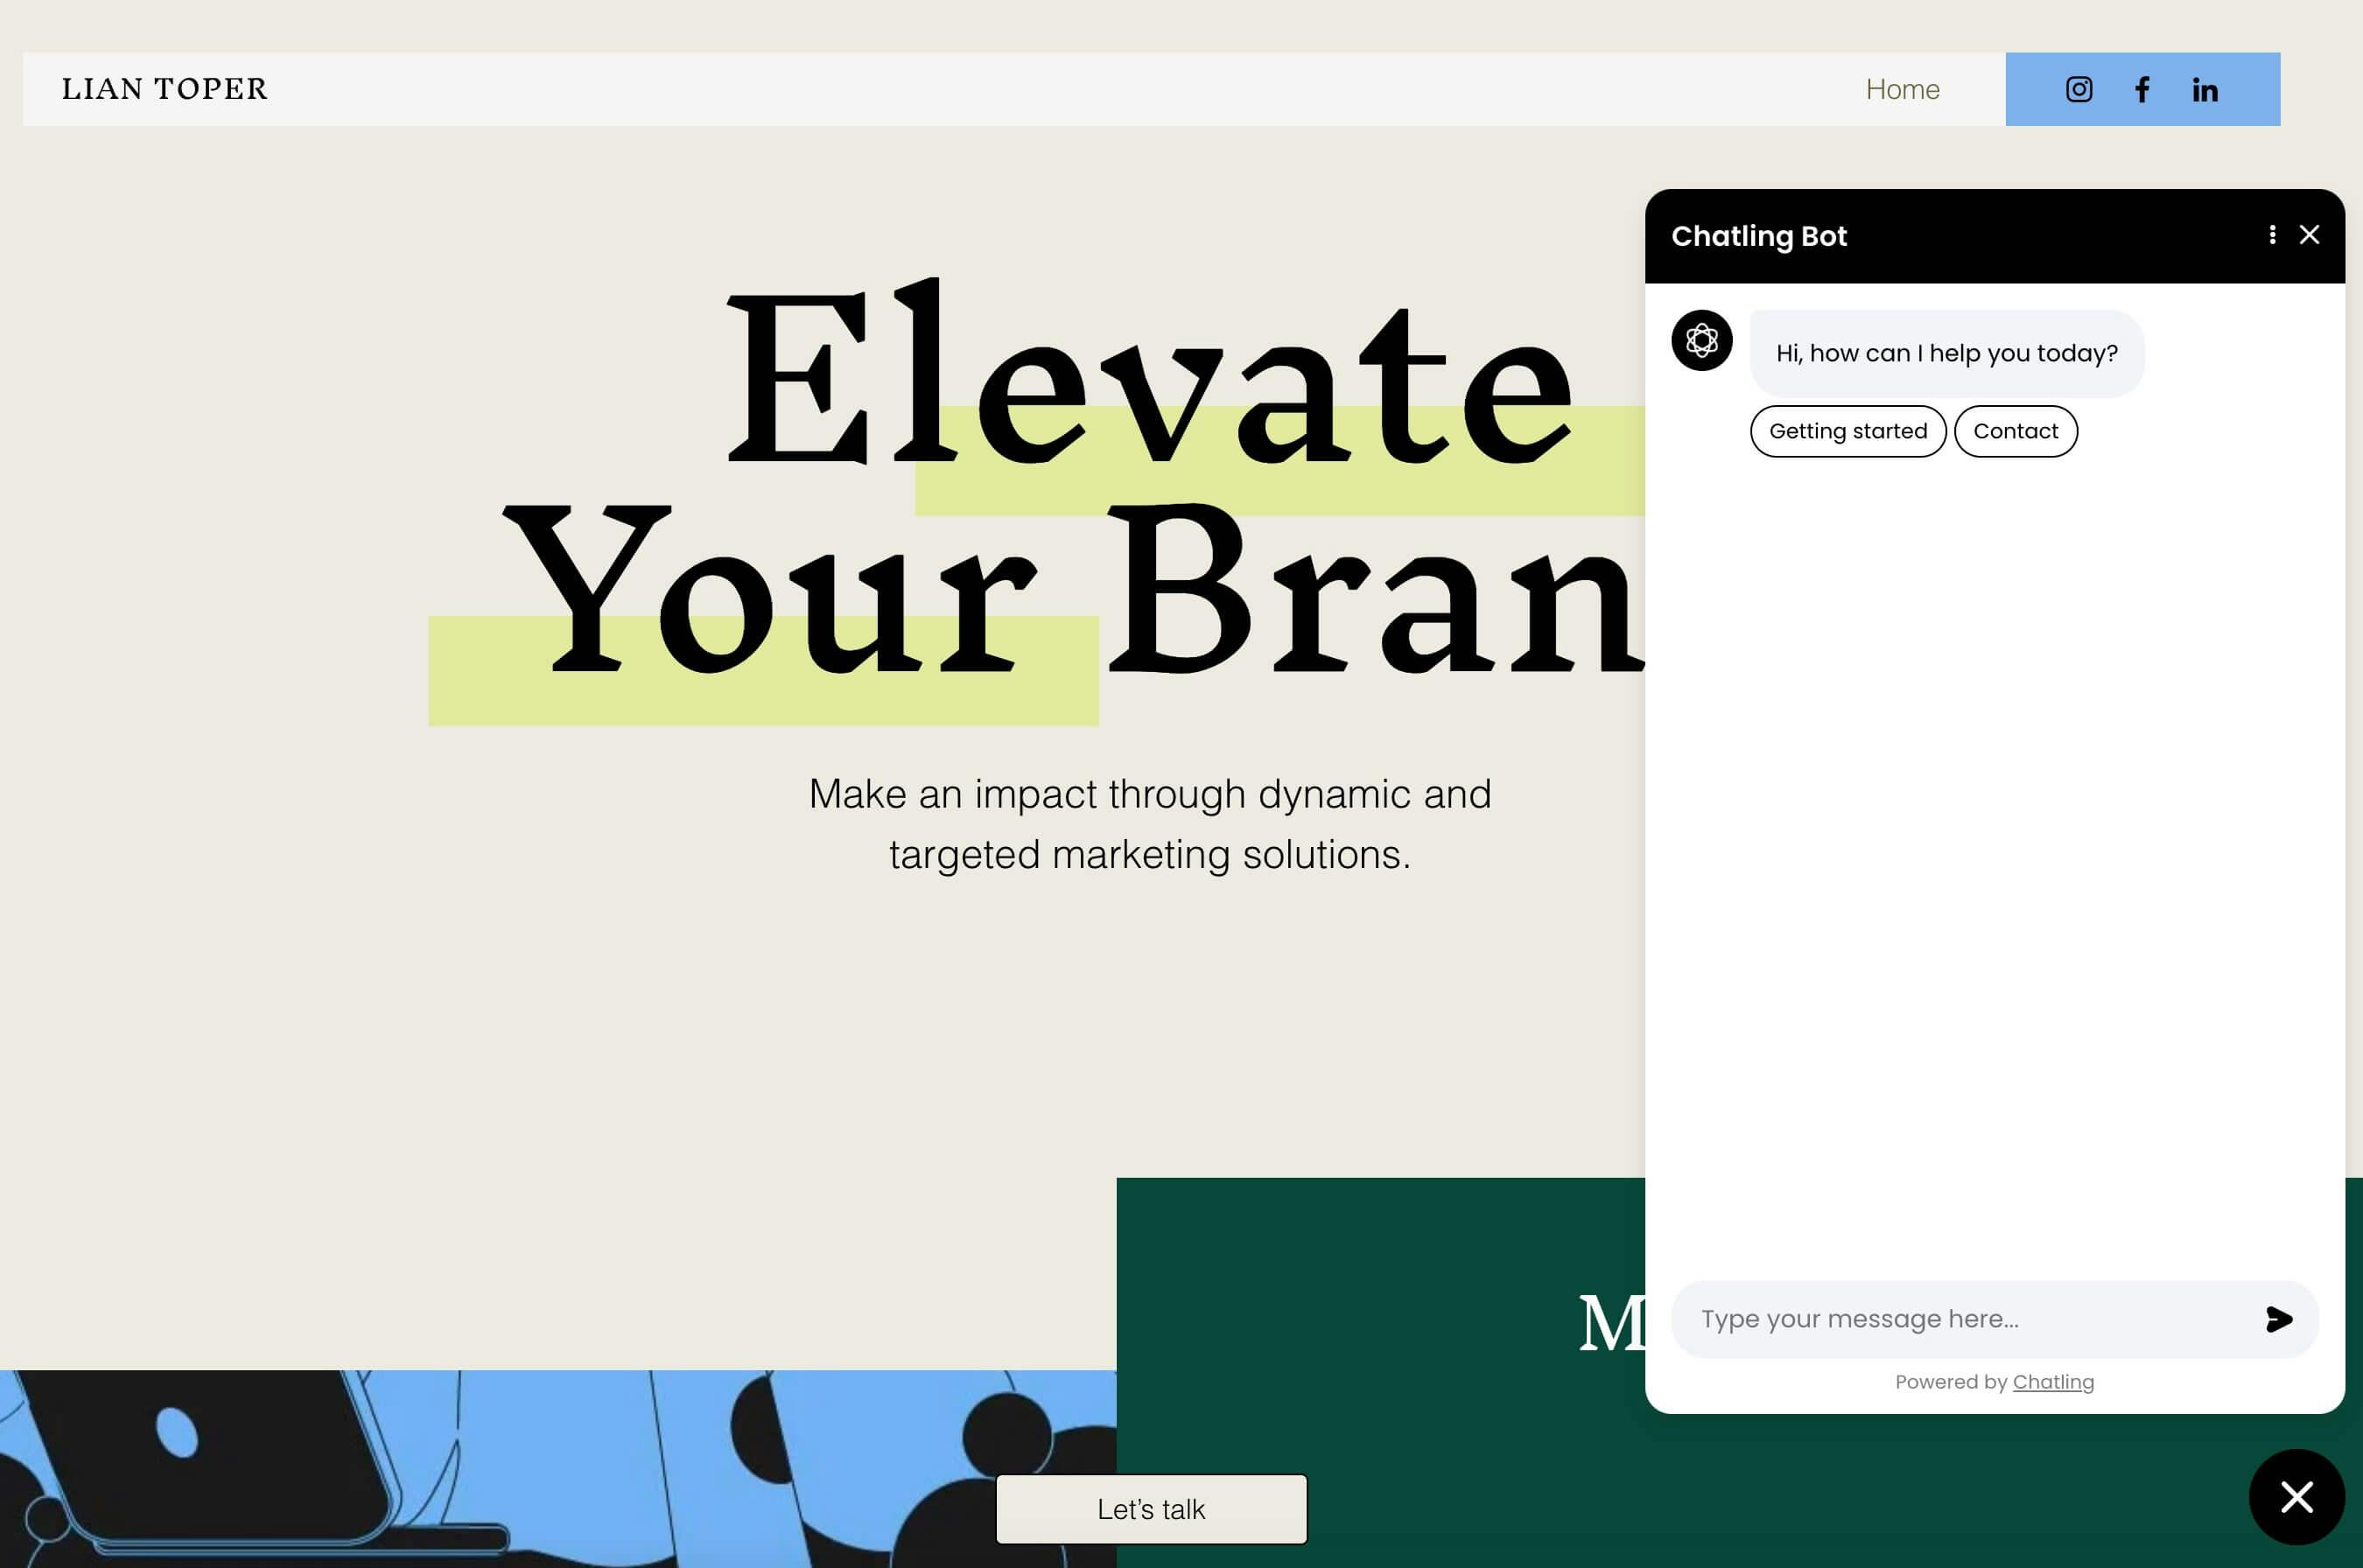
 11. The widget is now live on your Wix website and visitors can interact with it.