# Displaying sources
Source: https://docs.chatling.ai/ai/display-sources
Learn how to enable sources for AI responses.
1. From your chatbot's dashboard, click on the `Appearance` menu.
2. Go to `Configure`.
3. Enable the `Show Sources for AI Response` option. You can customize it by selecting the number and type of sources to display.
Here's how it appears in the chatbot:
# Fixing incorrect AI answers
Source: https://docs.chatling.ai/ai/fix-incorrect-answers
Learn how to fix incorrect AI responses using the fine-tuning feature in Chatling.
Although the AI is trained on the data you add to the knowledge base, it may not always get the answer right, such as when it's asked a question that is not in the knowledge base or when it hallucinates.
To fix this, you can use the fine-tuning feature on Chatling's conversations page. This feature is designed to help improve the chatbot's performance by refining incorrect responses.
When you're viewing a conversation, you'll see a "Fine-tune this answer" button below every AI response. This feature allows you to fix incorrect AI responses so that it will learn to answer correctly in the future.
## How to use the fine-tuning feature
1. From the chatbot dashboard, click on the "Conversations" menu.
2. Find and open a conversation where the AI has responded incorrectly.
3. Click the `Fine-tune this answer` button below the AI response you want to fix.
4. A dialog will appear where you can edit the AI's answer or replace it with a correct one.
5. Once done, click the `Finetune` button. The new answer will be added to the FAQ sources in the knowledge base and will be queued for processing.
Now, when the AI is asked a similar question, it will respond with the answer you provided.
# Instructions
Source: https://docs.chatling.ai/ai/instructions
A guide on what AI Instructions are and how to use them.
Instructions are a way to provide guidance to the AI on how to respond.
You can use instructions to tailor the AI's responses to your specific needs, such as providing more detailed responses, using a specific tone, have a specific personality, or avoiding certain topics.
Here are a few examples:
* Your name is "Joanne" and you are our customer support assistant. When referring to yourself, do not mention anything about being an AI assistant or AI model. Instead, refer to yourself as "Joanne".
* Keep your answers short and to the point, and do not provide unnecessary information.
* Use a friendly and casual tone when responding to users.
* You must act as a professional customer support agent. NEVER break character.
* When responding in English, use American English spelling and grammar.
* Promote special offers or promotions when appropriate. For example, if a customer asks about a product, you can mention that we have a store-wide promotion of 50% off.
* Limit your answers to a maximum of 5 sentences.
* You are a lead generation assistant for a Digital Marketing agency and you are communicating with a prospective customer.
* Do not discuss politics, religion, or any other sensitive topics.
## How to add instructions
The method for adding instructions depends on the [Response Source](/builder/blocks/ai/ai-response#what-is-the-response-source) that you've set for the [AI Response](/builder/blocks/ai/ai-response) block.
### Response Source: Knowledge Base
If you are using the Knowledge Base as the response source, you can add instructions using the [AI Configuration menu](/builder/sidebar#ai-configuration) in the Builder's sidebar.
1. Click on the AI Configuration menu in the sidebar.
2. Go to `Instructions`.
3. Click the `Add instruction` button and enter your instruction.
4. To add more instructions, click the `New` button to create a new instruction.
### Response Source: AI Model
If you are using the AI Model as the response source, you can add instructions directly from the [AI Response block](/builder/blocks/ai/ai-response).
1. Click the AI Response block on the canvas to open the block editor.
2. Under the `Instructions` section, you can add all your instructions. You can add multiple instructions in the same field, separated by a new line.
# Setting the AI model
Source: https://docs.chatling.ai/ai/set-ai-model
Learn how to set the LLM model used by the AI.
There are various [AI models](/ai/supported-ai-models) available in Chatling that you can use to generate responses for your chatbot.
We recommend testing with different models to see which one works best for your chatbot and provides the most accurate responses. Each model uses a different amount of credits per response.
## How to set the AI model?
The method for choosing the AI model depends on the [Response Source](/builder/blocks/ai/ai-response#what-is-the-response-source) that you've set for the [AI Response](/builder/blocks/ai/ai-response) block.
Below are the instructions based on the response source you've selected.
### 1. Response Source: Knowledge Base
If you are using the Knowledge Base as the response source, you can set the AI model using the [AI Configuration menu](/builder/sidebar#ai-configuration) in the Builder's sidebar.
1. Click on the AI Configuration menu in the sidebar.
2. Go to `Settings`.
3. Select the AI model you want to use from the dropdown list.
Once you've selected the AI model, all AI Response blocks that use the Knowledge Base as the response source will use this model to generate responses.
#### Setting the model on a per-block basis
If you want to set the AI model on a per-block basis, you can do so by opening the AI Response block's editor and settings the `Model` option. This will override the default model set in the AI Configuration settings.
### 2. Response Source: AI Model
If you are using the "AI Model" as the response source, you can set the AI model from the block's editor using the `Model` option.
# Supported AI models
Source: https://docs.chatling.ai/ai/supported-ai-models
A list of supported AI models in Chatling.
Chatling supports the following LLMs:
* o4 Mini
* o3 Mini
* GPT-4.1
* GPT-4.1 Mini
* GPT-4.1 Nano
* GPT-4.5
* GPT-4o
* GPT-4o Mini
* GPT-4
* GPT-4 Turbo
* GPT-3.5 Turbo
* Claude 4 Opus
* Claude 4 Sonnet
* Claude 3.5 Sonnet
* Claude 3.7 Sonnet
* Claude 3 Haiku
* Claude 3 Opus
* Claude 3 Sonnet
* Gemini 2.0 Flash
* Gemini 1.5 Flash
* Gemini 1.5 Pro
* Gemini 1.0 Pro
To request a new AI model, please [contact us](mailto:support@chatling.ai).
# Chat with Knowledge Base AI
Source: https://docs.chatling.ai/api-reference/v2/ai-kb/chat
POST /chatbots/{chatbotId}/ai/kb/chat
Chat with the AI using the knowledge base as the response source.
## Request parameters
### Path
The chatbot ID.
### Body
The message to send to the AI.
The ID of the AI model to use for the response. To get a list of available AI models, use the [List AI models](./list-ai-models) endpoint.
The ID of the conversation. This allows the AI to remember the context of the conversation.
If left blank, a new conversation will be created.
The ID of the language to use for the AI response. To get a list of available languages, use the [List languages](./list-ai-languages) endpoint.
The temperature to be used by the AI. The temperature controls the randomness of the response. A lower temperature value, such as 0, will make the outputs more focused and deterministic, whereas a higher temperature, such as 1, will make the responses more diverse and unpredictable.
List of [instructions](/ai/instructions) to tailor the AI's response. It can be used to provide additional context to the AI, such as the desired tone or style of the response.
Must be an array of strings.
## Response
The status of the request. Will be `success` if the request was successful, otherwise `error`.
The unique identifier of the conversation.
The response from the AI.
The type of the source, such as `webpage` or `document`.
The title of the source.
The URL of the source if it's a webpage.
```json Response
{
"status": "success",
"data": {
"conversation_id": "3154224116",
"response": "We offer a variety of AI models to power your chatbot. Here are the models available:\n\n- **GPT-4o**\n- **GPT-4 Turbo**\n- **GPT-3.5 Turbo**\n- **Claude 3.5 Sonnet**\n- **Claude 3 Opus**\n- **Claude 3 Sonnet**\n- **Claude 3 Haiku**\n\nThese models ensure that you can select the best fit for your specific needs and use cases.",
"sources": [
{
"type": "webpage",
"title": "Supported AI Models - Chatling Documentation",
"url": "https://docs.chatling.ai/ai/supported-ai-models"
},
{
"type": "webpage",
"title": "Pricing | Chatling",
"url": "https://chatling.ai/pricing"
},
]
}
}
```
# List AI languages
Source: https://docs.chatling.ai/api-reference/v2/ai-kb/list-ai-languages
GET /chatbots/{chatbotId}/ai/kb/languages
Get a list of all the supported AI languages.
## Request parameters
### Path
The chatbot ID.
### Query
The page number for pagination.
## Response
The status of the request. Will be `success` if the request was successful, otherwise `error`.
The current page number.
The last page number.
The number of items per page.
The unique identifier of the language.
The name of the language.
```json Response
{
"status": "success",
"data": {
"pages": {
"current_page": 1,
"last_page": 6,
"per_page": 15
},
"languages": [
{
"id": 1,
"name": "Auto"
},
{
"id": 2,
"name": "English"
},
{
"id": 3,
"name": "Albanian"
},
{
"id": 4,
"name": "Arabic"
},
{
"id": 5,
"name": "Armenian"
},
{
"id": 7,
"name": "Azerbaijani"
},
{
"id": 9,
"name": "Basque"
},
{
"id": 10,
"name": "Belarusian"
},
{
"id": 11,
"name": "Bengali"
},
{
"id": 12,
"name": "Bhojpuri"
},
{
"id": 13,
"name": "Bosnian"
},
{
"id": 15,
"name": "Bulgarian"
},
{
"id": 17,
"name": "Catalan"
},
{
"id": 19,
"name": "Chinese (Simplified)"
},
{
"id": 20,
"name": "Croatian"
}
]
}
}
```
# List AI models
Source: https://docs.chatling.ai/api-reference/v2/ai-kb/list-ai-models
GET /chatbots/{chatbotId}/ai/kb/models
Get a list of all the supported AI models.
## Request parameters
### Path
The chatbot ID.
### Query
The page number for pagination.
## Response
The status of the request. Will be `success` if the request was successful, otherwise `error`.
The current page number.
The last page number.
The number of items per page.
The unique identifier of the AI model.
The name of the model.
The number of AI credits consumed for each response generated by the model.
The minimum and maximum temperature values for the model.
```json Response
{
"status": "success",
"data": {
"pages": {
"current_page": 1,
"last_page": 1,
"per_page": 15
},
"models": [
{
"id": 1,
"name": "GPT-3.5 Turbo",
"credits": 1,
"temperature": {
"min": 0,
"max": 1
}
},
{
"id": 2,
"name": "GPT-4",
"credits": 10,
"temperature": {
"min": 0,
"max": 1
}
},
{
"id": 3,
"name": "Claude 3 Opus",
"credits": 18,
"temperature": {
"min": 0,
"max": 1
}
},
{
"id": 4,
"name": "Claude 3 Sonnet",
"credits": 4,
"temperature": {
"min": 0,
"max": 1
}
},
{
"id": 5,
"name": "Claude 3 Haiku",
"credits": 1,
"temperature": {
"min": 0,
"max": 1
}
},
{
"id": 6,
"name": "GPT-4o",
"credits": 5,
"temperature": {
"min": 0,
"max": 1
}
},
{
"id": 7,
"name": "Claude 3.5 Sonnet",
"credits": 4,
"temperature": {
"min": 0,
"max": 1
}
},
]
}
}
```
# Create chatbot
Source: https://docs.chatling.ai/api-reference/v2/chatbots/create-chatbot
POST /chatbots
Create a new chatbot using a template or from scratch.
## Request parameters
### Body
The chatbot name.
The ID of the chatbot template to use. You can get the list of available templates using the [List chatbot templates](./list-chatbot-templates) endpoint.
Leave blank to create a chatbot from scratch.
## Response
The status of the request. Will be `success` if the request was successful, otherwise `error`.
The unique identifier of the chatbot.
The name of the chatbot.
The version of the chatbot.
The visibility of the chatbot.
The date and time when the chatbot was created.
```json
{
"status": "success",
"data": {
"id": "9761342719",
"name": "My chatbot",
"version": "2.0",
"visibility": "public",
"created_at": "2024-06-17T12:00:00+00:00"
}
}
```
# Duplicate chatbot
Source: https://docs.chatling.ai/api-reference/v2/chatbots/duplicate-chatbot
POST /chatbots/{chatbotId}/duplicate
## Request parameters
### Path
The chatbot ID.
## Response
The status of the request. Will be `success` if the request was successful, otherwise `error`.
The unique identifier of the duplicated chatbot.
```json
{
"status": "success",
"data": {
"chatbot_id": "5285975738"
}
}
```
# List chatbot templates
Source: https://docs.chatling.ai/api-reference/v2/chatbots/list-chatbot-templates
GET /chatbot-templates
Get a list of all the available chatbot templates. Can be used to create a new chatbot.
## Request parameters
### Query
The page number for pagination.
## Response
The status of the request. Will be `success` if the request was successful, otherwise `error`.
The current page number.
The last page number.
The number of items per page.
The unique identifier of the template.
The name of the template.
The description of the template.
```json
{
"status": "success",
"data": {
"pages": {
"current_page": 1,
"last_page": 1,
"per_page": 25
},
"templates": [
{
"id": 1,
"name": "AI Chatbot",
"description": "Uses AI to automatically respond to customers by leveraging your data, such as your website content, documents, and more."
},
{
"id": 2,
"name": "Basic Lead Generation",
"description": "Engage with prospective leads and capture their contact information."
}
]
}
}
```
# List chatbots
Source: https://docs.chatling.ai/api-reference/v2/chatbots/list-chatbots
GET /chatbots
Get a list of all the chatbots in the project.
## Request parameters
### Query
The page number for pagination.
## Response
The status of the request. Will be `success` if the request was successful, otherwise `error`.
The current page number.
The last page number.
The number of items per page.
The unique identifier of the chatbot.
The name of the chatbot.
The version of the chatbot.
The visibility of the chatbot. Can be `public` or `private`.
The date the chatbot was created.
```json Response
{
"status": "success",
"data": {
"pages": {
"current_page": 1,
"last_page": 1,
"per_page": 25
},
"chatbots": [
{
"id": "8917794239",
"name": "My first chatbot",
"version": "2.0",
"visibility": "public",
"created_at": "2024-06-05T12:13:35:00+00:00"
}
]
}
}
```
# Retrieve chatbot
Source: https://docs.chatling.ai/api-reference/v2/chatbots/retrieve-chatbot
GET /chatbots/{chatbotId}
Retrieve a chatbot by its ID.
## Request parameters
### Path
The chatbot ID.
## Response
The status of the request. Will be `success` if the request was successful, otherwise `error`.
The unique identifier of the chatbot.
The name of the chatbot.
The version of the chatbot.
The visibility of the chatbot.
The date and time when the chatbot was created.
```json
{
"status": "success",
"data": {
"id": "9761342719",
"name": "My chatbot",
"version": "2.0",
"visibility": "public",
"created_at": "2024-06-17T12:00:00+00:00"
}
}
```
# Update chatbot settings
Source: https://docs.chatling.ai/api-reference/v2/chatbots/update-chatbot-settings
PATCH /chatbots/{chatbotId}
Update the settings of a chatbot.
## Request parameters
### Path
The chatbot ID.
### Body
The chatbot name.
The visibility of the chatbot. Possible values are `public` and `private`.
## Response
The status of the request. Will be `success` if the request was successful, otherwise `error`.
The unique identifier of the chatbot.
The name of the chatbot.
The version of the chatbot.
The visibility of the chatbot.
The date and time when the chatbot was created.
```json
{
"status": "success",
"data": {
"id": "9761342719",
"name": "My chatbot",
"version": "2.0",
"visibility": "public",
"created_at": "2024-06-17T12:00:00+00:00"
}
}
```
# Delete contact
Source: https://docs.chatling.ai/api-reference/v2/contacts/delete-contact
DELETE /chatbots/{chatbotId}/contacts/{contactId}
Delete a contact by its ID.
## Request parameters
### Path
The chatbot ID.
The contact ID.
## Response
The status of the request. Will be `success` if the request was successful, otherwise `error`.
```json
{
"status": "success"
}
```
# List contacts
Source: https://docs.chatling.ai/api-reference/v2/contacts/list-contacts
GET /chatbots/{chatbotId}/contacts
Get a list of all the contacts and leads saved by the chatbot.
## Request parameters
### Path
The chatbot ID.
### Query
The page number for pagination.
The sort order. Possible values:
* `date_desc`: Sort by date in descending order.
* `date_asc`: Sort by date in ascending order.
## Response
The status of the request. Will be `success` if the request was successful, otherwise `error`.
The current page number.
The last page number.
The number of items per page.
The unique identifier of the contact.
The name of the contact.
The email address of the contact.
The job title of the contact.
The phone number of the contact.
The website URL of the contact.
The company name of the contact.
The date and time when the contact was created.
```json Response
{
"status": "success",
"data": {
"pages": {
"current_page": 1,
"last_page": 1,
"per_page": 25
},
"contacts": [
{
"id": "qtr89df0-112d-d197-b541-3f8674663246",
"name": "Mark Zuckerberg",
"email": "mark@meta.com",
"job_title": "CEO",
"phone": "555-555-5555",
"website": "https://meta.com",
"company": "Meta Inc.",
"created_at": "2024-06-08T13:38:33+00:00"
}
]
}
}
```
# Retrieve contact
Source: https://docs.chatling.ai/api-reference/v2/contacts/retrieve-contact
GET /chatbots/{chatbotId}/contacts/{contactId}
Retrieve a contact by its ID.
## Request parameters
### Path
The contact ID.
The chatbot ID.
## Response
The status of the request. Will be `success` if the request was successful, otherwise `error`.
The unique identifier of the contact.
The name of the contact.
The email address of the contact.
The job title of the contact.
The phone number of the contact.
The website URL of the contact.
The company name of the contact.
The date and time when the contact was created.
```json
{
"status": "success",
"data": {
"id": "qtr89df0-112d-d197-b541-3f8674663246",
"name": "Mark Zuckerberg",
"email": "mark@meta.com",
"job_title": "CEO",
"phone": "555-555-5555",
"website": "https://meta.com",
"company": "Meta Inc.",
"created_at": "2024-06-08T13:38:33+00:00"
}
}
```
# List conversation messages
Source: https://docs.chatling.ai/api-reference/v2/conversations/list-conversation-messages
GET /chatbots/{chatbotId}/conversations/{conversationId}/messages
Get a list of all the messages for a conversation
## Request parameters
### Path
The chatbot ID.
The conversation ID.
### Query
The page number for pagination.
The sort order. Possible values:
* `date_desc`: Sort by date in descending order.
* `date_asc`: Sort by date in ascending order.
## Response
The status of the request. Will be `success` if the request was successful, otherwise `error`.
The current page number.
The last page number.
The number of items per page.
The text content of the message.
The role of the sender of the message (bot, user, or system).
Whether the message is AI generated and uses the knowledge base.
The data of the message. Varies depending on the message type.
The date and time when the message was created.
```json Response
{
"status": "success",
"data": {
"pages": {
"current_page": 1,
"last_page": 1,
"per_page": 15
},
"messages": [
{
"text": "System variables are predefined variables that contain system information or can be used to perform specific actions. These variables are automatically created by the Builder.",
"role": "bot",
"is_ai_kb_response": true,
"data": {
"helpful_value": null,
"sources": [
{
"type": "webpage",
"title": "Types of variables - Chatling Documentation",
"url": "https://docs.chatling.ai/builder/variables/variable-types"
},
{
"type": "webpage",
"title": "Sidebar - Chatling Documentation",
"url": "https://docs.chatling.ai/builder/sidebar"
},
{
"type": "webpage",
"title": "What are variables? - Chatling Documentation",
"url": "https://docs.chatling.ai/builder/variables/what-are-variables"
}
]
},
"created_at": "2024-06-17T16:09:52+00:00"
},
{
"text": "What are system variables",
"role": "user",
"created_at": "2024-06-17T16:09:45+00:00"
},
{
"text": "**Hello! How can I assist you today?**\n\nIf you have any questions related to our chatbot or services, please feel free to ask. I'm here to help!",
"role": "bot",
"is_ai_kb_response": true,
"data": {
"helpful_value": null,
"sources": []
},
"created_at": "2024-06-14T15:45:39+00:00"
},
{
"text": "Hello!",
"role": "user",
"created_at": "2024-06-14T15:45:34+00:00"
}
]
}
}
```
# List conversations
Source: https://docs.chatling.ai/api-reference/v2/conversations/list-conversations
GET /chatbots/{chatbotId}/conversations
Get a list of all the chatbot's conversations with users.
## Request parameters
### Path
The chatbot ID.
### Query
The page number for pagination.
The sort order. Possible values:
* `date_desc`: Sort by date in descending order.
* `date_asc`: Sort by date in ascending order.
## Response
The status of the request. Will be `success` if the request was successful, otherwise `error`.
The current page number.
The last page number.
The number of items per page.
The unique identifier of the conversation.
The unique identifier of the contact associated with the conversation.
Whether the conversation is archived (by the admin).
Whether the conversation is marked as important.
The date and time when the conversation was created.
List of the most recent 20 messages in the conversation.
The unique identifier of the message.
The text content of the message.
The role of the sender of the message (bot, user, or system).
Whether the message is generated by the AI using the knowledge base.
The data of the message. Varies depending on the message type.
(AI response) Whether the AI's response was marked as helpful by the user. Possible values are `1` for helpful, `0` for not helpful, and `null` for not rated.
(AI response) The sources used by the AI to generate the response.
The date and time when the message was created.
```json Response
{
"status": "success",
"data": {
"pages": {
"current_page": 1,
"last_page": 11,
"per_page": 5
},
"conversations": [
{
"id": "8977617953",
"contact_id": "qtr89df0-112d-d197-b541-3f8674663246",
"archived": 0,
"important": 1,
"created_at": "2024-06-14T15:45:34+00:00",
"messages": [
{
"text": "System variables are predefined variables that contain system information or can be used to perform specific actions. These variables are automatically created by the Builder.",
"role": "bot",
"is_ai_kb_response": true,
"data": {
"helpful_value": null,
"sources": [
{
"type": "webpage",
"title": "Types of variables - Chatling Documentation",
"url": "https://docs.chatling.ai/builder/variables/variable-types"
},
{
"type": "webpage",
"title": "Sidebar - Chatling Documentation",
"url": "https://docs.chatling.ai/builder/sidebar"
},
{
"type": "webpage",
"title": "What are variables? - Chatling Documentation",
"url": "https://docs.chatling.ai/builder/variables/what-are-variables"
}
]
},
"created_at": "2024-06-17T16:09:52+00:00"
},
{
"text": "What are system variables",
"role": "user",
"created_at": "2024-06-17T16:09:45+00:00"
},
{
"text": "**Hello! How can I assist you today?**\n\nIf you have any questions related to our chatbot or services, please feel free to ask. I'm here to help!",
"role": "bot",
"is_ai_kb_response": true,
"data": {
"helpful_value": null,
"sources": []
},
"created_at": "2024-06-14T15:45:39+00:00"
},
{
"text": "Hello!",
"role": "user",
"created_at": "2024-06-14T15:45:34+00:00"
}
]
}
]
}
}
```
# Rate AI answer
Source: https://docs.chatling.ai/api-reference/v2/conversations/rate-ai-answer
PATCH /chatbots/{chatbotId}/conversations/{conversationId}/messages/{messageId}/rate-ai-answer
Use this endpoint to rate an AI answer as helpful or not helpful. You can only rate AI answers generated using the Knowledge Base.
## Request parameters
### Path
The chatbot ID.
The conversation ID.
The message ID.
### Body
* `0`: Remove rating
* `1`: Helpful
* `-1`: Not helpful
## Response
The status of the request. Will be `success` if the request was successful, otherwise `error`.
```json Response
{
"status": "success",
"data": null
}
```
# Retrieve conversation
Source: https://docs.chatling.ai/api-reference/v2/conversations/retrieve-conversation
GET /chatbots/{chatbotId}/conversations/{conversationId}
Retrieve a conversation by its ID.
## Request parameters
### Path
The chatbot ID.
The conversation ID.
## Response
The status of the request. Will be `success` if the request was successful, otherwise `error`.
The unique identifier of the conversation.
The unique identifier of the contact associated with the conversation.
Whether the conversation is archived (by the admin).
Whether the conversation is marked as important.
The date and time when the conversation was created.
List of the most recent 20 messages in the conversation.
The unique identifier of the message.
The text content of the message.
The role of the sender of the message (bot, user, or system).
Whether the message is generated by the AI using the knowledge base.
The data of the message. Varies depending on the message type.
(AI response) Whether the AI's response was marked as helpful by the user. Possible values are `1` for helpful, `0` for not helpful, and `null` for not rated.
(AI response) The sources used by the AI to generate the response.
The date and time when the message was created.
```json
{
"status": "success",
"data": {
"id": "8977617953",
"contact_id": "qtr89df0-112d-d197-b541-3f8674663246",
"archived": 0,
"important": 1,
"created_at": "2024-06-14T15:45:34+00:00",
"messages": [
{
"text": "System variables are predefined variables that contain system information or can be used to perform specific actions. These variables are automatically created by the Builder.",
"role": "bot",
"is_ai_kb_response": true,
"data": {
"helpful_value": null,
"sources": [
{
"type": "webpage",
"title": "Types of variables - Chatling Documentation",
"url": "https://docs.chatling.ai/builder/variables/variable-types"
},
{
"type": "webpage",
"title": "Sidebar - Chatling Documentation",
"url": "https://docs.chatling.ai/builder/sidebar"
},
{
"type": "webpage",
"title": "What are variables? - Chatling Documentation",
"url": "https://docs.chatling.ai/builder/variables/what-are-variables"
}
]
},
"created_at": "2024-06-17T16:09:52+00:00"
},
{
"text": "What are system variables",
"role": "user",
"created_at": "2024-06-17T16:09:45+00:00"
},
{
"text": "**Hello! How can I assist you today?**\n\nIf you have any questions related to our chatbot or services, please feel free to ask. I'm here to help!",
"role": "bot",
"is_ai_kb_response": true,
"data": {
"helpful_value": null,
"sources": []
},
"created_at": "2024-06-14T15:45:39+00:00"
},
{
"text": "Hello!",
"role": "user",
"created_at": "2024-06-14T15:45:34+00:00"
}
]
}
}
```
# Update conversation
Source: https://docs.chatling.ai/api-reference/v2/conversations/update-conversation
PATCH /chatbots/{chatbotId}/conversations/{conversationId}
Update a conversation's properties.
## Request parameters
### Path
The chatbot ID.
The conversation ID.
### Body
Whether to archive the conversation.
Whether to mark the conversation as important.
## Response
The status of the request. Will be `success` if the request was successful, otherwise `error`.
The unique identifier of the conversation.
The unique identifier of the contact associated with the conversation.
Whether the conversation is archived (by the admin).
Whether the conversation is marked as important.
The date and time when the conversation was created.
The unique identifier of the message.
The text content of the message.
The role of the sender of the message (bot, user, or system).
Whether the message is generated by the AI using the knowledge base.
The data of the message. Varies depending on the message type.
(AI response) Whether the AI's response was marked as helpful by the user. Possible values are `1` for helpful, `0` for not helpful, and `null` for not rated.
(AI response) The sources used by the AI to generate the response.
The date and time when the message was created.
```json
{
"status": "success",
"data": {
"id": "8977617953",
"contact_id": "qtr89df0-112d-d197-b541-3f8674663246",
"archived": 0,
"important": 1,
"created_at": "2024-06-14T15:45:34+00:00",
"messages": [
{
"text": "System variables are predefined variables that contain system information or can be used to perform specific actions. These variables are automatically created by the Builder.",
"role": "bot",
"is_ai_kb_response": true,
"data": {
"helpful_value": null,
"sources": [
{
"type": "webpage",
"title": "Types of variables - Chatling Documentation",
"url": "https://docs.chatling.ai/builder/variables/variable-types"
},
{
"type": "webpage",
"title": "Sidebar - Chatling Documentation",
"url": "https://docs.chatling.ai/builder/sidebar"
},
{
"type": "webpage",
"title": "What are variables? - Chatling Documentation",
"url": "https://docs.chatling.ai/builder/variables/what-are-variables"
}
]
},
"created_at": "2024-06-17T16:09:52+00:00"
},
{
"text": "What are system variables",
"role": "user",
"created_at": "2024-06-17T16:09:45+00:00"
},
{
"text": "**Hello! How can I assist you today?**\n\nIf you have any questions related to our chatbot or services, please feel free to ask. I'm here to help!",
"role": "bot",
"is_ai_kb_response": true,
"data": {
"helpful_value": null,
"sources": []
},
"created_at": "2024-06-14T15:45:39+00:00"
},
{
"text": "Hello!",
"role": "user",
"created_at": "2024-06-14T15:45:34+00:00"
}
]
}
}
```
# API Introduction
Source: https://docs.chatling.ai/api-reference/v2/intro
The Chatling API allows you to manage your chatbots programmatically.
Integrate Chatling into your application or interact with your chatbots programmatically using our API.
This documentation guides you through creating your API key, authenticating requests, and sending requests to the API.
{/* ## Base URL
```
https://api.chatling.ai/v2
``` */}
## Generate your API key
To send requests to the API, you must include your API key. Here's how to create it:
1. Go to your Chatling account and open the Project Settings.
2. Click the API Keys tab.
3. Press the `New API key` button.
4. Enter a name for the key and press `Generate key`.
5. Copy the newly created key. For security purposes, the API key will be displayed once only. Note it down and store it in a secure place.
If you forget your API key, you must delete it and generate a new one.
## Authentication
Your API key acts as the Bearer token and must be supplied in the `Authorization` header of every request.
```
Authorization: Bearer
```
## Retrieving the chatbot ID
Some endpoints require that you pass a chatbot ID as the path parameter. Here's a couple of ways to retrieve it:
* **Recommended method**: Using the `List chatbots` endpoint, you can fetch all the chatbots along with their IDs.
* Open the chatbot's settings in your account and you will find its ID listed there.
# Add FAQ
Source: https://docs.chatling.ai/api-reference/v2/knowledge-base/add-faq
POST /chatbots/{chatbotId}/knowledge-base/data-sources/faqs
Add new FAQ data sources to the knowledge base.
## Request parameters
### Path
The chatbot ID.
### Body
Array of FAQs to add to the knowledge base.
The question of the FAQ.
The answer of the FAQ.
## Response
The status of the request. Will be `success` if the request was successful, otherwise `error`.
The number of FAQs that were added successfully.
```json Response
{
"status": "success",
"data": {
"faqs_added": 45
}
}
```
# Add link
Source: https://docs.chatling.ai/api-reference/v2/knowledge-base/add-link
POST /chatbots/{chatbotId}/knowledge-base/data-sources/links
Add new link data sources to the knowledge base.
## Request parameters
### Path
The chatbot ID.
### Body
Array of webpage links to add to the knowledge base.
Exclude sections of webpages based on their HTML class names.
Exclude sections of webpages based on their HTML IDs.
Exclude `header` tags.
Exclude `footer` tags.
Exclude `nav` tags.
## Response
The status of the request. Will be `success` if the request was successful, otherwise `error`.
The number of links that were added successfully.
An array of duplicate links that were removed.
```json Response
{
"status": "success",
"data": {
"links_added": 105,
"duplicate_links_removed": []
}
}
```
# Add text
Source: https://docs.chatling.ai/api-reference/v2/knowledge-base/add-text
POST /chatbots/{chatbotId}/knowledge-base/data-sources/texts
Add new text data sources to the knowledge base.
## Request parameters
### Path
The chatbot ID.
### Body
Array of texts to add to the knowledge base.
## Response
The status of the request. Will be `success` if the request was successful, otherwise `error`.
The number of texts that were added successfully.
```json Response
{
"status": "success",
"data": {
"texts_added": 45
}
}
```
# Delete data source
Source: https://docs.chatling.ai/api-reference/v2/knowledge-base/delete-source
Delete /chatbots/{chatbotId}/knowledge-base/data-sources/{dataSourceId}
Delete a data source from the knowledge base.
## Request parameters
### Path
The chatbot ID.
The data source ID.
## Response
The status of the request. Will be `success` if the request was successful, otherwise `error`.
```json Response
{
"status": "success"
}
```
# List data sources
Source: https://docs.chatling.ai/api-reference/v2/knowledge-base/list-data-sources
GET /chatbots/{chatbotId}/knowledge-base/data-sources
Get a list of the data sources added to the knowledge base.
## Request parameters
### Path
The chatbot ID.
### Query
The page number for pagination.
The sort order. Possible values:
* `date_desc`: Sort by date in descending order.
* `date_asc`: Sort by date in ascending order.
Filter by the type of the data source. Possible values are `link`, `text`, `faq`, `document`, and `zoho`.
Leave blank to get all types of data sources.
## Response
The status of the request. Will be `success` if the request was successful, otherwise `error`.
The current page number.
The last page number.
The number of items per page.
The unique identifier of the data source.
The type of the data source.
The processing status of the data source. Possible values are `pending`, `processing`, `processed`, `error`.
The number of characters used by the data source.
Whether the data source is queued for resync.
Additional data based on the type of the data source.
The date and time when the data source was created.
```json Response
{
{
"status": "success",
"data": {
"pages": {
"current_page": 1,
"last_page": 3,
"per_page": 25
},
"sources": [
{
"id": "321e979b-a174-89fc-25de-f0b31dbd659f",
"type": "link",
"status": "processed",
"characters": 6232,
"resync_queued": false,
"data": {
"url": "https://chatling.ai",
"page_title": "No-Code AI Chatbot for Your Website | Chatling"
},
"created_at": "2024-06-15T12:23:41"
},
]
}
}
```
# Resync data source
Source: https://docs.chatling.ai/api-reference/v2/knowledge-base/resync-source
POST /chatbots/{chatbotId}/knowledge-base/data-sources/{dataSourceId}/resync
Resync a data source.
**The following limitations apply:**
* The supported sources are links and Zoho articles.
* You can have up to 50 data sources queued for resync. If you exceed this limit, you will receive an error and must wait until some of the queued resyncs are complete.
* You can only resync data sources that are in the `processed` state.
## Request parameters
### Path
The chatbot ID.
The data source ID.
## Response
The status of the request. Will be `success` if the request was successful, otherwise `error`.
```json Response
{
"status": "success"
}
```
# List members
Source: https://docs.chatling.ai/api-reference/v2/members/list-members
GET /members
Get a list of all the members in the project.
## Request parameters
### Query
The page number for pagination.
## Response
The status of the request. Will be `success` if the request was successful, otherwise `error`.
The current page number.
The last page number.
The number of items per page.
The email address of the member.
The status of the member (`Active` or `Pending`).
The roles of the member in the project.
```json Response
{
"status": "success",
"data": {
"pages": {
"current_page": 1,
"last_page": 1,
"per_page": 15
},
"members": [
{
"email": "elon@tesla.com",
"status": "Active",
"roles": [
"Owner"
]
},
{
"email": "mark@meta.com",
"status": "Active",
"roles": [
"Admin"
]
},
{
"email": "sundar@google.com",
"status": "Pending",
"roles": [
"Editor",
"Billing"
]
}
]
}
}
```
# List settings
Source: https://docs.chatling.ai/api-reference/v2/project/list-settings
GET /project/settings
Retrieve the settings of the project.
## Response
The status of the request. Will be `success` if the request was successful, otherwise `error`.
The unique identifier of the project.
The name of the project.
```json Response
{
"status": "success",
"data": {
"project_id": "8917794239",
"name": "My first project"
}
}
```
# Update settings
Source: https://docs.chatling.ai/api-reference/v2/project/update-settings
PATCH /project/settings
Update the project settings.
## Request parameters
### Body
The project name.
## Response
The status of the request. Will be `success` if the request was successful, otherwise `error`.
The unique identifier of the project.
The name of the project.
```json Response
{
"status": "success",
"data": {
"project_id": "8917794239",
"name": "My project"
}
}
```
# Rate limiting
Source: https://docs.chatling.ai/api-reference/v2/rate-limiting
Our API has rate limits to prevent abuse and ensure fair usage.
We enforce rate limits to balance the load on our servers and provide a fair environment for all developers to interact with the Chatling API.
Therefore, the number of requests you send to the API will be measured and throttled if you surpass the allowed rate limit.
## Rate limit
The default rate limit is **300 API calls per minute** for each API key. We may adjust these limits in the future.
When you exceed the rate limit, you will receive a 429 status code with the following response:
```json
{
"status": "error",
"message": "Too many requests"
}
```
## When does the rate limit reset?
The rate limit lasts 1 minute, and the number of requests you've sent within that window will reset at the next minute.
# AI Credits
Source: https://docs.chatling.ai/api-reference/v2/usage/ai-credits
GET /usage/ai-credits
Get the AI credits usage for the project.
## Response
The status of the request. Will be `success` if the request was successful, otherwise `error`.
The number of AI credits used.
The maximum number of AI credits allowed for the project.
```json Response
{
"status": "success",
"data": {
"used": 55,
"max": 3000
}
}
```
# Chatbots
Source: https://docs.chatling.ai/api-reference/v2/usage/chatbots
GET /usage/chatbots
Get the chatbots usage for the project.
## Response
The status of the request. Will be `success` if the request was successful, otherwise `error`.
The number of chatbots created.
The maximum number of chatbots allowed for the project.
```json Response
{
"status": "success",
"data": {
"used": 2,
"max": 5
}
}
```
# Email Credits
Source: https://docs.chatling.ai/api-reference/v2/usage/email-credits
GET /usage/email-credits
Get the email credits usage for the project.
## Response
The status of the request. Will be `success` if the request was successful, otherwise `error`.
The number of email credits used.
The maximum number of email credits allowed for the project.
```json Response
{
"status": "success",
"data": {
"used": 125,
"max": 1500
}
}
```
# Knowledge Base
Source: https://docs.chatling.ai/api-reference/v2/usage/knowledge-base
GET /usage/knowledge-base
Get the knowledge base usage for the project.
## Response
The status of the request. Will be `success` if the request was successful, otherwise `error`.
Total number of characters used in the knowledge base.
The maximum number of characters allowed for the project.
```json Response
{
"status": "success",
"data": {
"used": 1500000,
"max": 20000000
}
}
```
# User Seats
Source: https://docs.chatling.ai/api-reference/v2/usage/user-seats
GET /usage/user-seats
Get the user seats usage for the project.
## Response
The status of the request. Will be `success` if the request was successful, otherwise `error`.
The number of seats used.
The maximum number of seats allowed for the project.
```json Response
{
"status": "success",
"data": {
"used": 3,
"max": 10
}
}
```
# Block Editor
Source: https://docs.chatling.ai/builder/block-editor
Learn how to edit blocks in the Builder.
The Block Editor is where you can configure the settings of a block in the Builder.
The editor appears when you click a block that you've added to the canvas. Every block has its own unique settings that you can configure.
# Quick Replies
Source: https://docs.chatling.ai/builder/block-options/quick-replies
Quick replies are messages that will help users respond quickly without having to type out a full response. They are displayed as buttons above the input field and users can click on them to send a message.
## Supported blocks
Quick replies are available for the following Capture Response blocks:
* Text
* Number
* Email
* URL
## Setting up Quick Replies
Here's how to add quick replies to a supported block:
* Open the block editor for a block that supports quick replies.
* Under the "Quick Replies" section, click `Add` to add a new quick reply.
* Enter the label for the quick reply. This is the text that will be displayed on the button.
* Enter the message that will be sent when the user clicks on the quick reply button.
For example if the label is "Pricing" and the message is "Tell me about your pricing", the user will see a button with the text "Pricing" and when they click on it, the message "Tell me about your pricing" will be sent.
# Voice Input
Source: https://docs.chatling.ai/builder/block-options/voice-input
Allow users to speak to your chatbot using Voice Input.
Voice Input is a speech-to-text feature that allows users to record voice messages and transcribes them into text. Rather than typing their message, users can speak to your chatbot and it will automatically be converted to text.
## Supported blocks
Currently, Voice Input is available for the Text input block only.
## How to enable Voice Input
Open the block editor for a Text input block and toggle on the "Voice Input" option.
The chatbot will then display a microphone icon when the block is displayed. Users can click on the microphone icon to record a voice message.
## What happens when I run out of Speech to Text credits?
When you're out of credits, the voice recording icon will be removed and users will not be able to access the feature. You can upgrade your plan to increase the credits limit or wait until the next billing cycle for the credits to reset.
# Create Contact Block
Source: https://docs.chatling.ai/builder/blocks/action/create-contact
Learn about the Create Contact block and how to set it up in the Builder.
The `Create Contact` block can be used to save a user's information as a contact. All saved contacts are displayed on the `Contacts` page in your dashboard.
When a contact is created, it is associated with the user and the information persists across multiple chat sessions. The information can be used to personalize the conversation, skip repetitive questions, and tailor the flow accordingly.
The block consists of the following components:
* **Contact details**: Define which fields you want to collect and save—such as first name, email, etc. These can be mapped from variables captured in the conversation flow (e.g. from a form or user input).
* **Deduplication**: Allows you to define how Chatling handles duplicate contacts during the creation process.
# Delete Contact Block
Source: https://docs.chatling.ai/builder/blocks/action/delete-contact
Learn about the Delete Contact block and how to set it up in the Builder.
The `Delete Contact` block can be used to delete a contact and dissociate it from the user.
The block consists of the following components:
* **Search**: Specify the field and value to use to look up the contact. You can enter a variable to search dynamically.
# Get Contact Block
Source: https://docs.chatling.ai/builder/blocks/action/get-contact
Learn about the Get Contact block and how to set it up in the Builder.
The `Get Contact` block can be used to retrieve a contact's information.
The block consists of the following components:
* **Search**: Specify the field and value to use to look up the contact. You can enter a variable to search dynamically.
* **Contact details**: Define the properties to retrieve and the variables to store the values in.
# HTTP Request Block
Source: https://docs.chatling.ai/builder/blocks/action/http-request
Learn about the HTTP Request block and how to set it up in the Builder.
The HTTP Request block is used to send HTTP requests to external APIs and services. You can use it to fetch data, send data, or perform other actions by interacting with APIs.
The block consists of the following components:
* **Request method**: The HTTP method to use for the request, such as GET, POST, PUT, PATCH, and DELETE.
* **URL**: The URL of the API endpoint to send the request to.
* **Request options**: You can configure additional options for the request, such as headers, query parameters, and request body.
* **Capture Response**: You can capture the responses from the API and store them a variable. The response must be in JSON format.
## Method and URL
In order to send a request, you must provide the endpoint URL and select the appropriate request method. The following request methods are supported:
* **GET**: Retrieve data from the server.
* **POST**: Send data to the server.
* **PUT**: Update data on the server.
* **PATCH**: Partially update data on the server.
* **DELETE**: Delete data from the server.
As an example, an endpoint URL might look like this:
`https://openlibrary.org/works/OL45804W.json`
## Request Options
When sending requests to external APIs, you may need to provide additional options such as headers, query parameters, and request body. Here are the available options:
* **Headers**: You can set headers for the request, such as Content-Type, Authorization, and Accept.
* **Query Params**: The URL query parameters to include for the request.
* **Request Body**: The request payload which can be passed as form data, form URL encoded, or raw JSON.
### How to use variables in JSON payload
To use variables in the request payload, you must enclose the variable's name in double curly braces within quotes. Here's an example:
```json
{
"name": "{{contact_name}}",
"age": 21,
"email": "{{contact_email}}"
}
```
Some points to note:
* Make sure that the variables exist and that their name is correct. Otherwise, they will not be replaced with the actual value.
* If you change a variable's name, you must also update the JSON payload to reflect the change.
* Variables must be enclosed in double curly braces as shown in the example above.
## Capture Response
Responses from the API can be captured and stored in one or more variables. In order for this to work, the response from the endpoint must be in JSON format.
Click the `Add` button to add a new row for capturing a value. You must specify the key and the variable where the value will be stored.
The naming convention for the key is as follows:
* **Top level data**: use the key, such as name or age.
* **Nested data**: use dot notation, such as user.name or profile.address.city.
* **Array data**: use the index, such as users\[0].name or countries\[1].cities\[0].population.
Let's take a look at an example. Below is a sample JSON response from an API endpoint:
```json
{
"title": "Fantastic Mr Fox",
"permalink": "/works/OL45804W",
"authors": [
{
"author": {
"name": "Roald Dahl"
},
}
],
"description": "The main character of Fantastic Mr. Fox is an extremely clever anthropomorphized fox named Mr. Fox. He lives with his wife and four little foxes. In order to feed his family, he steals food from the cruel, brutish farmers named Boggis, Bunce, and Bean every night.\r\n\r\nFinally tired of being constantly outwitted by Mr. Fox, the farmers attempt to capture and kill him. The foxes escape in time by burrowing deep into the ground. The farmers decide to wait outside the hole for the foxes to emerge. Unable to leave the hole and steal food, Mr. Fox and his family begin to starve. Mr. Fox devises a plan to steal food from the farmers by tunneling into the ground and borrowing into the farmer's houses.\r\n\r\nAided by a friendly Badger, the animals bring the stolen food back and Mrs. Fox prepares a great celebratory banquet attended by the other starving animals and their families. Mr. Fox invites all the animals to live with him underground and says that he will provide food for them daily thanks to his underground passages. All the animals live happily and safely, while the farmers remain waiting outside in vain for Mr. Fox to show up.",
"meta": {
"published_at": "1970-06-01"
},
}
```
To capture the title, date of publication, and author name from the response, you would use the following keys:
* **Title**: `title`
* **Published date**: `meta.published_at`
* **Author Name**: `authors[0].author.name`
# Send Email Block
Source: https://docs.chatling.ai/builder/blocks/action/send-email
Learn about the Send Email block and how to set it up in the Builder.
The Send Email block is used to send emails to one or more recipients. You can use it to send notifications, follow ups, transactional emails and other types of emails.
The block consists of the following components:
* **From**: The email address from which the email will be sent.
* **From name**: The name of the sender. For example, you can use your company name.
* **Reply to**: The email address to which the recipient can reply. For example, if you want to receive replies to your email address, you can set it here. Whenever the recipient replies to the email, it will be sent to your inbox.
* **To**: The email addresses of the recipients. You can add one or more email addresses.
* **CC**: The email addresses of the recipients who will receive a copy of the email. You can add one or more email addresses.
* **Subject**: The subject of the email.
* **Message**: The content of the email. You can use variables to personalize the email content.
# Set Variable
Source: https://docs.chatling.ai/builder/blocks/action/set-variable
Learn about the Set Variable block and how to set it up in the Builder.
The Set Variable block is used to set the value of one or more variables. With it, you can modify variable values dynamically at any point in the flow.
## How to configure
1. Click on the Set Variable block in the canvas to open its settings.
2. Select the variable you want to modify.
3. Select the type of the modification:
* **Value**: Set the variable to a specific value. You can also insert variables to make the value dynamic.
* **Add/Subtract/Multiply/Divide**: Perform a mathematical operation on the variable. You can add, subtract, multiply, or divide the variable by a specific value. The value must be a number.
4. Enter the value.
## Multiple variables
You can set multiple variables at once by clicking on the **Add variable** button. This will add a new row where you can select another variable and set its value.
## Example
Let's say you're building a lead generation chatbot for a real estate brokerage. You want to prompt the AI to ask the customer three questions about their requirements and forward the answers to the team. You can do this by using a counter variable that increments each time the user answers a question.
Below is a sample flow that demonstrates how to use the Set Variable block.
We're using a variable called `counter` to keep track of the number of questions that have been asked. This variable is incremented by 1 each time the user answers a question.
Then, we're using the Condition block to check if the counter is greater or equal to 3. If it is, a message is displayed to inform the user that their inquiry has been forwarded to the team. Else, the AI asks the next question.
# Update Contact Block
Source: https://docs.chatling.ai/builder/blocks/action/update-contact
Learn about the Update Contact block and how to set it up in the Builder.
The `Update Contact` block can be used to update an existing contact.
The block consists of the following components:
* **Search**: Specify the field and value to use to look up the contact. You can enter a variable to search dynamically.
* **Contact details**: Define the properties you want to update.
# AI Response Block
Source: https://docs.chatling.ai/builder/blocks/ai/ai-response
Learn about the AI Response block and how to set it up in the Builder.
The AI Response block is used for generating responses to user input using AI. It can provide answers based on the information you have added to the [Knowledge Base](/knowledge-base/overview) or from the AI's pretrained data.
The AI uses natural language processing (NLP) to understand the user's input and generate relevant responses.
## What is the "Response Source"?
The Response Source determines where the AI will look for answers to user queries. You can choose from the following options:
* **Knowledge Base**: The AI will search the data you've uploaded to the Knowledge Base for the relevant information and return the corresponding answer.
* **AI Model**: The AI will use its pretrained data to generate a response based on the user's query. This is ideal for a general-purpose AI that can answer a wide range of questions without limiting its responses to the data in the knowledge base.
## Configurations for Knowledge Base Response Source
When you select the "Knowledge Base" as the Response Source, you can configure the following settings:
* **Question**: The user's input or query that the AI will process to generate a response. You can use variables to make the question dynamic. For example, you can capture the user's input using a Text input block and store it in a variable called `user_input`. Then, you can use this variable in the "Question" field to make the AI response dynamic.
* **Store response in variable**: You can store the AI response in a variable to use it in other blocks.
* **Stream**: When enabled, the AI response will be streamed to the user in real-time as it is generated. This provides a more interactive experience for the user.
* When Stream is enabled, some features that require post-processing, such as "Not Found path" will be disabled.
* **Not Found path**: The path to follow if the AI does not find a relevant answer in the Knowledge Base.
* **Model**: The AI model to use for generating responses.
* **Language**: The language in which the AI will respond to the user. If you set it to "Auto," the AI will detect the language of the user's input and respond in the same language.
* If you want the AI to respond in a certain dialect or accent, you can specify it in Instructions section of the [AI Configuration](/builder/sidebar#ai-configuration).
* **Temperature**: The randomness of the AI's responses. A higher temperature value will result in more diverse and creative responses, while a lower value will produce more accurate responses.
### What does "Use global AI settings" mean?
When you set an option, such as the AI model, language, or temperature to "Use global AI settings", the AI will use the settings defined in the [AI Configuration](/builder/sidebar#ai-configuration) menu in the [sidebar](/builder/sidebar). This allows you to define global settings that will be applied to all AI blocks in your bot.
## Configurations for AI Model Response Source
When you set the Response Source to "AI Model", you can configure the following settings:
* **Prompt**: The message or query that the AI will use to generate a response. You can use variables to make the prompt dynamic.
* **Store response in variable**: You can store the AI response in a variable to use it in other blocks.
* **Instructions**: Additional instructions for the AI to follow when generating a response. For example, you can specify its personality, tone, or style, or provide specific context for the response.
* **Model**: The AI model to use for generating responses.
* **Max Length**: Maximum number of tokens to generate, shared between the prompt and the response. One token is roughly 4 characters.
* **Temperature**: Randomness of the AI's responses. A higher temperature value will result in more diverse and creative responses, while a lower value will produce more focused and deterministic responses.
* **Top P**: Controls diversity via nucleus sampling: 0.5 means half of all likelihood-weighted options are considered.
* **Frequency Penalty**: How much to penalize new tokens based on their existing frequency in the text so far. Decreases the model's likelihood to repeat the same line verbatim.
* **Presence Penalty**: How much to penalize new tokens based on whether they appear in the text so far. Increases the model's likelihood to talk about new topics.
## How to set up the AI block to respond from the knowledge base?
Here's a high level overview of how the AI generates responses using the knowledge base:
* The user inputs a question or query, which is saved in a variable of your choice.
* The stored input is passed to the AI which uses natural language processing (NLP) to understand the user's query and the context of the conversation.
* The AI searches the knowledge base for relevant information.
* The AI generates the response and displays it to the user.
To set up the AI block, follow these steps:
1. Add a Text input block to the canvas. We'll use this block to capture the user's input and store it in a variable so it can be passed to the AI block.
2. Click on the Text block to open the editor. In the `Store answer in variable` field, enter a variable where the user's input will be stored. In this example, we'll create and use a variable called `user_query`.
3. Next, drag and drop the AI Response block onto the canvas.
4. Connect the Text input block to the AI block by dragging the connector from the Text block to the AI block.
5. Click the AI Response block to open the editor. In the `Question` field, enter the variable where the user's input is stored. In step 2, we used the `user_query` variable, so we'll enter `{user_query}` in the Question field.
6. Set up the global AI settings by going to the `AI Configuration` in the sidebar. You can define settings such as the AI model, instructions, language, and business name.
7. Lastly, set up the block connections accordingly. For example, a setup like below will allow the user to continually ask questions and receive responses from the AI.
# Language
Source: https://docs.chatling.ai/builder/blocks/condition/language
Learn how to use the Language condition block in Chatling
The Language condition block is used to define flows based on the user's browser language. This can be useful for creating multilingual bots that respond in the user's preferred language.
Let's say you want to create a bot that supports English, Spanish, and French languages. You can use the Language condition block to define different responses or actions based on the user's preferred language setting in their browser.
Below is an example of such a flow. The Else path is a fallback for users whose language is not supported by the bot. In this case, it falls back to the English language.
# Overview
Source: https://docs.chatling.ai/builder/blocks/condition/overview
Learn about the condition blocks and how to use them
Condition blocks are used to create conditional logic in your bot. You can use it to check if a certain condition is met and then perform different actions based on the result.
Similar to an "if-else" statement in programming, condition blocks evaluate a condition and executes different paths based on whether the condition is true or false.
## Types of condition blocks
There are two types of condition blocks available in Chatling:
* [**Variable**](./variable): Compares a variable with a value or another variable.
* **Language**: Checks if the user's language matches a specific language. Useful for creating multilingual bots.
## How do condition blocks work?
Condition blocks consist of two main parts:
* **Conditions**: The conditions that the block will evaluate. You can use variables, languages, comparison operators, and logical operators to create complex conditions.
* **Paths**: The paths that the block will follow based on the result of the conditions. Every condition you add will have a corresponding path that the block will follow if the condition is true.
Here's an example of how a condition block works:
1. The block evaluates conditions in the order they are added.
2. If a condition is true, the block follows the path associated with that condition.
3. If none of the conditions are true, the block follows the "Else" path.
## The Else condition
The `Else` condition is executed if none of the other conditions are met. You can use it to define a fallback path that the block will follow if none of the other conditions are true.
## Comparison operators
Conditions support a variety of comparison operators that you can use to compare values. Here are some of the operators you can use:
* **Equals**: Checks if the variable is equal to the value.
* **Not equals**: Checks if the variable is not equal to the value.
* **Contains**: Checks if the variable contains the value.
* **Not contains**: Checks if the variable does not contain the value.
* **Greater than or equals**: Checks if the variable is greater than or equal to the value.
* **Less than**: Checks if the variable is less than the value.
* **Less than or equals**: Checks if the variable is less than or equal to the value.
* **Starts with**: Checks if the variable starts with the value.
* **Ends with**: Checks if the variable ends with the value.
* **Is empty**: Checks if the variable is empty.
* **Is not empty**: Checks if the variable is not empty.
## Group and child conditions
Conditions are grouped together to create complex logic using logical operators like "AND" and "OR". Every group contains one or more conditions that are evaluated together.
Conditions within a group are evaluated together to determine if the group is true or false. You can use logical operators such as "AND" and "OR" to combine conditions within a group.
For example, you can create a group with two conditions and set it to "AND" to require both conditions to be true for the group to be true. On the other hand, you can set it to "OR" to require only one of the conditions to be true for the group to be true.
By default, condition blocks have one group with one condition. To add additional groups, click the `Add group condition` button.
## Logical operators
Logical operators are used to combine conditions within a group. You can choose from the following logical operators:
* **AND**: Requires all conditions in the group to be true for the group to be true.
* **OR**: Requires at least one condition in the group to be true for the group to be true.
- Group 1:
* Condition 1: Variable A equals 5
* Condition 2: Variable B equals 10
* Logical operator: AND
- Group 2:
* Condition 1: Variable C contains "hello"
* Condition 2: Variable D contains "world"
* Logical operator: OR
In this example, Group 1 will be true only if Variable A equals 5 and Variable B equals 10. Group 2 will be true if either Variable C contains "hello" or Variable D contains "world".
# Variable
Source: https://docs.chatling.ai/builder/blocks/condition/variable
Learn how to use the Variable condition block in Chatling
The Variable condition block is used to compare a variable with a value or another variable. You can use it to create conditional logic in your bot based on user inputs, stored values, or system variables.
## Components of a variable condition
* **Label**: A descriptive label for the condition, which will be displayed in the block on the canvas. This is optional and can be skipped.
* **Variable**: The variable or value that the block will evaluate. The variable can be a user input, a stored value, or a system variable.
* **Comparison operator**: The operator that the block will use to compare the variable with the value you specify. You can choose from a list of comparison operators, such as "equals," "greater than," "contains," etc.
* **Value**: The value that the block will compare with the variable. This can be a static value or a variable for dynamic comparisons.
## Examples
### 1. Real estate bot
In a real estate bot, you can use conditions to check if the user is looking to buy or rent a property and display properties accordingly.
You can create two conditions:
* Condition 1: User input contains "buy"
* Condition 2: User input contains "rent"
Here's how to set it up in the editor:
Once you have set up the conditions, you can define the paths for each condition. Here's an example:
Based on the above, here's how the bot will respond:
* If the user input contains "buy," the bot will respond with `Great! Let me show you our available properties for sale`.
* If the user input contains "rent," the bot will respond with `Sure! We've got amazing properties for rent. Here's the list`.
* Else if none of the conditions are met, the bot will respond with `I'm sorry, I didn't understand. Please respond by typing "Buy" or "Rent"`.
### 2. Filtering job application candidates
Let's say a candidate is applying for a job through the bot and you want to qualify them based on the following criteria:
* Location: New York
* Willing to relocate: Yes
* Years of experience: 3 or more
You can set up the following conditions:
Once you have set up the conditions, you can define the paths for each condition. Here's an example:
Based on the above, here's how the bot will respond:
* If the candidate is from New York, willing to relocate, and has 3 or more years of experience, the bot will respond with `Congratulations! You've been shortlisted for the next round of interviews`.
* Otherwise, the bot will respond with `Sorry, you are not qualified for this job opening. We'll keep your application on file for future opportunities`.
# Create Company
Source: https://docs.chatling.ai/builder/blocks/hubspot/create-company
Create companies in HubSpot from your chatbot.
Easily create new companies in HubSpot through your chatbot to streamline lead capture and keep your CRM up to date automatically.
## Configuration
1. Click the `Connect account` button under the Account field to connect your HubSpot account to Chatling or select an existing connection.
2. Under the `Company details` section, add the properties you want to set for the company. You can enter variables in certain fields for dynamic values.
3. To store the company's ID when the company is created, select a variable for the `Company ID` field under the `Save response` section.
# Create Contact
Source: https://docs.chatling.ai/builder/blocks/hubspot/create-contact
Create contacts in HubSpot from your chatbot.
Create contacts in HubSpot from your chatbot. This is useful for capturing leads and enriching your CRM data.
## Configuration
1. Click the `Connect account` button under the Account field to connect your HubSpot account to Chatling or select an existing connection.
2. Under the `Contact details` section, add the properties you want to set for the contact.
3. To store the contact's ID when the contact is created, select a variable for the `Contact ID` field under the `Save response` section.
# Create Ticket
Source: https://docs.chatling.ai/builder/blocks/hubspot/create-ticket
Create tickets in HubSpot from your chatbot.
Create tickets in HubSpot from your chatbot. This is useful for forwarding user queries to your support team or creating tickets for issues that require further investigation.
## Configuration
1. Click the `Connect account` button under the Account field to connect your HubSpot account to Chatling or select an existing connection.
2. Select the `Pipeline` where the ticket should be created.
3. Enter the ticket's details, such as the subject, status, and description. You can enter variables in all fields to make the ticket dynamic.
4. To store the ticket's ID when the ticket is created, select a variable for the `Ticket ID` field under the `Save response` section.
# HubSpot Integration
Source: https://docs.chatling.ai/builder/blocks/hubspot/overview
Integrate with HubSpot and manage your contacts, companies, and tickets directly from your chatbot.
The HubSpot integration enables you to connect your Chatling chatbot to your HubSpot account, allowing you to automate and manage key CRM workflows directly within conversations.
With this integration, your chatbot can:
* Create support tickets
* Create, update, and retrieve contacts
* Create and update companies
This allows your team to capture leads, resolve issues, and enrich CRM data without leaving the chat interface.
# Retrieve Contact
Source: https://docs.chatling.ai/builder/blocks/hubspot/retrieve-contact
Retrieve contacts from HubSpot to use in your chatbot.
With this block, you can retrieve contacts from HubSpot and use them in your chatbot.
## Configuration
1. Click the `Connect account` button under the Account field to connect your HubSpot account to Chatling or select an existing connection.
2. The `Search method` determines how the contact is found in HubSpot. You can either search by the contact's ID or email address. You can enter variables to make the search dynamic.
3. Add the contact's properties you want to retrieve and select a variable for each property.
# Update Company
Source: https://docs.chatling.ai/builder/blocks/hubspot/update-company
Update companies in HubSpot from your chatbot.
Easily update companies in HubSpot through your chatbot to keep your CRM up to date automatically.
## Configuration
1. Click the `Connect account` button under the Account field to connect your HubSpot account to Chatling or select an existing connection.
2. The `Search method` determines how the contact is found in HubSpot. Currently, only searching by company ID is supported.
3. Add the properties you want to update for the company. You can enter variables in certain fields for dynamic values.
# Update Contact
Source: https://docs.chatling.ai/builder/blocks/hubspot/update-contact
Update contacts in HubSpot from your chatbot.
With this block, you can update contacts in HubSpot from your chatbot, for example to enrich your CRM data.
## Configuration
1. Click the `Connect account` button under the Account field to connect your HubSpot account to Chatling or select an existing connection.
2. The `Search method` determines how the contact is found in HubSpot. You can either search by the contact's ID or email address.
3. Add the properties you want to update for the contact. You can enter variables in certain fields to make the contact dynamic.
# Buttons Block
Source: https://docs.chatling.ai/builder/blocks/inputs/buttons
Learn about the Buttons input block and how to set it up in the Builder.
The Buttons block is used to display a set of buttons that users can click to trigger actions or provide responses. You can use this block to present multiple options to users and guide them through the conversation flow.
Every button in the block has a connector that allows you to link it to other blocks.
# Configuration
Buttons have the following configuration options:
* **Label**: The text that appears on the button.
* **Store selected button in variable**: The variable where the selected button's value will be stored. For example, if the user selects the "Yes" button, you can store the value "Yes" in a variable for later use.
## Connecting buttons
Buttons must be connected to other blocks so that the chatbot can respond to the user's selection.
To connect a button, click the connector next to it and drag it to the group you want to connect it to.
In the example below, when the user clicks the "Software Development" button, the chatbot will display the "Sure thing! Our team can help..." message and continues the flow from there.
# Date/Time Block
Source: https://docs.chatling.ai/builder/blocks/inputs/date
Learn about the Date/Time input block and how to set it up in the Builder.
The Date/Time block is used to collect the date and time from users. You can use this block to ask users for dates, times, or date-time combinations.
## Configuration
The Date/Time block has the following configuration options:
* **Store answer in variable**: The variable where the user's input will be stored.
* **Input required**: Whether the user's input is mandatory. If disabled, a Skip button will appear, allowing users to skip the input.
* **Format**: The type of input the block will accept. You can choose from the following:
* Date
* Time
* Date & Time
* **Min**: The minimum value the user can input.
* **Max**: The maximum value the user can input.
# Email Block
Source: https://docs.chatling.ai/builder/blocks/inputs/email
Learn about the Email input block and how to set it up in the Builder.
The Email block is used to capture a valid email address from the user. You can use this block to collect email addresses of users for various purposes, such as saving them as leads, sending newsletters, or providing account-related information.
## Configuration
The Email block has the following configuration options:
* **Store email in variable**: The variable where the user's email address will be stored.
* **Input required**: Determine whether the user must provide an email address to proceed. If this option is disabled, a Skip button will appear, allowing users to skip the input.
* **Disallowed domains**: Specify a list of email domains that are not allowed. Users will not be able to enter email addresses associated with these domains.
* **[Quick replies](/builder/block-options/quick-replies)**
# Form Block
Source: https://docs.chatling.ai/builder/blocks/inputs/form
Learn about the Form input block and how to set it up in the Builder.
The Form block is used to collect multiple pieces of information from users in a structured way. You can use this block to create forms for lead generation, user feedback, surveys, and more.
You can add multiple fields to the form and configure each field to collect different types of information, such as text, email, phone number, and more.
## Configuration
The Form block has the following configuration options:
* **Fields**: Add and configure the fields you want to include in the form.
* **Label**: The label of the field to indicate what information is being collected.
* **Type**: Type of the field, such as Text, Email, Number, etc. This prevents users from entering invalid data.
* **Store user input in variable**: The variable where the user's response to the field will be stored.
# Number Block
Source: https://docs.chatling.ai/builder/blocks/inputs/number
Learn about the Number input block and how to set it up in the Builder.
The Number block is used to collect numerical input from users. You can use this block to ask users for numbers, such as quantities, prices, or percentages.
## Configuration
The Number block has the following configuration options:
* **Store answer in variable**: The variable where the user's input will be stored.
* **Input required**: Whether the user's input is mandatory. If disabled, a Skip button will appear, allowing users to skip the input.
* **Date type**: The type of number the block will accept. You can choose from the following options:
* \*\*Number (Integer/Decimal): Accepts any number, including whole numbers and decimals.
* **Integer**: Accepts only whole numbers.
* **Min**: The minimum value the user can input.
* **Max**: The maximum value the user can input.
* **[Quick replies](/builder/block-options/quick-replies)**
# Phone Block
Source: https://docs.chatling.ai/builder/blocks/inputs/phone
Learn about the Phone input block and how to set it up in the Builder.
The Phone block is used to collect phone numbers from users.
At the moment, the Phone block is not fully developed and doesn't have the ability to validate phone numbers or provide option for users to select their country code. We are working on improving this block and will update this documentation once the changes are live.
# Text Block
Source: https://docs.chatling.ai/builder/blocks/inputs/text
Learn about the Text input block and how to set it up in the Builder.
The Text block is used to capture user input in the form of text. You can use this block to prompt users for answers and collect the necessary information.
## Configuration
You can configure the following settings for the Text block:
* **Store answer in variable**: Choose a variable to store the user's response. You can use the stored data in other blocks to personalize the conversation.
* **Input required**: Determine whether the user must provide an answer to proceed. If this option is disabled, a Skip button will appear, allowing users to skip the input.
* **[Voice Input](/builder/block-options/voice-input)**: Toggle on the Voice Input option to allow users to send messages using voice.
* **Min. characters**: The minimum number of characters the user must enter.
* **Max. characters**: The maximum number of characters the user can enter.
* **[Quick replies](/builder/block-options/quick-replies)**
# URL Block
Source: https://docs.chatling.ai/builder/blocks/inputs/url
Learn about the URL input block and how to set it up in the Builder.
The URL block is used to collect URLs from users. It validates the user's input to ensure that it is a valid URL.
You can use this block to ask users for website URLs, social media profiles, or any other web addresses.
## Configuration
The URL block has the following configuration options:
* **Store answer in variable**: The variable where the user's input will be stored.
* **Input required**: Whether the user's input is mandatory. If disabled, a Skip button will appear, allowing users to skip the input.
* **[Quick replies](/builder/block-options/quick-replies)**
# Blocks
Source: https://docs.chatling.ai/builder/blocks/overview
Blocks are the core components of every chatbot. Learn how to use them to build your chatbot's conversational flow.
With Blocks, you can build the conversational flow of your chatbot. They define the sequence in which the chatbot interacts with users and responds to their queries.
You can add blocks to the canvas and connect them to create a flow. Each block performs a specific action, such as sending a message, capturing user input, or integrating with external services.
## Types of blocks
Here are the different categories of blocks that are available:
* **Send message**: Display messages to the user.
* **Capture response**: Capture answers from the user, such as text, email, form submission, and more.
* **AI**: Use AI to generate responses to user's questions.
* **Condition**: Add conditions and logic to your flow.
* **Action**: Perform actions such as sending emails, setting variables, and more.
* **Trigger**: Trigger events automatically based on user's actions.
* **Zendesk**: Connect your chatbot to Zendesk to create tickets.
* **Cal.com**: Integration for Cal.com to book events and appointments.
## Groups
Blocks can be grouped together for better organization and for creating connections between them. A group is created when you drop a block onto an empty area of the canvas. You can then drag other blocks into the group to organize them.
{/* ## Send message
The `Send message` blocks are used to display messages to the user. You can use them to provide information, ask questions, or guide the user through the conversation.
Here are some of the blocks available:
- **[Text](/builder/blocks/send/text)**: Display a text message.
- **[Image](/builder/blocks/send/image)**: Display an image.
- **[Video](/builder/blocks/send/video)**: Display a video.
- **[Audio](/builder/blocks/send/audio)**: Play an audio file.
- **[Carousel](/builder/blocks/send/carousel)**: Display a carousel of cards.
## Capture response
The `Capture response` blocks are used to receive input from the user. You can use them to capture text, email, phone number, and more.
Here are the available blocks:
- **[Buttons](/builder/blocks/inputs/buttons)**: Display a set of buttons for the user to choose from.
- **[Text](/builder/blocks/inputs/text)**: Capture text input from the user.
- **[Email](/builder/blocks/inputs/email)**: Capture a valid email address from the user.
- **[Form](/builder/blocks/inputs/form)**: Displays a form for the user to fill out.
- **[Phone](/builder/blocks/inputs/phone)**: Capture a valid phone number from the user.
- **[Date](/builder/blocks/inputs/date)**: Capture a valid date from the user.
- **[URL](/builder/blocks/inputs/url)**: Capture a valid URL from the user.
- **[Number](/builder/blocks/inputs/number)**: Capture integer or decimal numbers from the user.
## AI
The `AI` blocks are related to the AI capabilities of the chatbot.
Here are the available blocks:
- **[AI Response](/builder/blocks/ai/ai-response)**: Generate an AI response using the knowledge base or the AI model's pre-trained data.
## Logic
The `Logic` blocks are used to add conditions and logic to your chatbot's flow. You can use them to create branches in the conversation based on user input or other conditions.
Here are the available blocks:
- **[Condition](/builder/blocks/logic/condition)**: Define the flow of the conversation based on a set of conditions. You can add multiple conditions and define the actions to be taken for each condition.
## Integration
The `Integration` blocks are used to connect your chatbot to external services.
Here are the available blocks:
- **[HTTP Request](/builder/blocks/integration/http-request)**: Send an HTTP request to an external web service and process the response.
To add a block, open the Blocks menu from the sidebar and drag the desired block onto the canvas.

You can then connect the blocks by dragging the connectors between them. This defines the sequence in which the blocks are executed during the conversation.
 */}
# Audio Block
Source: https://docs.chatling.ai/builder/blocks/send/audio
Learn about the Audio block and how to set it up in the builder
The Audio block allows you to play an audio file to the user in the conversation. It can be used for various purposes, such as playing a welcome message, providing information, or playing music.
## Adding an audio file
To add an audio file, you can either upload an audio file directly or provide a link to a file hosted online. The supported audio formats are `MP3`, `WAV`, and `OGG`.
You can enable the `Autoplay` option to automatically play the audio file when the block is displayed to the user.
# Carousel Block
Source: https://docs.chatling.ai/builder/blocks/send/carousel
Learn about the Carousel block and how to set it up in the builder
The Carousel block allows you to display a carousel of cards to the user. Each card can contain an image, title, description, and buttons.
Carousels are a great way to showcase multiple products, services, or information in a visually appealing format.
## Adding a carousel
To add a carousel, you can create multiple cards within the block editor. For each card, you can set an image, title, description, and buttons.
You can add as many cards as you like to the carousel. Users can swipe through the cards to view the content.
# Image Block
Source: https://docs.chatling.ai/builder/blocks/send/image
Learn about the Image block and how to set it up in the builder
You can use the Image block to display an image to the user. It can be used for various purposes, such as showing product images, providing visual instructions, or adding visual elements to your chatbot conversation.
## Adding an image
You can upload an image or insert its URL. The support image formats are `JPG/JPEG`, `PNG`, `WEBP`, and `GIF`.
# Text Block
Source: https://docs.chatling.ai/builder/blocks/send/text
Learn about the Text block and how to set it up in the builder
The Text block is used to display a text message to the user. You can use it to provide information, ask questions, or guide the user through the conversation.
## Adding text
Once you add a Text block to the canvas, click on it to open the block editor. You can then enter your message in the text editor and apply formatting using the toolbar.
## Inserting variables
You can insert variables into your text message to make it more dynamic and personalized.
To insert a variable, type `{` and a list of available variables will appear. Select the variable you want to insert and it will be added to the text message.
For example, if you have captured the user's name earlier in the conversation and stored it in a variable called `contact_name`, you can insert it into the text message by typing `{contact_name}`. When the message is sent to the user, the variable will be replaced with the user's name.
# URL Button Block
Source: https://docs.chatling.ai/builder/blocks/send/url-button
Learn about the URL Button block and how to set it up in the builder
The URL Button block displays buttons that redirect users to other pages.
## Adding URL buttons
1. Drag and drop the URL Button block on the canvas.
2. Click on the block to edit it.
3. Click `Add button` button to add a new button.
4. Enter the button label and URL. The label is the text that will be displayed on the button.
5. To add more buttons, click the `+` icon.
# Video Block
Source: https://docs.chatling.ai/builder/blocks/send/video
Learn about the Video block and how to set it up in the builder
The Video block allows you to display a video to the user in the conversation. You can add a video from YouTube, Vimeo, or any other video hosting platform, or you can paste the direct link to a video file.
For video platforms that support embedding, Chatling will automatically embed the video in the conversation. Here's an example:
## Adding a video
Adding a video is simple. Just paste the URL to the video in the block editor and the chatbot will automatically embed it in the conversation.
# Triggers
Source: https://docs.chatling.ai/builder/blocks/trigger/overview
Learn about triggers in Chatling and how to use them effectively in your chatbot flows.
Triggers are events that automatically start a specific flow in your chatbot based on user behavior. They enable you to create more dynamic and responsive chatbot experiences.
## Types of Triggers
The following triggers are currently available:
1. Returning Visitor: This trigger is activated when a visitor returns to your website after a period of time.
2. Specific Webpage Opened: This trigger is activated when a visitor opens a specific page on your website.
3. Intent: Triggered when there's a matching intent in the user's message.
## How Triggers Work
Triggers are automatically invoked when their conditions are met. When a trigger is activated, the chatbot will follow the conversation flow connected to that trigger in the builder.
For example, if you have a "Returning User" trigger set up, and a user comes back to your website after being away for a certain period, the chatbot will automatically start the conversation flow linked to this trigger.
## How to Use Triggers
To use triggers in your chatbot:
1. Open your chatbot builder.
2. From the Blocks page in the sidebar, look for the "Triggers" section.
3. Drag and drop the desired trigger onto your canvas.
4. Connect the trigger to the subsequent blocks in your conversation flow.
5. Configure the trigger settings if necessary (e.g. specifying the trigger frequency).
# Create Ticket
Source: https://docs.chatling.ai/builder/blocks/zendesk/create-ticket
Learn how to create tickets in Zendesk from your chatbot.
Create tickets in Zendesk directly from your chatbot using this block. This is useful for forwarding user queries to your support team or creating tickets for issues that require further investigation.
## Configuration
* **Account**: The Zendesk account to create the ticket in.
* **Subject**: The subject of the ticket.
* **Priority**: The priority of the ticket, such as Low, Normal, High, or Urgent.
* **Requester name**: The name of the user who should be associated with the ticket. Normally, this should be the customer's name.
* **Requester email**: The email address of the user who should be associated with the ticket. Normally, this should be the customer's email address.
* **Description**: The description of the ticket.
# Canvas
Source: https://docs.chatling.ai/builder/canvas
Learn about the canvas and how to navigate and interact with it.

The canvas is where you design the conversational flow of your chatbot. You can add [blocks](/builder/blocks/overview), connect them, and define the logic for how the chatbot responds to user inputs.
To move around the canvas, click and drag an empty area. To zoom in or out, use your mouse scroll wheel or the zoom controls in top toolbar.
All chatbots contain a default `Start` block, which is the entry point of the conversation. From there, you can add blocks to create the flow.
# Chatbot Builder
Source: https://docs.chatling.ai/builder/overview
Learn about the Builder and how to create conversational flows for your chatbot.
Chatling's Builder is a visual interface that allows you to create and manage conversational flows for your chatbot. It's where you define how the chatbot interacts with users and responds to their queries.
## Builder Interface

The Builder consists of the following components:
* **[Canvas](/builder/canvas)**: The main area where you add and connect blocks to build the conversational flow.
* **[Sidebar](/builder/sidebar)**: Contains menus for adding blocks, managing variables, and configuring the AI and general settings.
* **Toolbar**: Appears at the top and contains controls for zooming in/out, saving, preview, and publishing the chatbot.
In the next sections, we'll explore each component of the Builder in detail and learn how to create conversational flows for your chatbot.
# Publish your chatbot
Source: https://docs.chatling.ai/builder/publish-your-chatbot
Learn how to publish your chatbot and make it live.
Once you've built your chatbot and tested it thoroughly, you can publish it to make it live.
By publishing, any changes you've made to the chatbot will become available to users where the chatbot is embedded.
To publish your chatbot, click the `Publish` button in the top right corner of the Builder.

# Save your work
Source: https://docs.chatling.ai/builder/save-your-work
Learn how to save your changes in the Builder.
Any changes you make to your chatbot's flow in the [Builder](/builder/overview) is saved automatically. You can also save it manually by clicking the `Save` button in the top right side of the screen.
When you save your changes, it will be saved as a draft and will not be published. This allows you to work on the chatbot and test it without affecting the live version.
# Sidebar
Source: https://docs.chatling.ai/builder/sidebar
Learn about the Sidebar and its functionalities in the Builder.
The sidebar contains four menus:
* Blocks
* Variables
* AI Configuration
* Settings
## Sidebar Menus
### Blocks
The Blocks menu contains all the blocks you can add to your flow. [Blocks](/builder/blocks/overview) build up the conversational flow of your chatbot.
You can drag and drop blocks onto the canvas to add them to your flow.

Here are the different categories of blocks that are available:
* **Send message**: Display a message to the user.
* **Capture response**: Capture answers from the user, such as text, email, form submission, and more.
* **AI**: Use AI to generate responses to user's questions.
* **Logic**: Add conditions and logic to your flow.
* **Integration**: Connect your chatbot to external services.
### Variables
Variables are placeholders that store information during the conversation. You can use variables to store user inputs, API responses, and more. These variables can be used to personalize the conversation and make it more dynamic.
There are two types of variables:
* **System variables**: These are predefined variables that store system information or can be used to perform a specific action. For example, the `contact_email` variable can be used to store the user's email address and save them as a lead.
If you click on a system variable, you can view its purpose.
There are also additional system variables that aren't imported by default. To view and import them, click the `Import system variables` button.
* **Custom variables**: These are variables you create to store information specific to your chatbot. For example, you can create a custom variable to store the user's question and use it in the `AI Response` block to generate a response from the AI.
### AI Configuration
The AI Configuration menu allows you to configure the default AI settings for your chatbot. These settings are used when the chatbot generates AI responses using the Knowledge Base.
You can configure the following settings:
* **Instructions**: Provide instructions to the AI to tailor its responses. For example, you can instruct the AI to provide more detailed responses or to use a specific tone. You can click the `View examples` button to see examples of instructions you can provide.
* **Settings**:
* **Business, product, or brand name**: This will be used by the AI to generate more relevant responses and avoids answering off-topics questions that aren't related to your business, product, or brand, such as questions related to your competitors, weather, etc.
* **AI Model**: The AI model to use for generating responses. Every model uses a different amount of credits per response. We recommend testing with different models to see which one works best for your chatbot.
* **Language**: The language in which the AI should generate responses. If you set it to Auto, the AI will detect the language of the user's question and generate a response in the same language.
* **Temperature**: Controls the randomness of the responses. A higher temperature will generate more creative responses, while a lower temperature will generate more accurate responses.
### Settings
The Settings menu allows you to configure the chatbot's general settings. Here's what you can configure:
* **Message Delay**: The time delay in seconds between chatbot's messages.
# Test your chatbot
Source: https://docs.chatling.ai/builder/test-your-chatbot
Learn how to test your chatbot to see how it works.
While you're building the chatbot, you can test it to see how it works. This allows you to identify any issues and make improvements before publishing it.
Click the `Preview bot` button in the top right corner of the Builder to launch the chatbot for testing.

# Available system variables
Source: https://docs.chatling.ai/builder/variables/available-system-variables
List of all the system variables available and what they do.
Here are all the system variables that are available. If a variable is not present in your chatbot, you must [import it](/builder/variables/import-system-variables).
`chat_id`
The unique identifier of the chat.
`user_id`
The unique identifier of the user.
`conversation_content`
The chat transcript (recent 25 messages).
`current_date`
The current date in UTC.
`current_time`
The current time in UTC.
`locale`
The user's browser locale, such as en-US, en-CA, fr-FR, pt-BR, etc.
`page_title`
The title of the page the user is currently on.
`page_url`
The URL of the page the user is currently on.
`timestamp`
The UNIX timestamp, which is the number of seconds since January 1, 1970 UTC.
`current_time`
The current time in UTC.
`current_date`
The current date in UTC.
# How to create variables
Source: https://docs.chatling.ai/builder/variables/how-to-create-variables
Learn how to create variables in the Builder
Variables can be created from the [sidebar](/builder/sidebar) in the Builder. Here's how:
1. Click on the `Variables` menu in the sidebar.
2. Select `+ New`.
3. Enter a name for the variable and click `Create`. The name must be alphanumeric and can include underscores, such as `first_name`, `firstName`, or `First Name`.
Note that variable names are case-sensitive. For example, `first name` and `First Name` are considered different variables.
# How to use variables
Source: https://docs.chatling.ai/builder/variables/how-to-use-variables
A guide on how to use Variables in your chatbot
Variables can be used for capturing information, displaying dynamic content, and processing data in your chatbot.
## How to store data in variables
You can store data in variables using the `Store answer in variable` or a similar option that's available for certain blocks in the builder. This option appears in the [block editor](/builder/block-editor).
Let's take the [Text input block](/builder/blocks/inputs/text) as an example. This block allows users to enter text. To store the user's response in a variable, click the dropdown below the `Store answer in variable` option and select a variable.
## How to display variables in messages
You can display variables in messages using the `{variableName}` syntax. The variable name should be enclosed in curly braces.
As an example, let's you have a variable called `first_name` and you want to greet the user by their name. Here's how to do it:
1. Add a [Text output block](/builder/blocks/send/text) to your chatbot.
2. Click the block to open the editor.
3. Type `Hello, {first_name}!` in the message field.
4. When the chatbot displays this block, it will replace `{first_name}` with the value stored by the variable.
Note that the values stored are on a per-conversation basis. This means that the value of a variable is unique to each conversation and is not shared across different conversations.
# Import system variables
Source: https://docs.chatling.ai/builder/variables/import-system-variables
Learn how to import system variables that aren't available by default in your chatbot.
Not all system variables are available by default when you create a chatbot. If you require additional system variables that aren't available, you can import them from the `Variables` menu in the builder's [sidebar](/builder/sidebar).
## How to import additional system variables
1. Go to the `Builder` in your chatbot.
2. Click the `Variables` menu in the sidebar.
3. Click `Import system variables`.
4. A list is displayed with all the additional system variables that you can import. Select the ones you want to import.
5. Click the `Import` button.
6. The selected system variables are now available to use in your chatbot.
# Types of variables
Source: https://docs.chatling.ai/builder/variables/variable-types
There are two types of variables: System Variable and Custom Variable. Learn how to use them in your chatbot.
Variables in the Builder are of two types:
* System Variable
* Custom Variable
## System Variable
System variables are predefined variables that contain system information or which can be used to perform specific actions. These variables are automatically created by the Builder.
To learn what a specific system variable does, you can open it from the Variables menu in the [sidebar](/builder/sidebar) and read its description.
There are also additional system variables that aren't imported by default. To view and import them, go to the Variables menu from the [Sidebar](/builder/sidebar) and click the `Import system variables` button.
## Custom Variable
These are variables that you create to store information specific to your chatbot.
For example, you can create a custom variable to store the user's query and pass it to the AI for generating a response from the knowledge base.
# What are variables?
Source: https://docs.chatling.ai/builder/variables/what-are-variables
Learn about Variables, the different types, and how to use them
Variables are placeholders that store information during the conversation. You can use variables to store user inputs, API responses, and more. These variables can be used to personalize the conversation and make it more dynamic.
For example, you can store the user's name in a variable and use it to greet the user. This way, you can make the conversation more engaging and interactive.
In the next section, you will learn about the different types of variables and how to use them in your chatbot.
# Add disclaimer, privacy notice, or custom text to footer
Source: https://docs.chatling.ai/chatbot/add-footer-text
Learn how to display custom text in the chatbot's footer.
Often times, you may want to display a text in the chatbot's footer, such as a disclaimer, privacy notice, or any other text. Here's how you can do that.
1. Open the `Appearance` settings.
2. Click on `Texts` from the sidebar.
3. Under the `Footer` section, you can enter the text you want to display.
4. Click `Save` to apply the changes.
# Custom domain
Source: https://docs.chatling.ai/chatbot/custom-domain
Learn how to add a custom domain to your chatbot.
You can use a custom subdomain for the chatbot widget and sharing link rather than the default one used by Chatling. This allows you to whitelabel your chatbots to maintain your brand identity or make them look like your team developed them.
## How to set a custom domain
1. Open the chatbot you want to set a custom subdomain for.
2. From the menu, click on `Settings` under the `Chatbot` section.
3. Go to the `Custom Domain` tab.
4. Enter the custom domain you want to use for the chatbot, such as `sample.domain.com`, and click the `Save` button.
5. Add the DNS records displayed on the page to your domain provider to activate the custom domain.
6. Once you add the DNS records, it may take up to 24 hours for the changes to propagate. You can click the `Verify` button to check if the records are active.
7. Once completed and the status is `Active`, the chatbot widget and sharing link will use the custom domain.
# Design your chatbot widget
Source: https://docs.chatling.ai/chatbot/customize
A guide on how to customize the appearance of your chatbot widget and make it match your brand.

You can customize the appearance of your chatbot to match your brand. Many aspects of the widget, such as the colors, icons, and other design elements can be customized to create a chatbot that fits seamlessly into your website.
## Customizing the chatbot
To customize the chatbot widget, click the `Appearance` menu from your chatbot's dashboard.
Here are a few things you can customize:
* **Colors**: Change the primary, secondary, and chat icon colors.
* **Chat Width**: Set the width of the chat window.
* **Position**: Choose the position where the widget should appear on your website, such as bottom right or bottom left.
* **Bot Icon**: Upload a custom image for the icon that appears next to the bot's messages.
* **Chat Icon**: Upload a custom image for the chat icon that users click to open the chatbot.
* **Header Title**: The title that appears at the top of the chat window, such as "Support Chat" or "Virtual Assistant".
* **Interface Language**: The language of the chatbot's interface. Note that this doesn't affect the language used by the AI.
* **Ask user to rate AI response**: Enabling this will display a thumbs up/down icon after the AI response, allowing users to rate it. This feedback can be used to improve the AI's performance.
* **Hide "Powered by Chatling" text**: At the bottom of the chatbot, there's a "Powered by Chatling" text. You can hide it by enabling this option.
* **Hovering Message**: You can display attention-grabbing messages above the chat icon to encourage users to start a conversation.
* **Show Sources for AI Response**: Enable this option to show the sources of the AI responses when it answers from the Knowledge Base. This helps users understand where the information is coming from.
* **Auto-Open Chat**: Automatically open the chat window when the page loads.
Once you've made the changes, click the `Save` button to apply them to your chatbot.
# How to delete a chatbot
Source: https://docs.chatling.ai/chatbot/delete
Learn how to remove a chatbot permanently from your account.
If you no longer need a chatbot, you can delete it from the dashboard.
Deleting a chatbot will permanently remove it from your account, and you won't be able to recover it. All data associated with the chatbot, including contacts, conversations, and knowledge base will be removed permanently.
## How to delete a chatbot
1. Open the chatbot you want to delete.
2. From the menu, click on `Settings` under the `Chatbot` section.
3. Go to the `Delete` tab.
4. Click the `Delete` button.
5. Confirm the deletion by typing `delete permanently` in the text box and click \`Delete\`\`
# Download transcripts
Source: https://docs.chatling.ai/chatbot/download-chat-transcripts
A guide to enabling chat transcript downloads for end-users.
If you'd like your chatbot users to have the option to download chat transcripts, you can turn on this feature in the chatbot's appearance settings.
## How to allow end-users to download chat transcripts
1. Open your chatbot's dashboard.
2. Go to `Appearance`.
3. Click on `Configure` from the sidebar.
4. Enable `Allow users to download chat transcripts`.
5. Click `Save`.
# How to duplicate a chatbot
Source: https://docs.chatling.ai/chatbot/duplicate
Learn how to duplicate a chatbot to create a copy of it.
You can duplicate chatbots and create copies of them to use as templates or to make changes without affecting the original chatbot. This can be useful if you want to experiment with different configurations or create a backup of your chatbot.
By duplicating a chatbot, all its settings, appearance, and builder configurations will be copied to the new chatbot. You can then make changes to the duplicated chatbot without affecting the original one.
## Duplicating a chatbot
To duplicate a chatbot, follow these steps:
1. Go to your project's dashboard where you can view all your chatbots.
2. Click on the ellipsis `...` icon next to the chatbot you want to duplicate.
3. Select the `Duplicate` option from the dropdown menu.
# Set the language of your chatbot widget
Source: https://docs.chatling.ai/chatbot/language
Set the language of your chatbot widget.
The chatbot is available in over 45 languages. You can customize the language of your chatbot to match your audience's preferences. This affects all text elements in the chatbot widget, including placeholders, buttons, and system messages.
By default, the language is set to `Auto`. This means that the chatbot will automatically detect the user's language based on their browser settings.
## Set the language
1. From your chatbot's dashboard, go to **Appearance**.
2. Click `Configure` from the sidebar.
3. Use the `Interface language` dropdown to select the language of your chatbot.
Note: If you set the language to `Auto`, the chatbot will automatically detect the user's language based on their browser settings.
4. Click `Save`.
# Operating hours
Source: https://docs.chatling.ai/chatbot/operating-hours
Schedule the chatbot to be visible at certain times.
You can set the operating hours for your chatbot to define when it should be available to users. This is useful if you want to limit the chatbot's availability to certain times of the day or week, e.g during business hours or off-hours.
When outside of the operating hours, your chatbot will be automatically hidden, ensuring it's only live when you want it to be.
## Set operating hours
1. From your chatbot's dashboard, go to the **Settings** page.
2. Click the `Visibility` tab.
3. Under the `Operating hours` section, click the `Set operating hours` button.
4. Select the days and times when the chatbot should be visible. **Note that the timezone is UTC.**
To keep the chatbot visible throughout the day, leave the start and end times empty.
5. Click the `Add` button to add the schedule.
6. Click the `Save` button to save the changes.
Once you define the operating hours, the chatbot will be visible during the specified times and hidden outside of these hours.
## Edit existing operating hours
To edit the operating hours, you have to delete one or more schedules that you want to edit and then add the new schedules.
# How to pass custom data to your chatbot
Source: https://docs.chatling.ai/chatbot/pass-custom-data
Learn how to send any data, such as customer information, to the chatbot widget.
With the widget's code snippet, you can pass any data to the chatbot. This is useful if you want to send customer information, such as name and email, or any other data to the chatbot and use them in your flow.
## Before you begin
{/* - You need to have the chatbot installed on your website. If you haven't done this yet, see [how to install the chatbot](/docs/install-chatbot). */}
* You must know how to use [variables](/builder/variables) in the builder.
* You have to [create variables](/builder/variables/how-to-create-variables) in the builder for the data you want to pass to the chatbot. If the variables already exist, you can skip this step.
## Pass custom data during launch
When you [install the chatbot](/docs/install-chatbot) on your website, you get a code snippet similar to this:
```html
```
You can pass custom data during launch by adding the `variables` property to the `chtlConfig` object, and listing the variable names and their values.
```javascript
window.chtlConfig = {
chatbotId: "",
variables: {
"variable_name_1": "",
"variable_name_2": "",
"variable_name_3": ""
}
}
```
### Example
Let's say you want to pass the user's name, email and age to the chatbot. First, you need to [create variables](/builder/variables/how-to-create-variables) for them in the builder.
Next, add the variable values to your widget's code snippet. You must make sure that the variable names match exactly as they are in the builder.
```javascript
window.chtlConfig = {
chatbotId: "",
variables: {
"contact_name": "John Doe",
"contact_email": "john.doe@example.com",
"age": 25
}
}
```
Now if you use the variables in your chatbot's flow, they will have the values you passed during launch.
{/* In the above example, we are sending custom values for the variables `contact_name`, `contact_email`, and `age`. You must make sure that these variables have been [created](/builder/variables/how-to-create-variables) in the builder and that the names match exactly. */}
## Pass custom data after launch
If at any point after launching the chatbot, you want to pass some data to it, you can do so by calling the `window.Chatling.setVariables` function.
```javascript
window.Chatling.setVariables({
"contact_name": "Rick Astley",
"contact_email": "rick.astley@example.com",
"age": 30
}, function(success, errorMessage) {
if (!success) {
// handle error
}
});
```
**Note:**
* The `setVariables` function must be called after the chatbot widget has loaded.
{/* You can check if the widget has loaded by listening to the `chatling:ready` event. */}
* Variables must be present in the builder and the names must match exactly.
* This will overwrite any existing values for the variables.
# Rate limit
Source: https://docs.chatling.ai/chatbot/rate-limit
Learn how to set a rate limit for your chatbot to prevent it from being spammed.
Rate limiting allows you to limit the number of messages a user can send to your chatbot in a given period of time. This helps prevent end-users from spamming your chatbot and depleting your account credits.
## How to set a rate limit
1. Open your chatbot's dashboard.
2. Go to chatbot settings.
3. Click the `Security` tab.
4. Under the `Rate limiting` section, add a rate limit, e.g. 10 messages per minute. You can add multiple rate limits for different periods of time, such as per minute, per hour, or per day.
The rate limit is applied to individual users. For example, if you set a rate limit of 10 messages per minute, each user can send up to 10 messages per minute.
5. You can also add a custom error message to be displayed when the rate limit is exceeded. If left blank, a default error message will be displayed.
The default error message is automatically translated into the language of your chatbot widget. If you override it with a custom message, it won't be translated.
6. Click `Save`.
Once you've set the rate limits, your chatbot will prevent end-users from sending more messages than the rate limit in a given period of time. If the rate limit is exceeded, an error message will be displayed.
# Satisfaction survey
Source: https://docs.chatling.ai/chatbot/satisfaction-survey
A guide on how to set up and display satisfaction surveys.
You can collect feedback from users at the end of their chat by displaying a satisfaction survey. This can help you gain insights into user satisfaction, identify areas for improvement, and track the overall effectiveness of your chatbot over time.
## How to set up a satisfaction survey
1. From the chatbot dashboard, go to `Settings`.
2. Click the `Satisfaction Survey` tab.
3. Toggle on the `Show survey` option.
4. Customize the survey by selecting the rating type, questions to display, and more.
5. Click `Save` to apply the changes.
## View survey responses
You can view survey responses from the `Conversations` page of your chatbot dashboard. If a conversation has a survey response, the result will appear within the conversation thread as well as on the `Details` section in the sidebar.
# Widget SDK
Source: https://docs.chatling.ai/chatbot/sdk-methods
## Configuration
You can configure the widget during launch by setting the `window.chtlConfig` object, as shown below.
```javascript
window.chtlConfig = {
// Configuration options
};
```
Below are the available properties you can set.
### `chatIconVisible`
Whether to display the chat icon (open and close buttons).
* Possible values: `true`, `false`
* Default: `true`
```javascript
window.chtlConfig = {
chatIconVisible: true,
// ... other config options
};
```
### `displayType`
The type of widget to display.
* Possible values: `floating`, `fullscreen`, `page_inline`
* Default: `floating`
```javascript
window.chtlConfig = {
displayType: 'floating',
// ... other config options
};
```
### `language`
The language of the widget in ISO 639-1 format. This will override the language set in your chatbot's appearance settings.
* Possible values: `en`, `ar`, `az`, `bg`, `bn`, `bs`, `ca`, `cs`, `da`, `de`, `el`, `en`, `es`, `et`, `fa`, `fi`, `fr`, `he`, `hi`, `hr`, `hu`, `hy`, `id`, `it`, `ja`, `ko`, `lt`, `lv`, `mn`, `ms`, `nl`, `no`, `pl`, `pt`, `pt-br`, `ro`, `ru`, `sk`, `sl`, `sq`, `sr`, `sv`, `th`, `tr`, `uk`, `ur`, `vi`, `zh-cn`, `zh-tw`
```javascript
window.chtlConfig = {
language: 'en',
// ... other config options
};
```
## Methods
Below are the SDK methods you can call to interact with the widget.
You must wait for the widget script to load before calling these methods.
### `open()`
Opens the chatbot, similar to when a user clicks the chat icon.
```javascript
window.Chatling.open();
```
### `minimize()`
Minimizes the chatbot, similar to when a user clicks the minimize button in the widget.
```javascript
window.Chatling.minimize();
```
### `hideChatIcon()`
Hides the chat icon.
```javascript
window.Chatling.hideChatIcon();
```
### `showChatIcon()`
Shows the chat icon.
```javascript
window.Chatling.showChatIcon();
```
### `setVariables()`
You can pass custom values to the chatbot at any point after it's loaded.
The method takes an object containing the variable names and values. You must make sure that the variables [have been created](/builder/variables/how-to-create-variables) in the builder and that the names match exactly.
To pass custom data during launch, read [this guide](/chatbot/pass-custom-data#pass-custom-data-during-launch).
```javascript
window.Chatling.setVariables({
"contact_name": "Rick Astley",
"contact_email": "rick.astley@example.com",
"age": 30
}, function(success, errorMessage) {
if (!success) {
// handle error
}
});
```
### `destroy()`
Permanently removes the chatbot from the page.
```javascript
window.Chatling.destroy();
```
# Share
Source: https://docs.chatling.ai/chatbot/sharing
A guide on how to share your chatbot with others.
You can generate a unique link for your chatbot and share it with others for testing, collaboration, or other purposes. Here's how to do it:
1. From the chatbot dashboard, click `Share`.
2. Click `Generate Link`.
3. To password protect the link, enable `Require password` and type in a password.
4. Copy the link and share it with others.
# Visibility
Source: https://docs.chatling.ai/chatbot/visibility
A guide on how to make your chatbot public or private.
You can set the visibility of your chatbot to be public or private. Setting to Public will make your chatbot visible to all users, while setting to Private will make it accessible from your account only.
## How to set the visibility
1. From the chatbot dashboard, go to `Settings`.
2. Click the `Visibility` tab.
3. Set the visibility to `Public` or `Private`.
4. Click `Save` to apply the changes.
# Whitelist domains
Source: https://docs.chatling.ai/chatbot/whitelist-domains
Learn how to whitelist domains for your chatbot to prevent it from being added to unauthorized websites.
If you want to prevent your chatbot from being added to unauthorized websites, you can whitelist domains.
By adding whitelisted domains, the chatbot will only appear on websites that match the whitelisted domains.
## How to whitelist domains
1. Open your chatbot's dashboard.
2. Go to chatbot settings.
3. Click the `Security` tab.
4. Under the `Whitelist domains` section, type in a domain you want to whitelist and click the `+ Add` button. You can add multiple domains.
5. Click `Save`.
# Save contacts from chatbot conversations
Source: https://docs.chatling.ai/contacts/create
You can collect user information at any point in your chatbot flow and save it as a contact using the [Create Contact](/builder/blocks/action/create-contact) block. The contact is automatically associated with the user and retained across future chat sessions.
The example below shows a flow that collects the user's name, email, and phone number using a form. Once submitted, it is used to create a new contact.
All contacts created by the chatbot are displayed in the `Contacts` page in your dashboard.
# Identify users across multiple chats
Source: https://docs.chatling.ai/contacts/identify-users
{/* Fetching user details in future chat sessions */}
When you save a contact, it's associated with the user and persists across multiple chat sessions. This information can be used to personalize the conversation, skip repetitive questions, and tailor the flow accordingly.
## How it works
The [Get Contact](/builder/blocks/action/get-contact) block can be used to fetch the contact information associated with the current user.
The example below shows a flow that identifies the user and takes different actions based on whether their contact details exist.
Here's how the above flow works:
1. When the chat starts, the `Get Contact` block is executed to check if a contact exists for the current user.
We're using the `user_id` variable to search for the associated contact. This is a system variable that contains the user's unique ID. If this variable doesn't exist in your builder, you can [import it from the Variables menu](/builder/variables/import-system-variables).
2. If a contact is found, the information is stored in variables. For example, we're storing the contact's first name and email in the `first_name` and `email` variables.
3. Next, the [Variable condition block](/builder/blocks/condition/variable) is used to check if the `email` and `first_name` variables are not empty.
* If they're not empty, it means the user is a returning user. In this case, we skip the form and greet the user by name.
* If they're empty, it means the user is new. In this case, we show the form to collect the user's name and email.
# Overview
Source: https://docs.chatling.ai/contacts/overview
Learn how to leverage the Contacts feature to capture leads and manage your customer data.
Chatling makes it easy to capture and manage leads directly through chatbot conversations. All saved contacts are displayed in the `Contacts` page in your dashboard.
With the Contacts feature, you can automatically collect and store user information during chat interactions—turning conversations into valuable customer records.
## What you can do
* Automatically create contact records using chatbot flows
* Capture key details like name, email, phone number, company, and more
* Customize how and when contact info is collected using the [Create Contact](/builder/blocks/action/create-contact) block
* View, manage, and export saved contacts from the Contacts page
* Sync contact data with your CRM or other tools via exports, Zapier, or our API
# How many AI credits are consumed by each model?
Source: https://docs.chatling.ai/faq/ai-credit-usage-by-model
* Claude Haiku 3: 1 credit
* Claude Opus 3: 50 credits
* Claude Sonnet 3: 4 credits
* Claude Haiku 3.5: 1 credit
* Claude Sonnet 3.5: 4 credits
* Claude Sonnet 3.7: 1 credit
* Claude Sonnet 4: 1 credit
* Claude Opus 4: 25 credits
* Gemini 2.0 Flash: 1 credit
* Gemini 1.5 Flash: 0.5 credit
* Gemini 1.5 Pro: 1 credit
* Gemini 1.0 Pro: 0.5 credit
* GPT-3.5 Turbo: 1 credit
* GPT-4: 20 credits
* GPT-4 Turbo: 10 credits
* GPT-4o: 1 credit
* GPT-4o mini: 0.5 credit
* GPT-4.1: 1 credit
* GPT-4.1 Mini: 1 credit
* GPT-4.1 Nano: 1 credit
* GPT-4.5: 50 credits
* o3 Mini: 1 credit
* o4 Mini: 1 credit
# How to hide the chatbot on specific pages
Source: https://docs.chatling.ai/faq/hide-chatbot-on-specific-pages
Learn how to set the visibility of your chatbot on specific pages.
Sometimes you may want to hide your chatbot on specific pages of your website. This could be for various reasons, such as maintaining a distraction-free environment on certain pages, or to comply with specific page requirements. Chatling provides a simple way to control the visibility of your chatbot by allowing you to specify URLs where the chatbot widget should not appear.
## How to hide the chatbot on specific pages
1. From the chatbot dashboard, go to `Settings`.
2. Click the `Visibility` tab.
3. In the `Hide chatbot on specific pages` section, type the URL of the page where you want to hide the chatbot and press the Enter key.
4. Repeat the previous step for each page where you want to hide the chatbot.
5. Click `Save` to apply the changes.
You can also enter wildcard URLs to hide the chatbot on multiple pages. For example, if you want to hide the chatbot on the blog, you can enter `https://example.com/blog/*` to hide it from all pages in the blog.
# How to reset the chat on page load?
Source: https://docs.chatling.ai/faq/reset-chat-on-page-load
By default, chat history is retained when users navigate away from the chatbot and return to it, refresh the page, or go to a different page. This means that when users return to the chatbot, they can see their existing chat and continue from where they left off.
If you want to disable this so that the chat is reset on page load, you can do so by following these steps:
1. From your chatbot dashboard, go to `Builder`.
2. Click the settings icon in the sidebar.
3. Enable the the `Reset chat on page load` option.
# What are AI credits?
Source: https://docs.chatling.ai/faq/what-are-ai-credits
Understanding AI credits and how they are consumed
AI credits are used to manage and track AI usage. These credits are consumed each time the chatbot generates an AI response.
The number of AI credits used per response varies depending on the specific AI model you use. For a breakdown of credit usage by model, refer to [this page](/faq/ai-credit-usage-by-model).
Please note that credits are not consumed for normal messages sent and received by users. It is only used when the chatbot uses AI to generate responses (such as when you use the [AI block](/builder/blocks/ai/ai-response)).
# Getting started
Source: https://docs.chatling.ai/getting-started
Welcome to Chatling, the platform for building AI-powered chatbots.
Chatling is a no-code platform that allows businesses to build conversational AI chatbots with ease and speed. Whether you're looking to automate customer support, generate leads, or provide information, Chatling can help you create a chatbot that meets your needs.
This is your guide to getting started with Chatling. Here, you'll learn how to create your first chatbot, build its flow, and deploy it to your website in no time.
Let's get started! 🚀
What we'll be covering:
1. [Create a chatbot](#1-create-a-chatbot)
2. [Building your chatbot](#2-building-your-chatbot)
3. [Populating the knowledge base](#3-populate-the-ai-knowledge-base)
4. [Customize the widget](#4-customize-the-widget)
5. [Deploy your chatbot](#5-deploy-your-chatbot)
## 1. Create a chatbot
After you sign up and verify your email, the first step is to create your chatbot.
1. From the dashboard, click on the `Create chatbot` button.
2. You can choose to create a chatbot from scratch or use a template. Templates help you get started quickly with pre-built flows.
3. Give your chatbot a name and click `Create chatbot`.
Congrats! You've created your first chatbot. Now you can start building it based on your requirements.
## 2. Building your chatbot
For your chatbot to be functional, you need to build its conversational flow. This can be done using the Builder.
From your chatbot's dashboard, click on the `Builder` menu to open it.

{/* This is where you define how the chatbot interacts with users and responds to their queries. */}
The [Builder](/builder/overview) is where you can create and manage your chatbot's flow. It's a visual interface that allows you to add and connect blocks to create a conversational flow.
All chatbots contain a default `Start` block, which is the entry point of the conversation.

### Sidebar
On the left sidebar, you'll find the following menus:
* **[Blocks](/builder/blocks/overview)**: Contains all the blocks you can add to your flow. Blocks build up the conversational flow of your chatbot.
You can drag and drop blocks from this menu to the canvas to add them to your flow.

* **Variables**: These are like containers that store information during the conversation. You can use variables to personalize the conversation and make it more dynamic.
* **AI Configuration**: Configure the default AI settings for your chatbot. These settings are used when the chatbot generates AI responses using the Knowledge Base.
* **Settings**: Configure the general settings for your chatbot.
### Connecting blocks
Once you add blocks to the [canvas](/builder/canvas), you must connect them to create a flow that guides users through the conversation. Failure to do so will result in the chat ending prematurely.

### Configuring blocks
Each block has its own configuration settings that you can customize. To configure a block, click it and its settings will appear on the right side of the screen.

### Testing your chatbot
While you're building the chatbot, you can test it to see how it works. This allows you to identify any issues and make improvements before publishing it.
Click the `Preview bot` button in the top right corner of the screen to launch the chatbot for testing.

Your work is saved automatically as you build your chatbot. You can also save it manually by clicking the `Save` button in the top right side of the screen.
### Saving your work
Your work is saved automatically as you build your chatbot. You can also save it manually by clicking the `Save` button in the top right side of the screen.
Any changes you make to the chatbot are saved as drafts until you publish them. This allows you to work on the chatbot and test it without affecting the live version.
### Publish your chatbot
Once you've built and tested your chatbot, you can publish it to make it live. Click the `Publish` button in the top right corner of the screen to publish your chatbot.

## 3. Populate the AI knowledge base
The Knowledge Base is where you upload information that the AI uses to generate responses to user queries. It uses this information to provide accurate and relevant responses to users.
You can add websites, documents, texts, and FAQs to the knowledge base. When a user asks a question, the AI searches the knowledge base for relevant information and generates a response based on the data it finds.
Therefore, if your chatbot contains an AI Response block and it's "Response Source" is set to "Knowledge Base", you need to populate the Knowledge Base with information that the AI can use to generate responses.
## 4. Customize the widget
You can customize the appearance of your chatbot to match your brand, such as colors, icons, and other design elements. This helps create a chatbot that fits seamlessly into your website.
To customize, click on the `Appearance` menu from your chatbot's dashboard.

## 5. Deploy your chatbot
Once you've built your chatbot, it's time to deploy it to your website. Here's how you can do it:
* First, make sure that you've published your chatbot. You can publish it from the Builder page.

* Next, click the `Add to website` menu from your dashboard.

* Select the display mode for your chatbot, such as "Floating Chat", "Inline", or "Fullscreen".

* Copy the chatbot widget code.
* Paste the code into the `head` or `body` section of your website's HTML. If you selected the "Inline" mode, you must paste the code where you want the chatbot to appear on your website.
That's it! Your chatbot is now live on your website, ready to engage with your visitors.
# Bubble
Source: https://docs.chatling.ai/install-chatbot/bubble
Learn how to add Chatling to your Bubble website
1. Go to your chatbot's dashboard.
2. Click on `Website widget` in the sidebar.
3. Copy the widget code provided.
4. Go to your Bubble account and open the app/website where you want to add the chatbot.
5. On the side, click the gear icon to open Settings.
6. Go to `SEO / metatags`.
7. Under the `SEO settings` section, paste the widget code in the header or body textbox.
8. The settings will be saved automatically. Click the Preview icon to confirm that the chatbot has been added.
Note that this method only works on paid plans. If you're on a free account, Bubble doesn't load the chatbot widget.
# Custom Website
Source: https://docs.chatling.ai/install-chatbot/custom-website
Learn how to add Chatling to your website
You can easily add Chatling to your website by pasting the widget code to your website's header or body section.
1. Go to your chatbot's dashboard.
2. Click `Website widget` in the sidebar. It's located under the Integrations menu.
3. Copy the widget code provided.
4. Paste the widget code into your website's header or body section.
* If the display type is `Inline`, the code must be added to the body section.
# Google Tag Manager
Source: https://docs.chatling.ai/install-chatbot/google-tag-manager
Learn how to add Chatling to your website using Google Tag Manager
1. Go to your chatbot's dashboard.
2. Click on `Website widget` in the sidebar.
3. Copy the widget code provided.
4. Go to Google Tag Manager and open your website's container.
5. Click on `Add a new tag`.
6. Enter a name for the tag, such as `Chatling`.
7. Click on `Tag Configuration`.
8. Select `Custom HTML`.
9. Paste the widget code into the `HTML` field.
10. Click on `Triggering`.
11. Select `All Pages`.
12. Click `Save`.
# Overview
Source: https://docs.chatling.ai/install-chatbot/overview
Learn how to add Chatling to your website.
Chatling can be added to any website, whether it's a custom website or a website that's built using a CMS like WordPress, Shopify, or Wix.
Simply copy the widget code from your chatbot's dashboard and add it to your website's header or body section. This will embed the chatbot on your website, allowing visitors to interact with it.
Below are guides on adding Chatling to your custom websites and CMS platforms.
# PrestaShop
Source: https://docs.chatling.ai/install-chatbot/prestashop
Learn how to add Chatling to your PrestaShop website
1. Go to your chatbot's dashboard.
2. Click on `Website widget` in the sidebar.
3. Copy the widget code provided.
4. Download our [PrestaShop module](https://static.chatling.ai/files/chatling-prestashop-v1-0.zip).
5. Extract the zip file and open the `chatling` folder.
5. Inside the folder, open the `chatling.php` file using a text editor of your choice, such as Notepad on Windows or TextEdit on macOS.
6. Go to the bottom of the file and find the line that says `Paste code snippet here`.
Replace it with the code snippet you copied in step #2, as shown below.
7. Save the file and close it.
8. Zip the `chatling` folder. Do not rename the folder to anything else otherwise the module won't work.
9. Go to your PrestaShop admin panel. From the sidebar menu, click `Module` > `Module Manager`.
10. Click the `Upload a module` button in the top right. Browse and select the module's zip file.
11. Once the module is uploaded, the chatbot will be live on your website.
# Shopify
Source: https://docs.chatling.ai/install-chatbot/shopify
Learn how to add Chatling to your Shopify store
## Method 1: Using theme.liquid
1. Go to your chatbot's dashboard.
2. Click on `Website widget` in the sidebar.
3. Copy the widget code provided.
4. Go to your Shopify dashboard and click on `Online Store` from the sidebar.
5. Edit your theme by clicking the ellipsis icon next to your current theme and choosing `Edit code`.
6. Find and open the `theme.liquid` file From the sidebar where the list of files is displayed.
7. Paste the embed code in the `` section. You can paste it anywhere between the opening `` tag and the closing `` tag.
8. Click the Save button.
The chatbot will be live on your website and should appear across all your store's pages.
## Method 2: Using Customization
1. From your Shopify dashboard, click on `Online Store` and go to `Themes`.
2. Click on the `Customize` button next to your current theme.
3. Under the `Header` section, choose `Add section`. Search for `Custom liquid` and add it.
4. Open the `Custom liquid` editor and paste your widget code into the `Liquid code` field.
5. Set the `Top padding` and `Bottom padding` to `0` so the section doesn't create a blank space in your site's header.
6. Click the `Save` button.
The chatbot will be live on your website and should appear across all your store's pages.
# Squarespace
Source: https://docs.chatling.ai/install-chatbot/squarespace
Learn how to add Chatling to your Squarespace website
1. Go to your chatbot's dashboard.
2. Click on `Website widget` in the sidebar.
3. Copy the widget code provided.
4. Sign in to your Squarespace account and open the website where you want to add the chatbot.
5. From the sidebar menu, select `Website`.
6. Scroll to the bottom of the sidebar menu and choose `Website Tools`.
7. Open `Code Injection`.
* If you're on an older version of Squarespace, such as v7.0, code injection is located in `Settings` > `Developer Tools` > `Code Injection`.
8. Paste the code you copied in step 3 in the `Header` section, and click `Save`.
9. The chatbot is now live on your website, and visitors can interact with it.
# Webflow
Source: https://docs.chatling.ai/install-chatbot/webflow
Learn how to add Chatling to your Webflow website
1. Go to your chatbot's dashboard.
2. Click on `Website widget` in the sidebar.
3. Copy the widget code provided.
4. Go to your Webflow dashboard and open the website where you want to add the chatbot.
5. Click the webflow icon in the top left and select `Site settings`.
6. Click on `Custom code` from the sidebar.
7. Paste the chatbot widget code in the `Head code` textbox and click `Save`.
8. Publish the website so the chatbot can go live on your Webflow website.
# Wix
Source: https://docs.chatling.ai/install-chatbot/wix
Learn how to add Chatling to your Wix website
1. Go to your chatbot's dashboard.
2. Click on `Website widget` in the sidebar.
3. Copy the widget code provided.
4. Go to your Wix dashboard and click `Settings` from the sidebar menu.
5. Scroll down to the Advanced section and click `Custom code`.
6. Under the Head section, click `Add Code`.
7. Paste the chatbot's code snippet into the text box that appears and click `Apply`.
8. The chatbot is now live on your Wix website and visitors can interact with it.
# WordPress
Source: https://docs.chatling.ai/install-chatbot/wordpress
Learn how to add Chatling to your WordPress website
## Method 1: Install using a plugin
1. Go to your chatbot's dashboard.
2. Click on `Website widget` in the sidebar.
3. Copy the widget code provided.
4. In your WordPress dashboard, go to `Plugins` > `Add new plugin`.
4. Search for the `Insert Headers And Footers` plugin and install the one by WPBrigade.
6. Once installed, activate the plugin.
7. Go to `Settings` > `WP Headers and Footers` from the sidebar.
8. Paste the chatbot widget code in the header section.
9. Click `Save Changes`.
## Method 2: Install using the theme editor
1. Open your WordPress dashboard.
2. From the sidebar menu, select `Appearance` > `Theme File Editor`.
3. Under the `Theme Files` section (right side of the screen), search and open the `header.php` file.
4. Paste the chatbot widget code before the closing `` tag.
5. Click `Update File` to save.
# Introduction
Source: https://docs.chatling.ai/intents/introduction
Learn about intents and how they work in Chatling
## What are Intents?
Intents identify what users are trying to accomplish and capture the meaning behind their messages, regardless of how they phrase them.
For example, when users ask "Where's my order?" or "Track package", they share the same underlying goal - to locate their order.
Intents can be used to define how your chatbot should respond when it recognizes these user goals. Each intent can be linked to specific conversation flows, data collection requirements, and response templates, enabling the chatbot to take appropriate action.
{/* This combination of intent recognition and behavior definition allows your chatbot to provide consistent, meaningful responses while handling the natural variations in how users express themselves. */}
## How Intents Work
Intents are defined in the `Intents` section of your chatbot's builder. Each intent consists of:
* **Name**: A clear, descriptive identifier (e.g., "Order Tracking", "Submit ticket").
* **Description**: Explains the user's goal or purpose this intent represents.
* **Sample phrases**: Collection of sample messages that would trigger this intent. This helps the chatbot understand the intent and accurately match it to user messages.
# Manage intents
Source: https://docs.chatling.ai/intents/manage
A guide on how to create and manage your chatbot's intents
## Accessing the Intent page
The Intents page is located inside your chatbot's builder. To access it:
1. Open the Builder.
2. Click on the `Intents` button in the top left.
## Creating an intent
1. Open the Intents page.
2. Click the `New` button.
3. Enter the details for the intent.
* **Name**: A clear, descriptive identifier (e.g., "Order Tracking", "Submit ticket").
* **Description**: Explains the user's goal or purpose this intent represents.
* **Sample phrases**: Examples of user messages that should trigger this intent. This helps the chatbot understand and match the intent.
4. Click the `Create intent` button.
## Editing an intent
1. Open the Intents page to view all the existing intents.
2. Find and click on the intent you want to edit.
3. Make changes to the intent's details, such as name, description, and sample phrases.
4. Click the `Save` button to save your changes.
## Deleting intents
1. Open the Intents page to view all the existing intents.
2. Click the checkbox next to one or more intents you want to delete.
3. Click the `Delete` button in the top left.
# Using intents
Source: https://docs.chatling.ai/intents/using-intents
Learn how to use intents to create more complex chatbot flows
To make your intents work, there are two essential steps:
1. Enable intent matching in blocks to tell the chatbot which intents to look for in user messages.
2. Define the flow of the chatbot when an intent is matched.
## 1. Intent matching
Currently, intent matching can be enabled in [Text input blocks](/builder/blocks/inputs/text).
When users send messages using the Text block, you can configure whether these messages should be checked against one or more defined intents. This allows you to control when intent matching occurs and trigger appropriate flows based on the matches.
### Enabling intent matching
1. Open the editor for a text block.
2. Next to the `Match intent` option, click the `+` button.
3. Select the intents you want user messages to be checked against.
When a user sends a message, the chatbot will check if the message matches any of the selected intents and trigger the appropriate flow. If there are no matches, the flow will continue normally.
## 2. Defining intent flows
There are two ways to define the actions for an intent:
1. Intent trigger block (global)
2. Local trigger
### Intent trigger block
Intent triggers are flows that will be executed when an intent is matched. These triggers are global, meaning that they will be executed by any block that matches the intent. This is useful if you want to create a standard response for an intent that can be used in multiple places in your chatbot.
For example, if you create an Intent trigger for `Order Tracking`:
* Any block that matches this intent will start this flow.
* The same flow runs whether matched in a welcome message or support conversation.
* Flow can include actions like fetching order status, asking for order number, etc.
This provides a consistent response when users ask about order tracking anywhere in your chatbot.
**To add the trigger:**
1. Open `Blocks` from the sidebar.
2. Under the `Triggers` section, drag and drop the `Intent` block onto the canvas.
3. Click on the block to open the editor.
4. Select an intent this trigger belongs to.
5. Define the flow to run when the intent is triggered.
### Local trigger
Sometimes you want different flows for the same intent depending on where in the conversation it was matched. This is where local triggers come in.
* Open the block where you want to enable local trigger for an intent.
* Find the intent under the `Match intent` option and click the `Local trigger` icon as shown below. For example, we will enable local trigger for the `Order status` intent.
* Define the specific flow for this intent. For example, we will ask the user for their order number before fetching the order status. As such, whenever the input in this block matches the `Order status` intent, the flow defined here will be executed instead of the global trigger.
Note that the local trigger takes precedence over the global trigger when enabled.
### Using both triggers
You can have both global and local triggers for intents:
* Use global triggers for standard responses
* Override with local triggers where context-specific flows are needed
This flexibility allows you to:
* Maintain consistent base responses
* Customize flows for specific conversation stages
* Create more dynamic user experiences
## What happens when no intents match?
If no intent is matched, the chatbot will continue with the flow as normal.
# Add data source
Source: https://docs.chatling.ai/knowledge-base/add-data-source
A guide on adding data sources to the Knowledge Base.
## How to add data to the knowledge base
To add data to the Knowledge Base, follow these steps:
1. From the dashboard, go to `Knowledge Base`.
2. Click on the `Add new` or `New Data Source` button.
3. Select the type of data source you want to add.
4. Follow the on-screen instructions to add the data source to the knowledge base.
Once added, it will take a few minutes for the data to be processed. The status of the data source will be displayed in the Knowledge Base page and will change to "Processed" once the AI has extracted the information.
# Auto-sync data sources
Source: https://docs.chatling.ai/knowledge-base/auto-sync-data-sources
Learn how to auto-sync data sources in the Knowledge Base.
Auto-syncing allows you to automatically sync your knowledge base sources at specified intervals, such as daily, weekly, or monthly, to fetch the latest data. This ensures that your knowledge base is always up to date with the latest information.
## How to enable auto-syncing
1. Go to the `Knowledge Base` page.
2. From the `Auto-sync` column, you can select an interval for each data source.
3. Click on the auto-sync value for a specific source and choose an interval.
4. If you want to enable auto-syncing for multiple sources, you can select the sources and click the `Change auto-sync frequency` button to update all selected sources at once.
# Types of data sources
Source: https://docs.chatling.ai/knowledge-base/data-source-types
Learn about the different types of data sources you can add to the Knowledge Base.
Data sources are the sources of information you can add to the Knowledge Base. Together, they provide information the AI needs to respond accurately to user queries.
You can add the following types of data sources to the Knowledge Base:
* **Website**: When you add a website, our crawler will visit and extract all the pages from the website. You can then select the pages you want to add to the Knowledge Base.
* The website crawler can extract up to 1,000 pages from a website. If your site contains more pages, you must use the Sitemap data source.
* **Sitemap**: Add a sitemap URL to fetch all the pages of your website. The sitemap is suitable when your website has more than 1,000 pages. Once the sitemap is fetched, you can select the pages to add to the Knowledge Base.
* **Document**: Upload documents such as PDF, DOCX, and TXT. The AI will extract the text from the document and use it to generate responses.
* **Text**: You can add text directly to the Knowledge Base. This is useful when you want to add custom information that isn't available on your website or documents.
* **FAQs**: You can add a list of questions and answers that users frequently ask. This is useful when the information is not available through other data sources. You can also use it for fine-tuning the AI responses, such as when it responds incorrectly to certain questions.
* **Zoho**: Import all or select articles from your Zoho account into the Chatling knowledge base.
# Delete data sources
Source: https://docs.chatling.ai/knowledge-base/delete-data-sources
Learn how to delete data sources in the Knowledge Base.
If you no longer need a data source or want to prevent the AI from using it, you can delete it from the Knowledge Base. The information associated with the deleted data source will be purged permanently and cannot be recovered.
## How to delete a data source
1. Go to the `Knowledge Base`.
2. Next to every data source is a delete icon, as shown below. Click on the icon to delete the data source.
## How to delete data sources in bulk
To delete multiple data sources at once, click on the checkbox next to the data sources you want to delete. Then, click the `Bulk action` dropdown and select `Delete`.
# Exclude webpage sections
Source: https://docs.chatling.ai/knowledge-base/exclude-webpage-sections
Learn how to exclude certain sections of a webpage when adding a data source.
Websites often contain a lot of information that may not be relevant to the AI. When you add webpages to the knowledge base, you can exclude certain sections of the page from being crawled and indexed by the AI.
This can be useful for removing irrelevant information as well as preventing unnecessary characters from being counted towards your plan's limit.
## How to exclude sections of a webpage
1. Go to the `Knowledge Base`.
2. Click the `New Data Source` or `Add new` button.
3. Select `Website`, `Sitemap`, or `URL list` as the data source type.
4. Click the `Advanced Settings` button.
5. You can exclude sections by entering the HTML classes or IDs of the elements you want to exclude. You must press Enter after each class or ID to add it to the list.
You can also select the HTML tags you want to remove, such as `header` or `footer`.
You can now go ahead with entering the website, sitemap, or list of URLs that you want to add to the knowledge base. The crawler will exclude the sections you specified.
# What is the Knowledge Base?
Source: https://docs.chatling.ai/knowledge-base/overview
Learn about the Knowledge Base and how it works.
The Knowledge Base is where you upload information that the AI uses to generate responses to user queries. You can add [data sources](/knowledge-base/data-source-types) such as websites, webpages, documents, texts, and FAQs to the knowledge base.
When a user asks a question, the AI searches the Knowledge Base for all relevant information and returns the best answer based on the data it finds.
If your chatbot contains an AI Response block and it's "Response Source" is set to "Knowledge Base", it's essential to populate the knowledge base with information that the AI can use to generate responses.
# Re-sync data sources
Source: https://docs.chatling.ai/knowledge-base/re-sync-data-sources
Learn how to re-sync data sources in the Knowledge Base.
If you've made changes to your Link data sources (websites/webpages) or want to update the information in the Knowledge Base, you can re-sync the data sources to fetch the latest data. This process will re-fetch the data from the source and update the information in the Knowledge Base.
## Supported data sources
Re-syncing is available for Links data sources only, which include websites and webpages. Other data sources like Documents, Text, and FAQs do not require re-syncing as they are static and do not change unless you manually update them.
## How to re-sync a data source
To re-sync data sources in the Knowledge Base, follow these steps:
* Go to the `Knowledge Base`.
* Click on the `Link` tab to view all the links you have added.
* Next to every link is a re-sync icon, as shown below. Click on the icon to queue the link for re-syncing.
## Re-sync data sources in bulk
To re-sync multiple data sources at once, click on the checkbox next to the links you want to re-sync. Then, click on the `Bulk action` dropdown and select `Re-sync links`.
# Got other questions?
Source: https://docs.chatling.ai/missing-topics
If there are any topics you'd like to see covered in the documentation, please let us know! We're always looking to improve our documentation and make it as helpful as possible for our users.
Please reach out to us at [support@chatling.ai](mailto:support@chatling.ai) with your suggestions and any questions you have.
# Invite Team Members
Source: https://docs.chatling.ai/team-members/invite
Learn about the different roles and permissions that can be assigned to team members in a project.
You can invite team members to your project if you are an Owner or Admin. Here's how:
1. From the Project menu, go to **Members**.
2. Click the **Invite** button.
3. Enter the email address of the member you want to invite and select one or more roles to assign to them.
4. Click **Send invite**.
The user will receive an email invitation to join the project. Once they accept the invitation, they will be added to the project with the assigned roles.
# Overview
Source: https://docs.chatling.ai/team-members/overview
A guide on how to manage team members in your project.
As you build chatbots, you may need to collaborate with other team members to create, manage, and maintain them. Chatling allows you to invite team members and collaborate with them on your projects.
Team members can be added to each project and assigned different roles and permissions based on their responsibilities. This allows you to control what they can access and modify within the project.
Every project has an Owner who has full access and cannot be removed from the project.
As an Owner or Admin of a project, you can invite members and manage their roles and permissions. You can assign multiple roles to a team member, and each role has different permissions.
# Remove Team Members
Source: https://docs.chatling.ai/team-members/remove
Learn how to remove team members from your project.
To remove team members from your project:
1. From the Project menu, go to **Members**.
2. Find the member you want to remove and click the ellipsis icon next to them.
3. Click **Remove member**.
The member will be removed from the project immediately and will no longer have access to it.
# Roles & Permissions
Source: https://docs.chatling.ai/team-members/roles
Learn how to invite team members to your project and assign them different roles.
Members can be assigned one or more roles, each having different permissions.
Here are the available roles and their permissions:
1. **Admin**: Full access to all settings and features, including inviting members, creating chatbots and API keys, and managing billing.
* Create, update, and delete projects
* Create, view, test, and delete chatbots
* View analytics
* View and update chatbot settings
* View, update, and publish chatbots in the Builder
* View, update, and delete conversations
* View, update, export, and delete leads
* View and update appearance settings
* View and update knowledge base
* View, create, update, and delete members
* Share chatbots
* View, create, and delete API keys
* View and update billing settings
* View usage
* View invoices
* View, download, and delete exports
2. **Editor**: Can access and modify the builder, knowledge base, and widget appearance. Can also create chatbots and view usage.
* Create, view, and test chatbots
* View and update chatbot settings
* View, update, and publish chatbots in the Builder
* View and update appearance settings
* View and update knowledge base
* Share chatbots
* View billing
* View usage
3. **Analyst**: Can access chatbot analytics, conversations, and leads.
* View chatbots
* View analytics
* View, update, and delete conversations
* View, update, export, and delete leads
* View, download, and delete exports
* View billing
* View usage
4. **Billing**: Can update account billing and view usage.
* View and update billing settings
* View usage
* View invoices
5. **Viewer**: Can view the builder and test chatbots, but doesn't have the ability to modify.
* View and test chatbots
* View chatbot flow in the Builder
# Change language
Source: https://docs.chatling.ai/whatsapp/change-language
A guide to change the language of system and other messages in your WhatsApp chatbot.
You can set the language that your chatbot will use for system messages, errors, and various other messages.
1. From your chatbot's dashboard, click the `Settings` button under the Chatbot menu.
2. Under the `General` tab, you will see the `Language` setting. Select the language you want to use.
3. Click `Save` to save the changes.
# Create a WhatsApp Chatbot
Source: https://docs.chatling.ai/whatsapp/create
Learn how to create a WhatsApp chatbot in Chatling.
To create a WhatsApp chatbot, follow these steps:
1. Login to your [Chatling account](https://app.chatling.ai).
2. From the "My chatbots" page, click on the `Create chatbot` button.
3. Select `WhatsApp` as the platform.
4. Choose a template or start from scratch.
5. Enter a name for your chatbot and click on the `Create chatbot` button.
Your WhatsApp chatbot is now created, but there's a few more steps to complete before it's ready to use.
Read the next section to learn how to connect your WhatsApp Business account to Chatling.
# Customize profile
Source: https://docs.chatling.ai/whatsapp/customize-profile
Learn how to change your profile picture, name, bio, and more.
You can visit the [WhatsApp Manager](https://business.facebook.com/latest/whatsapp_manager) on Facebook to change your profile picture, display name, and business details such as description, address, email, and website.
## How to customize your WhatsApp Business profile
1. Go to the [WhatsApp Manager](https://business.facebook.com/latest/whatsapp_manager) on Facebook.
2. From the sidebar, click on the `Phone numbers` tab.
3. Find your phone number from the list and click on the settings icon next to it.
4. From here, you can update the profile information for your WhatsApp Business account.
# Disconnect WhatsApp account
Source: https://docs.chatling.ai/whatsapp/disconnect-account
Learn how to disconnect your WhatsApp account from your chatbot in Chatling.
1. From your chatbot's dashboard, click the `Settings` button under the Chatbot menu.
2. Go to the `WhatsApp` tab.
3. Click the `Disconnect` button.
Disconnecting your WhatsApp account will prevent your chatbot from sending and receiving messages from WhatsApp. To restore this functionality, you must reconnect your WhatsApp account.
# Display name approval
Source: https://docs.chatling.ai/whatsapp/display-name-approval
Learn how to fix issues related to the display name approval for your WhatsApp account.
If you get an error message stating `WhatsApp provided number needs display name approval before messages can be sent`, it means you cannot use the WhatsApp bot until Facebook approves your display name.
This normally happens when you use the free WhatsApp number provided by Facebook when you first connect your WhatsApp account to Chatling.
To fix this issue, you must verify your business in Facebook before they approve your display name.
## How to verify your business in Facebook
1. Go to the [Security Center](https://business.facebook.com/latest/settings/security_center) in your Facebook Business Manager.
2. Under the `Business Verification` section, set the verification use case to `Setting up a WhatsApp Business account`.
3. Click the `Start verification` button.
4. Follow the on-screen instructions to verify your business.
5. Once you complete the process, your business will either be verified immediately or placed under review.
6. After your business is verified, Facebook will begin reviewing your display name. To view the status of the review:
* Go to [WhatsApp Manager](https://business.facebook.com/latest/whatsapp_manager/overview).
* Click `Phone numbers` in the left sidebar.
* You will see the status of the review under the display name as shown below.
7. Once the review is complete, you'll receive an email notification from Facebook and you can begin using your WhatsApp bot to send and receive messages.
# WhatsApp Integration
Source: https://docs.chatling.ai/whatsapp/overview
Learn how to create chatbots for WhatsApp.
With the WhatsApp integration, you can create and deploy AI-powered chatbots directly on WhatsApp.
This integration helps businesses automate customer support, handle inquiries, and engage with leads on one of the world's most popular messaging platforms.
{/* Follow the next sections to learn how to set up and connect your WhatsApp Business account to Chatling. */}
# Reconnect WhatsApp account
Source: https://docs.chatling.ai/whatsapp/reconnect-account
Learn how to reconnect your WhatsApp account to your chatbot in Chatling.
If you want to restart the connection between your WhatsApp account and your chatbot, you can disconnect and reconnect your account.
1. From your chatbot's dashboard, click the `Settings` button under the Chatbot menu.
2. Go to the `WhatsApp` tab.
3. Click the `Disconnect` button.
4. An onboarding will be displayed to reconnect your account. Follow the on-screen instructions to reconnect your account. You can also check [this guide](/whatsapp/setup) for the steps to connect your account.
# How to connect your WhatsApp Business account
Source: https://docs.chatling.ai/whatsapp/setup
When you create a WhatsApp chatbot, an onboarding is displayed to guide you through the process of connecting your WhatsApp Business account to Chatling. We'll walk you through the steps below.
## Before you start
The phone number you connect must not be in use by a WhatsApp account. If it's in use, you must delete the account from WhatsApp before continuing.
Here's how to delete a WhatsApp account:
1. Open the WhatsApp app.
2. Go to `Settings` > `Account` > `Delete my account`.
3. Type in your phone number for confirmation and tap on `Delete my account`.
Once deleted, the phone number can be used to connect a new WhatsApp Business account.
## How to connect your WhatsApp Business account
1. Click the `Login with Facebook` button.
2. A Facebook authentication window will open. Click the `Continue` button.
3. Select `Get started` to continue.
4. Select a business profile or create a new one.
5. Choose or create a new WhatsApp Business account and profile.
6. Enter the required information to create a new business profile.
* *Skip this step if you selected an existing business profile.*
{/* */}
7. Add and verify your phone number.
* *Skip this step if you selected an existing business profile.*
8. Click the `Continue` button.
9. Facebook begins verifying the information you provided. Once it's completed successfully, you should see a message similar to below. Click the `Finish` button.
10. Go back to Chatling and a message will be displayed that your authentication is being processed. If successful, you should see a message similar to below.
11. Next, you must enter a six digit code for two-factor authentication so that your phone number can be registered with WhatsApp. If the number already has 2FA enabled, enter the same code you had set up.
12. Once the phone number is registered successfully, you're all set and your WhatsApp Business account is connected to Chatling. Click the `Open Dashboard` button to continue.
WhatsApp provides 1,000 free conversations per month. If you reach this limit, you must add a payment method in your Facebook Business Manager to continue sending and receiving messages.
 2. Go to `Configure`.
 3. Enable the `Show Sources for AI Response` option. You can customize it by selecting the number and type of sources to display.
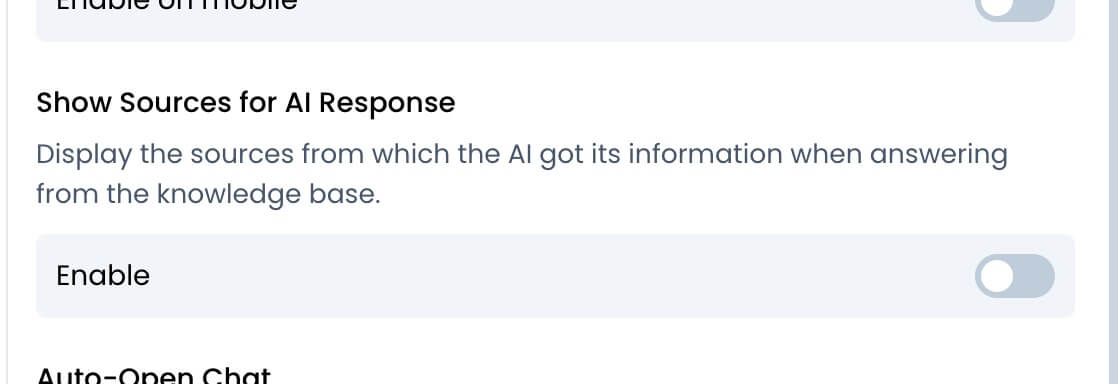 Here's how it appears in the chatbot:
 # Fixing incorrect AI answers
Source: https://docs.chatling.ai/ai/fix-incorrect-answers
Learn how to fix incorrect AI responses using the fine-tuning feature in Chatling.
Although the AI is trained on the data you add to the knowledge base, it may not always get the answer right, such as when it's asked a question that is not in the knowledge base or when it hallucinates.
To fix this, you can use the fine-tuning feature on Chatling's conversations page. This feature is designed to help improve the chatbot's performance by refining incorrect responses.
When you're viewing a conversation, you'll see a "Fine-tune this answer" button below every AI response. This feature allows you to fix incorrect AI responses so that it will learn to answer correctly in the future.
## How to use the fine-tuning feature
1. From the chatbot dashboard, click on the "Conversations" menu.
# Fixing incorrect AI answers
Source: https://docs.chatling.ai/ai/fix-incorrect-answers
Learn how to fix incorrect AI responses using the fine-tuning feature in Chatling.
Although the AI is trained on the data you add to the knowledge base, it may not always get the answer right, such as when it's asked a question that is not in the knowledge base or when it hallucinates.
To fix this, you can use the fine-tuning feature on Chatling's conversations page. This feature is designed to help improve the chatbot's performance by refining incorrect responses.
When you're viewing a conversation, you'll see a "Fine-tune this answer" button below every AI response. This feature allows you to fix incorrect AI responses so that it will learn to answer correctly in the future.
## How to use the fine-tuning feature
1. From the chatbot dashboard, click on the "Conversations" menu.
 2. Find and open a conversation where the AI has responded incorrectly.
3. Click the `Fine-tune this answer` button below the AI response you want to fix.
2. Find and open a conversation where the AI has responded incorrectly.
3. Click the `Fine-tune this answer` button below the AI response you want to fix.
 4. A dialog will appear where you can edit the AI's answer or replace it with a correct one.
 5. Once done, click the `Finetune` button. The new answer will be added to the FAQ sources in the knowledge base and will be queued for processing.
Now, when the AI is asked a similar question, it will respond with the answer you provided.
# Instructions
Source: https://docs.chatling.ai/ai/instructions
A guide on what AI Instructions are and how to use them.
Instructions are a way to provide guidance to the AI on how to respond.
You can use instructions to tailor the AI's responses to your specific needs, such as providing more detailed responses, using a specific tone, have a specific personality, or avoiding certain topics.
Here are a few examples:
* Your name is "Joanne" and you are our customer support assistant. When referring to yourself, do not mention anything about being an AI assistant or AI model. Instead, refer to yourself as "Joanne".
* Keep your answers short and to the point, and do not provide unnecessary information.
* Use a friendly and casual tone when responding to users.
* You must act as a professional customer support agent. NEVER break character.
* When responding in English, use American English spelling and grammar.
* Promote special offers or promotions when appropriate. For example, if a customer asks about a product, you can mention that we have a store-wide promotion of 50% off.
* Limit your answers to a maximum of 5 sentences.
* You are a lead generation assistant for a Digital Marketing agency and you are communicating with a prospective customer.
* Do not discuss politics, religion, or any other sensitive topics.
## How to add instructions
The method for adding instructions depends on the [Response Source](/builder/blocks/ai/ai-response#what-is-the-response-source) that you've set for the [AI Response](/builder/blocks/ai/ai-response) block.
### Response Source: Knowledge Base
If you are using the Knowledge Base as the response source, you can add instructions using the [AI Configuration menu](/builder/sidebar#ai-configuration) in the Builder's sidebar.
1. Click on the AI Configuration menu in the sidebar.
5. Once done, click the `Finetune` button. The new answer will be added to the FAQ sources in the knowledge base and will be queued for processing.
Now, when the AI is asked a similar question, it will respond with the answer you provided.
# Instructions
Source: https://docs.chatling.ai/ai/instructions
A guide on what AI Instructions are and how to use them.
Instructions are a way to provide guidance to the AI on how to respond.
You can use instructions to tailor the AI's responses to your specific needs, such as providing more detailed responses, using a specific tone, have a specific personality, or avoiding certain topics.
Here are a few examples:
* Your name is "Joanne" and you are our customer support assistant. When referring to yourself, do not mention anything about being an AI assistant or AI model. Instead, refer to yourself as "Joanne".
* Keep your answers short and to the point, and do not provide unnecessary information.
* Use a friendly and casual tone when responding to users.
* You must act as a professional customer support agent. NEVER break character.
* When responding in English, use American English spelling and grammar.
* Promote special offers or promotions when appropriate. For example, if a customer asks about a product, you can mention that we have a store-wide promotion of 50% off.
* Limit your answers to a maximum of 5 sentences.
* You are a lead generation assistant for a Digital Marketing agency and you are communicating with a prospective customer.
* Do not discuss politics, religion, or any other sensitive topics.
## How to add instructions
The method for adding instructions depends on the [Response Source](/builder/blocks/ai/ai-response#what-is-the-response-source) that you've set for the [AI Response](/builder/blocks/ai/ai-response) block.
### Response Source: Knowledge Base
If you are using the Knowledge Base as the response source, you can add instructions using the [AI Configuration menu](/builder/sidebar#ai-configuration) in the Builder's sidebar.
1. Click on the AI Configuration menu in the sidebar.
 2. Go to `Instructions`.
 3. Click the `Add instruction` button and enter your instruction.
 4. To add more instructions, click the `New` button to create a new instruction.
### Response Source: AI Model
If you are using the AI Model as the response source, you can add instructions directly from the [AI Response block](/builder/blocks/ai/ai-response).
1. Click the AI Response block on the canvas to open the block editor.
2. Under the `Instructions` section, you can add all your instructions. You can add multiple instructions in the same field, separated by a new line.
4. To add more instructions, click the `New` button to create a new instruction.
### Response Source: AI Model
If you are using the AI Model as the response source, you can add instructions directly from the [AI Response block](/builder/blocks/ai/ai-response).
1. Click the AI Response block on the canvas to open the block editor.
2. Under the `Instructions` section, you can add all your instructions. You can add multiple instructions in the same field, separated by a new line.
 # Setting the AI model
Source: https://docs.chatling.ai/ai/set-ai-model
Learn how to set the LLM model used by the AI.
There are various [AI models](/ai/supported-ai-models) available in Chatling that you can use to generate responses for your chatbot.
We recommend testing with different models to see which one works best for your chatbot and provides the most accurate responses. Each model uses a different amount of credits per response.
## How to set the AI model?
The method for choosing the AI model depends on the [Response Source](/builder/blocks/ai/ai-response#what-is-the-response-source) that you've set for the [AI Response](/builder/blocks/ai/ai-response) block.
Below are the instructions based on the response source you've selected.
### 1. Response Source: Knowledge Base
If you are using the Knowledge Base as the response source, you can set the AI model using the [AI Configuration menu](/builder/sidebar#ai-configuration) in the Builder's sidebar.
1. Click on the AI Configuration menu in the sidebar.
# Setting the AI model
Source: https://docs.chatling.ai/ai/set-ai-model
Learn how to set the LLM model used by the AI.
There are various [AI models](/ai/supported-ai-models) available in Chatling that you can use to generate responses for your chatbot.
We recommend testing with different models to see which one works best for your chatbot and provides the most accurate responses. Each model uses a different amount of credits per response.
## How to set the AI model?
The method for choosing the AI model depends on the [Response Source](/builder/blocks/ai/ai-response#what-is-the-response-source) that you've set for the [AI Response](/builder/blocks/ai/ai-response) block.
Below are the instructions based on the response source you've selected.
### 1. Response Source: Knowledge Base
If you are using the Knowledge Base as the response source, you can set the AI model using the [AI Configuration menu](/builder/sidebar#ai-configuration) in the Builder's sidebar.
1. Click on the AI Configuration menu in the sidebar.
 3. Select the AI model you want to use from the dropdown list.
 Once you've selected the AI model, all AI Response blocks that use the Knowledge Base as the response source will use this model to generate responses.
#### Setting the model on a per-block basis
If you want to set the AI model on a per-block basis, you can do so by opening the AI Response block's editor and settings the `Model` option. This will override the default model set in the AI Configuration settings.
Once you've selected the AI model, all AI Response blocks that use the Knowledge Base as the response source will use this model to generate responses.
#### Setting the model on a per-block basis
If you want to set the AI model on a per-block basis, you can do so by opening the AI Response block's editor and settings the `Model` option. This will override the default model set in the AI Configuration settings.
 ### 2. Response Source: AI Model
If you are using the "AI Model" as the response source, you can set the AI model from the block's editor using the `Model` option.
### 2. Response Source: AI Model
If you are using the "AI Model" as the response source, you can set the AI model from the block's editor using the `Model` option.
 # Supported AI models
Source: https://docs.chatling.ai/ai/supported-ai-models
A list of supported AI models in Chatling.
Chatling supports the following LLMs:
* o4 Mini
* o3 Mini
* GPT-4.1
* GPT-4.1 Mini
* GPT-4.1 Nano
* GPT-4.5
* GPT-4o
* GPT-4o Mini
* GPT-4
* GPT-4 Turbo
* GPT-3.5 Turbo
* Claude 4 Opus
* Claude 4 Sonnet
* Claude 3.5 Sonnet
* Claude 3.7 Sonnet
* Claude 3 Haiku
* Claude 3 Opus
* Claude 3 Sonnet
* Gemini 2.0 Flash
* Gemini 1.5 Flash
* Gemini 1.5 Pro
* Gemini 1.0 Pro
To request a new AI model, please [contact us](mailto:support@chatling.ai).
# Chat with Knowledge Base AI
Source: https://docs.chatling.ai/api-reference/v2/ai-kb/chat
POST /chatbots/{chatbotId}/ai/kb/chat
Chat with the AI using the knowledge base as the response source.
## Request parameters
### Path
# Supported AI models
Source: https://docs.chatling.ai/ai/supported-ai-models
A list of supported AI models in Chatling.
Chatling supports the following LLMs:
* o4 Mini
* o3 Mini
* GPT-4.1
* GPT-4.1 Mini
* GPT-4.1 Nano
* GPT-4.5
* GPT-4o
* GPT-4o Mini
* GPT-4
* GPT-4 Turbo
* GPT-3.5 Turbo
* Claude 4 Opus
* Claude 4 Sonnet
* Claude 3.5 Sonnet
* Claude 3.7 Sonnet
* Claude 3 Haiku
* Claude 3 Opus
* Claude 3 Sonnet
* Gemini 2.0 Flash
* Gemini 1.5 Flash
* Gemini 1.5 Pro
* Gemini 1.0 Pro
To request a new AI model, please [contact us](mailto:support@chatling.ai).
# Chat with Knowledge Base AI
Source: https://docs.chatling.ai/api-reference/v2/ai-kb/chat
POST /chatbots/{chatbotId}/ai/kb/chat
Chat with the AI using the knowledge base as the response source.
## Request parameters
### Path
 # Quick Replies
Source: https://docs.chatling.ai/builder/block-options/quick-replies
Quick replies are messages that will help users respond quickly without having to type out a full response. They are displayed as buttons above the input field and users can click on them to send a message.
# Quick Replies
Source: https://docs.chatling.ai/builder/block-options/quick-replies
Quick replies are messages that will help users respond quickly without having to type out a full response. They are displayed as buttons above the input field and users can click on them to send a message.
 ## Supported blocks
Quick replies are available for the following Capture Response blocks:
* Text
* Number
* Email
* URL
## Setting up Quick Replies
Here's how to add quick replies to a supported block:
* Open the block editor for a block that supports quick replies.
* Under the "Quick Replies" section, click `Add` to add a new quick reply.
## Supported blocks
Quick replies are available for the following Capture Response blocks:
* Text
* Number
* Email
* URL
## Setting up Quick Replies
Here's how to add quick replies to a supported block:
* Open the block editor for a block that supports quick replies.
* Under the "Quick Replies" section, click `Add` to add a new quick reply.
 * Enter the label for the quick reply. This is the text that will be displayed on the button.
* Enter the message that will be sent when the user clicks on the quick reply button.
For example if the label is "Pricing" and the message is "Tell me about your pricing", the user will see a button with the text "Pricing" and when they click on it, the message "Tell me about your pricing" will be sent.
# Voice Input
Source: https://docs.chatling.ai/builder/block-options/voice-input
Allow users to speak to your chatbot using Voice Input.
Voice Input is a speech-to-text feature that allows users to record voice messages and transcribes them into text. Rather than typing their message, users can speak to your chatbot and it will automatically be converted to text.
* Enter the label for the quick reply. This is the text that will be displayed on the button.
* Enter the message that will be sent when the user clicks on the quick reply button.
For example if the label is "Pricing" and the message is "Tell me about your pricing", the user will see a button with the text "Pricing" and when they click on it, the message "Tell me about your pricing" will be sent.
# Voice Input
Source: https://docs.chatling.ai/builder/block-options/voice-input
Allow users to speak to your chatbot using Voice Input.
Voice Input is a speech-to-text feature that allows users to record voice messages and transcribes them into text. Rather than typing their message, users can speak to your chatbot and it will automatically be converted to text.
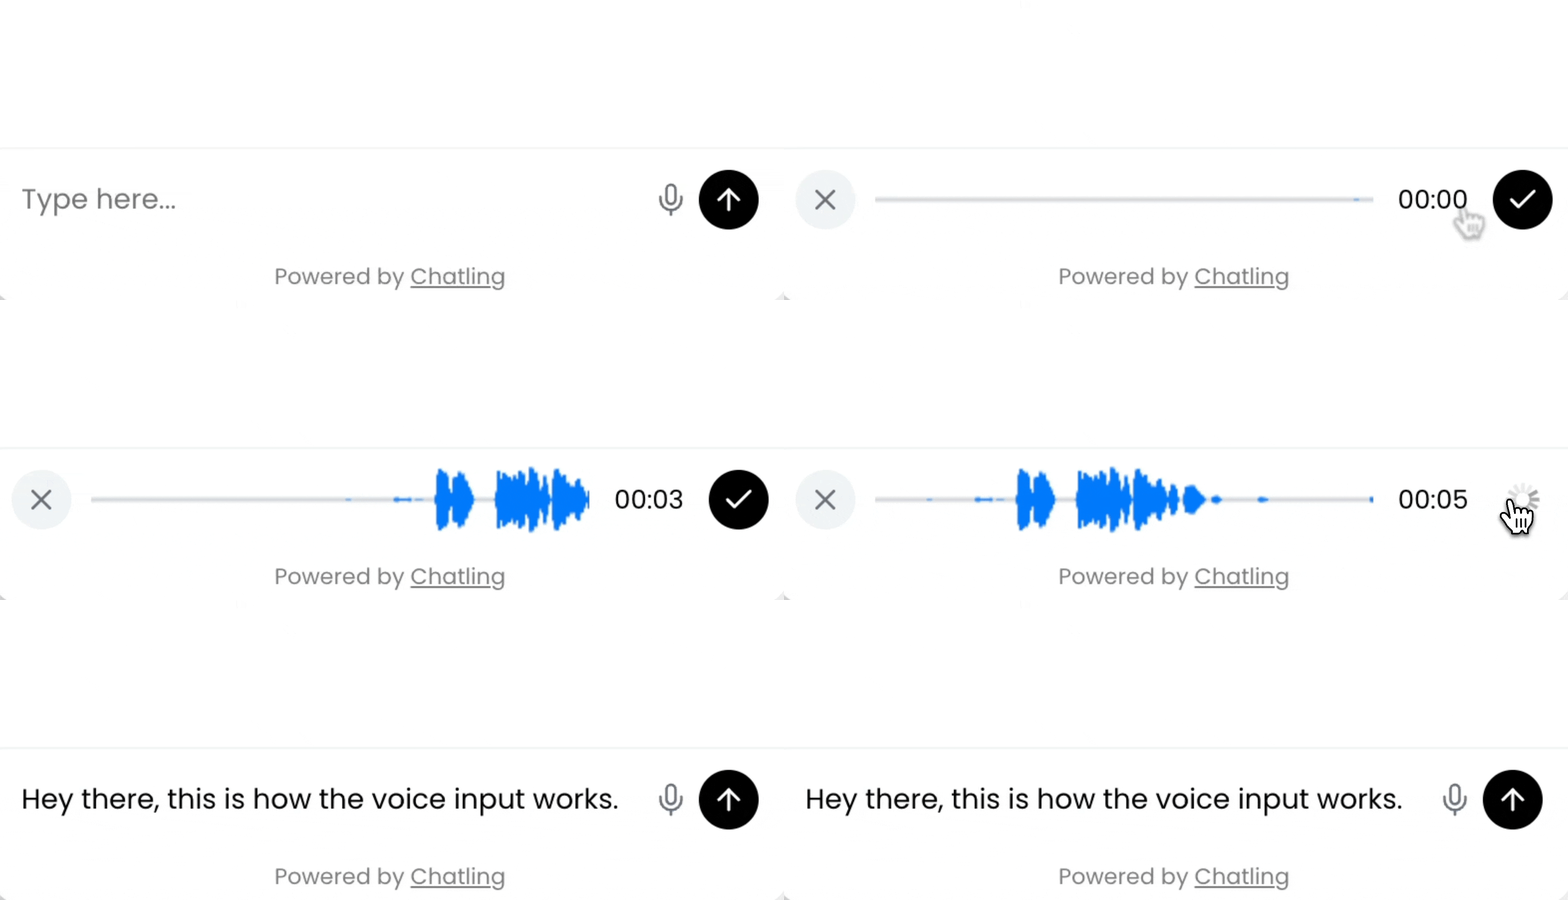 ## Supported blocks
Currently, Voice Input is available for the Text input block only.
## How to enable Voice Input
Open the block editor for a Text input block and toggle on the "Voice Input" option.
## Supported blocks
Currently, Voice Input is available for the Text input block only.
## How to enable Voice Input
Open the block editor for a Text input block and toggle on the "Voice Input" option.
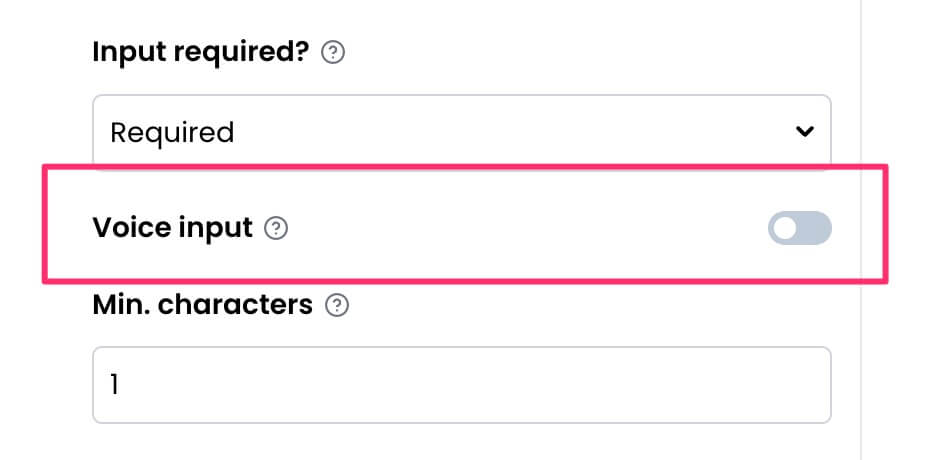 The chatbot will then display a microphone icon when the block is displayed. Users can click on the microphone icon to record a voice message.
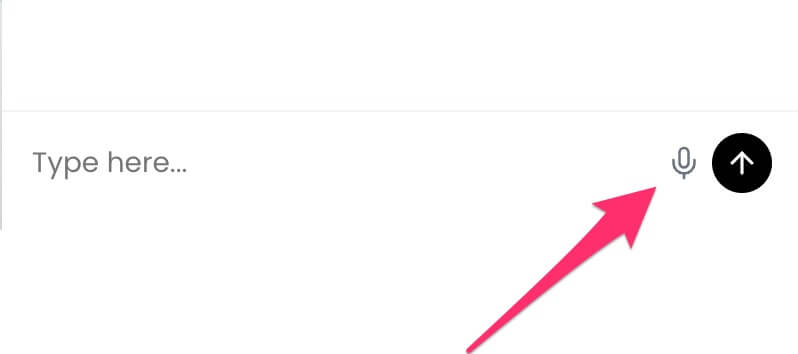 ## What happens when I run out of Speech to Text credits?
When you're out of credits, the voice recording icon will be removed and users will not be able to access the feature. You can upgrade your plan to increase the credits limit or wait until the next billing cycle for the credits to reset.
# Create Contact Block
Source: https://docs.chatling.ai/builder/blocks/action/create-contact
Learn about the Create Contact block and how to set it up in the Builder.
The `Create Contact` block can be used to save a user's information as a contact. All saved contacts are displayed on the `Contacts` page in your dashboard.
When a contact is created, it is associated with the user and the information persists across multiple chat sessions. The information can be used to personalize the conversation, skip repetitive questions, and tailor the flow accordingly.
The block consists of the following components:
* **Contact details**: Define which fields you want to collect and save—such as first name, email, etc. These can be mapped from variables captured in the conversation flow (e.g. from a form or user input).
* **Deduplication**: Allows you to define how Chatling handles duplicate contacts during the creation process.
# Delete Contact Block
Source: https://docs.chatling.ai/builder/blocks/action/delete-contact
Learn about the Delete Contact block and how to set it up in the Builder.
The `Delete Contact` block can be used to delete a contact and dissociate it from the user.
The block consists of the following components:
* **Search**: Specify the field and value to use to look up the contact. You can enter a variable to search dynamically.
# Get Contact Block
Source: https://docs.chatling.ai/builder/blocks/action/get-contact
Learn about the Get Contact block and how to set it up in the Builder.
The `Get Contact` block can be used to retrieve a contact's information.
The block consists of the following components:
* **Search**: Specify the field and value to use to look up the contact. You can enter a variable to search dynamically.
* **Contact details**: Define the properties to retrieve and the variables to store the values in.
# HTTP Request Block
Source: https://docs.chatling.ai/builder/blocks/action/http-request
Learn about the HTTP Request block and how to set it up in the Builder.
The HTTP Request block is used to send HTTP requests to external APIs and services. You can use it to fetch data, send data, or perform other actions by interacting with APIs.
The block consists of the following components:
* **Request method**: The HTTP method to use for the request, such as GET, POST, PUT, PATCH, and DELETE.
* **URL**: The URL of the API endpoint to send the request to.
* **Request options**: You can configure additional options for the request, such as headers, query parameters, and request body.
* **Capture Response**: You can capture the responses from the API and store them a variable. The response must be in JSON format.
## Method and URL
In order to send a request, you must provide the endpoint URL and select the appropriate request method. The following request methods are supported:
* **GET**: Retrieve data from the server.
* **POST**: Send data to the server.
* **PUT**: Update data on the server.
* **PATCH**: Partially update data on the server.
* **DELETE**: Delete data from the server.
As an example, an endpoint URL might look like this:
`https://openlibrary.org/works/OL45804W.json`
## Request Options
When sending requests to external APIs, you may need to provide additional options such as headers, query parameters, and request body. Here are the available options:
* **Headers**: You can set headers for the request, such as Content-Type, Authorization, and Accept.
* **Query Params**: The URL query parameters to include for the request.
* **Request Body**: The request payload which can be passed as form data, form URL encoded, or raw JSON.
### How to use variables in JSON payload
To use variables in the request payload, you must enclose the variable's name in double curly braces within quotes. Here's an example:
```json
{
"name": "{{contact_name}}",
"age": 21,
"email": "{{contact_email}}"
}
```
Some points to note:
* Make sure that the variables exist and that their name is correct. Otherwise, they will not be replaced with the actual value.
* If you change a variable's name, you must also update the JSON payload to reflect the change.
* Variables must be enclosed in double curly braces as shown in the example above.
## Capture Response
Responses from the API can be captured and stored in one or more variables. In order for this to work, the response from the endpoint must be in JSON format.
Click the `Add` button to add a new row for capturing a value. You must specify the key and the variable where the value will be stored.
The naming convention for the key is as follows:
* **Top level data**: use the key, such as name or age.
* **Nested data**: use dot notation, such as user.name or profile.address.city.
* **Array data**: use the index, such as users\[0].name or countries\[1].cities\[0].population.
Let's take a look at an example. Below is a sample JSON response from an API endpoint:
```json
{
"title": "Fantastic Mr Fox",
"permalink": "/works/OL45804W",
"authors": [
{
"author": {
"name": "Roald Dahl"
},
}
],
"description": "The main character of Fantastic Mr. Fox is an extremely clever anthropomorphized fox named Mr. Fox. He lives with his wife and four little foxes. In order to feed his family, he steals food from the cruel, brutish farmers named Boggis, Bunce, and Bean every night.\r\n\r\nFinally tired of being constantly outwitted by Mr. Fox, the farmers attempt to capture and kill him. The foxes escape in time by burrowing deep into the ground. The farmers decide to wait outside the hole for the foxes to emerge. Unable to leave the hole and steal food, Mr. Fox and his family begin to starve. Mr. Fox devises a plan to steal food from the farmers by tunneling into the ground and borrowing into the farmer's houses.\r\n\r\nAided by a friendly Badger, the animals bring the stolen food back and Mrs. Fox prepares a great celebratory banquet attended by the other starving animals and their families. Mr. Fox invites all the animals to live with him underground and says that he will provide food for them daily thanks to his underground passages. All the animals live happily and safely, while the farmers remain waiting outside in vain for Mr. Fox to show up.",
"meta": {
"published_at": "1970-06-01"
},
}
```
To capture the title, date of publication, and author name from the response, you would use the following keys:
* **Title**: `title`
* **Published date**: `meta.published_at`
* **Author Name**: `authors[0].author.name`
## What happens when I run out of Speech to Text credits?
When you're out of credits, the voice recording icon will be removed and users will not be able to access the feature. You can upgrade your plan to increase the credits limit or wait until the next billing cycle for the credits to reset.
# Create Contact Block
Source: https://docs.chatling.ai/builder/blocks/action/create-contact
Learn about the Create Contact block and how to set it up in the Builder.
The `Create Contact` block can be used to save a user's information as a contact. All saved contacts are displayed on the `Contacts` page in your dashboard.
When a contact is created, it is associated with the user and the information persists across multiple chat sessions. The information can be used to personalize the conversation, skip repetitive questions, and tailor the flow accordingly.
The block consists of the following components:
* **Contact details**: Define which fields you want to collect and save—such as first name, email, etc. These can be mapped from variables captured in the conversation flow (e.g. from a form or user input).
* **Deduplication**: Allows you to define how Chatling handles duplicate contacts during the creation process.
# Delete Contact Block
Source: https://docs.chatling.ai/builder/blocks/action/delete-contact
Learn about the Delete Contact block and how to set it up in the Builder.
The `Delete Contact` block can be used to delete a contact and dissociate it from the user.
The block consists of the following components:
* **Search**: Specify the field and value to use to look up the contact. You can enter a variable to search dynamically.
# Get Contact Block
Source: https://docs.chatling.ai/builder/blocks/action/get-contact
Learn about the Get Contact block and how to set it up in the Builder.
The `Get Contact` block can be used to retrieve a contact's information.
The block consists of the following components:
* **Search**: Specify the field and value to use to look up the contact. You can enter a variable to search dynamically.
* **Contact details**: Define the properties to retrieve and the variables to store the values in.
# HTTP Request Block
Source: https://docs.chatling.ai/builder/blocks/action/http-request
Learn about the HTTP Request block and how to set it up in the Builder.
The HTTP Request block is used to send HTTP requests to external APIs and services. You can use it to fetch data, send data, or perform other actions by interacting with APIs.
The block consists of the following components:
* **Request method**: The HTTP method to use for the request, such as GET, POST, PUT, PATCH, and DELETE.
* **URL**: The URL of the API endpoint to send the request to.
* **Request options**: You can configure additional options for the request, such as headers, query parameters, and request body.
* **Capture Response**: You can capture the responses from the API and store them a variable. The response must be in JSON format.
## Method and URL
In order to send a request, you must provide the endpoint URL and select the appropriate request method. The following request methods are supported:
* **GET**: Retrieve data from the server.
* **POST**: Send data to the server.
* **PUT**: Update data on the server.
* **PATCH**: Partially update data on the server.
* **DELETE**: Delete data from the server.
As an example, an endpoint URL might look like this:
`https://openlibrary.org/works/OL45804W.json`
## Request Options
When sending requests to external APIs, you may need to provide additional options such as headers, query parameters, and request body. Here are the available options:
* **Headers**: You can set headers for the request, such as Content-Type, Authorization, and Accept.
* **Query Params**: The URL query parameters to include for the request.
* **Request Body**: The request payload which can be passed as form data, form URL encoded, or raw JSON.
### How to use variables in JSON payload
To use variables in the request payload, you must enclose the variable's name in double curly braces within quotes. Here's an example:
```json
{
"name": "{{contact_name}}",
"age": 21,
"email": "{{contact_email}}"
}
```
Some points to note:
* Make sure that the variables exist and that their name is correct. Otherwise, they will not be replaced with the actual value.
* If you change a variable's name, you must also update the JSON payload to reflect the change.
* Variables must be enclosed in double curly braces as shown in the example above.
## Capture Response
Responses from the API can be captured and stored in one or more variables. In order for this to work, the response from the endpoint must be in JSON format.
Click the `Add` button to add a new row for capturing a value. You must specify the key and the variable where the value will be stored.
The naming convention for the key is as follows:
* **Top level data**: use the key, such as name or age.
* **Nested data**: use dot notation, such as user.name or profile.address.city.
* **Array data**: use the index, such as users\[0].name or countries\[1].cities\[0].population.
Let's take a look at an example. Below is a sample JSON response from an API endpoint:
```json
{
"title": "Fantastic Mr Fox",
"permalink": "/works/OL45804W",
"authors": [
{
"author": {
"name": "Roald Dahl"
},
}
],
"description": "The main character of Fantastic Mr. Fox is an extremely clever anthropomorphized fox named Mr. Fox. He lives with his wife and four little foxes. In order to feed his family, he steals food from the cruel, brutish farmers named Boggis, Bunce, and Bean every night.\r\n\r\nFinally tired of being constantly outwitted by Mr. Fox, the farmers attempt to capture and kill him. The foxes escape in time by burrowing deep into the ground. The farmers decide to wait outside the hole for the foxes to emerge. Unable to leave the hole and steal food, Mr. Fox and his family begin to starve. Mr. Fox devises a plan to steal food from the farmers by tunneling into the ground and borrowing into the farmer's houses.\r\n\r\nAided by a friendly Badger, the animals bring the stolen food back and Mrs. Fox prepares a great celebratory banquet attended by the other starving animals and their families. Mr. Fox invites all the animals to live with him underground and says that he will provide food for them daily thanks to his underground passages. All the animals live happily and safely, while the farmers remain waiting outside in vain for Mr. Fox to show up.",
"meta": {
"published_at": "1970-06-01"
},
}
```
To capture the title, date of publication, and author name from the response, you would use the following keys:
* **Title**: `title`
* **Published date**: `meta.published_at`
* **Author Name**: `authors[0].author.name`
 # Send Email Block
Source: https://docs.chatling.ai/builder/blocks/action/send-email
Learn about the Send Email block and how to set it up in the Builder.
The Send Email block is used to send emails to one or more recipients. You can use it to send notifications, follow ups, transactional emails and other types of emails.
The block consists of the following components:
* **From**: The email address from which the email will be sent.
* **From name**: The name of the sender. For example, you can use your company name.
* **Reply to**: The email address to which the recipient can reply. For example, if you want to receive replies to your email address, you can set it here. Whenever the recipient replies to the email, it will be sent to your inbox.
* **To**: The email addresses of the recipients. You can add one or more email addresses.
* **CC**: The email addresses of the recipients who will receive a copy of the email. You can add one or more email addresses.
* **Subject**: The subject of the email.
* **Message**: The content of the email. You can use variables to personalize the email content.
# Set Variable
Source: https://docs.chatling.ai/builder/blocks/action/set-variable
Learn about the Set Variable block and how to set it up in the Builder.
The Set Variable block is used to set the value of one or more variables. With it, you can modify variable values dynamically at any point in the flow.
## How to configure
1. Click on the Set Variable block in the canvas to open its settings.
2. Select the variable you want to modify.
3. Select the type of the modification:
* **Value**: Set the variable to a specific value. You can also insert variables to make the value dynamic.
* **Add/Subtract/Multiply/Divide**: Perform a mathematical operation on the variable. You can add, subtract, multiply, or divide the variable by a specific value. The value must be a number.
4. Enter the value.
# Send Email Block
Source: https://docs.chatling.ai/builder/blocks/action/send-email
Learn about the Send Email block and how to set it up in the Builder.
The Send Email block is used to send emails to one or more recipients. You can use it to send notifications, follow ups, transactional emails and other types of emails.
The block consists of the following components:
* **From**: The email address from which the email will be sent.
* **From name**: The name of the sender. For example, you can use your company name.
* **Reply to**: The email address to which the recipient can reply. For example, if you want to receive replies to your email address, you can set it here. Whenever the recipient replies to the email, it will be sent to your inbox.
* **To**: The email addresses of the recipients. You can add one or more email addresses.
* **CC**: The email addresses of the recipients who will receive a copy of the email. You can add one or more email addresses.
* **Subject**: The subject of the email.
* **Message**: The content of the email. You can use variables to personalize the email content.
# Set Variable
Source: https://docs.chatling.ai/builder/blocks/action/set-variable
Learn about the Set Variable block and how to set it up in the Builder.
The Set Variable block is used to set the value of one or more variables. With it, you can modify variable values dynamically at any point in the flow.
## How to configure
1. Click on the Set Variable block in the canvas to open its settings.
2. Select the variable you want to modify.
3. Select the type of the modification:
* **Value**: Set the variable to a specific value. You can also insert variables to make the value dynamic.
* **Add/Subtract/Multiply/Divide**: Perform a mathematical operation on the variable. You can add, subtract, multiply, or divide the variable by a specific value. The value must be a number.
4. Enter the value.
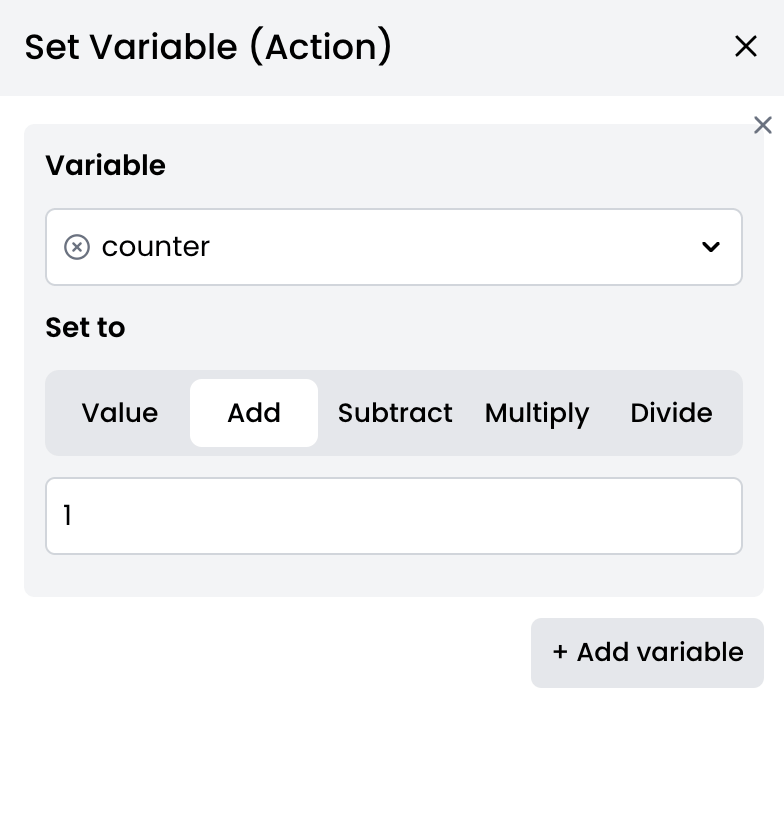 ## Multiple variables
You can set multiple variables at once by clicking on the **Add variable** button. This will add a new row where you can select another variable and set its value.
## Multiple variables
You can set multiple variables at once by clicking on the **Add variable** button. This will add a new row where you can select another variable and set its value.
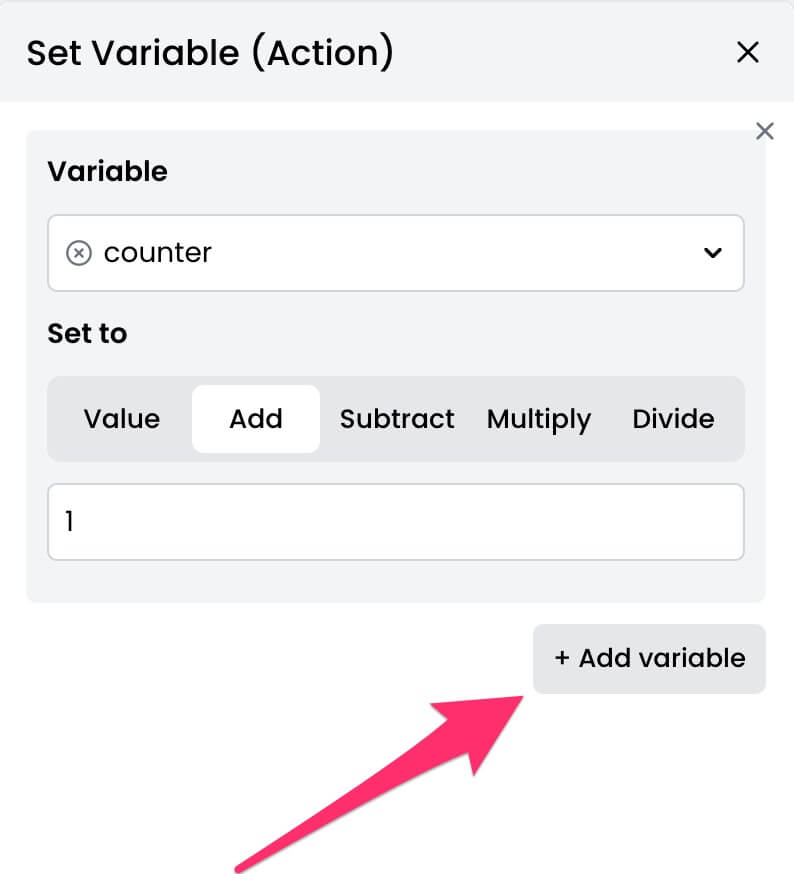 ## Example
Let's say you're building a lead generation chatbot for a real estate brokerage. You want to prompt the AI to ask the customer three questions about their requirements and forward the answers to the team. You can do this by using a counter variable that increments each time the user answers a question.
Below is a sample flow that demonstrates how to use the Set Variable block.
## Example
Let's say you're building a lead generation chatbot for a real estate brokerage. You want to prompt the AI to ask the customer three questions about their requirements and forward the answers to the team. You can do this by using a counter variable that increments each time the user answers a question.
Below is a sample flow that demonstrates how to use the Set Variable block.
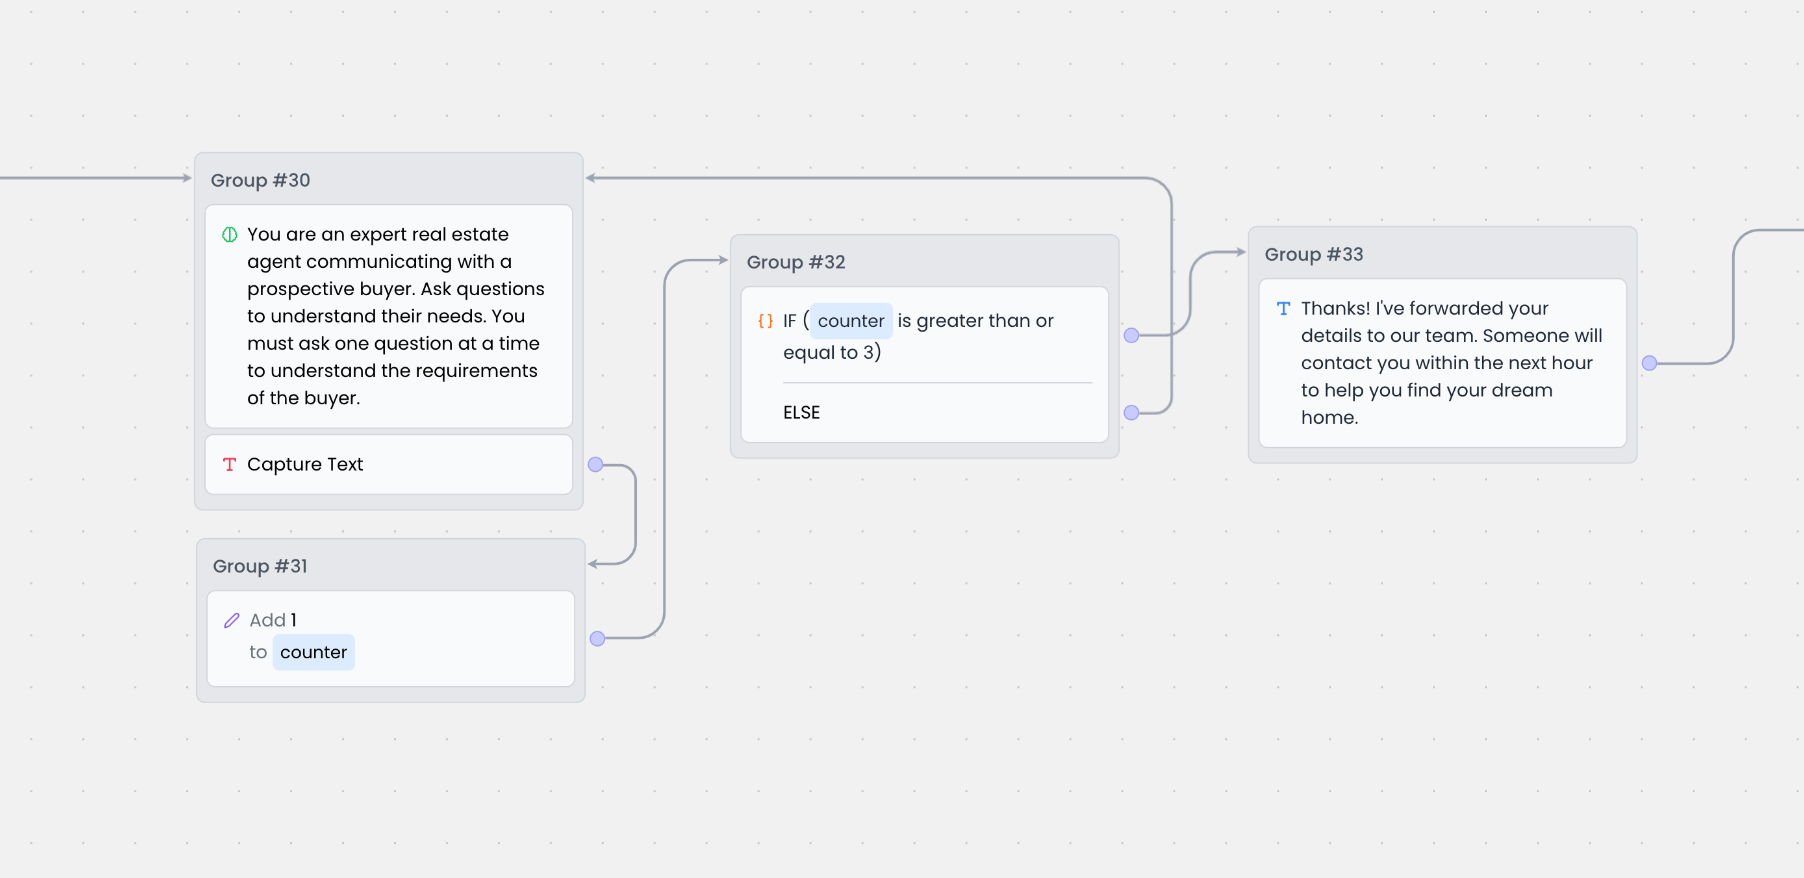 We're using a variable called `counter` to keep track of the number of questions that have been asked. This variable is incremented by 1 each time the user answers a question.
Then, we're using the Condition block to check if the counter is greater or equal to 3. If it is, a message is displayed to inform the user that their inquiry has been forwarded to the team. Else, the AI asks the next question.
# Update Contact Block
Source: https://docs.chatling.ai/builder/blocks/action/update-contact
Learn about the Update Contact block and how to set it up in the Builder.
The `Update Contact` block can be used to update an existing contact.
The block consists of the following components:
* **Search**: Specify the field and value to use to look up the contact. You can enter a variable to search dynamically.
* **Contact details**: Define the properties you want to update.
# AI Response Block
Source: https://docs.chatling.ai/builder/blocks/ai/ai-response
Learn about the AI Response block and how to set it up in the Builder.
The AI Response block is used for generating responses to user input using AI. It can provide answers based on the information you have added to the [Knowledge Base](/knowledge-base/overview) or from the AI's pretrained data.
The AI uses natural language processing (NLP) to understand the user's input and generate relevant responses.
## What is the "Response Source"?
The Response Source determines where the AI will look for answers to user queries. You can choose from the following options:
* **Knowledge Base**: The AI will search the data you've uploaded to the Knowledge Base for the relevant information and return the corresponding answer.
* **AI Model**: The AI will use its pretrained data to generate a response based on the user's query. This is ideal for a general-purpose AI that can answer a wide range of questions without limiting its responses to the data in the knowledge base.
## Configurations for Knowledge Base Response Source
We're using a variable called `counter` to keep track of the number of questions that have been asked. This variable is incremented by 1 each time the user answers a question.
Then, we're using the Condition block to check if the counter is greater or equal to 3. If it is, a message is displayed to inform the user that their inquiry has been forwarded to the team. Else, the AI asks the next question.
# Update Contact Block
Source: https://docs.chatling.ai/builder/blocks/action/update-contact
Learn about the Update Contact block and how to set it up in the Builder.
The `Update Contact` block can be used to update an existing contact.
The block consists of the following components:
* **Search**: Specify the field and value to use to look up the contact. You can enter a variable to search dynamically.
* **Contact details**: Define the properties you want to update.
# AI Response Block
Source: https://docs.chatling.ai/builder/blocks/ai/ai-response
Learn about the AI Response block and how to set it up in the Builder.
The AI Response block is used for generating responses to user input using AI. It can provide answers based on the information you have added to the [Knowledge Base](/knowledge-base/overview) or from the AI's pretrained data.
The AI uses natural language processing (NLP) to understand the user's input and generate relevant responses.
## What is the "Response Source"?
The Response Source determines where the AI will look for answers to user queries. You can choose from the following options:
* **Knowledge Base**: The AI will search the data you've uploaded to the Knowledge Base for the relevant information and return the corresponding answer.
* **AI Model**: The AI will use its pretrained data to generate a response based on the user's query. This is ideal for a general-purpose AI that can answer a wide range of questions without limiting its responses to the data in the knowledge base.
## Configurations for Knowledge Base Response Source
 When you select the "Knowledge Base" as the Response Source, you can configure the following settings:
* **Question**: The user's input or query that the AI will process to generate a response. You can use variables to make the question dynamic. For example, you can capture the user's input using a Text input block and store it in a variable called `user_input`. Then, you can use this variable in the "Question" field to make the AI response dynamic.
* **Store response in variable**: You can store the AI response in a variable to use it in other blocks.
* **Stream**: When enabled, the AI response will be streamed to the user in real-time as it is generated. This provides a more interactive experience for the user.
* When Stream is enabled, some features that require post-processing, such as "Not Found path" will be disabled.
* **Not Found path**: The path to follow if the AI does not find a relevant answer in the Knowledge Base.
* **Model**: The AI model to use for generating responses.
* **Language**: The language in which the AI will respond to the user. If you set it to "Auto," the AI will detect the language of the user's input and respond in the same language.
* If you want the AI to respond in a certain dialect or accent, you can specify it in Instructions section of the [AI Configuration](/builder/sidebar#ai-configuration).
* **Temperature**: The randomness of the AI's responses. A higher temperature value will result in more diverse and creative responses, while a lower value will produce more accurate responses.
### What does "Use global AI settings" mean?
When you set an option, such as the AI model, language, or temperature to "Use global AI settings", the AI will use the settings defined in the [AI Configuration](/builder/sidebar#ai-configuration) menu in the [sidebar](/builder/sidebar). This allows you to define global settings that will be applied to all AI blocks in your bot.
## Configurations for AI Model Response Source
When you set the Response Source to "AI Model", you can configure the following settings:
* **Prompt**: The message or query that the AI will use to generate a response. You can use variables to make the prompt dynamic.
* **Store response in variable**: You can store the AI response in a variable to use it in other blocks.
* **Instructions**: Additional instructions for the AI to follow when generating a response. For example, you can specify its personality, tone, or style, or provide specific context for the response.
* **Model**: The AI model to use for generating responses.
* **Max Length**: Maximum number of tokens to generate, shared between the prompt and the response. One token is roughly 4 characters.
* **Temperature**: Randomness of the AI's responses. A higher temperature value will result in more diverse and creative responses, while a lower value will produce more focused and deterministic responses.
* **Top P**: Controls diversity via nucleus sampling: 0.5 means half of all likelihood-weighted options are considered.
* **Frequency Penalty**: How much to penalize new tokens based on their existing frequency in the text so far. Decreases the model's likelihood to repeat the same line verbatim.
* **Presence Penalty**: How much to penalize new tokens based on whether they appear in the text so far. Increases the model's likelihood to talk about new topics.
## How to set up the AI block to respond from the knowledge base?
Here's a high level overview of how the AI generates responses using the knowledge base:
* The user inputs a question or query, which is saved in a variable of your choice.
* The stored input is passed to the AI which uses natural language processing (NLP) to understand the user's query and the context of the conversation.
* The AI searches the knowledge base for relevant information.
* The AI generates the response and displays it to the user.
To set up the AI block, follow these steps:
1. Add a Text input block to the canvas. We'll use this block to capture the user's input and store it in a variable so it can be passed to the AI block.
When you select the "Knowledge Base" as the Response Source, you can configure the following settings:
* **Question**: The user's input or query that the AI will process to generate a response. You can use variables to make the question dynamic. For example, you can capture the user's input using a Text input block and store it in a variable called `user_input`. Then, you can use this variable in the "Question" field to make the AI response dynamic.
* **Store response in variable**: You can store the AI response in a variable to use it in other blocks.
* **Stream**: When enabled, the AI response will be streamed to the user in real-time as it is generated. This provides a more interactive experience for the user.
* When Stream is enabled, some features that require post-processing, such as "Not Found path" will be disabled.
* **Not Found path**: The path to follow if the AI does not find a relevant answer in the Knowledge Base.
* **Model**: The AI model to use for generating responses.
* **Language**: The language in which the AI will respond to the user. If you set it to "Auto," the AI will detect the language of the user's input and respond in the same language.
* If you want the AI to respond in a certain dialect or accent, you can specify it in Instructions section of the [AI Configuration](/builder/sidebar#ai-configuration).
* **Temperature**: The randomness of the AI's responses. A higher temperature value will result in more diverse and creative responses, while a lower value will produce more accurate responses.
### What does "Use global AI settings" mean?
When you set an option, such as the AI model, language, or temperature to "Use global AI settings", the AI will use the settings defined in the [AI Configuration](/builder/sidebar#ai-configuration) menu in the [sidebar](/builder/sidebar). This allows you to define global settings that will be applied to all AI blocks in your bot.
## Configurations for AI Model Response Source
When you set the Response Source to "AI Model", you can configure the following settings:
* **Prompt**: The message or query that the AI will use to generate a response. You can use variables to make the prompt dynamic.
* **Store response in variable**: You can store the AI response in a variable to use it in other blocks.
* **Instructions**: Additional instructions for the AI to follow when generating a response. For example, you can specify its personality, tone, or style, or provide specific context for the response.
* **Model**: The AI model to use for generating responses.
* **Max Length**: Maximum number of tokens to generate, shared between the prompt and the response. One token is roughly 4 characters.
* **Temperature**: Randomness of the AI's responses. A higher temperature value will result in more diverse and creative responses, while a lower value will produce more focused and deterministic responses.
* **Top P**: Controls diversity via nucleus sampling: 0.5 means half of all likelihood-weighted options are considered.
* **Frequency Penalty**: How much to penalize new tokens based on their existing frequency in the text so far. Decreases the model's likelihood to repeat the same line verbatim.
* **Presence Penalty**: How much to penalize new tokens based on whether they appear in the text so far. Increases the model's likelihood to talk about new topics.
## How to set up the AI block to respond from the knowledge base?
Here's a high level overview of how the AI generates responses using the knowledge base:
* The user inputs a question or query, which is saved in a variable of your choice.
* The stored input is passed to the AI which uses natural language processing (NLP) to understand the user's query and the context of the conversation.
* The AI searches the knowledge base for relevant information.
* The AI generates the response and displays it to the user.
To set up the AI block, follow these steps:
1. Add a Text input block to the canvas. We'll use this block to capture the user's input and store it in a variable so it can be passed to the AI block.
 2. Click on the Text block to open the editor. In the `Store answer in variable` field, enter a variable where the user's input will be stored. In this example, we'll create and use a variable called `user_query`.
 3. Next, drag and drop the AI Response block onto the canvas.
 4. Connect the Text input block to the AI block by dragging the connector from the Text block to the AI block.
 5. Click the AI Response block to open the editor. In the `Question` field, enter the variable where the user's input is stored. In step 2, we used the `user_query` variable, so we'll enter `{user_query}` in the Question field.
 6. Set up the global AI settings by going to the `AI Configuration` in the sidebar. You can define settings such as the AI model, instructions, language, and business name.
7. Lastly, set up the block connections accordingly. For example, a setup like below will allow the user to continually ask questions and receive responses from the AI.
6. Set up the global AI settings by going to the `AI Configuration` in the sidebar. You can define settings such as the AI model, instructions, language, and business name.
7. Lastly, set up the block connections accordingly. For example, a setup like below will allow the user to continually ask questions and receive responses from the AI.
 # Language
Source: https://docs.chatling.ai/builder/blocks/condition/language
Learn how to use the Language condition block in Chatling
The Language condition block is used to define flows based on the user's browser language. This can be useful for creating multilingual bots that respond in the user's preferred language.
Let's say you want to create a bot that supports English, Spanish, and French languages. You can use the Language condition block to define different responses or actions based on the user's preferred language setting in their browser.
Below is an example of such a flow. The Else path is a fallback for users whose language is not supported by the bot. In this case, it falls back to the English language.
# Language
Source: https://docs.chatling.ai/builder/blocks/condition/language
Learn how to use the Language condition block in Chatling
The Language condition block is used to define flows based on the user's browser language. This can be useful for creating multilingual bots that respond in the user's preferred language.
Let's say you want to create a bot that supports English, Spanish, and French languages. You can use the Language condition block to define different responses or actions based on the user's preferred language setting in their browser.
Below is an example of such a flow. The Else path is a fallback for users whose language is not supported by the bot. In this case, it falls back to the English language.
 # Overview
Source: https://docs.chatling.ai/builder/blocks/condition/overview
Learn about the condition blocks and how to use them
Condition blocks are used to create conditional logic in your bot. You can use it to check if a certain condition is met and then perform different actions based on the result.
Similar to an "if-else" statement in programming, condition blocks evaluate a condition and executes different paths based on whether the condition is true or false.
# Overview
Source: https://docs.chatling.ai/builder/blocks/condition/overview
Learn about the condition blocks and how to use them
Condition blocks are used to create conditional logic in your bot. You can use it to check if a certain condition is met and then perform different actions based on the result.
Similar to an "if-else" statement in programming, condition blocks evaluate a condition and executes different paths based on whether the condition is true or false.
 ## Types of condition blocks
There are two types of condition blocks available in Chatling:
* [**Variable**](./variable): Compares a variable with a value or another variable.
* **Language**: Checks if the user's language matches a specific language. Useful for creating multilingual bots.
## How do condition blocks work?
Condition blocks consist of two main parts:
* **Conditions**: The conditions that the block will evaluate. You can use variables, languages, comparison operators, and logical operators to create complex conditions.
* **Paths**: The paths that the block will follow based on the result of the conditions. Every condition you add will have a corresponding path that the block will follow if the condition is true.
## Types of condition blocks
There are two types of condition blocks available in Chatling:
* [**Variable**](./variable): Compares a variable with a value or another variable.
* **Language**: Checks if the user's language matches a specific language. Useful for creating multilingual bots.
## How do condition blocks work?
Condition blocks consist of two main parts:
* **Conditions**: The conditions that the block will evaluate. You can use variables, languages, comparison operators, and logical operators to create complex conditions.
* **Paths**: The paths that the block will follow based on the result of the conditions. Every condition you add will have a corresponding path that the block will follow if the condition is true.
 Here's an example of how a condition block works:
1. The block evaluates conditions in the order they are added.
2. If a condition is true, the block follows the path associated with that condition.
3. If none of the conditions are true, the block follows the "Else" path.
## The Else condition
The `Else` condition is executed if none of the other conditions are met. You can use it to define a fallback path that the block will follow if none of the other conditions are true.
## Comparison operators
Conditions support a variety of comparison operators that you can use to compare values. Here are some of the operators you can use:
* **Equals**: Checks if the variable is equal to the value.
* **Not equals**: Checks if the variable is not equal to the value.
* **Contains**: Checks if the variable contains the value.
* **Not contains**: Checks if the variable does not contain the value.
* **Greater than or equals**: Checks if the variable is greater than or equal to the value.
* **Less than**: Checks if the variable is less than the value.
* **Less than or equals**: Checks if the variable is less than or equal to the value.
* **Starts with**: Checks if the variable starts with the value.
* **Ends with**: Checks if the variable ends with the value.
* **Is empty**: Checks if the variable is empty.
* **Is not empty**: Checks if the variable is not empty.
## Group and child conditions
Conditions are grouped together to create complex logic using logical operators like "AND" and "OR". Every group contains one or more conditions that are evaluated together.
Here's an example of how a condition block works:
1. The block evaluates conditions in the order they are added.
2. If a condition is true, the block follows the path associated with that condition.
3. If none of the conditions are true, the block follows the "Else" path.
## The Else condition
The `Else` condition is executed if none of the other conditions are met. You can use it to define a fallback path that the block will follow if none of the other conditions are true.
## Comparison operators
Conditions support a variety of comparison operators that you can use to compare values. Here are some of the operators you can use:
* **Equals**: Checks if the variable is equal to the value.
* **Not equals**: Checks if the variable is not equal to the value.
* **Contains**: Checks if the variable contains the value.
* **Not contains**: Checks if the variable does not contain the value.
* **Greater than or equals**: Checks if the variable is greater than or equal to the value.
* **Less than**: Checks if the variable is less than the value.
* **Less than or equals**: Checks if the variable is less than or equal to the value.
* **Starts with**: Checks if the variable starts with the value.
* **Ends with**: Checks if the variable ends with the value.
* **Is empty**: Checks if the variable is empty.
* **Is not empty**: Checks if the variable is not empty.
## Group and child conditions
Conditions are grouped together to create complex logic using logical operators like "AND" and "OR". Every group contains one or more conditions that are evaluated together.
 Conditions within a group are evaluated together to determine if the group is true or false. You can use logical operators such as "AND" and "OR" to combine conditions within a group.
For example, you can create a group with two conditions and set it to "AND" to require both conditions to be true for the group to be true. On the other hand, you can set it to "OR" to require only one of the conditions to be true for the group to be true.
By default, condition blocks have one group with one condition. To add additional groups, click the `Add group condition` button.
## Logical operators
Logical operators are used to combine conditions within a group. You can choose from the following logical operators:
* **AND**: Requires all conditions in the group to be true for the group to be true.
* **OR**: Requires at least one condition in the group to be true for the group to be true.
Conditions within a group are evaluated together to determine if the group is true or false. You can use logical operators such as "AND" and "OR" to combine conditions within a group.
For example, you can create a group with two conditions and set it to "AND" to require both conditions to be true for the group to be true. On the other hand, you can set it to "OR" to require only one of the conditions to be true for the group to be true.
By default, condition blocks have one group with one condition. To add additional groups, click the `Add group condition` button.
## Logical operators
Logical operators are used to combine conditions within a group. You can choose from the following logical operators:
* **AND**: Requires all conditions in the group to be true for the group to be true.
* **OR**: Requires at least one condition in the group to be true for the group to be true.
 * **Label**: A descriptive label for the condition, which will be displayed in the block on the canvas. This is optional and can be skipped.
* **Variable**: The variable or value that the block will evaluate. The variable can be a user input, a stored value, or a system variable.
* **Comparison operator**: The operator that the block will use to compare the variable with the value you specify. You can choose from a list of comparison operators, such as "equals," "greater than," "contains," etc.
* **Value**: The value that the block will compare with the variable. This can be a static value or a variable for dynamic comparisons.
## Examples
### 1. Real estate bot
In a real estate bot, you can use conditions to check if the user is looking to buy or rent a property and display properties accordingly.
You can create two conditions:
* Condition 1: User input contains "buy"
* Condition 2: User input contains "rent"
Here's how to set it up in the editor:
* **Label**: A descriptive label for the condition, which will be displayed in the block on the canvas. This is optional and can be skipped.
* **Variable**: The variable or value that the block will evaluate. The variable can be a user input, a stored value, or a system variable.
* **Comparison operator**: The operator that the block will use to compare the variable with the value you specify. You can choose from a list of comparison operators, such as "equals," "greater than," "contains," etc.
* **Value**: The value that the block will compare with the variable. This can be a static value or a variable for dynamic comparisons.
## Examples
### 1. Real estate bot
In a real estate bot, you can use conditions to check if the user is looking to buy or rent a property and display properties accordingly.
You can create two conditions:
* Condition 1: User input contains "buy"
* Condition 2: User input contains "rent"
Here's how to set it up in the editor:
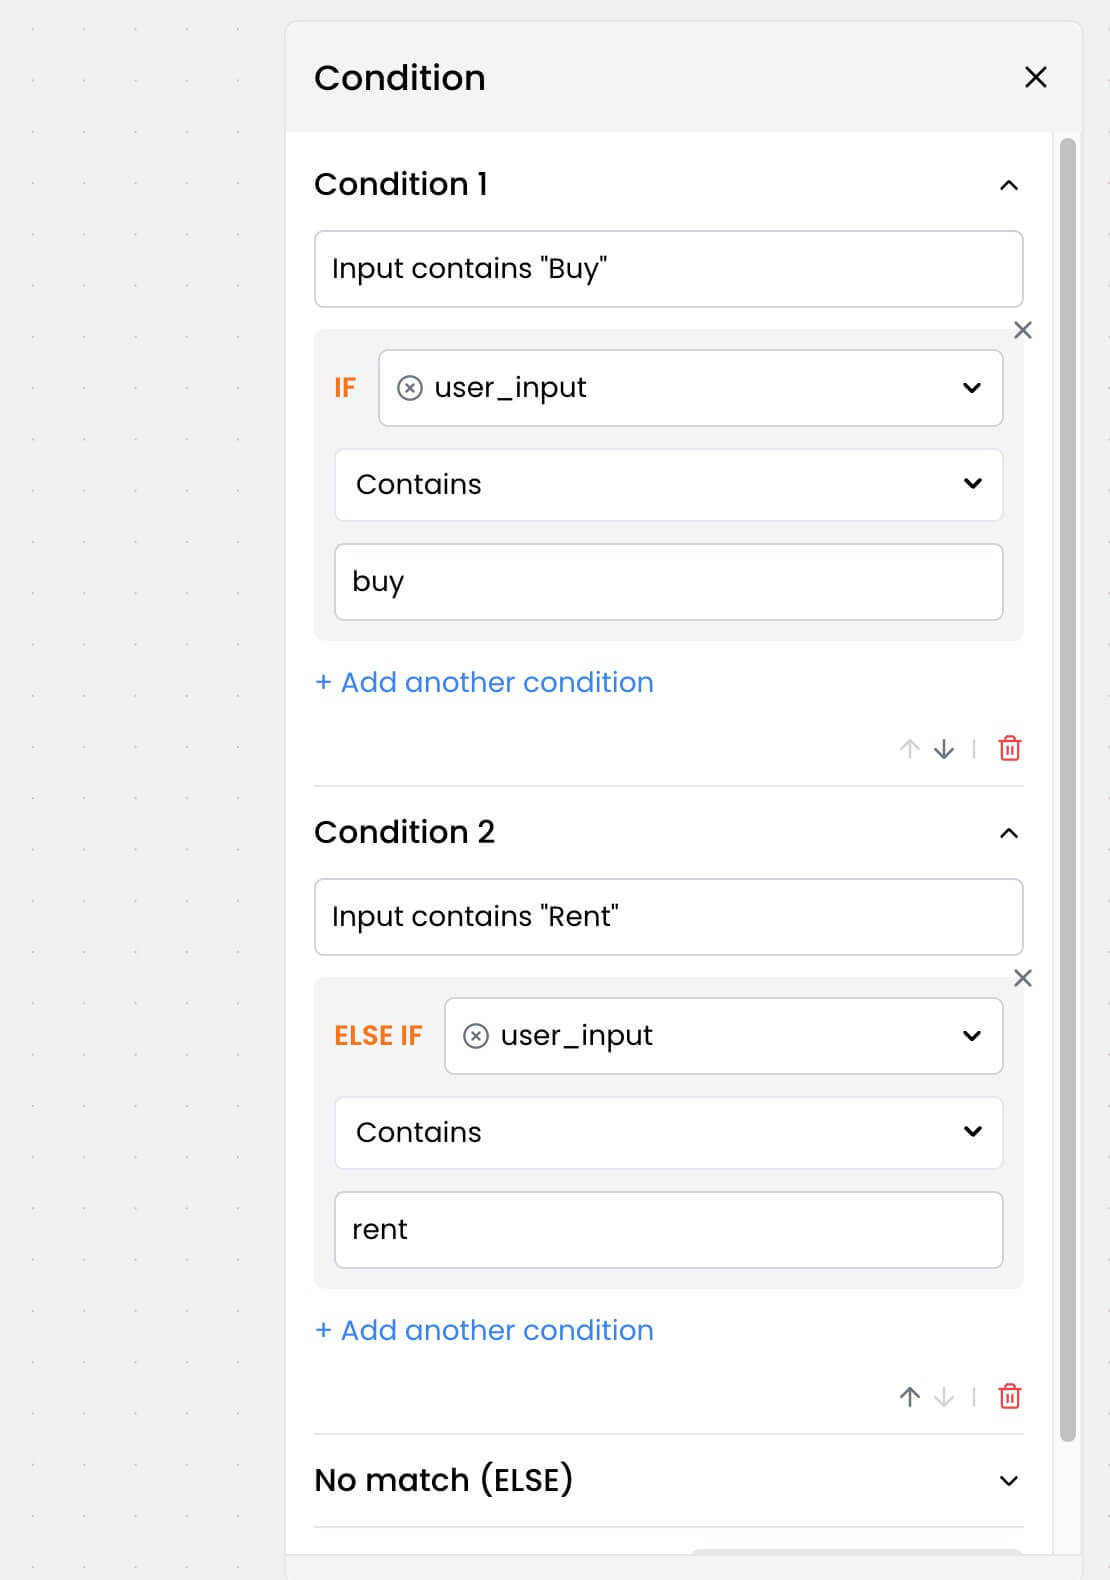 Once you have set up the conditions, you can define the paths for each condition. Here's an example:
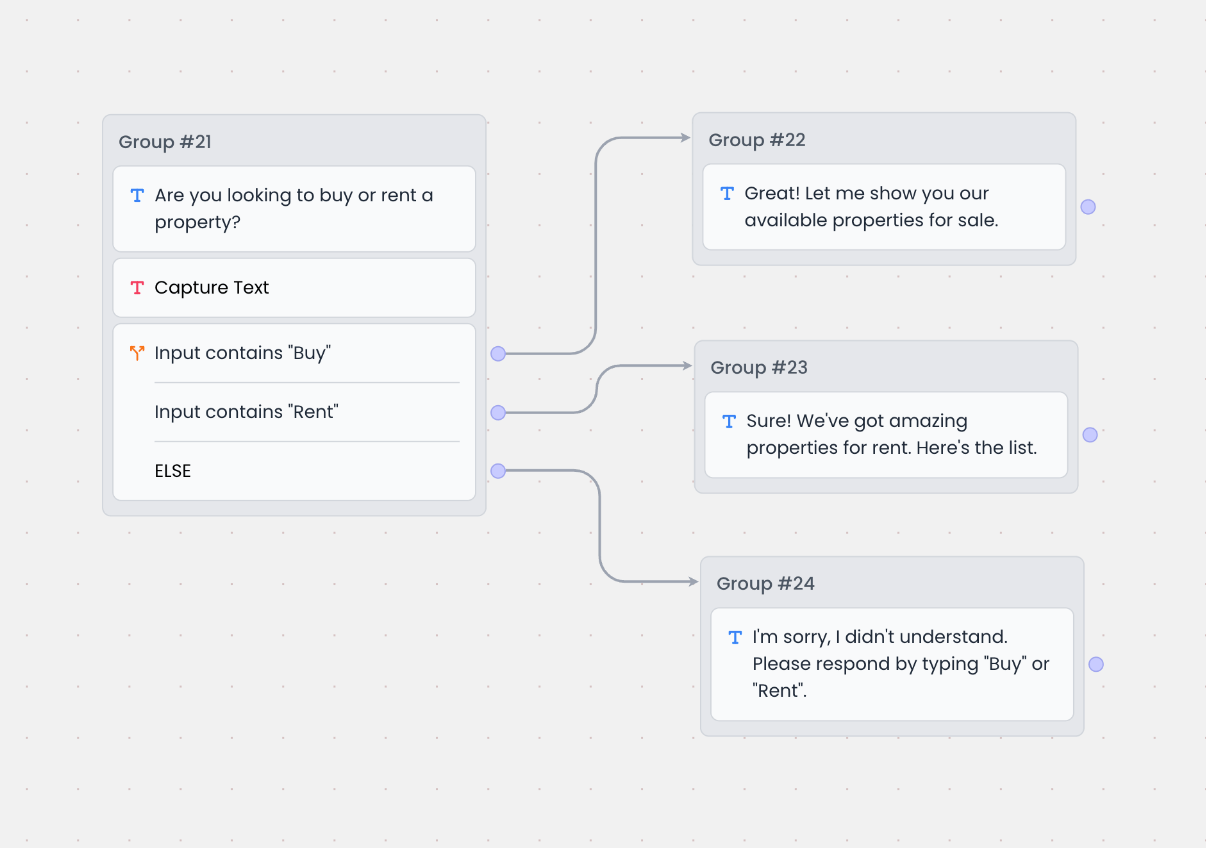 Based on the above, here's how the bot will respond:
* If the user input contains "buy," the bot will respond with `Great! Let me show you our available properties for sale`.
* If the user input contains "rent," the bot will respond with `Sure! We've got amazing properties for rent. Here's the list`.
* Else if none of the conditions are met, the bot will respond with `I'm sorry, I didn't understand. Please respond by typing "Buy" or "Rent"`.
### 2. Filtering job application candidates
Let's say a candidate is applying for a job through the bot and you want to qualify them based on the following criteria:
* Location: New York
* Willing to relocate: Yes
* Years of experience: 3 or more
You can set up the following conditions:
Based on the above, here's how the bot will respond:
* If the user input contains "buy," the bot will respond with `Great! Let me show you our available properties for sale`.
* If the user input contains "rent," the bot will respond with `Sure! We've got amazing properties for rent. Here's the list`.
* Else if none of the conditions are met, the bot will respond with `I'm sorry, I didn't understand. Please respond by typing "Buy" or "Rent"`.
### 2. Filtering job application candidates
Let's say a candidate is applying for a job through the bot and you want to qualify them based on the following criteria:
* Location: New York
* Willing to relocate: Yes
* Years of experience: 3 or more
You can set up the following conditions:
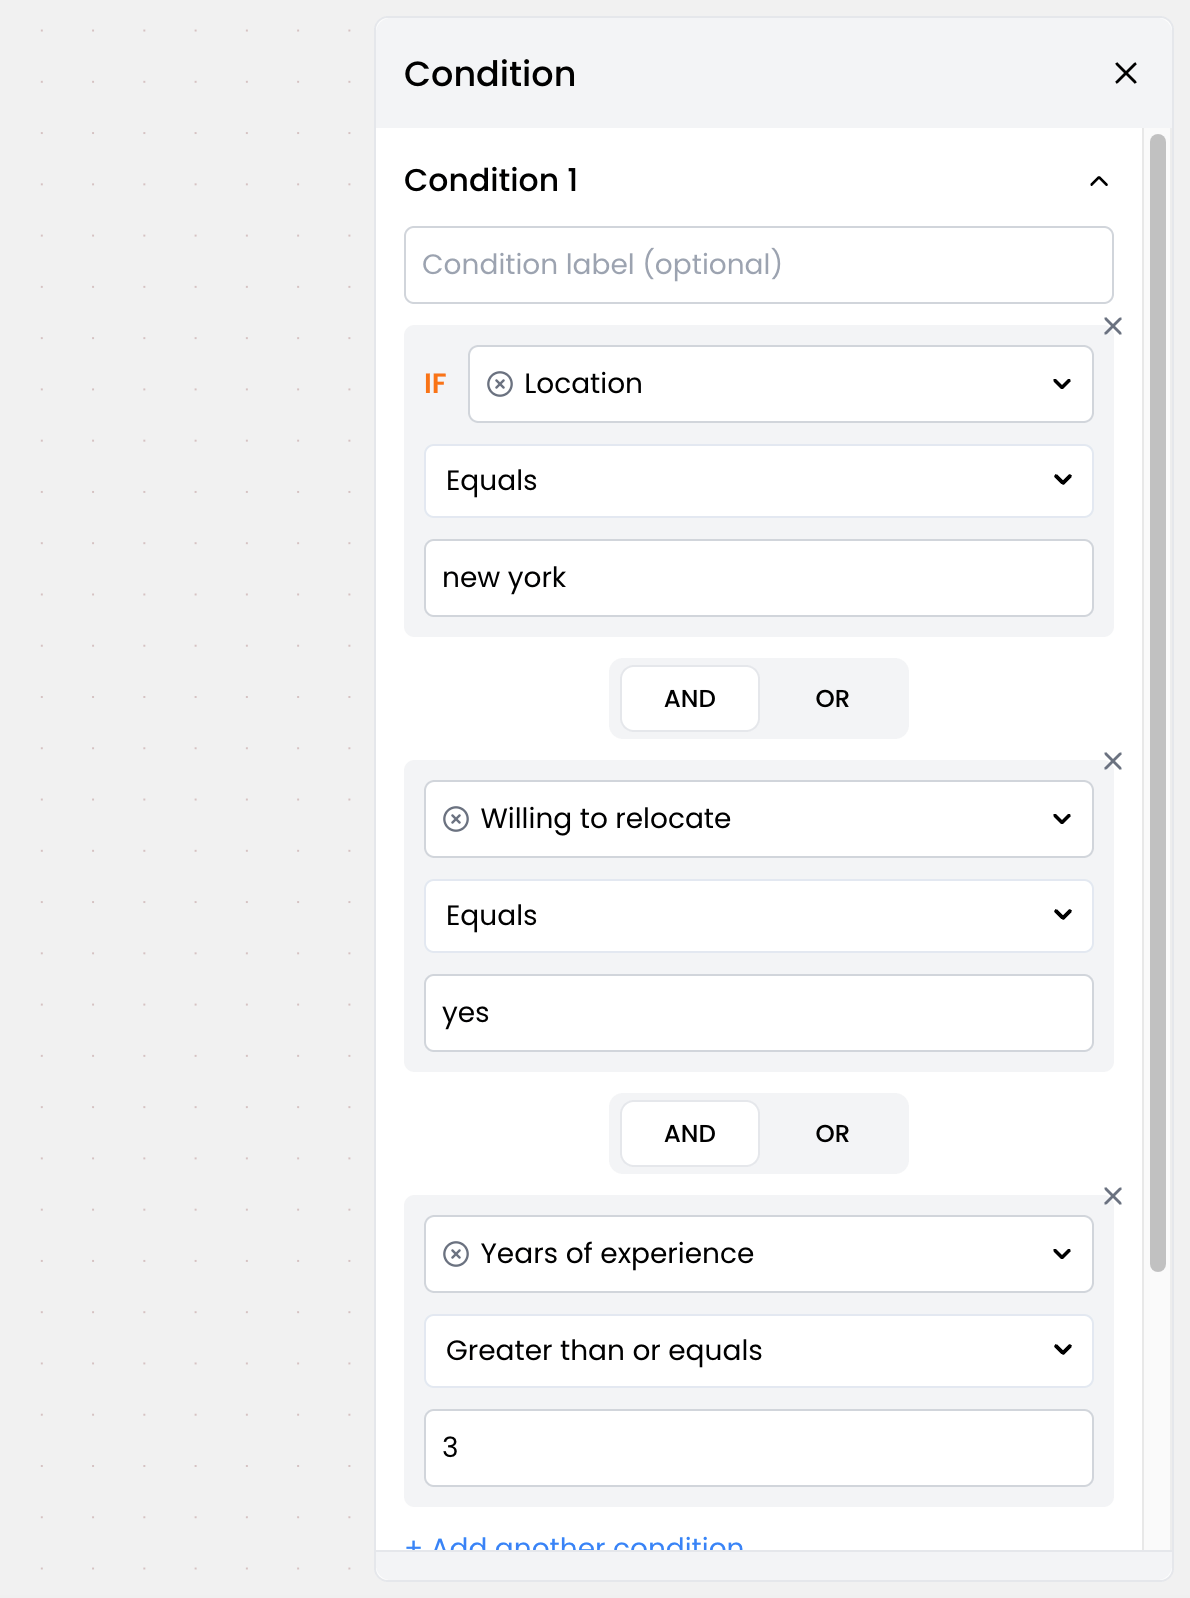 Once you have set up the conditions, you can define the paths for each condition. Here's an example:
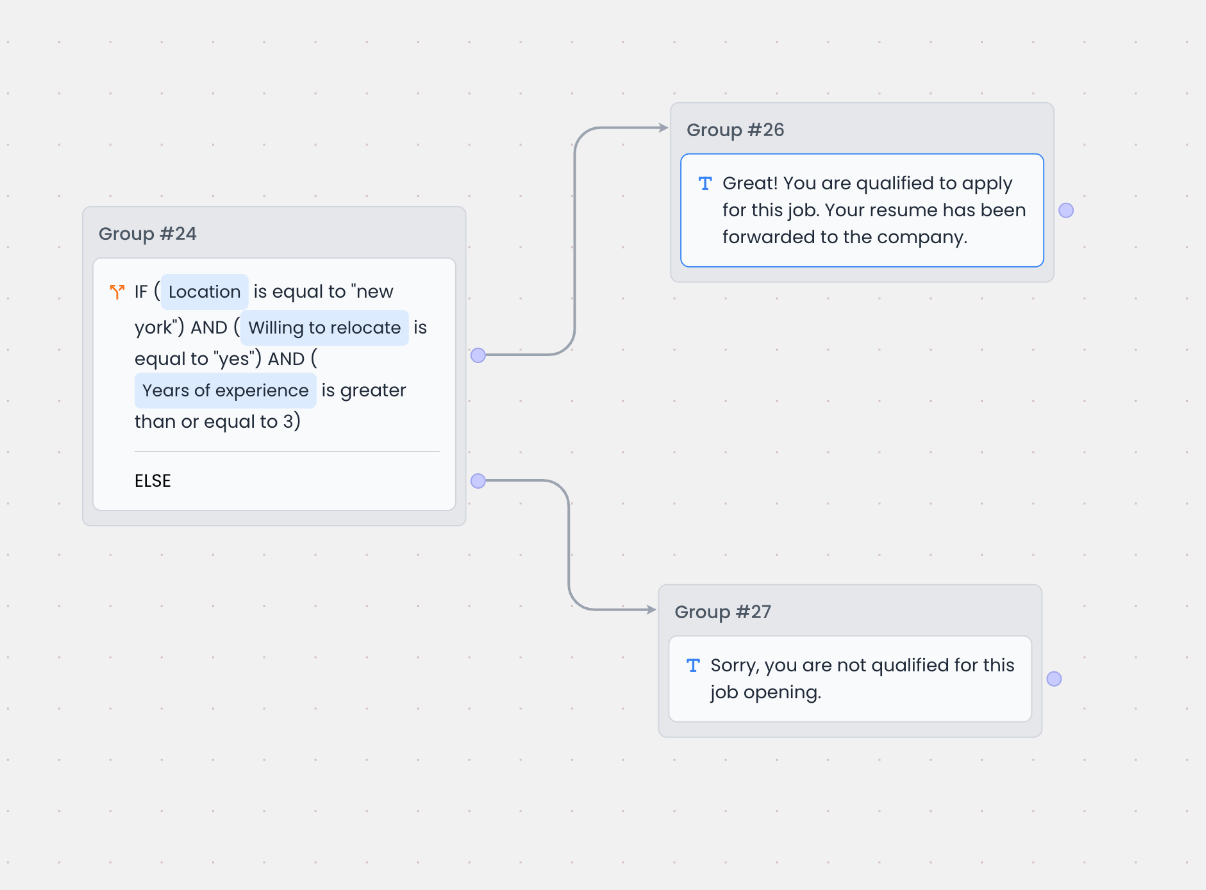 Based on the above, here's how the bot will respond:
* If the candidate is from New York, willing to relocate, and has 3 or more years of experience, the bot will respond with `Congratulations! You've been shortlisted for the next round of interviews`.
* Otherwise, the bot will respond with `Sorry, you are not qualified for this job opening. We'll keep your application on file for future opportunities`.
# Create Company
Source: https://docs.chatling.ai/builder/blocks/hubspot/create-company
Create companies in HubSpot from your chatbot.
Easily create new companies in HubSpot through your chatbot to streamline lead capture and keep your CRM up to date automatically.
## Configuration
1. Click the `Connect account` button under the Account field to connect your HubSpot account to Chatling or select an existing connection.
2. Under the `Company details` section, add the properties you want to set for the company. You can enter variables in certain fields for dynamic values.
3. To store the company's ID when the company is created, select a variable for the `Company ID` field under the `Save response` section.
# Create Contact
Source: https://docs.chatling.ai/builder/blocks/hubspot/create-contact
Create contacts in HubSpot from your chatbot.
Create contacts in HubSpot from your chatbot. This is useful for capturing leads and enriching your CRM data.
## Configuration
1. Click the `Connect account` button under the Account field to connect your HubSpot account to Chatling or select an existing connection.
2. Under the `Contact details` section, add the properties you want to set for the contact.
3. To store the contact's ID when the contact is created, select a variable for the `Contact ID` field under the `Save response` section.
# Create Ticket
Source: https://docs.chatling.ai/builder/blocks/hubspot/create-ticket
Create tickets in HubSpot from your chatbot.
Create tickets in HubSpot from your chatbot. This is useful for forwarding user queries to your support team or creating tickets for issues that require further investigation.
## Configuration
1. Click the `Connect account` button under the Account field to connect your HubSpot account to Chatling or select an existing connection.
2. Select the `Pipeline` where the ticket should be created.
3. Enter the ticket's details, such as the subject, status, and description. You can enter variables in all fields to make the ticket dynamic.
4. To store the ticket's ID when the ticket is created, select a variable for the `Ticket ID` field under the `Save response` section.
# HubSpot Integration
Source: https://docs.chatling.ai/builder/blocks/hubspot/overview
Integrate with HubSpot and manage your contacts, companies, and tickets directly from your chatbot.
The HubSpot integration enables you to connect your Chatling chatbot to your HubSpot account, allowing you to automate and manage key CRM workflows directly within conversations.
With this integration, your chatbot can:
* Create support tickets
* Create, update, and retrieve contacts
* Create and update companies
This allows your team to capture leads, resolve issues, and enrich CRM data without leaving the chat interface.
Based on the above, here's how the bot will respond:
* If the candidate is from New York, willing to relocate, and has 3 or more years of experience, the bot will respond with `Congratulations! You've been shortlisted for the next round of interviews`.
* Otherwise, the bot will respond with `Sorry, you are not qualified for this job opening. We'll keep your application on file for future opportunities`.
# Create Company
Source: https://docs.chatling.ai/builder/blocks/hubspot/create-company
Create companies in HubSpot from your chatbot.
Easily create new companies in HubSpot through your chatbot to streamline lead capture and keep your CRM up to date automatically.
## Configuration
1. Click the `Connect account` button under the Account field to connect your HubSpot account to Chatling or select an existing connection.
2. Under the `Company details` section, add the properties you want to set for the company. You can enter variables in certain fields for dynamic values.
3. To store the company's ID when the company is created, select a variable for the `Company ID` field under the `Save response` section.
# Create Contact
Source: https://docs.chatling.ai/builder/blocks/hubspot/create-contact
Create contacts in HubSpot from your chatbot.
Create contacts in HubSpot from your chatbot. This is useful for capturing leads and enriching your CRM data.
## Configuration
1. Click the `Connect account` button under the Account field to connect your HubSpot account to Chatling or select an existing connection.
2. Under the `Contact details` section, add the properties you want to set for the contact.
3. To store the contact's ID when the contact is created, select a variable for the `Contact ID` field under the `Save response` section.
# Create Ticket
Source: https://docs.chatling.ai/builder/blocks/hubspot/create-ticket
Create tickets in HubSpot from your chatbot.
Create tickets in HubSpot from your chatbot. This is useful for forwarding user queries to your support team or creating tickets for issues that require further investigation.
## Configuration
1. Click the `Connect account` button under the Account field to connect your HubSpot account to Chatling or select an existing connection.
2. Select the `Pipeline` where the ticket should be created.
3. Enter the ticket's details, such as the subject, status, and description. You can enter variables in all fields to make the ticket dynamic.
4. To store the ticket's ID when the ticket is created, select a variable for the `Ticket ID` field under the `Save response` section.
# HubSpot Integration
Source: https://docs.chatling.ai/builder/blocks/hubspot/overview
Integrate with HubSpot and manage your contacts, companies, and tickets directly from your chatbot.
The HubSpot integration enables you to connect your Chatling chatbot to your HubSpot account, allowing you to automate and manage key CRM workflows directly within conversations.
With this integration, your chatbot can:
* Create support tickets
* Create, update, and retrieve contacts
* Create and update companies
This allows your team to capture leads, resolve issues, and enrich CRM data without leaving the chat interface.
 Every button in the block has a connector that allows you to link it to other blocks.
# Configuration
Buttons have the following configuration options:
* **Label**: The text that appears on the button.
* **Store selected button in variable**: The variable where the selected button's value will be stored. For example, if the user selects the "Yes" button, you can store the value "Yes" in a variable for later use.
Every button in the block has a connector that allows you to link it to other blocks.
# Configuration
Buttons have the following configuration options:
* **Label**: The text that appears on the button.
* **Store selected button in variable**: The variable where the selected button's value will be stored. For example, if the user selects the "Yes" button, you can store the value "Yes" in a variable for later use.
 ## Connecting buttons
Buttons must be connected to other blocks so that the chatbot can respond to the user's selection.
To connect a button, click the connector next to it and drag it to the group you want to connect it to.
In the example below, when the user clicks the "Software Development" button, the chatbot will display the "Sure thing! Our team can help..." message and continues the flow from there.
## Connecting buttons
Buttons must be connected to other blocks so that the chatbot can respond to the user's selection.
To connect a button, click the connector next to it and drag it to the group you want to connect it to.
In the example below, when the user clicks the "Software Development" button, the chatbot will display the "Sure thing! Our team can help..." message and continues the flow from there.
 # Date/Time Block
Source: https://docs.chatling.ai/builder/blocks/inputs/date
Learn about the Date/Time input block and how to set it up in the Builder.
The Date/Time block is used to collect the date and time from users. You can use this block to ask users for dates, times, or date-time combinations.
## Configuration
The Date/Time block has the following configuration options:
* **Store answer in variable**: The variable where the user's input will be stored.
* **Input required**: Whether the user's input is mandatory. If disabled, a Skip button will appear, allowing users to skip the input.
* **Format**: The type of input the block will accept. You can choose from the following:
* Date
* Time
* Date & Time
* **Min**: The minimum value the user can input.
* **Max**: The maximum value the user can input.
# Date/Time Block
Source: https://docs.chatling.ai/builder/blocks/inputs/date
Learn about the Date/Time input block and how to set it up in the Builder.
The Date/Time block is used to collect the date and time from users. You can use this block to ask users for dates, times, or date-time combinations.
## Configuration
The Date/Time block has the following configuration options:
* **Store answer in variable**: The variable where the user's input will be stored.
* **Input required**: Whether the user's input is mandatory. If disabled, a Skip button will appear, allowing users to skip the input.
* **Format**: The type of input the block will accept. You can choose from the following:
* Date
* Time
* Date & Time
* **Min**: The minimum value the user can input.
* **Max**: The maximum value the user can input.
 # Email Block
Source: https://docs.chatling.ai/builder/blocks/inputs/email
Learn about the Email input block and how to set it up in the Builder.
The Email block is used to capture a valid email address from the user. You can use this block to collect email addresses of users for various purposes, such as saving them as leads, sending newsletters, or providing account-related information.
## Configuration
# Email Block
Source: https://docs.chatling.ai/builder/blocks/inputs/email
Learn about the Email input block and how to set it up in the Builder.
The Email block is used to capture a valid email address from the user. You can use this block to collect email addresses of users for various purposes, such as saving them as leads, sending newsletters, or providing account-related information.
## Configuration
 The Email block has the following configuration options:
* **Store email in variable**: The variable where the user's email address will be stored.
* **Input required**: Determine whether the user must provide an email address to proceed. If this option is disabled, a Skip button will appear, allowing users to skip the input.
* **Disallowed domains**: Specify a list of email domains that are not allowed. Users will not be able to enter email addresses associated with these domains.
* **[Quick replies](/builder/block-options/quick-replies)**
# Form Block
Source: https://docs.chatling.ai/builder/blocks/inputs/form
Learn about the Form input block and how to set it up in the Builder.
The Form block is used to collect multiple pieces of information from users in a structured way. You can use this block to create forms for lead generation, user feedback, surveys, and more.
You can add multiple fields to the form and configure each field to collect different types of information, such as text, email, phone number, and more.
The Email block has the following configuration options:
* **Store email in variable**: The variable where the user's email address will be stored.
* **Input required**: Determine whether the user must provide an email address to proceed. If this option is disabled, a Skip button will appear, allowing users to skip the input.
* **Disallowed domains**: Specify a list of email domains that are not allowed. Users will not be able to enter email addresses associated with these domains.
* **[Quick replies](/builder/block-options/quick-replies)**
# Form Block
Source: https://docs.chatling.ai/builder/blocks/inputs/form
Learn about the Form input block and how to set it up in the Builder.
The Form block is used to collect multiple pieces of information from users in a structured way. You can use this block to create forms for lead generation, user feedback, surveys, and more.
You can add multiple fields to the form and configure each field to collect different types of information, such as text, email, phone number, and more.
 ## Configuration
The Form block has the following configuration options:
* **Fields**: Add and configure the fields you want to include in the form.
* **Label**: The label of the field to indicate what information is being collected.
* **Type**: Type of the field, such as Text, Email, Number, etc. This prevents users from entering invalid data.
* **Store user input in variable**: The variable where the user's response to the field will be stored.
## Configuration
The Form block has the following configuration options:
* **Fields**: Add and configure the fields you want to include in the form.
* **Label**: The label of the field to indicate what information is being collected.
* **Type**: Type of the field, such as Text, Email, Number, etc. This prevents users from entering invalid data.
* **Store user input in variable**: The variable where the user's response to the field will be stored.
 # Number Block
Source: https://docs.chatling.ai/builder/blocks/inputs/number
Learn about the Number input block and how to set it up in the Builder.
The Number block is used to collect numerical input from users. You can use this block to ask users for numbers, such as quantities, prices, or percentages.
## Configuration
The Number block has the following configuration options:
* **Store answer in variable**: The variable where the user's input will be stored.
* **Input required**: Whether the user's input is mandatory. If disabled, a Skip button will appear, allowing users to skip the input.
* **Date type**: The type of number the block will accept. You can choose from the following options:
* \*\*Number (Integer/Decimal): Accepts any number, including whole numbers and decimals.
* **Integer**: Accepts only whole numbers.
* **Min**: The minimum value the user can input.
* **Max**: The maximum value the user can input.
* **[Quick replies](/builder/block-options/quick-replies)**
# Number Block
Source: https://docs.chatling.ai/builder/blocks/inputs/number
Learn about the Number input block and how to set it up in the Builder.
The Number block is used to collect numerical input from users. You can use this block to ask users for numbers, such as quantities, prices, or percentages.
## Configuration
The Number block has the following configuration options:
* **Store answer in variable**: The variable where the user's input will be stored.
* **Input required**: Whether the user's input is mandatory. If disabled, a Skip button will appear, allowing users to skip the input.
* **Date type**: The type of number the block will accept. You can choose from the following options:
* \*\*Number (Integer/Decimal): Accepts any number, including whole numbers and decimals.
* **Integer**: Accepts only whole numbers.
* **Min**: The minimum value the user can input.
* **Max**: The maximum value the user can input.
* **[Quick replies](/builder/block-options/quick-replies)**
 # Phone Block
Source: https://docs.chatling.ai/builder/blocks/inputs/phone
Learn about the Phone input block and how to set it up in the Builder.
The Phone block is used to collect phone numbers from users.
At the moment, the Phone block is not fully developed and doesn't have the ability to validate phone numbers or provide option for users to select their country code. We are working on improving this block and will update this documentation once the changes are live.
# Text Block
Source: https://docs.chatling.ai/builder/blocks/inputs/text
Learn about the Text input block and how to set it up in the Builder.
The Text block is used to capture user input in the form of text. You can use this block to prompt users for answers and collect the necessary information.
## Configuration
# Phone Block
Source: https://docs.chatling.ai/builder/blocks/inputs/phone
Learn about the Phone input block and how to set it up in the Builder.
The Phone block is used to collect phone numbers from users.
At the moment, the Phone block is not fully developed and doesn't have the ability to validate phone numbers or provide option for users to select their country code. We are working on improving this block and will update this documentation once the changes are live.
# Text Block
Source: https://docs.chatling.ai/builder/blocks/inputs/text
Learn about the Text input block and how to set it up in the Builder.
The Text block is used to capture user input in the form of text. You can use this block to prompt users for answers and collect the necessary information.
## Configuration
 You can configure the following settings for the Text block:
* **Store answer in variable**: Choose a variable to store the user's response. You can use the stored data in other blocks to personalize the conversation.
* **Input required**: Determine whether the user must provide an answer to proceed. If this option is disabled, a Skip button will appear, allowing users to skip the input.
* **[Voice Input](/builder/block-options/voice-input)**: Toggle on the Voice Input option to allow users to send messages using voice.
* **Min. characters**: The minimum number of characters the user must enter.
* **Max. characters**: The maximum number of characters the user can enter.
* **[Quick replies](/builder/block-options/quick-replies)**
# URL Block
Source: https://docs.chatling.ai/builder/blocks/inputs/url
Learn about the URL input block and how to set it up in the Builder.
The URL block is used to collect URLs from users. It validates the user's input to ensure that it is a valid URL.
You can use this block to ask users for website URLs, social media profiles, or any other web addresses.
## Configuration
The URL block has the following configuration options:
* **Store answer in variable**: The variable where the user's input will be stored.
* **Input required**: Whether the user's input is mandatory. If disabled, a Skip button will appear, allowing users to skip the input.
* **[Quick replies](/builder/block-options/quick-replies)**
You can configure the following settings for the Text block:
* **Store answer in variable**: Choose a variable to store the user's response. You can use the stored data in other blocks to personalize the conversation.
* **Input required**: Determine whether the user must provide an answer to proceed. If this option is disabled, a Skip button will appear, allowing users to skip the input.
* **[Voice Input](/builder/block-options/voice-input)**: Toggle on the Voice Input option to allow users to send messages using voice.
* **Min. characters**: The minimum number of characters the user must enter.
* **Max. characters**: The maximum number of characters the user can enter.
* **[Quick replies](/builder/block-options/quick-replies)**
# URL Block
Source: https://docs.chatling.ai/builder/blocks/inputs/url
Learn about the URL input block and how to set it up in the Builder.
The URL block is used to collect URLs from users. It validates the user's input to ensure that it is a valid URL.
You can use this block to ask users for website URLs, social media profiles, or any other web addresses.
## Configuration
The URL block has the following configuration options:
* **Store answer in variable**: The variable where the user's input will be stored.
* **Input required**: Whether the user's input is mandatory. If disabled, a Skip button will appear, allowing users to skip the input.
* **[Quick replies](/builder/block-options/quick-replies)**
 # Blocks
Source: https://docs.chatling.ai/builder/blocks/overview
Blocks are the core components of every chatbot. Learn how to use them to build your chatbot's conversational flow.
With Blocks, you can build the conversational flow of your chatbot. They define the sequence in which the chatbot interacts with users and responds to their queries.
You can add blocks to the canvas and connect them to create a flow. Each block performs a specific action, such as sending a message, capturing user input, or integrating with external services.
# Blocks
Source: https://docs.chatling.ai/builder/blocks/overview
Blocks are the core components of every chatbot. Learn how to use them to build your chatbot's conversational flow.
With Blocks, you can build the conversational flow of your chatbot. They define the sequence in which the chatbot interacts with users and responds to their queries.
You can add blocks to the canvas and connect them to create a flow. Each block performs a specific action, such as sending a message, capturing user input, or integrating with external services.
 ## Types of blocks
Here are the different categories of blocks that are available:
* **Send message**: Display messages to the user.
* **Capture response**: Capture answers from the user, such as text, email, form submission, and more.
* **AI**: Use AI to generate responses to user's questions.
* **Condition**: Add conditions and logic to your flow.
* **Action**: Perform actions such as sending emails, setting variables, and more.
* **Trigger**: Trigger events automatically based on user's actions.
* **Zendesk**: Connect your chatbot to Zendesk to create tickets.
* **Cal.com**: Integration for Cal.com to book events and appointments.
## Groups
Blocks can be grouped together for better organization and for creating connections between them. A group is created when you drop a block onto an empty area of the canvas. You can then drag other blocks into the group to organize them.
## Types of blocks
Here are the different categories of blocks that are available:
* **Send message**: Display messages to the user.
* **Capture response**: Capture answers from the user, such as text, email, form submission, and more.
* **AI**: Use AI to generate responses to user's questions.
* **Condition**: Add conditions and logic to your flow.
* **Action**: Perform actions such as sending emails, setting variables, and more.
* **Trigger**: Trigger events automatically based on user's actions.
* **Zendesk**: Connect your chatbot to Zendesk to create tickets.
* **Cal.com**: Integration for Cal.com to book events and appointments.
## Groups
Blocks can be grouped together for better organization and for creating connections between them. A group is created when you drop a block onto an empty area of the canvas. You can then drag other blocks into the group to organize them.
 {/* ## Send message
The `Send message` blocks are used to display messages to the user. You can use them to provide information, ask questions, or guide the user through the conversation.
Here are some of the blocks available:
- **[Text](/builder/blocks/send/text)**: Display a text message.
- **[Image](/builder/blocks/send/image)**: Display an image.
- **[Video](/builder/blocks/send/video)**: Display a video.
- **[Audio](/builder/blocks/send/audio)**: Play an audio file.
- **[Carousel](/builder/blocks/send/carousel)**: Display a carousel of cards.
## Capture response
The `Capture response` blocks are used to receive input from the user. You can use them to capture text, email, phone number, and more.
Here are the available blocks:
- **[Buttons](/builder/blocks/inputs/buttons)**: Display a set of buttons for the user to choose from.
- **[Text](/builder/blocks/inputs/text)**: Capture text input from the user.
- **[Email](/builder/blocks/inputs/email)**: Capture a valid email address from the user.
- **[Form](/builder/blocks/inputs/form)**: Displays a form for the user to fill out.
- **[Phone](/builder/blocks/inputs/phone)**: Capture a valid phone number from the user.
- **[Date](/builder/blocks/inputs/date)**: Capture a valid date from the user.
- **[URL](/builder/blocks/inputs/url)**: Capture a valid URL from the user.
- **[Number](/builder/blocks/inputs/number)**: Capture integer or decimal numbers from the user.
## AI
The `AI` blocks are related to the AI capabilities of the chatbot.
Here are the available blocks:
- **[AI Response](/builder/blocks/ai/ai-response)**: Generate an AI response using the knowledge base or the AI model's pre-trained data.
## Logic
The `Logic` blocks are used to add conditions and logic to your chatbot's flow. You can use them to create branches in the conversation based on user input or other conditions.
Here are the available blocks:
- **[Condition](/builder/blocks/logic/condition)**: Define the flow of the conversation based on a set of conditions. You can add multiple conditions and define the actions to be taken for each condition.
## Integration
The `Integration` blocks are used to connect your chatbot to external services.
Here are the available blocks:
- **[HTTP Request](/builder/blocks/integration/http-request)**: Send an HTTP request to an external web service and process the response.
To add a block, open the Blocks menu from the sidebar and drag the desired block onto the canvas.

You can then connect the blocks by dragging the connectors between them. This defines the sequence in which the blocks are executed during the conversation.
 */}
# Audio Block
Source: https://docs.chatling.ai/builder/blocks/send/audio
Learn about the Audio block and how to set it up in the builder
The Audio block allows you to play an audio file to the user in the conversation. It can be used for various purposes, such as playing a welcome message, providing information, or playing music.
## Adding an audio file
To add an audio file, you can either upload an audio file directly or provide a link to a file hosted online. The supported audio formats are `MP3`, `WAV`, and `OGG`.
{/* ## Send message
The `Send message` blocks are used to display messages to the user. You can use them to provide information, ask questions, or guide the user through the conversation.
Here are some of the blocks available:
- **[Text](/builder/blocks/send/text)**: Display a text message.
- **[Image](/builder/blocks/send/image)**: Display an image.
- **[Video](/builder/blocks/send/video)**: Display a video.
- **[Audio](/builder/blocks/send/audio)**: Play an audio file.
- **[Carousel](/builder/blocks/send/carousel)**: Display a carousel of cards.
## Capture response
The `Capture response` blocks are used to receive input from the user. You can use them to capture text, email, phone number, and more.
Here are the available blocks:
- **[Buttons](/builder/blocks/inputs/buttons)**: Display a set of buttons for the user to choose from.
- **[Text](/builder/blocks/inputs/text)**: Capture text input from the user.
- **[Email](/builder/blocks/inputs/email)**: Capture a valid email address from the user.
- **[Form](/builder/blocks/inputs/form)**: Displays a form for the user to fill out.
- **[Phone](/builder/blocks/inputs/phone)**: Capture a valid phone number from the user.
- **[Date](/builder/blocks/inputs/date)**: Capture a valid date from the user.
- **[URL](/builder/blocks/inputs/url)**: Capture a valid URL from the user.
- **[Number](/builder/blocks/inputs/number)**: Capture integer or decimal numbers from the user.
## AI
The `AI` blocks are related to the AI capabilities of the chatbot.
Here are the available blocks:
- **[AI Response](/builder/blocks/ai/ai-response)**: Generate an AI response using the knowledge base or the AI model's pre-trained data.
## Logic
The `Logic` blocks are used to add conditions and logic to your chatbot's flow. You can use them to create branches in the conversation based on user input or other conditions.
Here are the available blocks:
- **[Condition](/builder/blocks/logic/condition)**: Define the flow of the conversation based on a set of conditions. You can add multiple conditions and define the actions to be taken for each condition.
## Integration
The `Integration` blocks are used to connect your chatbot to external services.
Here are the available blocks:
- **[HTTP Request](/builder/blocks/integration/http-request)**: Send an HTTP request to an external web service and process the response.
To add a block, open the Blocks menu from the sidebar and drag the desired block onto the canvas.

You can then connect the blocks by dragging the connectors between them. This defines the sequence in which the blocks are executed during the conversation.
 */}
# Audio Block
Source: https://docs.chatling.ai/builder/blocks/send/audio
Learn about the Audio block and how to set it up in the builder
The Audio block allows you to play an audio file to the user in the conversation. It can be used for various purposes, such as playing a welcome message, providing information, or playing music.
## Adding an audio file
To add an audio file, you can either upload an audio file directly or provide a link to a file hosted online. The supported audio formats are `MP3`, `WAV`, and `OGG`.
 You can enable the `Autoplay` option to automatically play the audio file when the block is displayed to the user.
# Carousel Block
Source: https://docs.chatling.ai/builder/blocks/send/carousel
Learn about the Carousel block and how to set it up in the builder
The Carousel block allows you to display a carousel of cards to the user. Each card can contain an image, title, description, and buttons.
Carousels are a great way to showcase multiple products, services, or information in a visually appealing format.
You can enable the `Autoplay` option to automatically play the audio file when the block is displayed to the user.
# Carousel Block
Source: https://docs.chatling.ai/builder/blocks/send/carousel
Learn about the Carousel block and how to set it up in the builder
The Carousel block allows you to display a carousel of cards to the user. Each card can contain an image, title, description, and buttons.
Carousels are a great way to showcase multiple products, services, or information in a visually appealing format.
 ## Adding a carousel
To add a carousel, you can create multiple cards within the block editor. For each card, you can set an image, title, description, and buttons.
You can add as many cards as you like to the carousel. Users can swipe through the cards to view the content.
## Adding a carousel
To add a carousel, you can create multiple cards within the block editor. For each card, you can set an image, title, description, and buttons.
You can add as many cards as you like to the carousel. Users can swipe through the cards to view the content.
 # Image Block
Source: https://docs.chatling.ai/builder/blocks/send/image
Learn about the Image block and how to set it up in the builder
You can use the Image block to display an image to the user. It can be used for various purposes, such as showing product images, providing visual instructions, or adding visual elements to your chatbot conversation.
## Adding an image
You can upload an image or insert its URL. The support image formats are `JPG/JPEG`, `PNG`, `WEBP`, and `GIF`.
# Image Block
Source: https://docs.chatling.ai/builder/blocks/send/image
Learn about the Image block and how to set it up in the builder
You can use the Image block to display an image to the user. It can be used for various purposes, such as showing product images, providing visual instructions, or adding visual elements to your chatbot conversation.
## Adding an image
You can upload an image or insert its URL. The support image formats are `JPG/JPEG`, `PNG`, `WEBP`, and `GIF`.
 # Text Block
Source: https://docs.chatling.ai/builder/blocks/send/text
Learn about the Text block and how to set it up in the builder
The Text block is used to display a text message to the user. You can use it to provide information, ask questions, or guide the user through the conversation.
## Adding text
Once you add a Text block to the canvas, click on it to open the block editor. You can then enter your message in the text editor and apply formatting using the toolbar.
# Text Block
Source: https://docs.chatling.ai/builder/blocks/send/text
Learn about the Text block and how to set it up in the builder
The Text block is used to display a text message to the user. You can use it to provide information, ask questions, or guide the user through the conversation.
## Adding text
Once you add a Text block to the canvas, click on it to open the block editor. You can then enter your message in the text editor and apply formatting using the toolbar.
 ## Inserting variables
You can insert variables into your text message to make it more dynamic and personalized.
To insert a variable, type `{` and a list of available variables will appear. Select the variable you want to insert and it will be added to the text message.
## Inserting variables
You can insert variables into your text message to make it more dynamic and personalized.
To insert a variable, type `{` and a list of available variables will appear. Select the variable you want to insert and it will be added to the text message.
 For example, if you have captured the user's name earlier in the conversation and stored it in a variable called `contact_name`, you can insert it into the text message by typing `{contact_name}`. When the message is sent to the user, the variable will be replaced with the user's name.
 # URL Button Block
Source: https://docs.chatling.ai/builder/blocks/send/url-button
Learn about the URL Button block and how to set it up in the builder
The URL Button block displays buttons that redirect users to other pages.
# URL Button Block
Source: https://docs.chatling.ai/builder/blocks/send/url-button
Learn about the URL Button block and how to set it up in the builder
The URL Button block displays buttons that redirect users to other pages.
 ## Adding URL buttons
1. Drag and drop the URL Button block on the canvas.
## Adding URL buttons
1. Drag and drop the URL Button block on the canvas.
 2. Click on the block to edit it.
3. Click `Add button` button to add a new button.
2. Click on the block to edit it.
3. Click `Add button` button to add a new button.
 4. Enter the button label and URL. The label is the text that will be displayed on the button.
 5. To add more buttons, click the `+` icon.
 # Video Block
Source: https://docs.chatling.ai/builder/blocks/send/video
Learn about the Video block and how to set it up in the builder
The Video block allows you to display a video to the user in the conversation. You can add a video from YouTube, Vimeo, or any other video hosting platform, or you can paste the direct link to a video file.
For video platforms that support embedding, Chatling will automatically embed the video in the conversation. Here's an example:
# Video Block
Source: https://docs.chatling.ai/builder/blocks/send/video
Learn about the Video block and how to set it up in the builder
The Video block allows you to display a video to the user in the conversation. You can add a video from YouTube, Vimeo, or any other video hosting platform, or you can paste the direct link to a video file.
For video platforms that support embedding, Chatling will automatically embed the video in the conversation. Here's an example:
 ## Adding a video
Adding a video is simple. Just paste the URL to the video in the block editor and the chatbot will automatically embed it in the conversation.
## Adding a video
Adding a video is simple. Just paste the URL to the video in the block editor and the chatbot will automatically embed it in the conversation.
 # Triggers
Source: https://docs.chatling.ai/builder/blocks/trigger/overview
Learn about triggers in Chatling and how to use them effectively in your chatbot flows.
Triggers are events that automatically start a specific flow in your chatbot based on user behavior. They enable you to create more dynamic and responsive chatbot experiences.
## Types of Triggers
The following triggers are currently available:
1. Returning Visitor: This trigger is activated when a visitor returns to your website after a period of time.
2. Specific Webpage Opened: This trigger is activated when a visitor opens a specific page on your website.
3. Intent: Triggered when there's a matching intent in the user's message.
## How Triggers Work
Triggers are automatically invoked when their conditions are met. When a trigger is activated, the chatbot will follow the conversation flow connected to that trigger in the builder.
For example, if you have a "Returning User" trigger set up, and a user comes back to your website after being away for a certain period, the chatbot will automatically start the conversation flow linked to this trigger.
## How to Use Triggers
To use triggers in your chatbot:
1. Open your chatbot builder.
2. From the Blocks page in the sidebar, look for the "Triggers" section.
3. Drag and drop the desired trigger onto your canvas.
4. Connect the trigger to the subsequent blocks in your conversation flow.
5. Configure the trigger settings if necessary (e.g. specifying the trigger frequency).
# Create Ticket
Source: https://docs.chatling.ai/builder/blocks/zendesk/create-ticket
Learn how to create tickets in Zendesk from your chatbot.
Create tickets in Zendesk directly from your chatbot using this block. This is useful for forwarding user queries to your support team or creating tickets for issues that require further investigation.
## Configuration
* **Account**: The Zendesk account to create the ticket in.
* **Subject**: The subject of the ticket.
* **Priority**: The priority of the ticket, such as Low, Normal, High, or Urgent.
* **Requester name**: The name of the user who should be associated with the ticket. Normally, this should be the customer's name.
* **Requester email**: The email address of the user who should be associated with the ticket. Normally, this should be the customer's email address.
* **Description**: The description of the ticket.
# Canvas
Source: https://docs.chatling.ai/builder/canvas
Learn about the canvas and how to navigate and interact with it.

The canvas is where you design the conversational flow of your chatbot. You can add [blocks](/builder/blocks/overview), connect them, and define the logic for how the chatbot responds to user inputs.
To move around the canvas, click and drag an empty area. To zoom in or out, use your mouse scroll wheel or the zoom controls in top toolbar.
All chatbots contain a default `Start` block, which is the entry point of the conversation. From there, you can add blocks to create the flow.
# Chatbot Builder
Source: https://docs.chatling.ai/builder/overview
Learn about the Builder and how to create conversational flows for your chatbot.
Chatling's Builder is a visual interface that allows you to create and manage conversational flows for your chatbot. It's where you define how the chatbot interacts with users and responds to their queries.
## Builder Interface

The Builder consists of the following components:
* **[Canvas](/builder/canvas)**: The main area where you add and connect blocks to build the conversational flow.
* **[Sidebar](/builder/sidebar)**: Contains menus for adding blocks, managing variables, and configuring the AI and general settings.
* **Toolbar**: Appears at the top and contains controls for zooming in/out, saving, preview, and publishing the chatbot.
In the next sections, we'll explore each component of the Builder in detail and learn how to create conversational flows for your chatbot.
# Publish your chatbot
Source: https://docs.chatling.ai/builder/publish-your-chatbot
Learn how to publish your chatbot and make it live.
Once you've built your chatbot and tested it thoroughly, you can publish it to make it live.
By publishing, any changes you've made to the chatbot will become available to users where the chatbot is embedded.
To publish your chatbot, click the `Publish` button in the top right corner of the Builder.

# Save your work
Source: https://docs.chatling.ai/builder/save-your-work
Learn how to save your changes in the Builder.
Any changes you make to your chatbot's flow in the [Builder](/builder/overview) is saved automatically. You can also save it manually by clicking the `Save` button in the top right side of the screen.
# Triggers
Source: https://docs.chatling.ai/builder/blocks/trigger/overview
Learn about triggers in Chatling and how to use them effectively in your chatbot flows.
Triggers are events that automatically start a specific flow in your chatbot based on user behavior. They enable you to create more dynamic and responsive chatbot experiences.
## Types of Triggers
The following triggers are currently available:
1. Returning Visitor: This trigger is activated when a visitor returns to your website after a period of time.
2. Specific Webpage Opened: This trigger is activated when a visitor opens a specific page on your website.
3. Intent: Triggered when there's a matching intent in the user's message.
## How Triggers Work
Triggers are automatically invoked when their conditions are met. When a trigger is activated, the chatbot will follow the conversation flow connected to that trigger in the builder.
For example, if you have a "Returning User" trigger set up, and a user comes back to your website after being away for a certain period, the chatbot will automatically start the conversation flow linked to this trigger.
## How to Use Triggers
To use triggers in your chatbot:
1. Open your chatbot builder.
2. From the Blocks page in the sidebar, look for the "Triggers" section.
3. Drag and drop the desired trigger onto your canvas.
4. Connect the trigger to the subsequent blocks in your conversation flow.
5. Configure the trigger settings if necessary (e.g. specifying the trigger frequency).
# Create Ticket
Source: https://docs.chatling.ai/builder/blocks/zendesk/create-ticket
Learn how to create tickets in Zendesk from your chatbot.
Create tickets in Zendesk directly from your chatbot using this block. This is useful for forwarding user queries to your support team or creating tickets for issues that require further investigation.
## Configuration
* **Account**: The Zendesk account to create the ticket in.
* **Subject**: The subject of the ticket.
* **Priority**: The priority of the ticket, such as Low, Normal, High, or Urgent.
* **Requester name**: The name of the user who should be associated with the ticket. Normally, this should be the customer's name.
* **Requester email**: The email address of the user who should be associated with the ticket. Normally, this should be the customer's email address.
* **Description**: The description of the ticket.
# Canvas
Source: https://docs.chatling.ai/builder/canvas
Learn about the canvas and how to navigate and interact with it.

The canvas is where you design the conversational flow of your chatbot. You can add [blocks](/builder/blocks/overview), connect them, and define the logic for how the chatbot responds to user inputs.
To move around the canvas, click and drag an empty area. To zoom in or out, use your mouse scroll wheel or the zoom controls in top toolbar.
All chatbots contain a default `Start` block, which is the entry point of the conversation. From there, you can add blocks to create the flow.
# Chatbot Builder
Source: https://docs.chatling.ai/builder/overview
Learn about the Builder and how to create conversational flows for your chatbot.
Chatling's Builder is a visual interface that allows you to create and manage conversational flows for your chatbot. It's where you define how the chatbot interacts with users and responds to their queries.
## Builder Interface

The Builder consists of the following components:
* **[Canvas](/builder/canvas)**: The main area where you add and connect blocks to build the conversational flow.
* **[Sidebar](/builder/sidebar)**: Contains menus for adding blocks, managing variables, and configuring the AI and general settings.
* **Toolbar**: Appears at the top and contains controls for zooming in/out, saving, preview, and publishing the chatbot.
In the next sections, we'll explore each component of the Builder in detail and learn how to create conversational flows for your chatbot.
# Publish your chatbot
Source: https://docs.chatling.ai/builder/publish-your-chatbot
Learn how to publish your chatbot and make it live.
Once you've built your chatbot and tested it thoroughly, you can publish it to make it live.
By publishing, any changes you've made to the chatbot will become available to users where the chatbot is embedded.
To publish your chatbot, click the `Publish` button in the top right corner of the Builder.

# Save your work
Source: https://docs.chatling.ai/builder/save-your-work
Learn how to save your changes in the Builder.
Any changes you make to your chatbot's flow in the [Builder](/builder/overview) is saved automatically. You can also save it manually by clicking the `Save` button in the top right side of the screen.
 When you save your changes, it will be saved as a draft and will not be published. This allows you to work on the chatbot and test it without affecting the live version.
# Sidebar
Source: https://docs.chatling.ai/builder/sidebar
Learn about the Sidebar and its functionalities in the Builder.
When you save your changes, it will be saved as a draft and will not be published. This allows you to work on the chatbot and test it without affecting the live version.
# Sidebar
Source: https://docs.chatling.ai/builder/sidebar
Learn about the Sidebar and its functionalities in the Builder.
 The sidebar contains four menus:
* Blocks
* Variables
* AI Configuration
* Settings
## Sidebar Menus
### Blocks
The Blocks menu contains all the blocks you can add to your flow. [Blocks](/builder/blocks/overview) build up the conversational flow of your chatbot.
You can drag and drop blocks onto the canvas to add them to your flow.

Here are the different categories of blocks that are available:
* **Send message**: Display a message to the user.
* **Capture response**: Capture answers from the user, such as text, email, form submission, and more.
* **AI**: Use AI to generate responses to user's questions.
* **Logic**: Add conditions and logic to your flow.
* **Integration**: Connect your chatbot to external services.
### Variables
Variables are placeholders that store information during the conversation. You can use variables to store user inputs, API responses, and more. These variables can be used to personalize the conversation and make it more dynamic.
The sidebar contains four menus:
* Blocks
* Variables
* AI Configuration
* Settings
## Sidebar Menus
### Blocks
The Blocks menu contains all the blocks you can add to your flow. [Blocks](/builder/blocks/overview) build up the conversational flow of your chatbot.
You can drag and drop blocks onto the canvas to add them to your flow.

Here are the different categories of blocks that are available:
* **Send message**: Display a message to the user.
* **Capture response**: Capture answers from the user, such as text, email, form submission, and more.
* **AI**: Use AI to generate responses to user's questions.
* **Logic**: Add conditions and logic to your flow.
* **Integration**: Connect your chatbot to external services.
### Variables
Variables are placeholders that store information during the conversation. You can use variables to store user inputs, API responses, and more. These variables can be used to personalize the conversation and make it more dynamic.
 You can configure the following settings:
* **Instructions**: Provide instructions to the AI to tailor its responses. For example, you can instruct the AI to provide more detailed responses or to use a specific tone. You can click the `View examples` button to see examples of instructions you can provide.
* **Settings**:
* **Business, product, or brand name**: This will be used by the AI to generate more relevant responses and avoids answering off-topics questions that aren't related to your business, product, or brand, such as questions related to your competitors, weather, etc.
* **AI Model**: The AI model to use for generating responses. Every model uses a different amount of credits per response. We recommend testing with different models to see which one works best for your chatbot.
* **Language**: The language in which the AI should generate responses. If you set it to Auto, the AI will detect the language of the user's question and generate a response in the same language.
* **Temperature**: Controls the randomness of the responses. A higher temperature will generate more creative responses, while a lower temperature will generate more accurate responses.
### Settings
The Settings menu allows you to configure the chatbot's general settings. Here's what you can configure:
* **Message Delay**: The time delay in seconds between chatbot's messages.
# Test your chatbot
Source: https://docs.chatling.ai/builder/test-your-chatbot
Learn how to test your chatbot to see how it works.
While you're building the chatbot, you can test it to see how it works. This allows you to identify any issues and make improvements before publishing it.
Click the `Preview bot` button in the top right corner of the Builder to launch the chatbot for testing.

# Available system variables
Source: https://docs.chatling.ai/builder/variables/available-system-variables
List of all the system variables available and what they do.
Here are all the system variables that are available. If a variable is not present in your chatbot, you must [import it](/builder/variables/import-system-variables).
`chat_id`
The unique identifier of the chat.
`user_id`
The unique identifier of the user.
`conversation_content`
The chat transcript (recent 25 messages).
`current_date`
The current date in UTC.
`current_time`
The current time in UTC.
`locale`
The user's browser locale, such as en-US, en-CA, fr-FR, pt-BR, etc.
`page_title`
The title of the page the user is currently on.
`page_url`
The URL of the page the user is currently on.
`timestamp`
The UNIX timestamp, which is the number of seconds since January 1, 1970 UTC.
`current_time`
The current time in UTC.
`current_date`
The current date in UTC.
# How to create variables
Source: https://docs.chatling.ai/builder/variables/how-to-create-variables
Learn how to create variables in the Builder
Variables can be created from the [sidebar](/builder/sidebar) in the Builder. Here's how:
1. Click on the `Variables` menu in the sidebar.
2. Select `+ New`.
You can configure the following settings:
* **Instructions**: Provide instructions to the AI to tailor its responses. For example, you can instruct the AI to provide more detailed responses or to use a specific tone. You can click the `View examples` button to see examples of instructions you can provide.
* **Settings**:
* **Business, product, or brand name**: This will be used by the AI to generate more relevant responses and avoids answering off-topics questions that aren't related to your business, product, or brand, such as questions related to your competitors, weather, etc.
* **AI Model**: The AI model to use for generating responses. Every model uses a different amount of credits per response. We recommend testing with different models to see which one works best for your chatbot.
* **Language**: The language in which the AI should generate responses. If you set it to Auto, the AI will detect the language of the user's question and generate a response in the same language.
* **Temperature**: Controls the randomness of the responses. A higher temperature will generate more creative responses, while a lower temperature will generate more accurate responses.
### Settings
The Settings menu allows you to configure the chatbot's general settings. Here's what you can configure:
* **Message Delay**: The time delay in seconds between chatbot's messages.
# Test your chatbot
Source: https://docs.chatling.ai/builder/test-your-chatbot
Learn how to test your chatbot to see how it works.
While you're building the chatbot, you can test it to see how it works. This allows you to identify any issues and make improvements before publishing it.
Click the `Preview bot` button in the top right corner of the Builder to launch the chatbot for testing.

# Available system variables
Source: https://docs.chatling.ai/builder/variables/available-system-variables
List of all the system variables available and what they do.
Here are all the system variables that are available. If a variable is not present in your chatbot, you must [import it](/builder/variables/import-system-variables).
`chat_id`
The unique identifier of the chat.
`user_id`
The unique identifier of the user.
`conversation_content`
The chat transcript (recent 25 messages).
`current_date`
The current date in UTC.
`current_time`
The current time in UTC.
`locale`
The user's browser locale, such as en-US, en-CA, fr-FR, pt-BR, etc.
`page_title`
The title of the page the user is currently on.
`page_url`
The URL of the page the user is currently on.
`timestamp`
The UNIX timestamp, which is the number of seconds since January 1, 1970 UTC.
`current_time`
The current time in UTC.
`current_date`
The current date in UTC.
# How to create variables
Source: https://docs.chatling.ai/builder/variables/how-to-create-variables
Learn how to create variables in the Builder
Variables can be created from the [sidebar](/builder/sidebar) in the Builder. Here's how:
1. Click on the `Variables` menu in the sidebar.
2. Select `+ New`.
 3. Enter a name for the variable and click `Create`. The name must be alphanumeric and can include underscores, such as `first_name`, `firstName`, or `First Name`.
 Note that variable names are case-sensitive. For example, `first name` and `First Name` are considered different variables.
# How to use variables
Source: https://docs.chatling.ai/builder/variables/how-to-use-variables
A guide on how to use Variables in your chatbot
Variables can be used for capturing information, displaying dynamic content, and processing data in your chatbot.
## How to store data in variables
You can store data in variables using the `Store answer in variable` or a similar option that's available for certain blocks in the builder. This option appears in the [block editor](/builder/block-editor).
Let's take the [Text input block](/builder/blocks/inputs/text) as an example. This block allows users to enter text. To store the user's response in a variable, click the dropdown below the `Store answer in variable` option and select a variable.
Note that variable names are case-sensitive. For example, `first name` and `First Name` are considered different variables.
# How to use variables
Source: https://docs.chatling.ai/builder/variables/how-to-use-variables
A guide on how to use Variables in your chatbot
Variables can be used for capturing information, displaying dynamic content, and processing data in your chatbot.
## How to store data in variables
You can store data in variables using the `Store answer in variable` or a similar option that's available for certain blocks in the builder. This option appears in the [block editor](/builder/block-editor).
Let's take the [Text input block](/builder/blocks/inputs/text) as an example. This block allows users to enter text. To store the user's response in a variable, click the dropdown below the `Store answer in variable` option and select a variable.
 ## How to display variables in messages
You can display variables in messages using the `{variableName}` syntax. The variable name should be enclosed in curly braces.
As an example, let's you have a variable called `first_name` and you want to greet the user by their name. Here's how to do it:
1. Add a [Text output block](/builder/blocks/send/text) to your chatbot.
2. Click the block to open the editor.
3. Type `Hello, {first_name}!` in the message field.
## How to display variables in messages
You can display variables in messages using the `{variableName}` syntax. The variable name should be enclosed in curly braces.
As an example, let's you have a variable called `first_name` and you want to greet the user by their name. Here's how to do it:
1. Add a [Text output block](/builder/blocks/send/text) to your chatbot.
2. Click the block to open the editor.
3. Type `Hello, {first_name}!` in the message field.
 4. When the chatbot displays this block, it will replace `{first_name}` with the value stored by the variable.
 Note that the values stored are on a per-conversation basis. This means that the value of a variable is unique to each conversation and is not shared across different conversations.
# Import system variables
Source: https://docs.chatling.ai/builder/variables/import-system-variables
Learn how to import system variables that aren't available by default in your chatbot.
Not all system variables are available by default when you create a chatbot. If you require additional system variables that aren't available, you can import them from the `Variables` menu in the builder's [sidebar](/builder/sidebar).
## How to import additional system variables
1. Go to the `Builder` in your chatbot.
2. Click the `Variables` menu in the sidebar.
Note that the values stored are on a per-conversation basis. This means that the value of a variable is unique to each conversation and is not shared across different conversations.
# Import system variables
Source: https://docs.chatling.ai/builder/variables/import-system-variables
Learn how to import system variables that aren't available by default in your chatbot.
Not all system variables are available by default when you create a chatbot. If you require additional system variables that aren't available, you can import them from the `Variables` menu in the builder's [sidebar](/builder/sidebar).
## How to import additional system variables
1. Go to the `Builder` in your chatbot.
2. Click the `Variables` menu in the sidebar.
 3. Click `Import system variables`.
 4. A list is displayed with all the additional system variables that you can import. Select the ones you want to import.
 5. Click the `Import` button.
 6. The selected system variables are now available to use in your chatbot.
# Types of variables
Source: https://docs.chatling.ai/builder/variables/variable-types
There are two types of variables: System Variable and Custom Variable. Learn how to use them in your chatbot.
Variables in the Builder are of two types:
* System Variable
* Custom Variable
## System Variable
6. The selected system variables are now available to use in your chatbot.
# Types of variables
Source: https://docs.chatling.ai/builder/variables/variable-types
There are two types of variables: System Variable and Custom Variable. Learn how to use them in your chatbot.
Variables in the Builder are of two types:
* System Variable
* Custom Variable
## System Variable
 System variables are predefined variables that contain system information or which can be used to perform specific actions. These variables are automatically created by the Builder.
To learn what a specific system variable does, you can open it from the Variables menu in the [sidebar](/builder/sidebar) and read its description.
There are also additional system variables that aren't imported by default. To view and import them, go to the Variables menu from the [Sidebar](/builder/sidebar) and click the `Import system variables` button.
System variables are predefined variables that contain system information or which can be used to perform specific actions. These variables are automatically created by the Builder.
To learn what a specific system variable does, you can open it from the Variables menu in the [sidebar](/builder/sidebar) and read its description.
There are also additional system variables that aren't imported by default. To view and import them, go to the Variables menu from the [Sidebar](/builder/sidebar) and click the `Import system variables` button.
 ## Custom Variable
These are variables that you create to store information specific to your chatbot.
For example, you can create a custom variable to store the user's query and pass it to the AI for generating a response from the knowledge base.
# What are variables?
Source: https://docs.chatling.ai/builder/variables/what-are-variables
Learn about Variables, the different types, and how to use them
## Custom Variable
These are variables that you create to store information specific to your chatbot.
For example, you can create a custom variable to store the user's query and pass it to the AI for generating a response from the knowledge base.
# What are variables?
Source: https://docs.chatling.ai/builder/variables/what-are-variables
Learn about Variables, the different types, and how to use them
 Variables are placeholders that store information during the conversation. You can use variables to store user inputs, API responses, and more. These variables can be used to personalize the conversation and make it more dynamic.
For example, you can store the user's name in a variable and use it to greet the user. This way, you can make the conversation more engaging and interactive.
In the next section, you will learn about the different types of variables and how to use them in your chatbot.
# Add disclaimer, privacy notice, or custom text to footer
Source: https://docs.chatling.ai/chatbot/add-footer-text
Learn how to display custom text in the chatbot's footer.
Variables are placeholders that store information during the conversation. You can use variables to store user inputs, API responses, and more. These variables can be used to personalize the conversation and make it more dynamic.
For example, you can store the user's name in a variable and use it to greet the user. This way, you can make the conversation more engaging and interactive.
In the next section, you will learn about the different types of variables and how to use them in your chatbot.
# Add disclaimer, privacy notice, or custom text to footer
Source: https://docs.chatling.ai/chatbot/add-footer-text
Learn how to display custom text in the chatbot's footer.
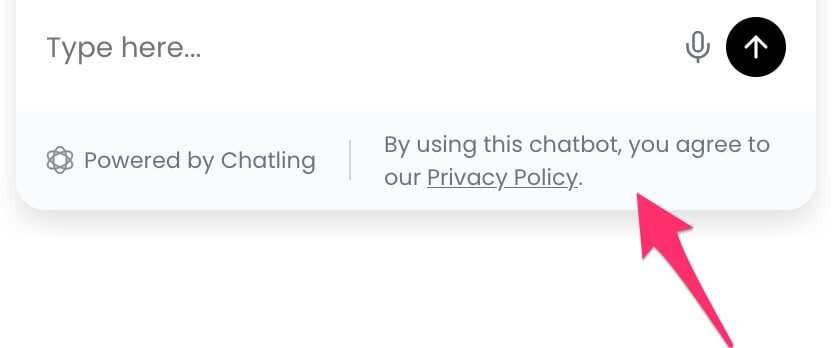 Often times, you may want to display a text in the chatbot's footer, such as a disclaimer, privacy notice, or any other text. Here's how you can do that.
1. Open the `Appearance` settings.
Often times, you may want to display a text in the chatbot's footer, such as a disclaimer, privacy notice, or any other text. Here's how you can do that.
1. Open the `Appearance` settings.
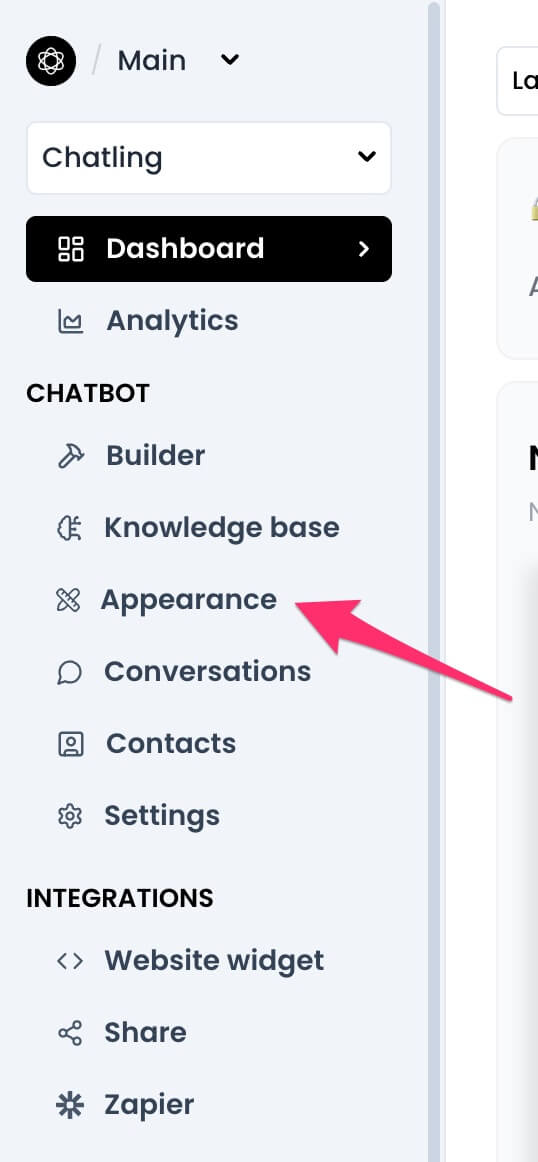 2. Click on `Texts` from the sidebar.
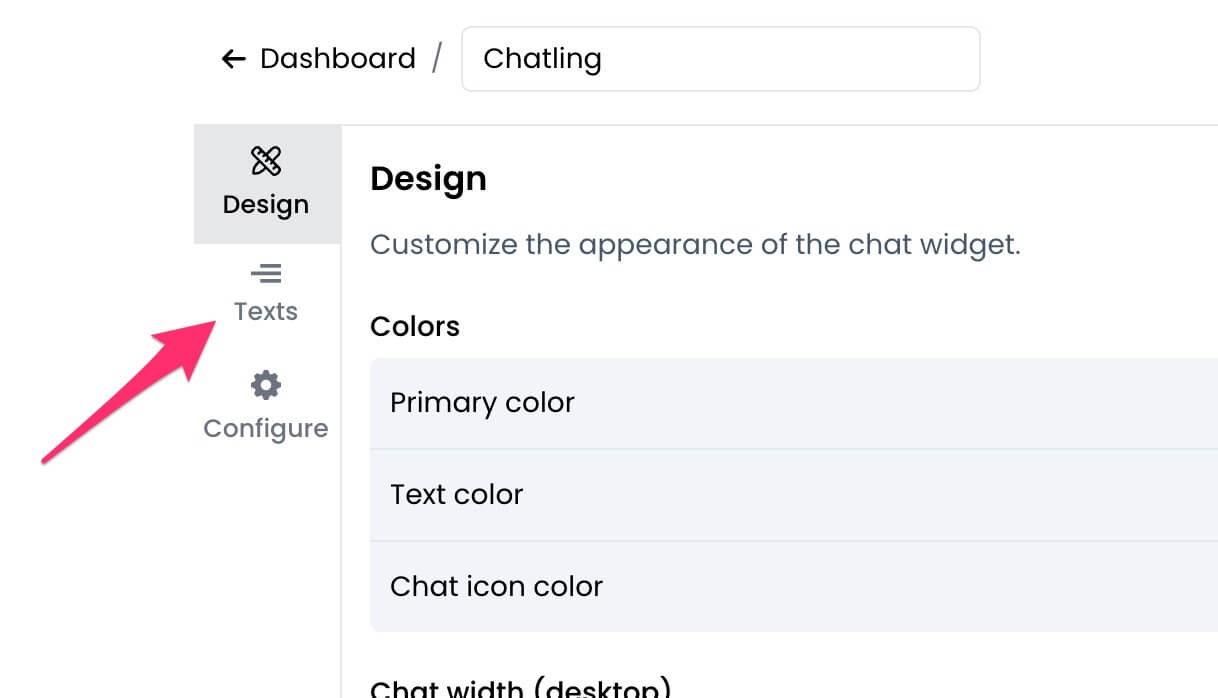 3. Under the `Footer` section, you can enter the text you want to display.
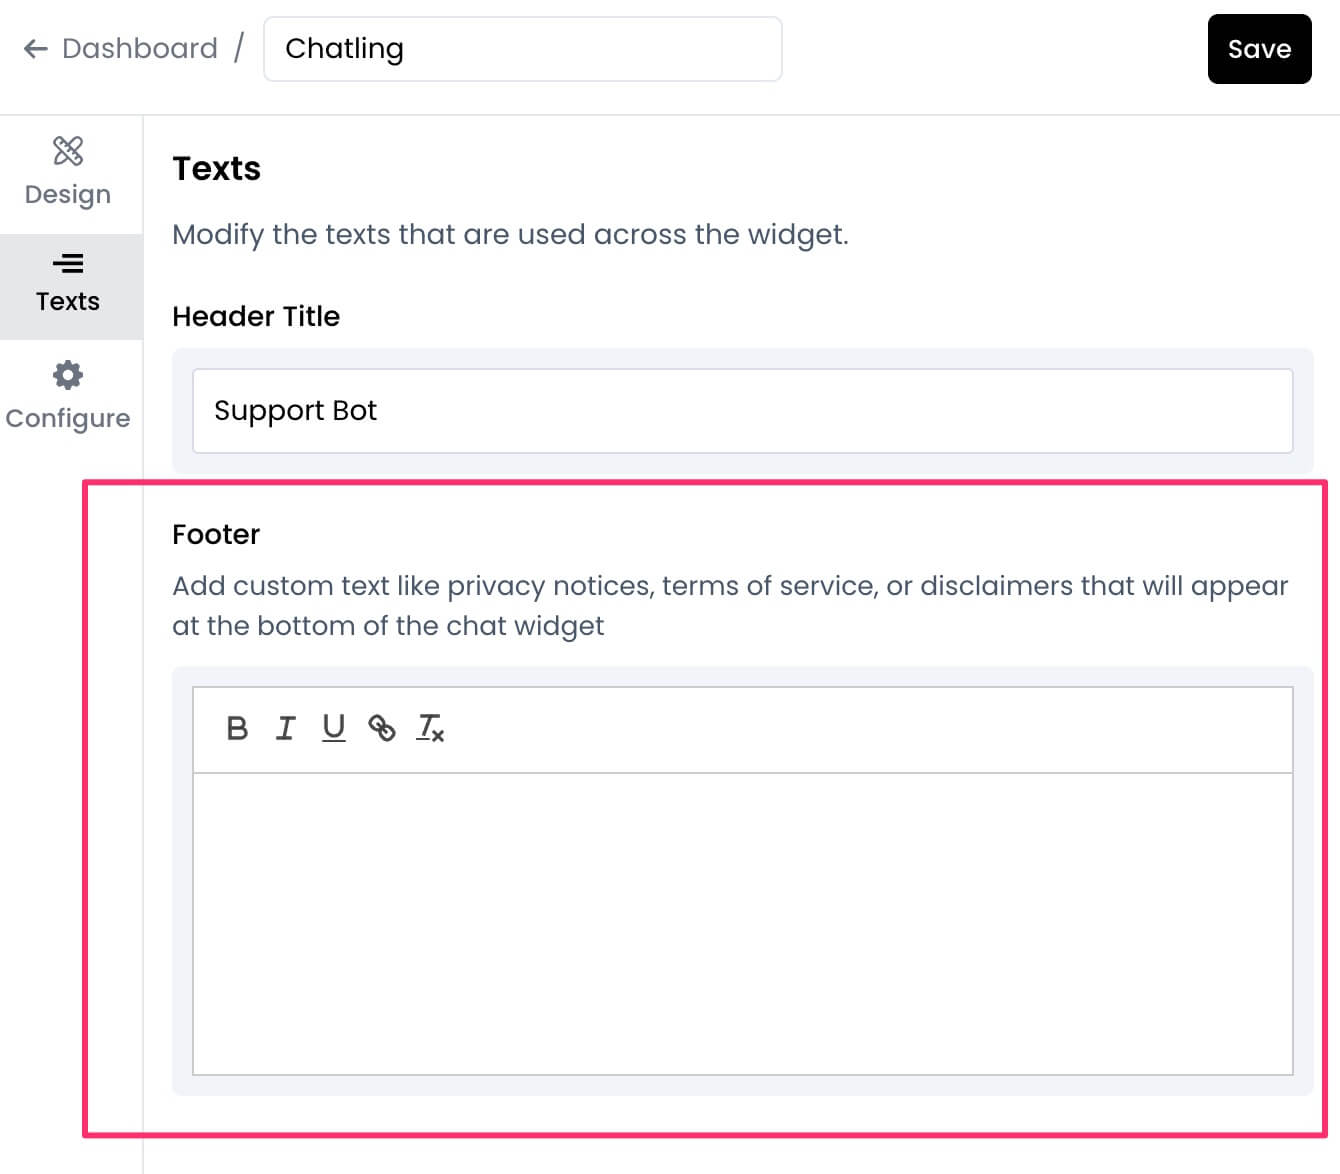 4. Click `Save` to apply the changes.
# Custom domain
Source: https://docs.chatling.ai/chatbot/custom-domain
Learn how to add a custom domain to your chatbot.
You can use a custom subdomain for the chatbot widget and sharing link rather than the default one used by Chatling. This allows you to whitelabel your chatbots to maintain your brand identity or make them look like your team developed them.
## How to set a custom domain
1. Open the chatbot you want to set a custom subdomain for.
2. From the menu, click on `Settings` under the `Chatbot` section.
4. Click `Save` to apply the changes.
# Custom domain
Source: https://docs.chatling.ai/chatbot/custom-domain
Learn how to add a custom domain to your chatbot.
You can use a custom subdomain for the chatbot widget and sharing link rather than the default one used by Chatling. This allows you to whitelabel your chatbots to maintain your brand identity or make them look like your team developed them.
## How to set a custom domain
1. Open the chatbot you want to set a custom subdomain for.
2. From the menu, click on `Settings` under the `Chatbot` section.
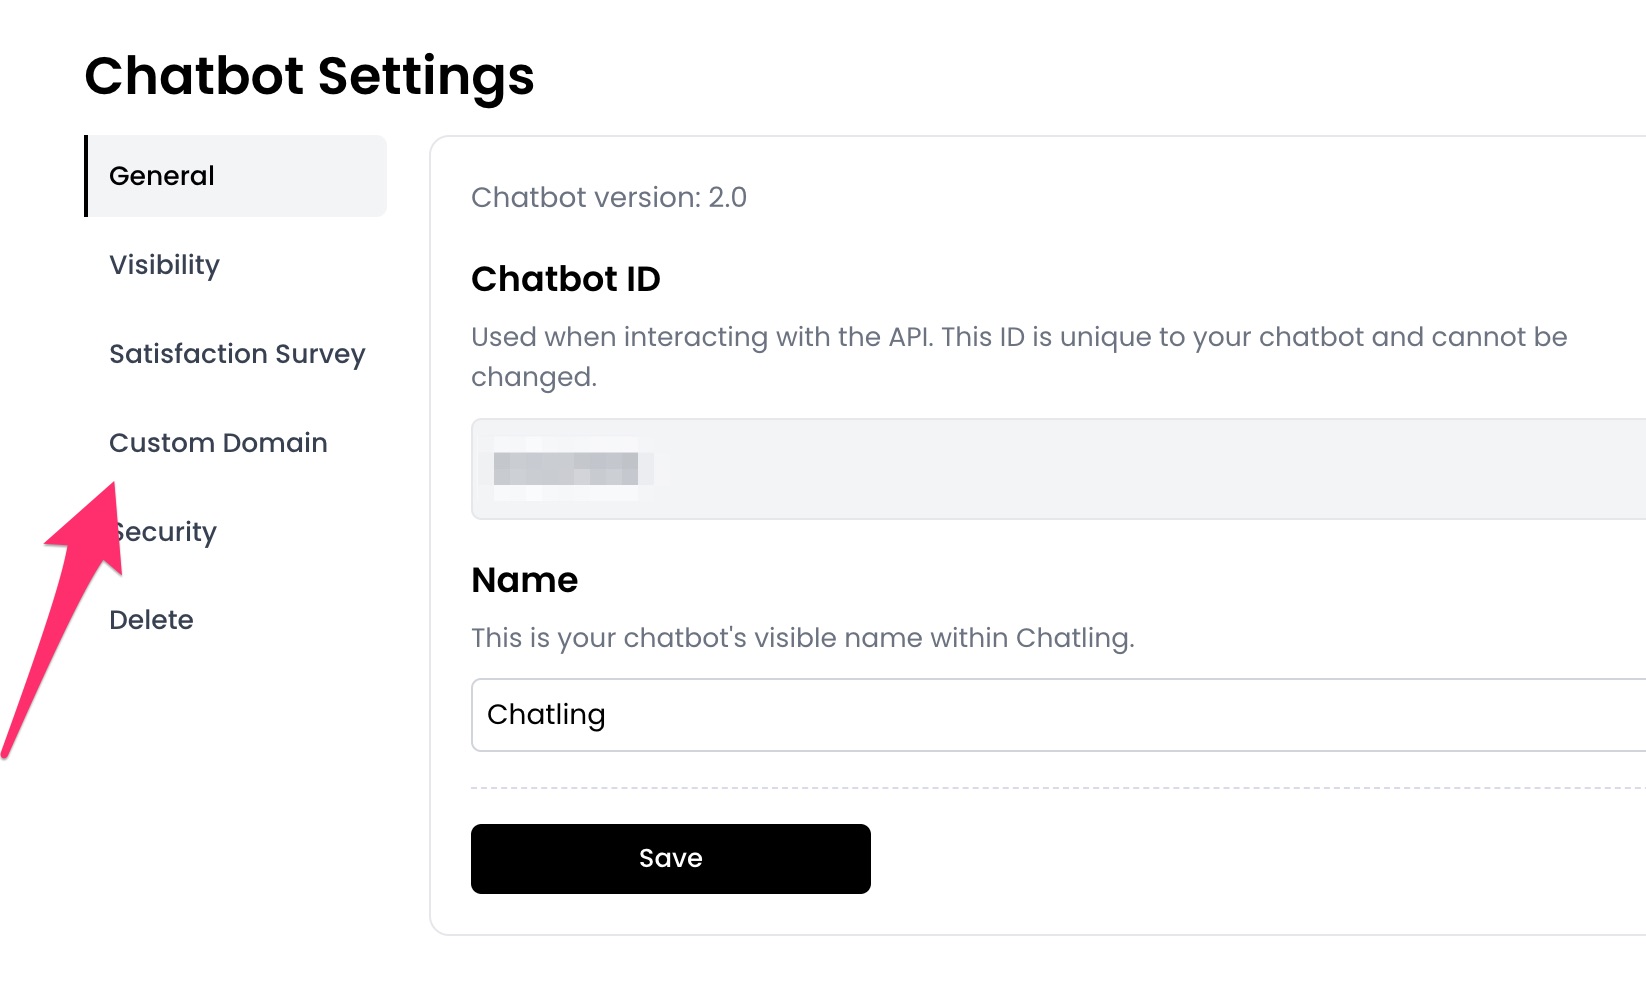 4. Enter the custom domain you want to use for the chatbot, such as `sample.domain.com`, and click the `Save` button.
 5. Add the DNS records displayed on the page to your domain provider to activate the custom domain.
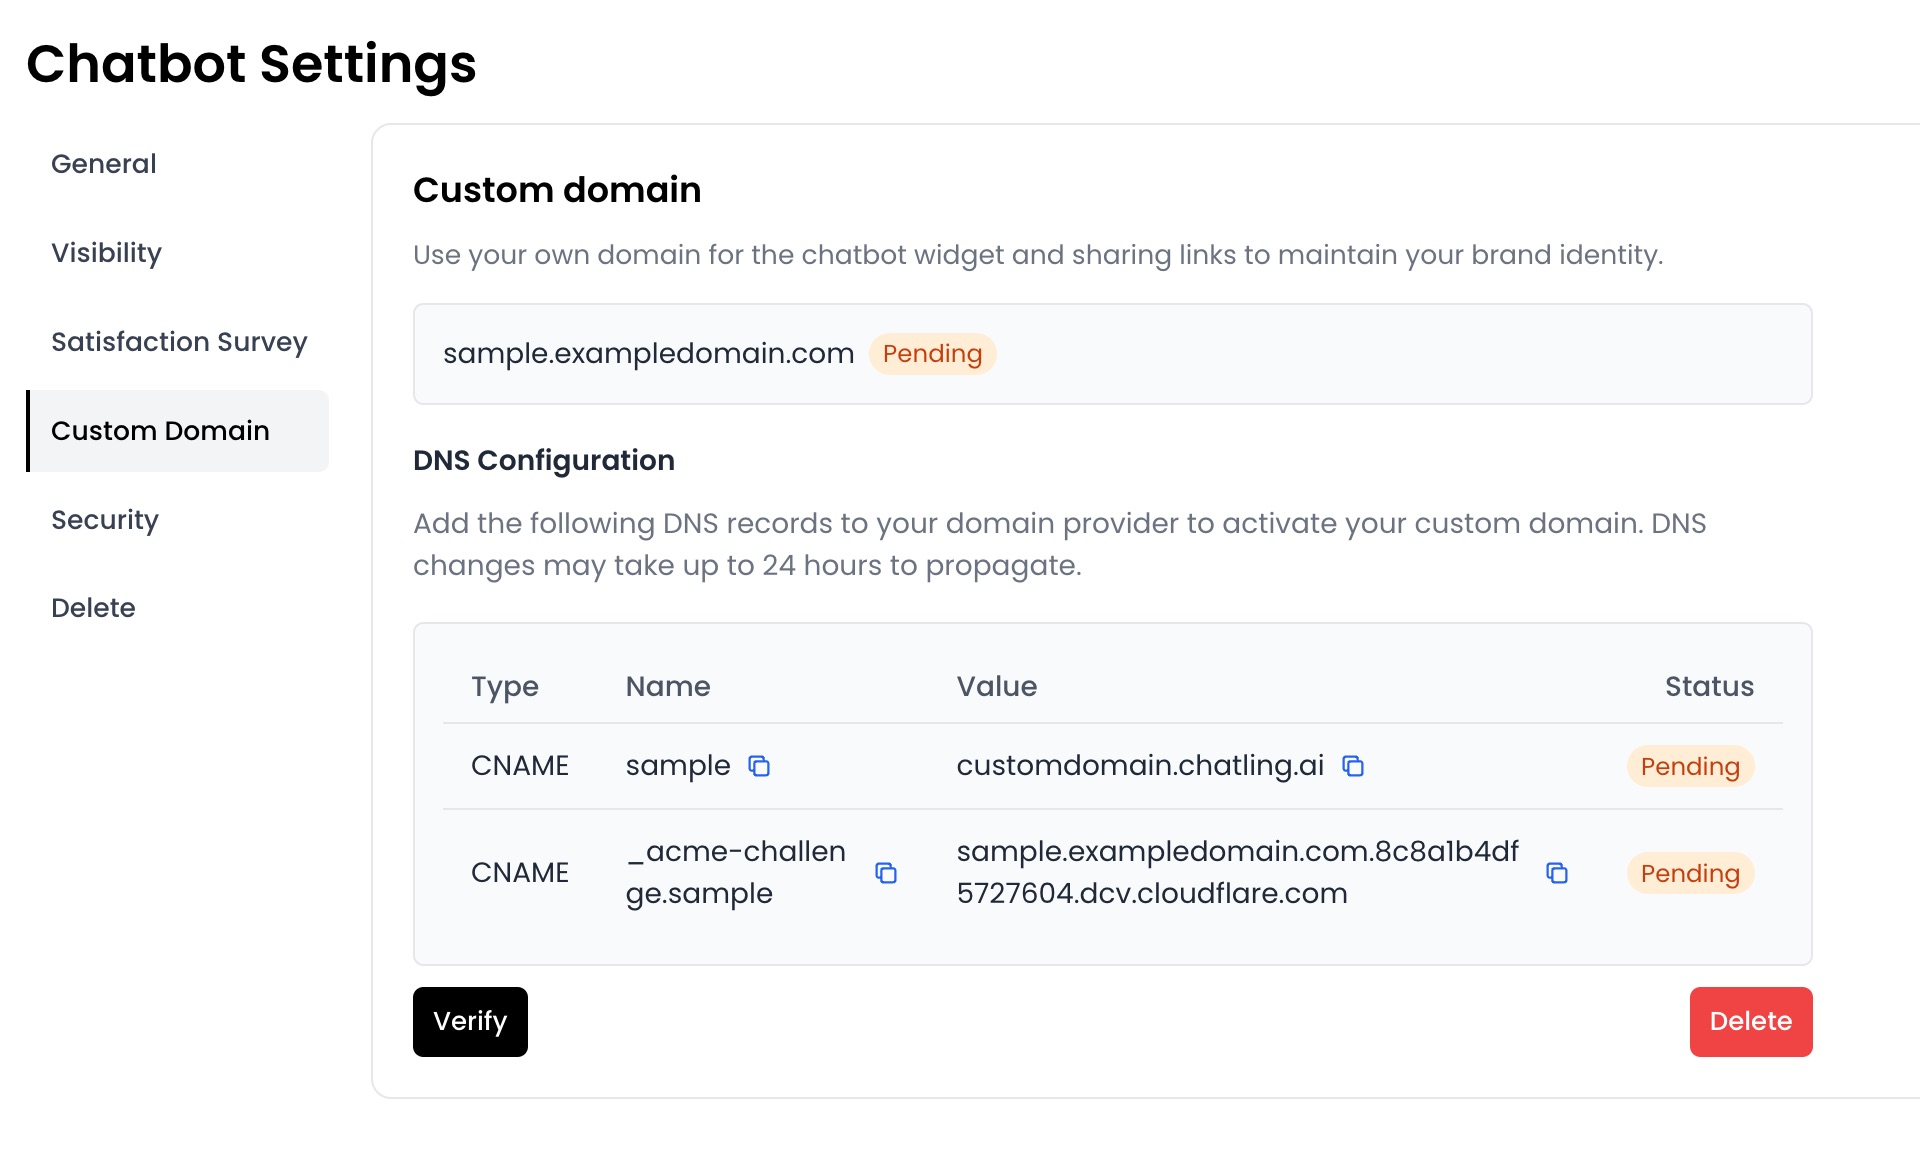 6. Once you add the DNS records, it may take up to 24 hours for the changes to propagate. You can click the `Verify` button to check if the records are active.
7. Once completed and the status is `Active`, the chatbot widget and sharing link will use the custom domain.
# Design your chatbot widget
Source: https://docs.chatling.ai/chatbot/customize
A guide on how to customize the appearance of your chatbot widget and make it match your brand.

You can customize the appearance of your chatbot to match your brand. Many aspects of the widget, such as the colors, icons, and other design elements can be customized to create a chatbot that fits seamlessly into your website.
## Customizing the chatbot
To customize the chatbot widget, click the `Appearance` menu from your chatbot's dashboard.
Here are a few things you can customize:
* **Colors**: Change the primary, secondary, and chat icon colors.
* **Chat Width**: Set the width of the chat window.
* **Position**: Choose the position where the widget should appear on your website, such as bottom right or bottom left.
* **Bot Icon**: Upload a custom image for the icon that appears next to the bot's messages.
* **Chat Icon**: Upload a custom image for the chat icon that users click to open the chatbot.
* **Header Title**: The title that appears at the top of the chat window, such as "Support Chat" or "Virtual Assistant".
* **Interface Language**: The language of the chatbot's interface. Note that this doesn't affect the language used by the AI.
* **Ask user to rate AI response**: Enabling this will display a thumbs up/down icon after the AI response, allowing users to rate it. This feedback can be used to improve the AI's performance.
* **Hide "Powered by Chatling" text**: At the bottom of the chatbot, there's a "Powered by Chatling" text. You can hide it by enabling this option.
* **Hovering Message**: You can display attention-grabbing messages above the chat icon to encourage users to start a conversation.
* **Show Sources for AI Response**: Enable this option to show the sources of the AI responses when it answers from the Knowledge Base. This helps users understand where the information is coming from.
* **Auto-Open Chat**: Automatically open the chat window when the page loads.
Once you've made the changes, click the `Save` button to apply them to your chatbot.
# How to delete a chatbot
Source: https://docs.chatling.ai/chatbot/delete
Learn how to remove a chatbot permanently from your account.
If you no longer need a chatbot, you can delete it from the dashboard.
Deleting a chatbot will permanently remove it from your account, and you won't be able to recover it. All data associated with the chatbot, including contacts, conversations, and knowledge base will be removed permanently.
## How to delete a chatbot
1. Open the chatbot you want to delete.
2. From the menu, click on `Settings` under the `Chatbot` section.
6. Once you add the DNS records, it may take up to 24 hours for the changes to propagate. You can click the `Verify` button to check if the records are active.
7. Once completed and the status is `Active`, the chatbot widget and sharing link will use the custom domain.
# Design your chatbot widget
Source: https://docs.chatling.ai/chatbot/customize
A guide on how to customize the appearance of your chatbot widget and make it match your brand.

You can customize the appearance of your chatbot to match your brand. Many aspects of the widget, such as the colors, icons, and other design elements can be customized to create a chatbot that fits seamlessly into your website.
## Customizing the chatbot
To customize the chatbot widget, click the `Appearance` menu from your chatbot's dashboard.
Here are a few things you can customize:
* **Colors**: Change the primary, secondary, and chat icon colors.
* **Chat Width**: Set the width of the chat window.
* **Position**: Choose the position where the widget should appear on your website, such as bottom right or bottom left.
* **Bot Icon**: Upload a custom image for the icon that appears next to the bot's messages.
* **Chat Icon**: Upload a custom image for the chat icon that users click to open the chatbot.
* **Header Title**: The title that appears at the top of the chat window, such as "Support Chat" or "Virtual Assistant".
* **Interface Language**: The language of the chatbot's interface. Note that this doesn't affect the language used by the AI.
* **Ask user to rate AI response**: Enabling this will display a thumbs up/down icon after the AI response, allowing users to rate it. This feedback can be used to improve the AI's performance.
* **Hide "Powered by Chatling" text**: At the bottom of the chatbot, there's a "Powered by Chatling" text. You can hide it by enabling this option.
* **Hovering Message**: You can display attention-grabbing messages above the chat icon to encourage users to start a conversation.
* **Show Sources for AI Response**: Enable this option to show the sources of the AI responses when it answers from the Knowledge Base. This helps users understand where the information is coming from.
* **Auto-Open Chat**: Automatically open the chat window when the page loads.
Once you've made the changes, click the `Save` button to apply them to your chatbot.
# How to delete a chatbot
Source: https://docs.chatling.ai/chatbot/delete
Learn how to remove a chatbot permanently from your account.
If you no longer need a chatbot, you can delete it from the dashboard.
Deleting a chatbot will permanently remove it from your account, and you won't be able to recover it. All data associated with the chatbot, including contacts, conversations, and knowledge base will be removed permanently.
## How to delete a chatbot
1. Open the chatbot you want to delete.
2. From the menu, click on `Settings` under the `Chatbot` section.
 4. Click the `Delete` button.
 5. Confirm the deletion by typing `delete permanently` in the text box and click \`Delete\`\`
 # Download transcripts
Source: https://docs.chatling.ai/chatbot/download-chat-transcripts
A guide to enabling chat transcript downloads for end-users.
If you'd like your chatbot users to have the option to download chat transcripts, you can turn on this feature in the chatbot's appearance settings.
## How to allow end-users to download chat transcripts
1. Open your chatbot's dashboard.
2. Go to `Appearance`.
3. Click on `Configure` from the sidebar.
# Download transcripts
Source: https://docs.chatling.ai/chatbot/download-chat-transcripts
A guide to enabling chat transcript downloads for end-users.
If you'd like your chatbot users to have the option to download chat transcripts, you can turn on this feature in the chatbot's appearance settings.
## How to allow end-users to download chat transcripts
1. Open your chatbot's dashboard.
2. Go to `Appearance`.
3. Click on `Configure` from the sidebar.
 4. Enable `Allow users to download chat transcripts`.
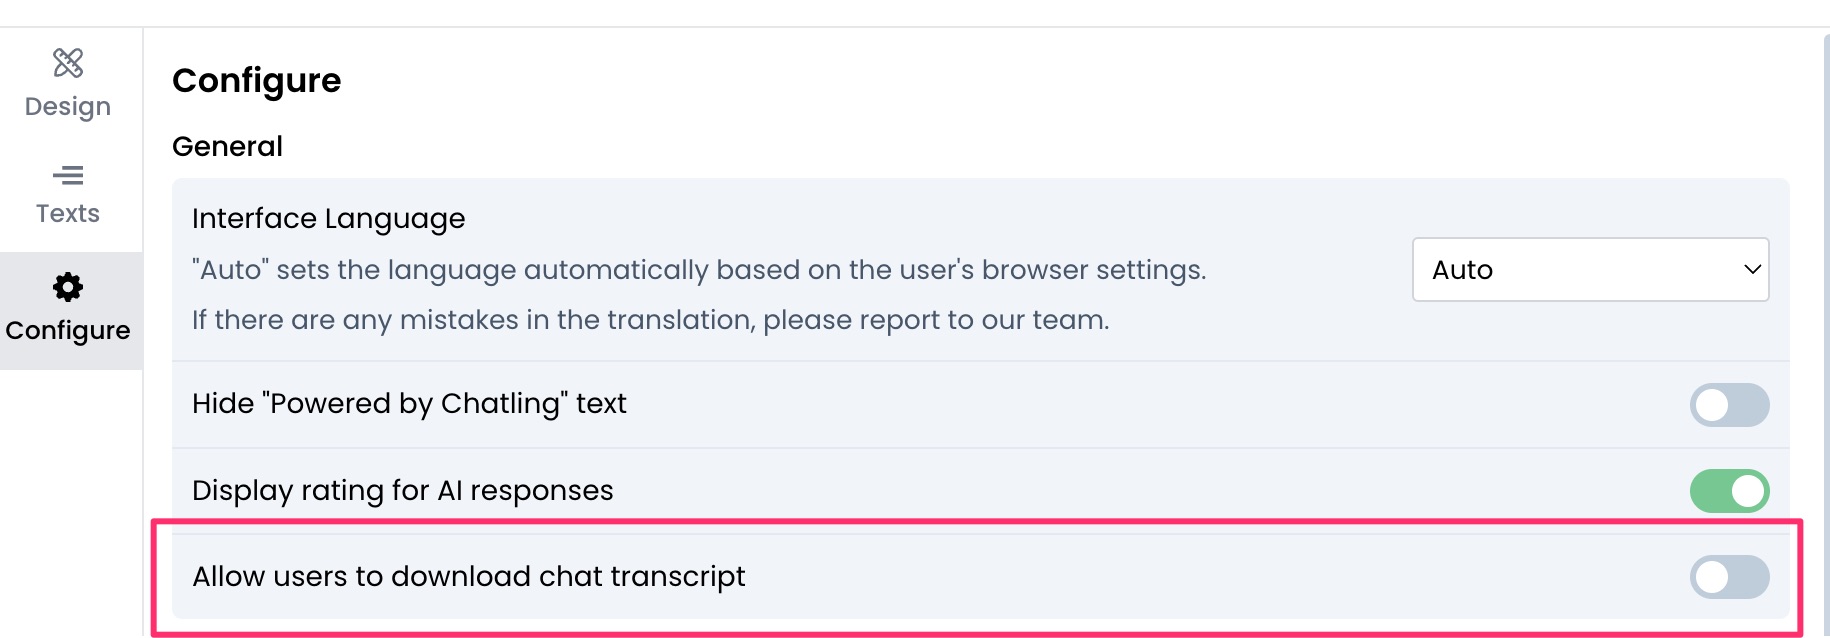 5. Click `Save`.
# How to duplicate a chatbot
Source: https://docs.chatling.ai/chatbot/duplicate
Learn how to duplicate a chatbot to create a copy of it.
You can duplicate chatbots and create copies of them to use as templates or to make changes without affecting the original chatbot. This can be useful if you want to experiment with different configurations or create a backup of your chatbot.
By duplicating a chatbot, all its settings, appearance, and builder configurations will be copied to the new chatbot. You can then make changes to the duplicated chatbot without affecting the original one.
## Duplicating a chatbot
To duplicate a chatbot, follow these steps:
1. Go to your project's dashboard where you can view all your chatbots.
5. Click `Save`.
# How to duplicate a chatbot
Source: https://docs.chatling.ai/chatbot/duplicate
Learn how to duplicate a chatbot to create a copy of it.
You can duplicate chatbots and create copies of them to use as templates or to make changes without affecting the original chatbot. This can be useful if you want to experiment with different configurations or create a backup of your chatbot.
By duplicating a chatbot, all its settings, appearance, and builder configurations will be copied to the new chatbot. You can then make changes to the duplicated chatbot without affecting the original one.
## Duplicating a chatbot
To duplicate a chatbot, follow these steps:
1. Go to your project's dashboard where you can view all your chatbots.
 2. Click on the ellipsis `...` icon next to the chatbot you want to duplicate.
 3. Select the `Duplicate` option from the dropdown menu.
 # Set the language of your chatbot widget
Source: https://docs.chatling.ai/chatbot/language
Set the language of your chatbot widget.
The chatbot is available in over 45 languages. You can customize the language of your chatbot to match your audience's preferences. This affects all text elements in the chatbot widget, including placeholders, buttons, and system messages.
By default, the language is set to `Auto`. This means that the chatbot will automatically detect the user's language based on their browser settings.
## Set the language
1. From your chatbot's dashboard, go to **Appearance**.
# Set the language of your chatbot widget
Source: https://docs.chatling.ai/chatbot/language
Set the language of your chatbot widget.
The chatbot is available in over 45 languages. You can customize the language of your chatbot to match your audience's preferences. This affects all text elements in the chatbot widget, including placeholders, buttons, and system messages.
By default, the language is set to `Auto`. This means that the chatbot will automatically detect the user's language based on their browser settings.
## Set the language
1. From your chatbot's dashboard, go to **Appearance**.
 2. Click `Configure` from the sidebar.
 3. Use the `Interface language` dropdown to select the language of your chatbot.
Note: If you set the language to `Auto`, the chatbot will automatically detect the user's language based on their browser settings.
3. Use the `Interface language` dropdown to select the language of your chatbot.
Note: If you set the language to `Auto`, the chatbot will automatically detect the user's language based on their browser settings.
 4. Click `Save`.
# Operating hours
Source: https://docs.chatling.ai/chatbot/operating-hours
Schedule the chatbot to be visible at certain times.
You can set the operating hours for your chatbot to define when it should be available to users. This is useful if you want to limit the chatbot's availability to certain times of the day or week, e.g during business hours or off-hours.
When outside of the operating hours, your chatbot will be automatically hidden, ensuring it's only live when you want it to be.
## Set operating hours
1. From your chatbot's dashboard, go to the **Settings** page.
4. Click `Save`.
# Operating hours
Source: https://docs.chatling.ai/chatbot/operating-hours
Schedule the chatbot to be visible at certain times.
You can set the operating hours for your chatbot to define when it should be available to users. This is useful if you want to limit the chatbot's availability to certain times of the day or week, e.g during business hours or off-hours.
When outside of the operating hours, your chatbot will be automatically hidden, ensuring it's only live when you want it to be.
## Set operating hours
1. From your chatbot's dashboard, go to the **Settings** page.
 3. Under the `Operating hours` section, click the `Set operating hours` button.
 4. Select the days and times when the chatbot should be visible. **Note that the timezone is UTC.**
To keep the chatbot visible throughout the day, leave the start and end times empty.
4. Select the days and times when the chatbot should be visible. **Note that the timezone is UTC.**
To keep the chatbot visible throughout the day, leave the start and end times empty.
 5. Click the `Add` button to add the schedule.
6. Click the `Save` button to save the changes.
Once you define the operating hours, the chatbot will be visible during the specified times and hidden outside of these hours.
## Edit existing operating hours
To edit the operating hours, you have to delete one or more schedules that you want to edit and then add the new schedules.
# How to pass custom data to your chatbot
Source: https://docs.chatling.ai/chatbot/pass-custom-data
Learn how to send any data, such as customer information, to the chatbot widget.
With the widget's code snippet, you can pass any data to the chatbot. This is useful if you want to send customer information, such as name and email, or any other data to the chatbot and use them in your flow.
## Before you begin
{/* - You need to have the chatbot installed on your website. If you haven't done this yet, see [how to install the chatbot](/docs/install-chatbot). */}
* You must know how to use [variables](/builder/variables) in the builder.
* You have to [create variables](/builder/variables/how-to-create-variables) in the builder for the data you want to pass to the chatbot. If the variables already exist, you can skip this step.
## Pass custom data during launch
When you [install the chatbot](/docs/install-chatbot) on your website, you get a code snippet similar to this:
```html
```
You can pass custom data during launch by adding the `variables` property to the `chtlConfig` object, and listing the variable names and their values.
```javascript
window.chtlConfig = {
chatbotId: "
5. Click the `Add` button to add the schedule.
6. Click the `Save` button to save the changes.
Once you define the operating hours, the chatbot will be visible during the specified times and hidden outside of these hours.
## Edit existing operating hours
To edit the operating hours, you have to delete one or more schedules that you want to edit and then add the new schedules.
# How to pass custom data to your chatbot
Source: https://docs.chatling.ai/chatbot/pass-custom-data
Learn how to send any data, such as customer information, to the chatbot widget.
With the widget's code snippet, you can pass any data to the chatbot. This is useful if you want to send customer information, such as name and email, or any other data to the chatbot and use them in your flow.
## Before you begin
{/* - You need to have the chatbot installed on your website. If you haven't done this yet, see [how to install the chatbot](/docs/install-chatbot). */}
* You must know how to use [variables](/builder/variables) in the builder.
* You have to [create variables](/builder/variables/how-to-create-variables) in the builder for the data you want to pass to the chatbot. If the variables already exist, you can skip this step.
## Pass custom data during launch
When you [install the chatbot](/docs/install-chatbot) on your website, you get a code snippet similar to this:
```html
```
You can pass custom data during launch by adding the `variables` property to the `chtlConfig` object, and listing the variable names and their values.
```javascript
window.chtlConfig = {
chatbotId: "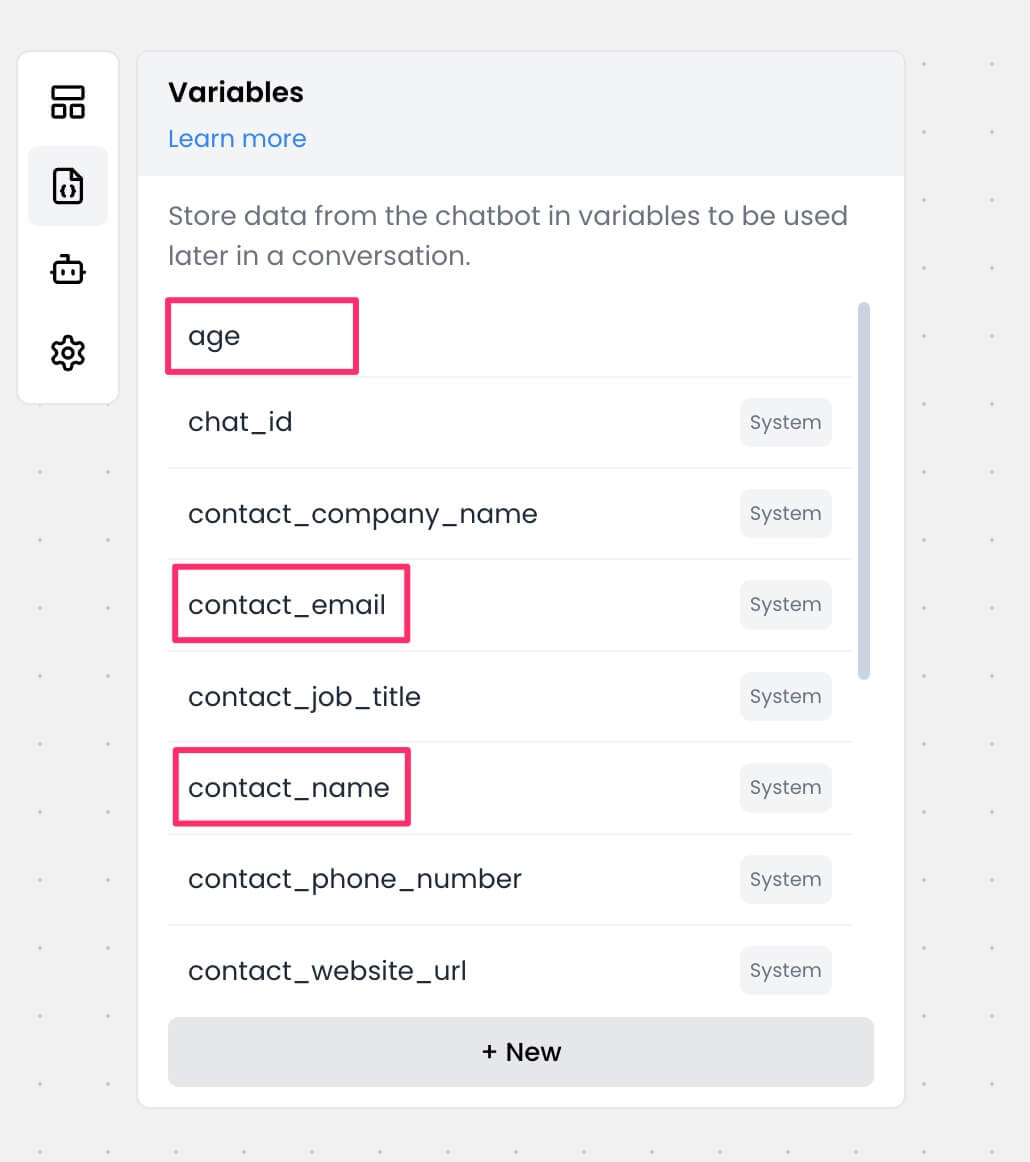 Next, add the variable values to your widget's code snippet. You must make sure that the variable names match exactly as they are in the builder.
```javascript
window.chtlConfig = {
chatbotId: "
Next, add the variable values to your widget's code snippet. You must make sure that the variable names match exactly as they are in the builder.
```javascript
window.chtlConfig = {
chatbotId: "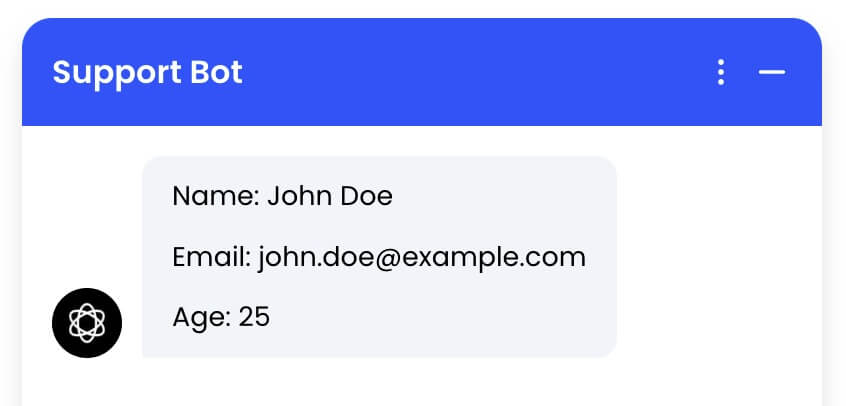 {/* In the above example, we are sending custom values for the variables `contact_name`, `contact_email`, and `age`. You must make sure that these variables have been [created](/builder/variables/how-to-create-variables) in the builder and that the names match exactly. */}
## Pass custom data after launch
If at any point after launching the chatbot, you want to pass some data to it, you can do so by calling the `window.Chatling.setVariables` function.
```javascript
window.Chatling.setVariables({
"contact_name": "Rick Astley",
"contact_email": "rick.astley@example.com",
"age": 30
}, function(success, errorMessage) {
if (!success) {
// handle error
}
});
```
**Note:**
* The `setVariables` function must be called after the chatbot widget has loaded.
{/* You can check if the widget has loaded by listening to the `chatling:ready` event. */}
* Variables must be present in the builder and the names must match exactly.
* This will overwrite any existing values for the variables.
# Rate limit
Source: https://docs.chatling.ai/chatbot/rate-limit
Learn how to set a rate limit for your chatbot to prevent it from being spammed.
Rate limiting allows you to limit the number of messages a user can send to your chatbot in a given period of time. This helps prevent end-users from spamming your chatbot and depleting your account credits.
## How to set a rate limit
1. Open your chatbot's dashboard.
2. Go to chatbot settings.
{/* In the above example, we are sending custom values for the variables `contact_name`, `contact_email`, and `age`. You must make sure that these variables have been [created](/builder/variables/how-to-create-variables) in the builder and that the names match exactly. */}
## Pass custom data after launch
If at any point after launching the chatbot, you want to pass some data to it, you can do so by calling the `window.Chatling.setVariables` function.
```javascript
window.Chatling.setVariables({
"contact_name": "Rick Astley",
"contact_email": "rick.astley@example.com",
"age": 30
}, function(success, errorMessage) {
if (!success) {
// handle error
}
});
```
**Note:**
* The `setVariables` function must be called after the chatbot widget has loaded.
{/* You can check if the widget has loaded by listening to the `chatling:ready` event. */}
* Variables must be present in the builder and the names must match exactly.
* This will overwrite any existing values for the variables.
# Rate limit
Source: https://docs.chatling.ai/chatbot/rate-limit
Learn how to set a rate limit for your chatbot to prevent it from being spammed.
Rate limiting allows you to limit the number of messages a user can send to your chatbot in a given period of time. This helps prevent end-users from spamming your chatbot and depleting your account credits.
## How to set a rate limit
1. Open your chatbot's dashboard.
2. Go to chatbot settings.
 3. Click the `Security` tab.
4. Under the `Rate limiting` section, add a rate limit, e.g. 10 messages per minute. You can add multiple rate limits for different periods of time, such as per minute, per hour, or per day.
3. Click the `Security` tab.
4. Under the `Rate limiting` section, add a rate limit, e.g. 10 messages per minute. You can add multiple rate limits for different periods of time, such as per minute, per hour, or per day.
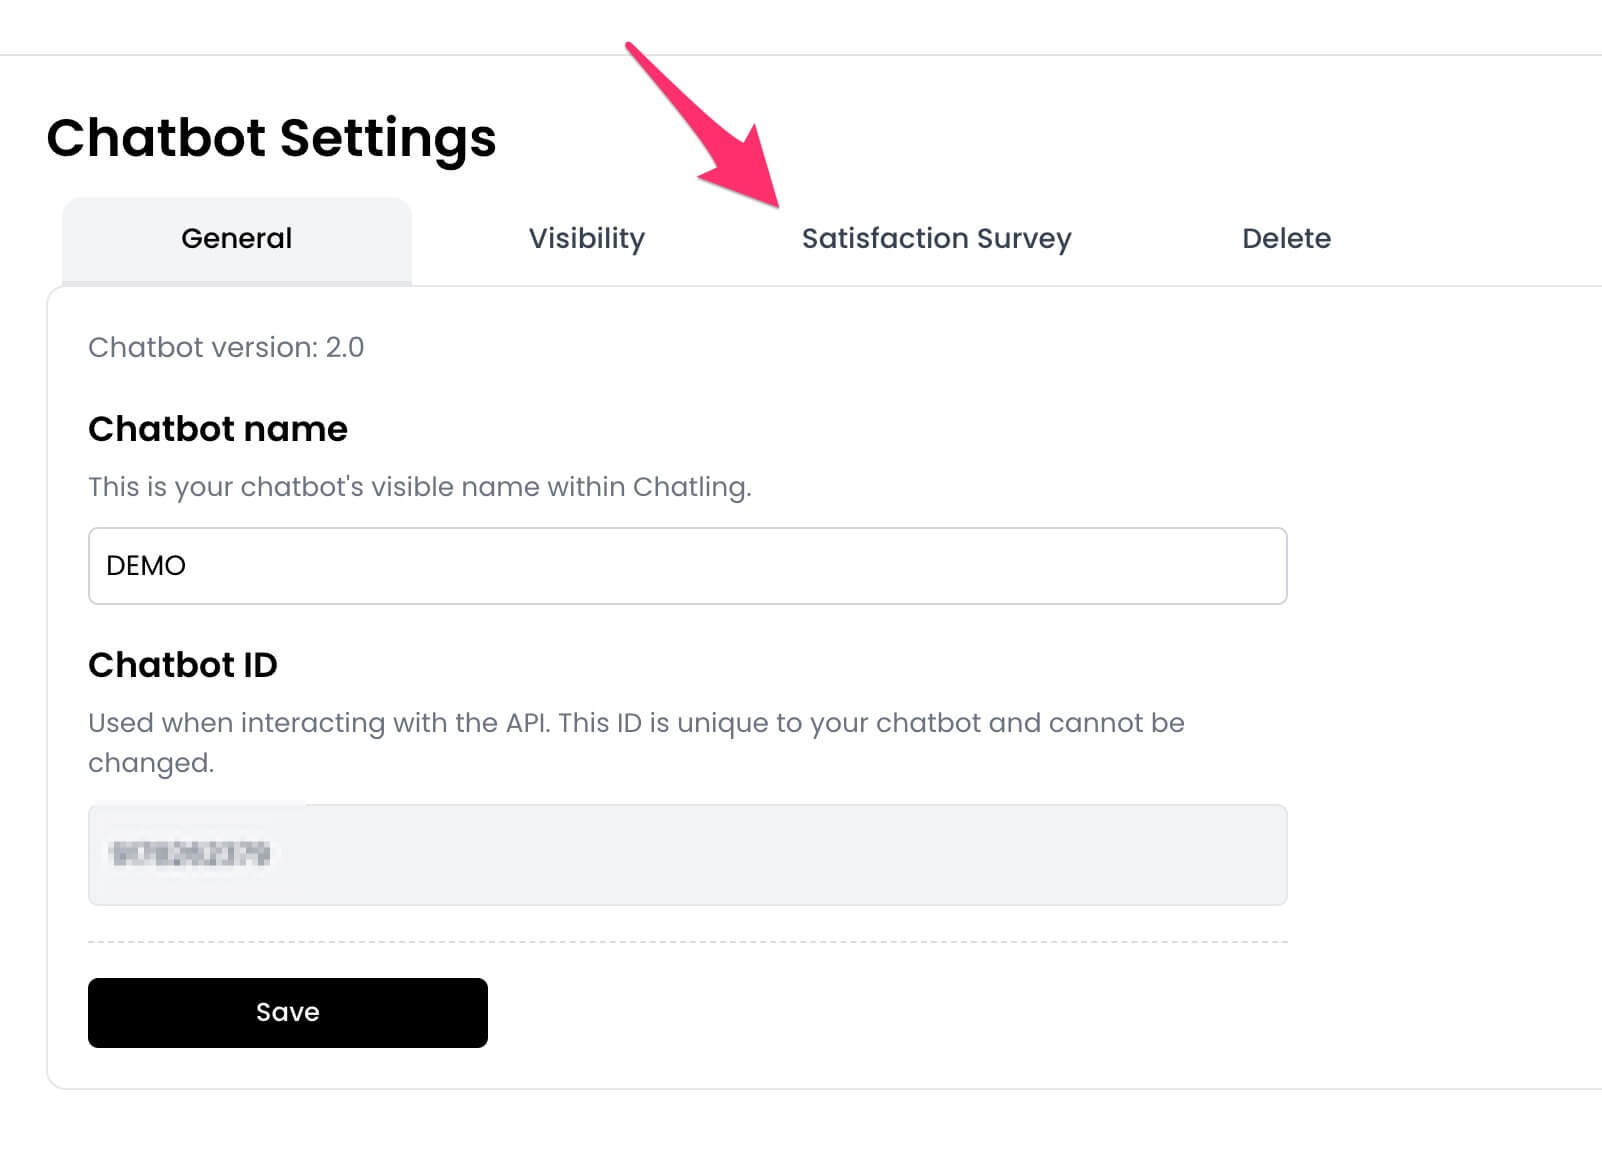 3. Toggle on the `Show survey` option.
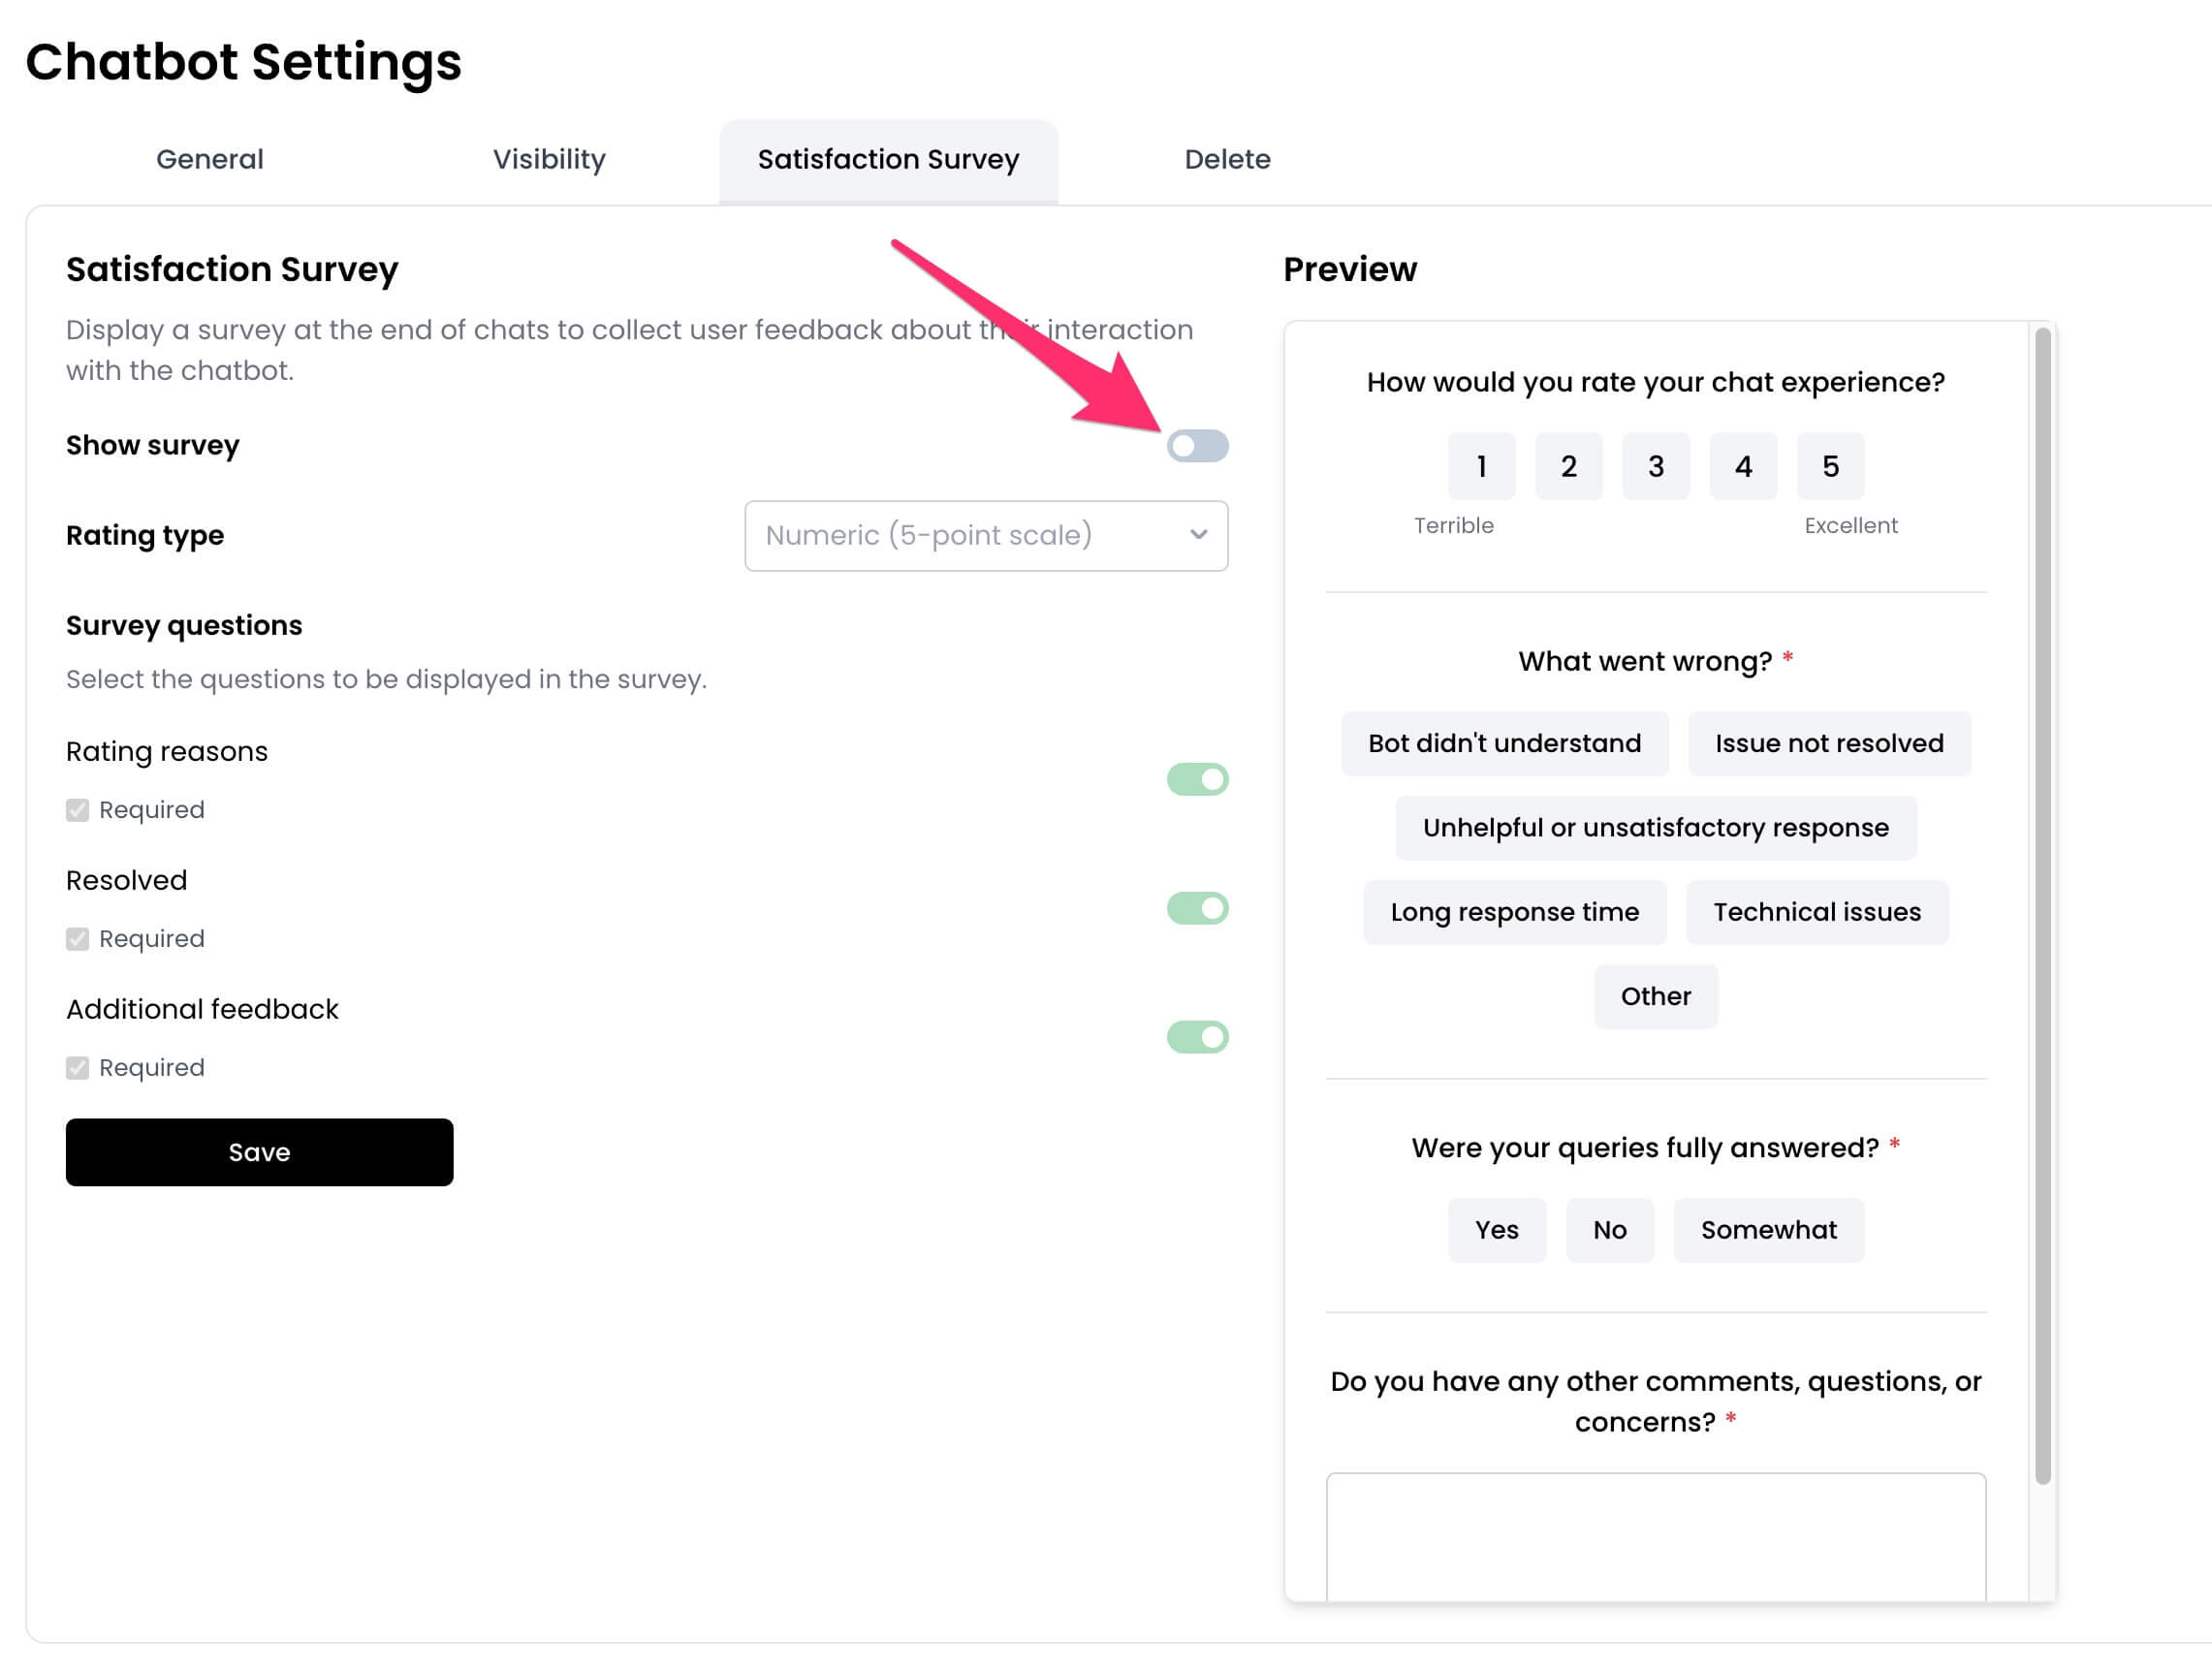 4. Customize the survey by selecting the rating type, questions to display, and more.
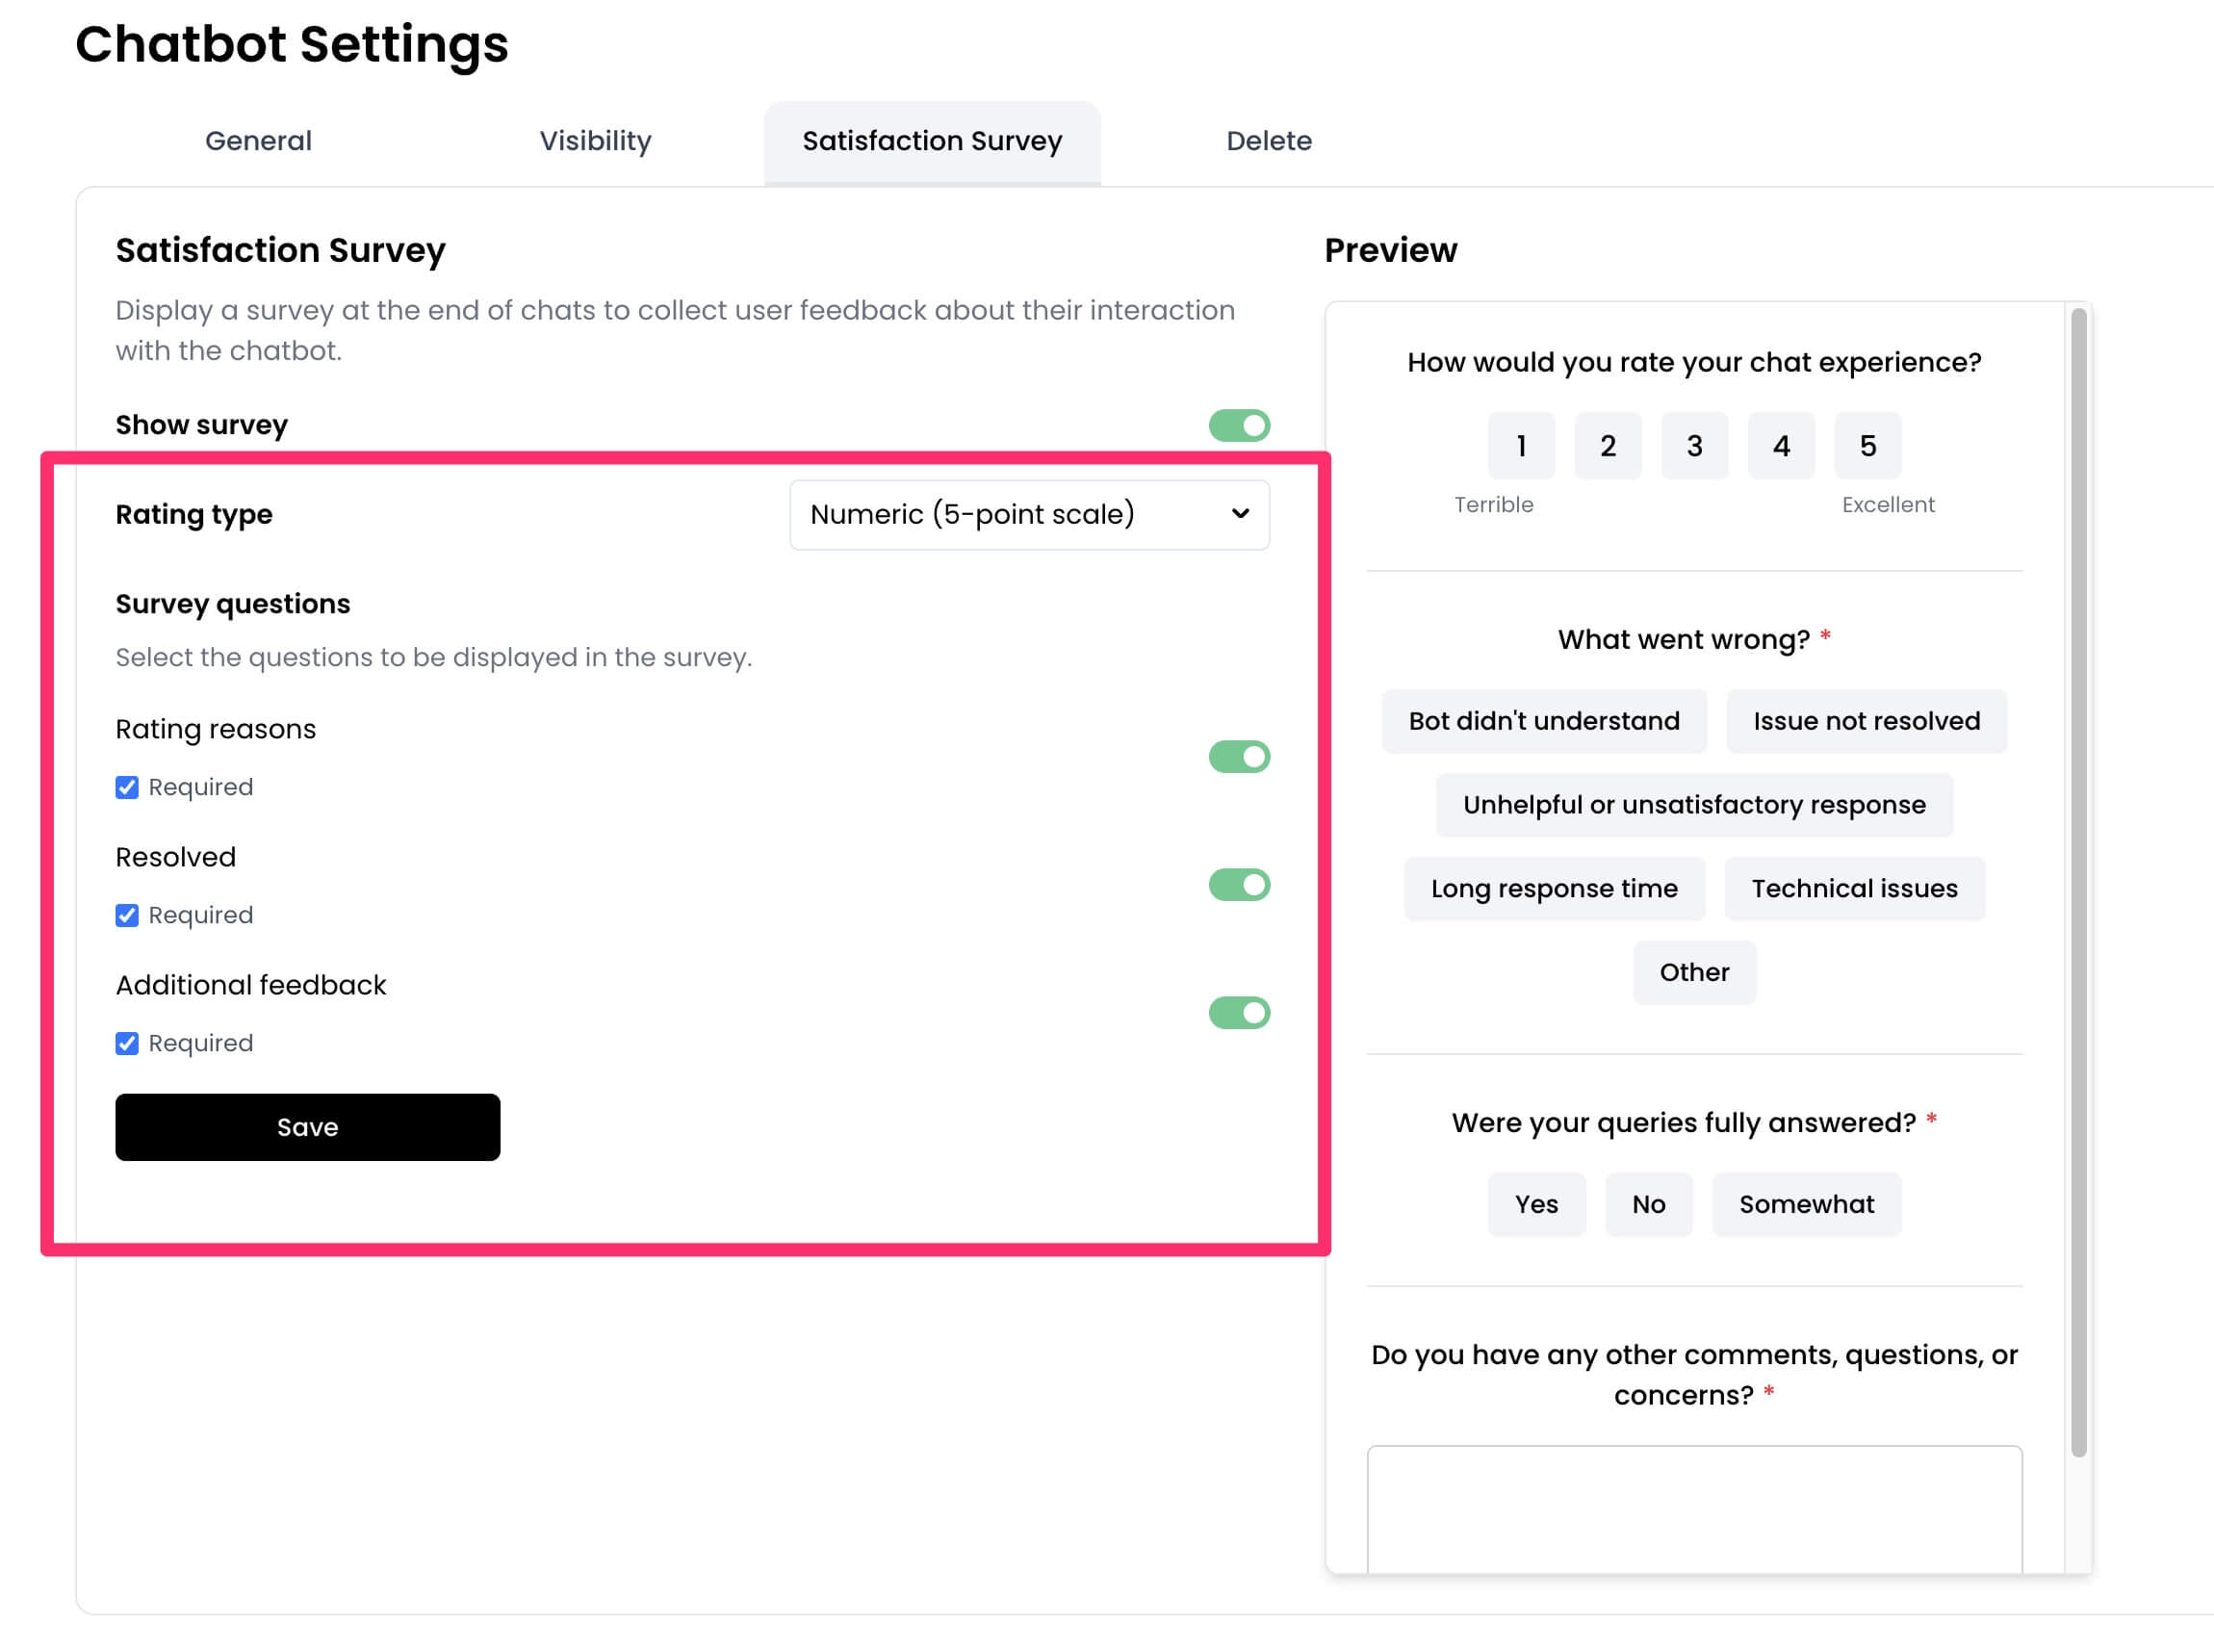 5. Click `Save` to apply the changes.
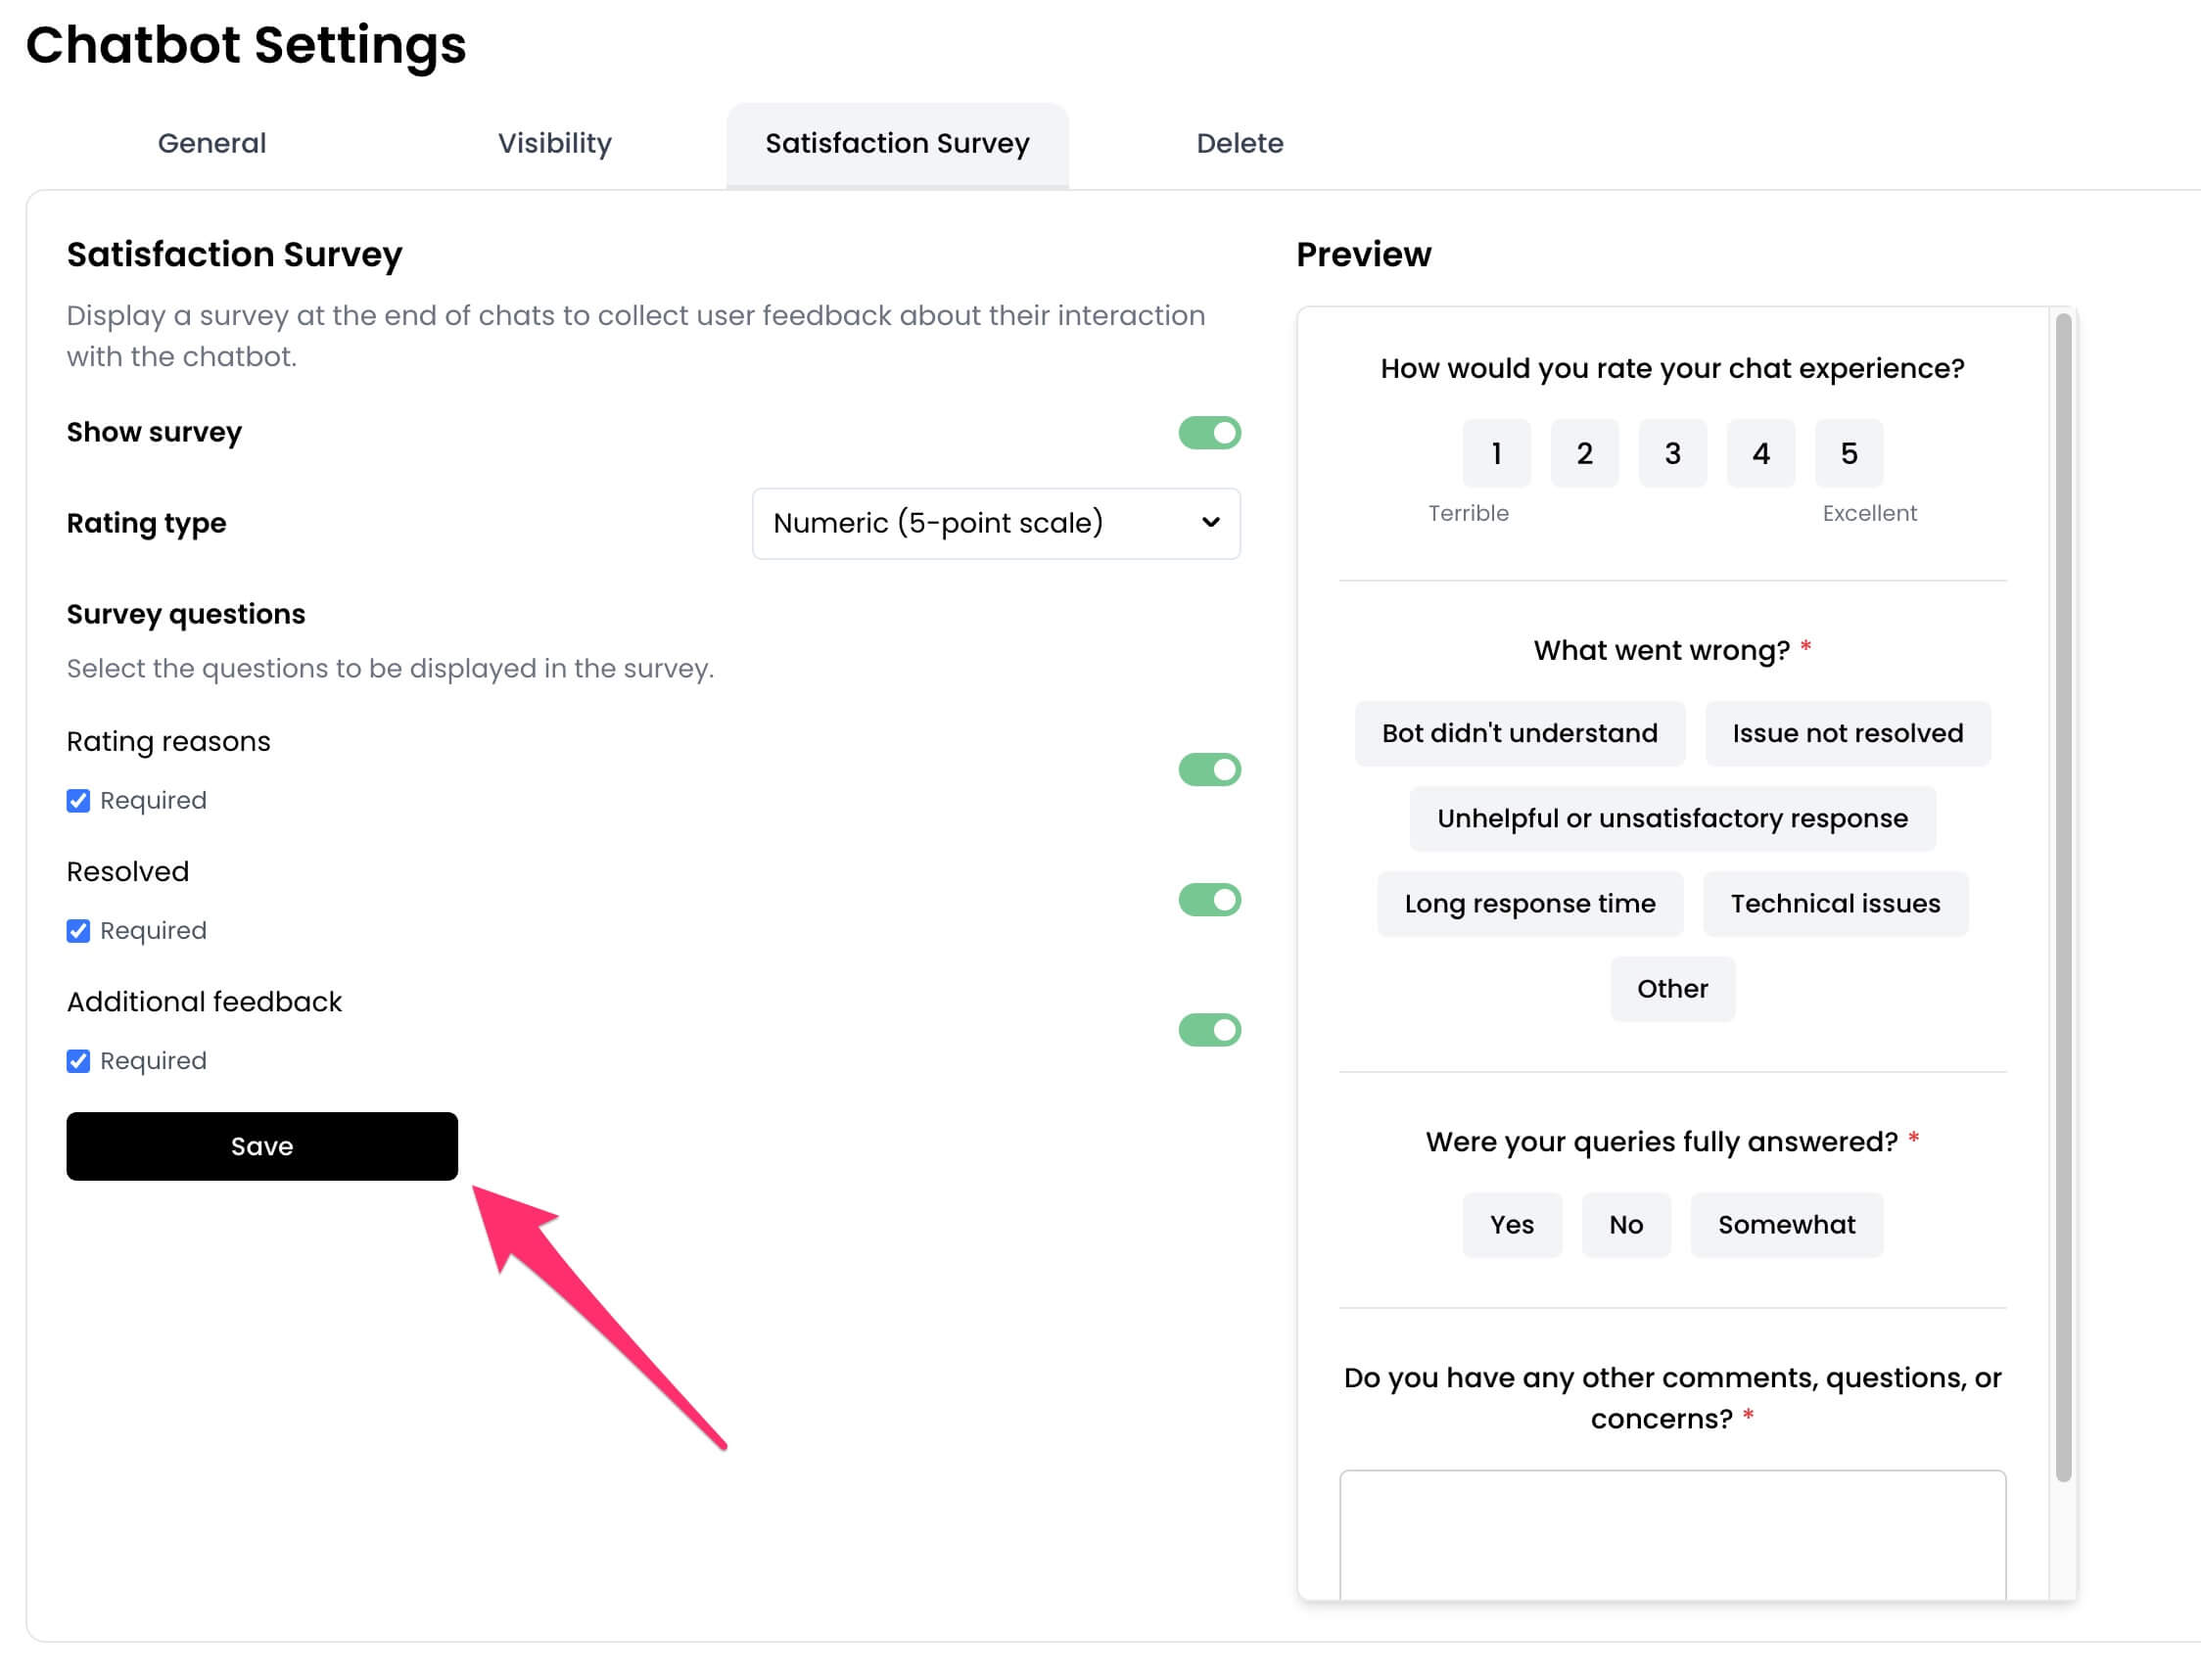 ## View survey responses
You can view survey responses from the `Conversations` page of your chatbot dashboard. If a conversation has a survey response, the result will appear within the conversation thread as well as on the `Details` section in the sidebar.
## View survey responses
You can view survey responses from the `Conversations` page of your chatbot dashboard. If a conversation has a survey response, the result will appear within the conversation thread as well as on the `Details` section in the sidebar.
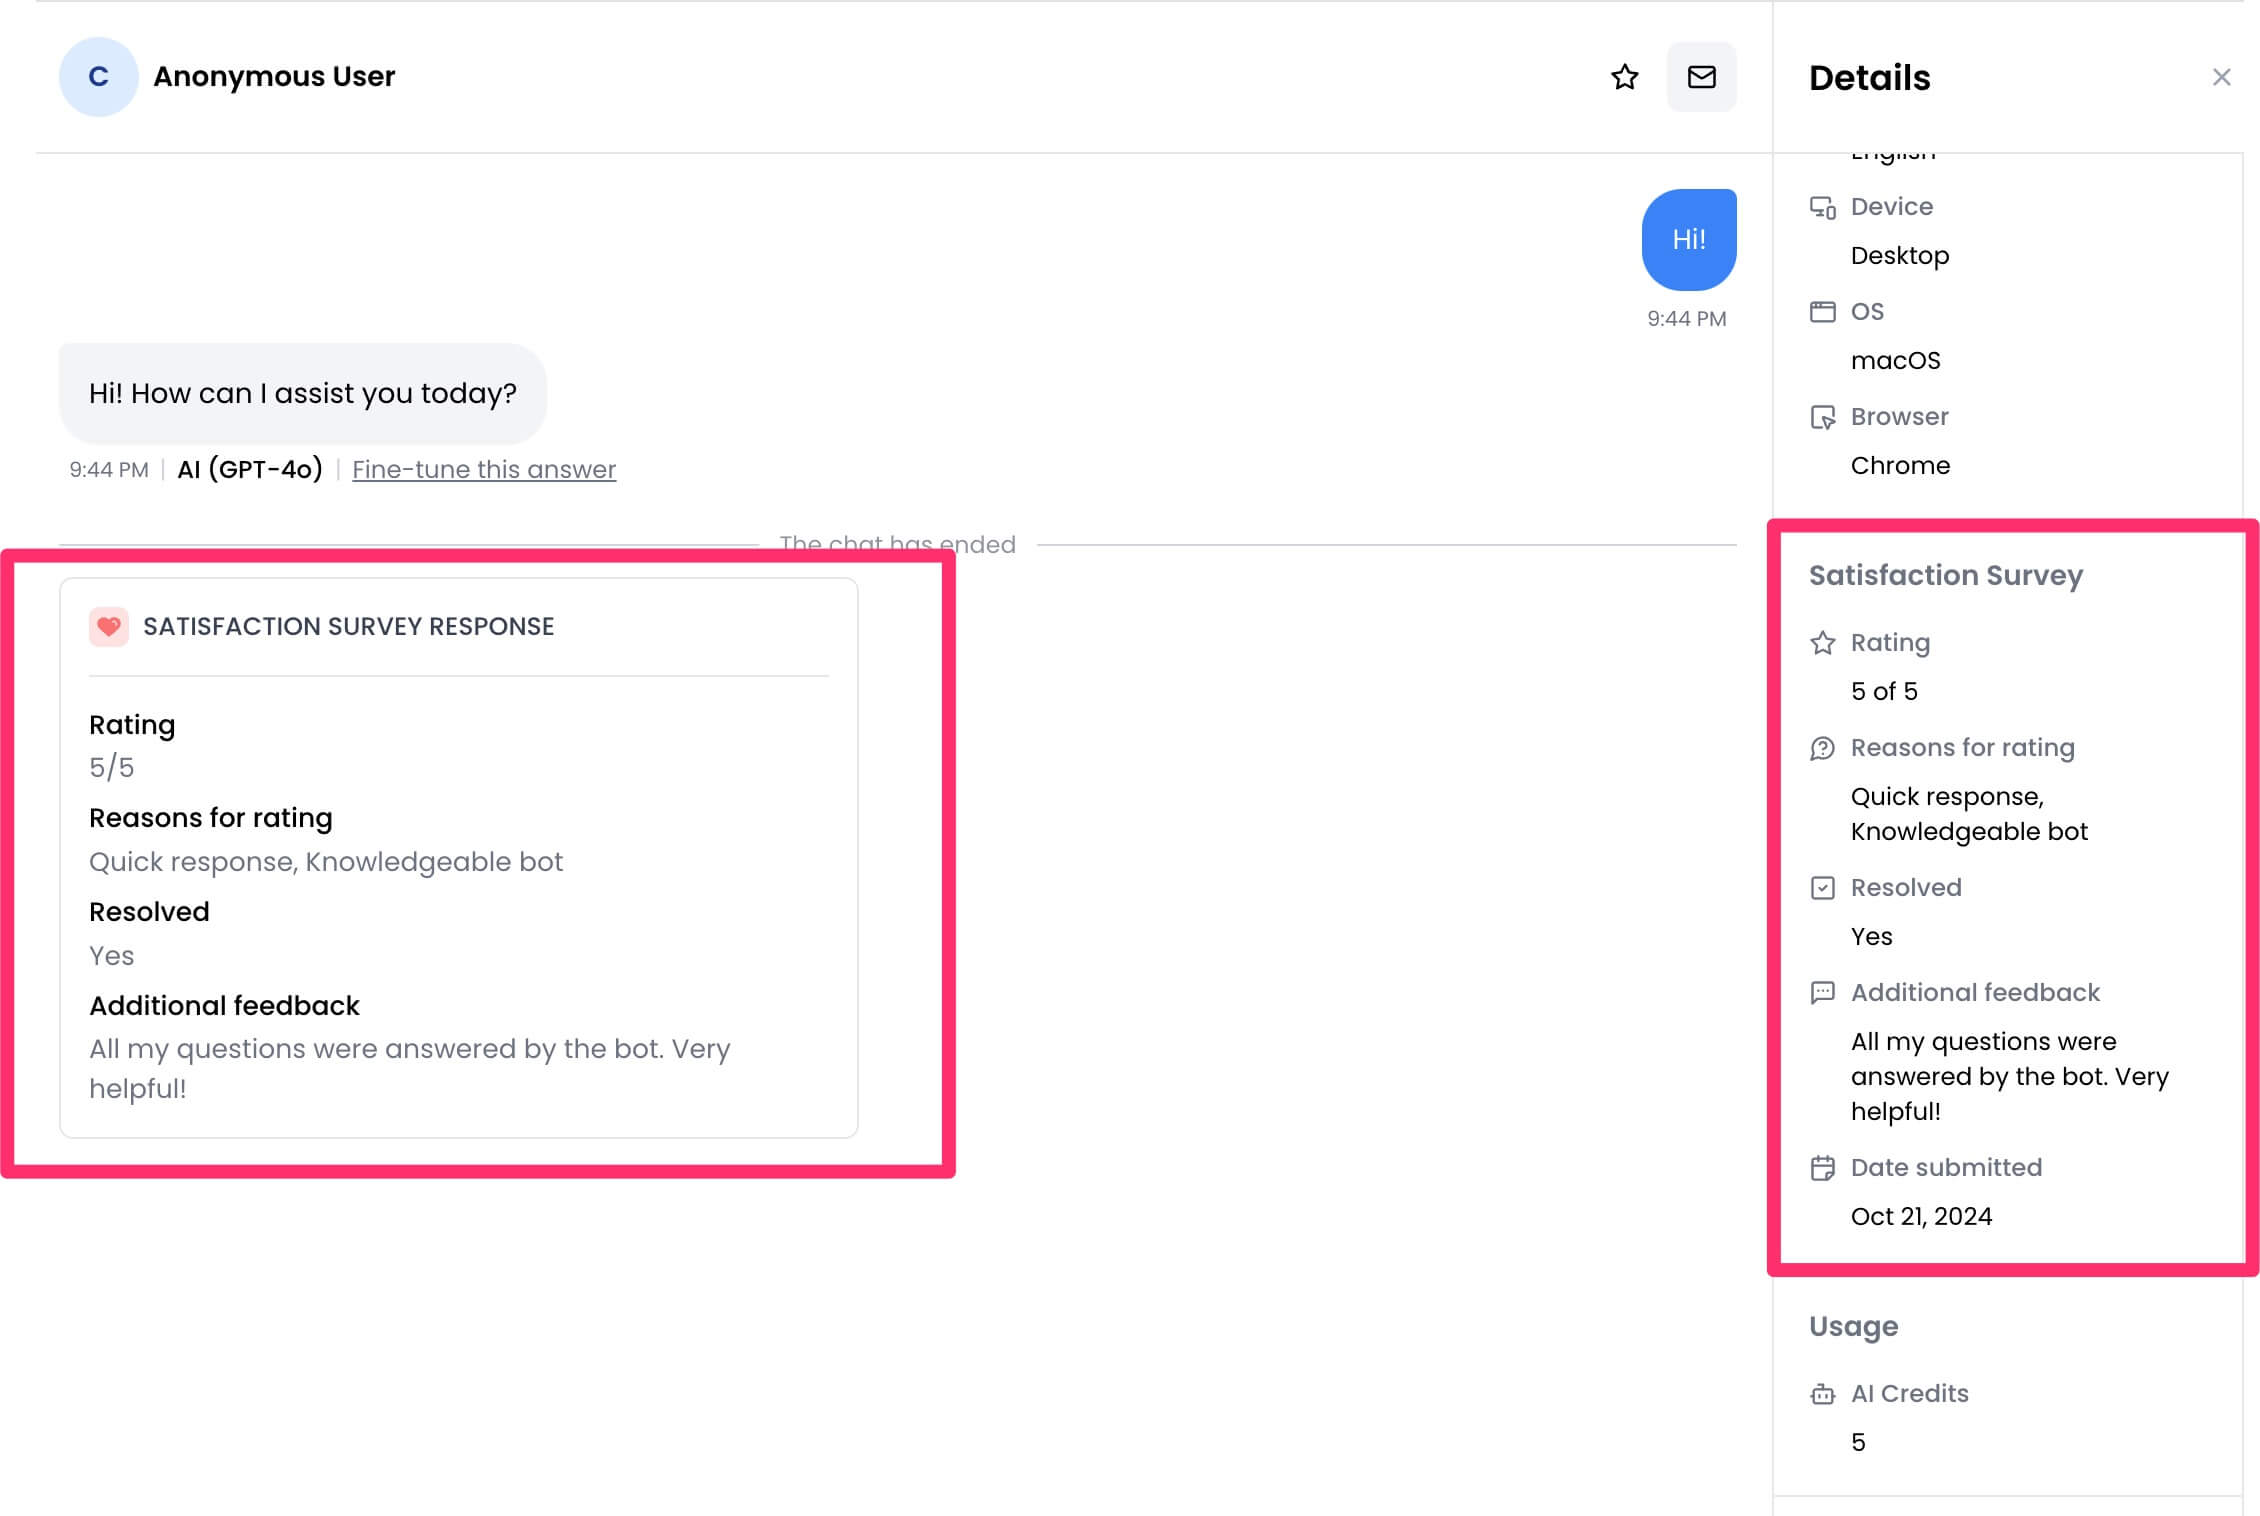 # Widget SDK
Source: https://docs.chatling.ai/chatbot/sdk-methods
## Configuration
You can configure the widget during launch by setting the `window.chtlConfig` object, as shown below.
```javascript
window.chtlConfig = {
// Configuration options
};
```
Below are the available properties you can set.
### `chatIconVisible`
Whether to display the chat icon (open and close buttons).
* Possible values: `true`, `false`
* Default: `true`
```javascript
window.chtlConfig = {
chatIconVisible: true,
// ... other config options
};
```
### `displayType`
The type of widget to display.
* Possible values: `floating`, `fullscreen`, `page_inline`
* Default: `floating`
```javascript
window.chtlConfig = {
displayType: 'floating',
// ... other config options
};
```
### `language`
The language of the widget in ISO 639-1 format. This will override the language set in your chatbot's appearance settings.
* Possible values: `en`, `ar`, `az`, `bg`, `bn`, `bs`, `ca`, `cs`, `da`, `de`, `el`, `en`, `es`, `et`, `fa`, `fi`, `fr`, `he`, `hi`, `hr`, `hu`, `hy`, `id`, `it`, `ja`, `ko`, `lt`, `lv`, `mn`, `ms`, `nl`, `no`, `pl`, `pt`, `pt-br`, `ro`, `ru`, `sk`, `sl`, `sq`, `sr`, `sv`, `th`, `tr`, `uk`, `ur`, `vi`, `zh-cn`, `zh-tw`
```javascript
window.chtlConfig = {
language: 'en',
// ... other config options
};
```
## Methods
Below are the SDK methods you can call to interact with the widget.
# Widget SDK
Source: https://docs.chatling.ai/chatbot/sdk-methods
## Configuration
You can configure the widget during launch by setting the `window.chtlConfig` object, as shown below.
```javascript
window.chtlConfig = {
// Configuration options
};
```
Below are the available properties you can set.
### `chatIconVisible`
Whether to display the chat icon (open and close buttons).
* Possible values: `true`, `false`
* Default: `true`
```javascript
window.chtlConfig = {
chatIconVisible: true,
// ... other config options
};
```
### `displayType`
The type of widget to display.
* Possible values: `floating`, `fullscreen`, `page_inline`
* Default: `floating`
```javascript
window.chtlConfig = {
displayType: 'floating',
// ... other config options
};
```
### `language`
The language of the widget in ISO 639-1 format. This will override the language set in your chatbot's appearance settings.
* Possible values: `en`, `ar`, `az`, `bg`, `bn`, `bs`, `ca`, `cs`, `da`, `de`, `el`, `en`, `es`, `et`, `fa`, `fi`, `fr`, `he`, `hi`, `hr`, `hu`, `hy`, `id`, `it`, `ja`, `ko`, `lt`, `lv`, `mn`, `ms`, `nl`, `no`, `pl`, `pt`, `pt-br`, `ro`, `ru`, `sk`, `sl`, `sq`, `sr`, `sv`, `th`, `tr`, `uk`, `ur`, `vi`, `zh-cn`, `zh-tw`
```javascript
window.chtlConfig = {
language: 'en',
// ... other config options
};
```
## Methods
Below are the SDK methods you can call to interact with the widget.
 2. Click `Generate Link`.
 3. To password protect the link, enable `Require password` and type in a password.
 4. Copy the link and share it with others.
# Visibility
Source: https://docs.chatling.ai/chatbot/visibility
A guide on how to make your chatbot public or private.
You can set the visibility of your chatbot to be public or private. Setting to Public will make your chatbot visible to all users, while setting to Private will make it accessible from your account only.
## How to set the visibility
1. From the chatbot dashboard, go to `Settings`.
4. Copy the link and share it with others.
# Visibility
Source: https://docs.chatling.ai/chatbot/visibility
A guide on how to make your chatbot public or private.
You can set the visibility of your chatbot to be public or private. Setting to Public will make your chatbot visible to all users, while setting to Private will make it accessible from your account only.
## How to set the visibility
1. From the chatbot dashboard, go to `Settings`.
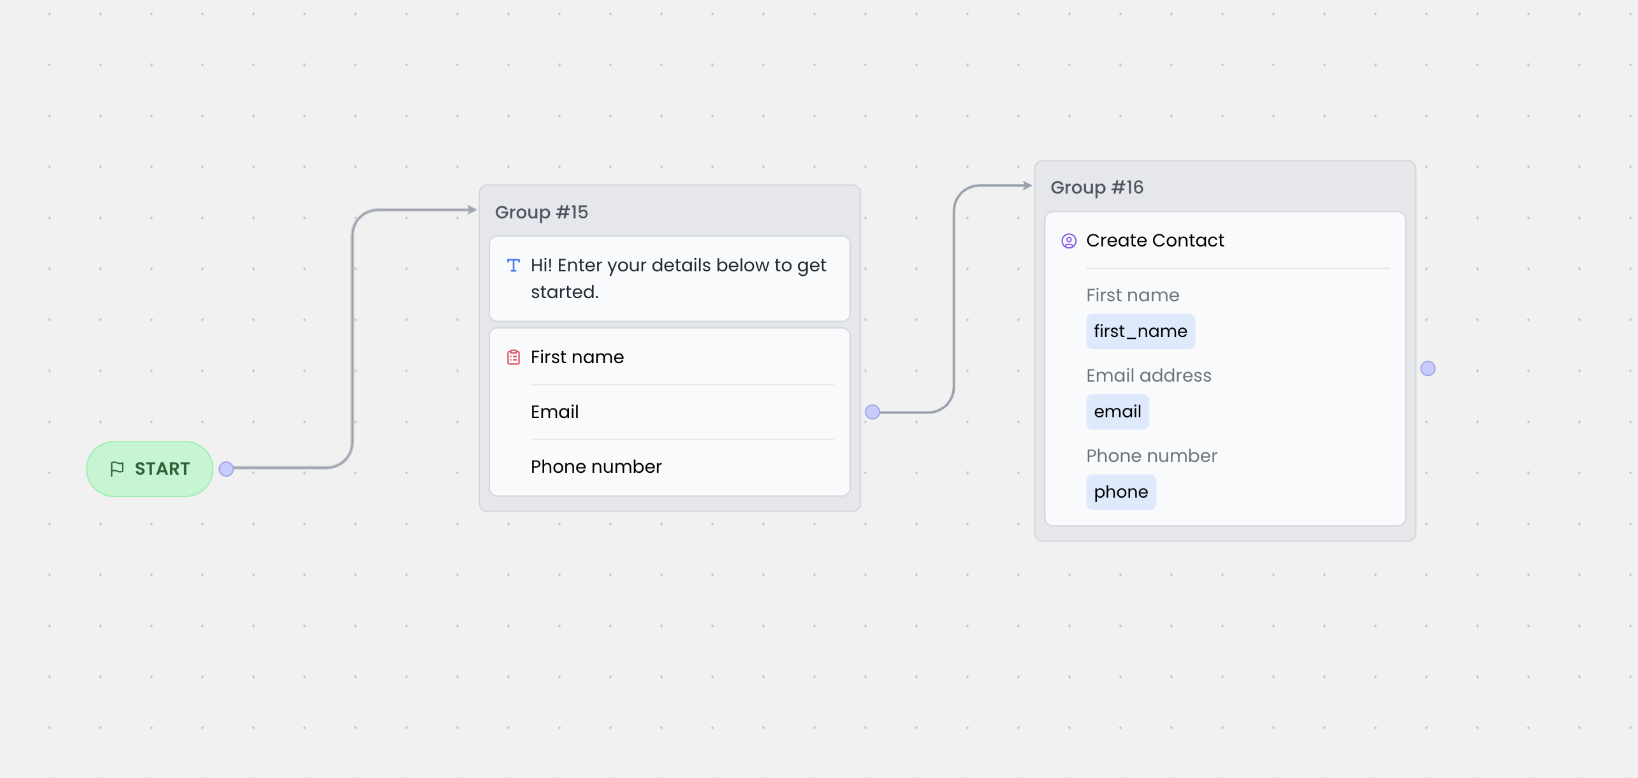 All contacts created by the chatbot are displayed in the `Contacts` page in your dashboard.
# Identify users across multiple chats
Source: https://docs.chatling.ai/contacts/identify-users
{/* Fetching user details in future chat sessions */}
When you save a contact, it's associated with the user and persists across multiple chat sessions. This information can be used to personalize the conversation, skip repetitive questions, and tailor the flow accordingly.
## How it works
The [Get Contact](/builder/blocks/action/get-contact) block can be used to fetch the contact information associated with the current user.
The example below shows a flow that identifies the user and takes different actions based on whether their contact details exist.
All contacts created by the chatbot are displayed in the `Contacts` page in your dashboard.
# Identify users across multiple chats
Source: https://docs.chatling.ai/contacts/identify-users
{/* Fetching user details in future chat sessions */}
When you save a contact, it's associated with the user and persists across multiple chat sessions. This information can be used to personalize the conversation, skip repetitive questions, and tailor the flow accordingly.
## How it works
The [Get Contact](/builder/blocks/action/get-contact) block can be used to fetch the contact information associated with the current user.
The example below shows a flow that identifies the user and takes different actions based on whether their contact details exist.
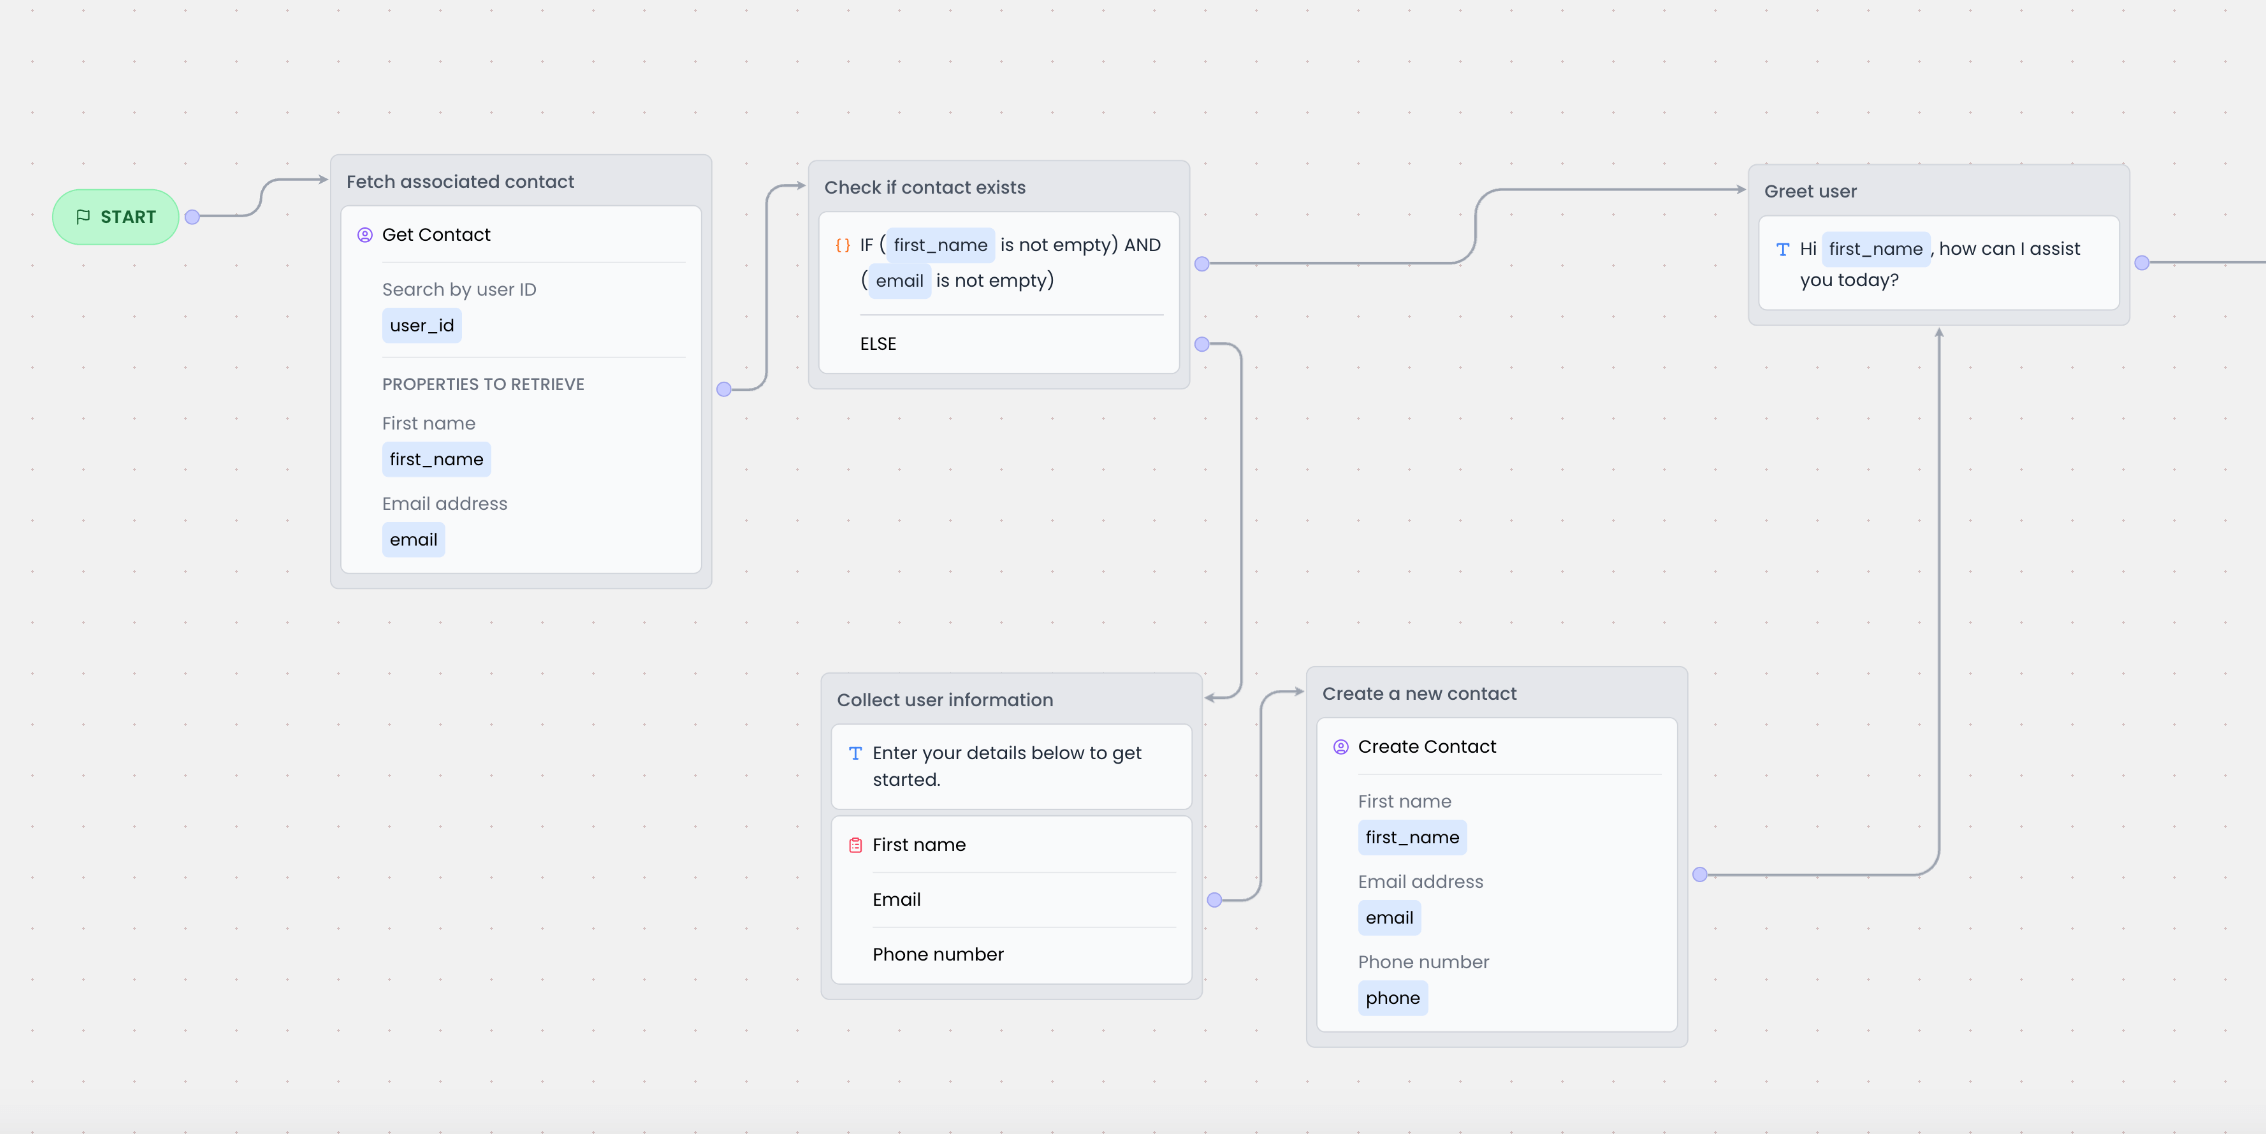 Here's how the above flow works:
1. When the chat starts, the `Get Contact` block is executed to check if a contact exists for the current user.
Here's how the above flow works:
1. When the chat starts, the `Get Contact` block is executed to check if a contact exists for the current user.
 2. Click the settings icon in the sidebar.
 3. Enable the the `Reset chat on page load` option.
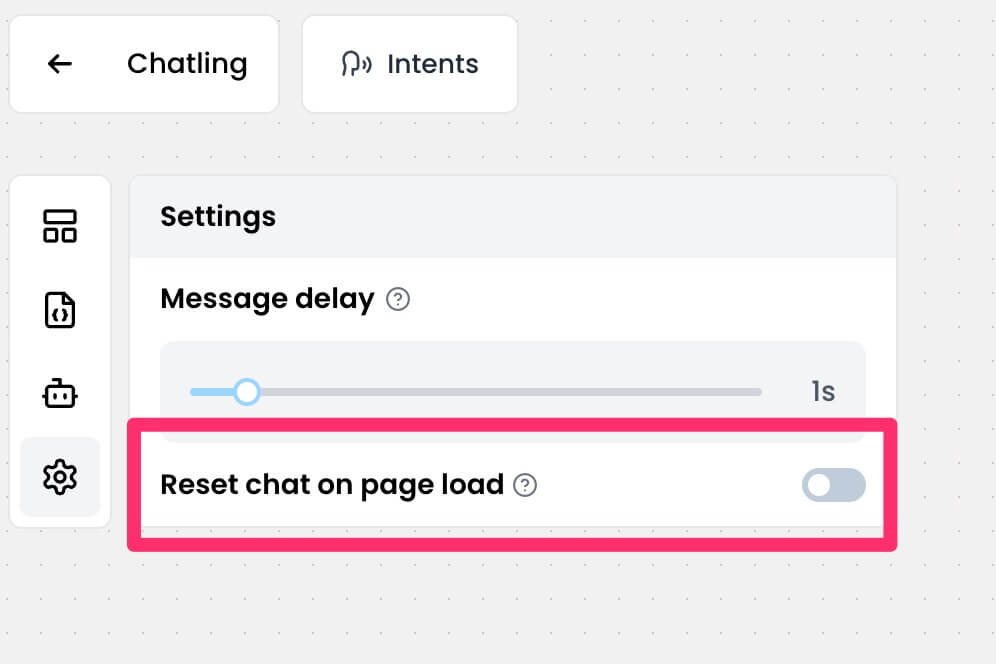 # What are AI credits?
Source: https://docs.chatling.ai/faq/what-are-ai-credits
Understanding AI credits and how they are consumed
AI credits are used to manage and track AI usage. These credits are consumed each time the chatbot generates an AI response.
The number of AI credits used per response varies depending on the specific AI model you use. For a breakdown of credit usage by model, refer to [this page](/faq/ai-credit-usage-by-model).
Please note that credits are not consumed for normal messages sent and received by users. It is only used when the chatbot uses AI to generate responses (such as when you use the [AI block](/builder/blocks/ai/ai-response)).
# Getting started
Source: https://docs.chatling.ai/getting-started
Welcome to Chatling, the platform for building AI-powered chatbots.
Chatling is a no-code platform that allows businesses to build conversational AI chatbots with ease and speed. Whether you're looking to automate customer support, generate leads, or provide information, Chatling can help you create a chatbot that meets your needs.
This is your guide to getting started with Chatling. Here, you'll learn how to create your first chatbot, build its flow, and deploy it to your website in no time.
Let's get started! 🚀
What we'll be covering:
1. [Create a chatbot](#1-create-a-chatbot)
2. [Building your chatbot](#2-building-your-chatbot)
3. [Populating the knowledge base](#3-populate-the-ai-knowledge-base)
4. [Customize the widget](#4-customize-the-widget)
5. [Deploy your chatbot](#5-deploy-your-chatbot)
## 1. Create a chatbot
After you sign up and verify your email, the first step is to create your chatbot.
1. From the dashboard, click on the `Create chatbot` button.
# What are AI credits?
Source: https://docs.chatling.ai/faq/what-are-ai-credits
Understanding AI credits and how they are consumed
AI credits are used to manage and track AI usage. These credits are consumed each time the chatbot generates an AI response.
The number of AI credits used per response varies depending on the specific AI model you use. For a breakdown of credit usage by model, refer to [this page](/faq/ai-credit-usage-by-model).
Please note that credits are not consumed for normal messages sent and received by users. It is only used when the chatbot uses AI to generate responses (such as when you use the [AI block](/builder/blocks/ai/ai-response)).
# Getting started
Source: https://docs.chatling.ai/getting-started
Welcome to Chatling, the platform for building AI-powered chatbots.
Chatling is a no-code platform that allows businesses to build conversational AI chatbots with ease and speed. Whether you're looking to automate customer support, generate leads, or provide information, Chatling can help you create a chatbot that meets your needs.
This is your guide to getting started with Chatling. Here, you'll learn how to create your first chatbot, build its flow, and deploy it to your website in no time.
Let's get started! 🚀
What we'll be covering:
1. [Create a chatbot](#1-create-a-chatbot)
2. [Building your chatbot](#2-building-your-chatbot)
3. [Populating the knowledge base](#3-populate-the-ai-knowledge-base)
4. [Customize the widget](#4-customize-the-widget)
5. [Deploy your chatbot](#5-deploy-your-chatbot)
## 1. Create a chatbot
After you sign up and verify your email, the first step is to create your chatbot.
1. From the dashboard, click on the `Create chatbot` button.
 2. You can choose to create a chatbot from scratch or use a template. Templates help you get started quickly with pre-built flows.
 3. Give your chatbot a name and click `Create chatbot`.
 Congrats! You've created your first chatbot. Now you can start building it based on your requirements.
## 2. Building your chatbot
For your chatbot to be functional, you need to build its conversational flow. This can be done using the Builder.
From your chatbot's dashboard, click on the `Builder` menu to open it.

{/* This is where you define how the chatbot interacts with users and responds to their queries. */}
The [Builder](/builder/overview) is where you can create and manage your chatbot's flow. It's a visual interface that allows you to add and connect blocks to create a conversational flow.
All chatbots contain a default `Start` block, which is the entry point of the conversation.

### Sidebar
On the left sidebar, you'll find the following menus:
* **[Blocks](/builder/blocks/overview)**: Contains all the blocks you can add to your flow. Blocks build up the conversational flow of your chatbot.
You can drag and drop blocks from this menu to the canvas to add them to your flow.

* **Variables**: These are like containers that store information during the conversation. You can use variables to personalize the conversation and make it more dynamic.
Congrats! You've created your first chatbot. Now you can start building it based on your requirements.
## 2. Building your chatbot
For your chatbot to be functional, you need to build its conversational flow. This can be done using the Builder.
From your chatbot's dashboard, click on the `Builder` menu to open it.

{/* This is where you define how the chatbot interacts with users and responds to their queries. */}
The [Builder](/builder/overview) is where you can create and manage your chatbot's flow. It's a visual interface that allows you to add and connect blocks to create a conversational flow.
All chatbots contain a default `Start` block, which is the entry point of the conversation.

### Sidebar
On the left sidebar, you'll find the following menus:
* **[Blocks](/builder/blocks/overview)**: Contains all the blocks you can add to your flow. Blocks build up the conversational flow of your chatbot.
You can drag and drop blocks from this menu to the canvas to add them to your flow.

* **Variables**: These are like containers that store information during the conversation. You can use variables to personalize the conversation and make it more dynamic.
 * **AI Configuration**: Configure the default AI settings for your chatbot. These settings are used when the chatbot generates AI responses using the Knowledge Base.
* **Settings**: Configure the general settings for your chatbot.
### Connecting blocks
Once you add blocks to the [canvas](/builder/canvas), you must connect them to create a flow that guides users through the conversation. Failure to do so will result in the chat ending prematurely.

### Configuring blocks
Each block has its own configuration settings that you can customize. To configure a block, click it and its settings will appear on the right side of the screen.

### Testing your chatbot
While you're building the chatbot, you can test it to see how it works. This allows you to identify any issues and make improvements before publishing it.
Click the `Preview bot` button in the top right corner of the screen to launch the chatbot for testing.

Your work is saved automatically as you build your chatbot. You can also save it manually by clicking the `Save` button in the top right side of the screen.
### Saving your work
Your work is saved automatically as you build your chatbot. You can also save it manually by clicking the `Save` button in the top right side of the screen.
Any changes you make to the chatbot are saved as drafts until you publish them. This allows you to work on the chatbot and test it without affecting the live version.
### Publish your chatbot
Once you've built and tested your chatbot, you can publish it to make it live. Click the `Publish` button in the top right corner of the screen to publish your chatbot.

## 3. Populate the AI knowledge base
The Knowledge Base is where you upload information that the AI uses to generate responses to user queries. It uses this information to provide accurate and relevant responses to users.
* **AI Configuration**: Configure the default AI settings for your chatbot. These settings are used when the chatbot generates AI responses using the Knowledge Base.
* **Settings**: Configure the general settings for your chatbot.
### Connecting blocks
Once you add blocks to the [canvas](/builder/canvas), you must connect them to create a flow that guides users through the conversation. Failure to do so will result in the chat ending prematurely.

### Configuring blocks
Each block has its own configuration settings that you can customize. To configure a block, click it and its settings will appear on the right side of the screen.

### Testing your chatbot
While you're building the chatbot, you can test it to see how it works. This allows you to identify any issues and make improvements before publishing it.
Click the `Preview bot` button in the top right corner of the screen to launch the chatbot for testing.

Your work is saved automatically as you build your chatbot. You can also save it manually by clicking the `Save` button in the top right side of the screen.
### Saving your work
Your work is saved automatically as you build your chatbot. You can also save it manually by clicking the `Save` button in the top right side of the screen.
Any changes you make to the chatbot are saved as drafts until you publish them. This allows you to work on the chatbot and test it without affecting the live version.
### Publish your chatbot
Once you've built and tested your chatbot, you can publish it to make it live. Click the `Publish` button in the top right corner of the screen to publish your chatbot.

## 3. Populate the AI knowledge base
The Knowledge Base is where you upload information that the AI uses to generate responses to user queries. It uses this information to provide accurate and relevant responses to users.
 You can add websites, documents, texts, and FAQs to the knowledge base. When a user asks a question, the AI searches the knowledge base for relevant information and generates a response based on the data it finds.
Therefore, if your chatbot contains an AI Response block and it's "Response Source" is set to "Knowledge Base", you need to populate the Knowledge Base with information that the AI can use to generate responses.
## 4. Customize the widget
You can customize the appearance of your chatbot to match your brand, such as colors, icons, and other design elements. This helps create a chatbot that fits seamlessly into your website.
To customize, click on the `Appearance` menu from your chatbot's dashboard.

## 5. Deploy your chatbot
Once you've built your chatbot, it's time to deploy it to your website. Here's how you can do it:
* First, make sure that you've published your chatbot. You can publish it from the Builder page.

* Next, click the `Add to website` menu from your dashboard.

* Select the display mode for your chatbot, such as "Floating Chat", "Inline", or "Fullscreen".

* Copy the chatbot widget code.
* Paste the code into the `head` or `body` section of your website's HTML. If you selected the "Inline" mode, you must paste the code where you want the chatbot to appear on your website.
That's it! Your chatbot is now live on your website, ready to engage with your visitors.
# Bubble
Source: https://docs.chatling.ai/install-chatbot/bubble
Learn how to add Chatling to your Bubble website
1. Go to your chatbot's dashboard.
2. Click on `Website widget` in the sidebar.
You can add websites, documents, texts, and FAQs to the knowledge base. When a user asks a question, the AI searches the knowledge base for relevant information and generates a response based on the data it finds.
Therefore, if your chatbot contains an AI Response block and it's "Response Source" is set to "Knowledge Base", you need to populate the Knowledge Base with information that the AI can use to generate responses.
## 4. Customize the widget
You can customize the appearance of your chatbot to match your brand, such as colors, icons, and other design elements. This helps create a chatbot that fits seamlessly into your website.
To customize, click on the `Appearance` menu from your chatbot's dashboard.

## 5. Deploy your chatbot
Once you've built your chatbot, it's time to deploy it to your website. Here's how you can do it:
* First, make sure that you've published your chatbot. You can publish it from the Builder page.

* Next, click the `Add to website` menu from your dashboard.

* Select the display mode for your chatbot, such as "Floating Chat", "Inline", or "Fullscreen".

* Copy the chatbot widget code.
* Paste the code into the `head` or `body` section of your website's HTML. If you selected the "Inline" mode, you must paste the code where you want the chatbot to appear on your website.
That's it! Your chatbot is now live on your website, ready to engage with your visitors.
# Bubble
Source: https://docs.chatling.ai/install-chatbot/bubble
Learn how to add Chatling to your Bubble website
1. Go to your chatbot's dashboard.
2. Click on `Website widget` in the sidebar.
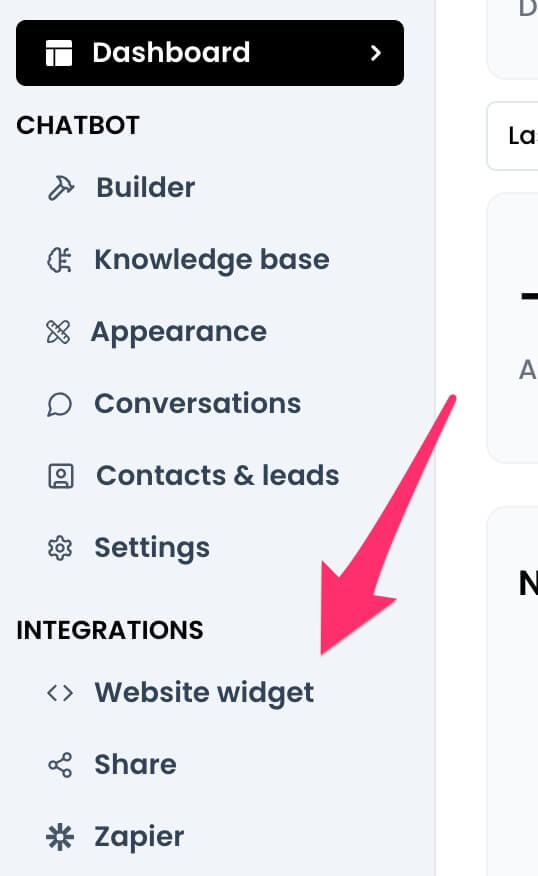 3. Copy the widget code provided.
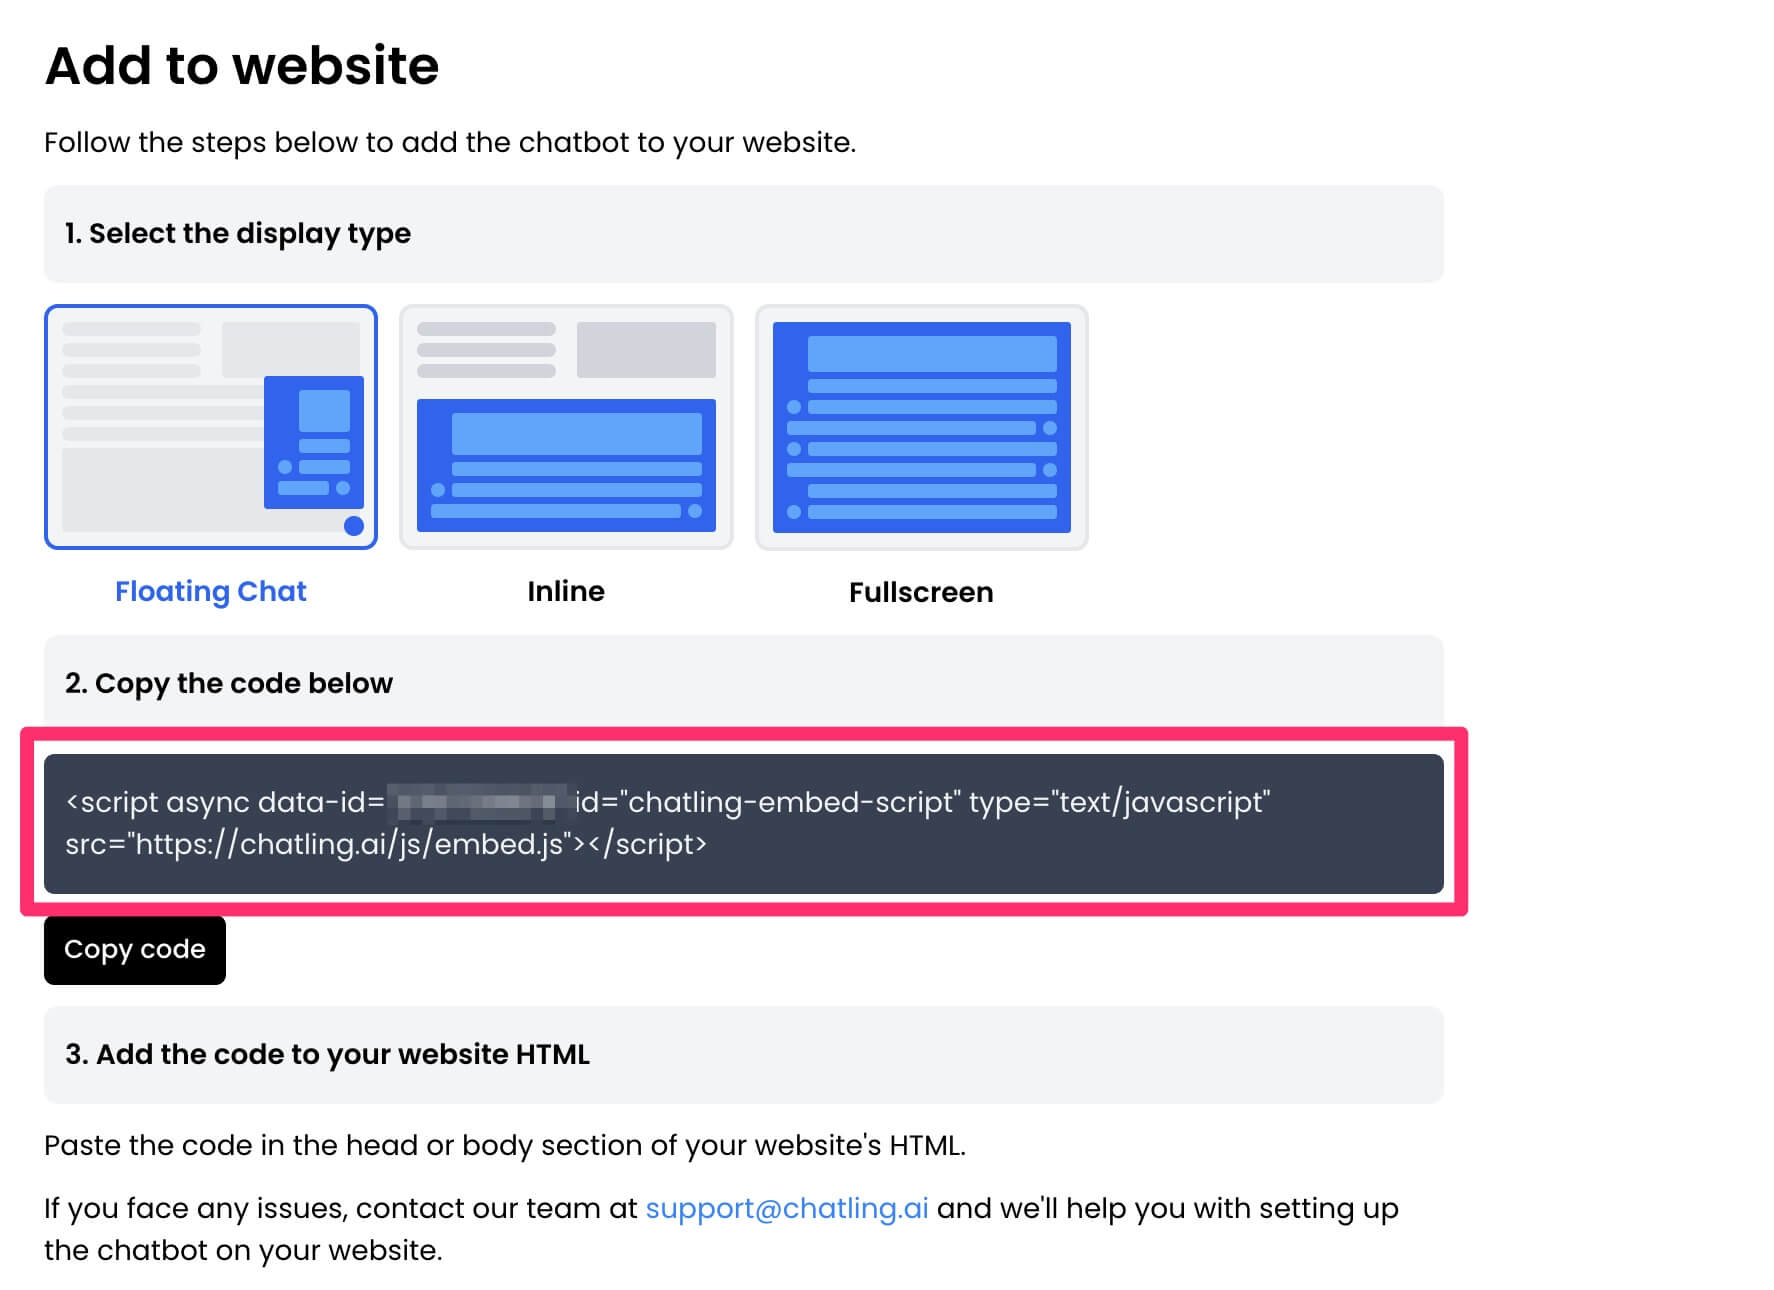 4. Go to your Bubble account and open the app/website where you want to add the chatbot.
 5. On the side, click the gear icon to open Settings.
 6. Go to `SEO / metatags`.
 7. Under the `SEO settings` section, paste the widget code in the header or body textbox.
 8. The settings will be saved automatically. Click the Preview icon to confirm that the chatbot has been added.
Note that this method only works on paid plans. If you're on a free account, Bubble doesn't load the chatbot widget.
8. The settings will be saved automatically. Click the Preview icon to confirm that the chatbot has been added.
Note that this method only works on paid plans. If you're on a free account, Bubble doesn't load the chatbot widget.
 # Custom Website
Source: https://docs.chatling.ai/install-chatbot/custom-website
Learn how to add Chatling to your website
You can easily add Chatling to your website by pasting the widget code to your website's header or body section.
1. Go to your chatbot's dashboard.
2. Click `Website widget` in the sidebar. It's located under the Integrations menu.
# Custom Website
Source: https://docs.chatling.ai/install-chatbot/custom-website
Learn how to add Chatling to your website
You can easily add Chatling to your website by pasting the widget code to your website's header or body section.
1. Go to your chatbot's dashboard.
2. Click `Website widget` in the sidebar. It's located under the Integrations menu.
 6. Enter a name for the tag, such as `Chatling`.
 7. Click on `Tag Configuration`.
 8. Select `Custom HTML`.
 9. Paste the widget code into the `HTML` field.
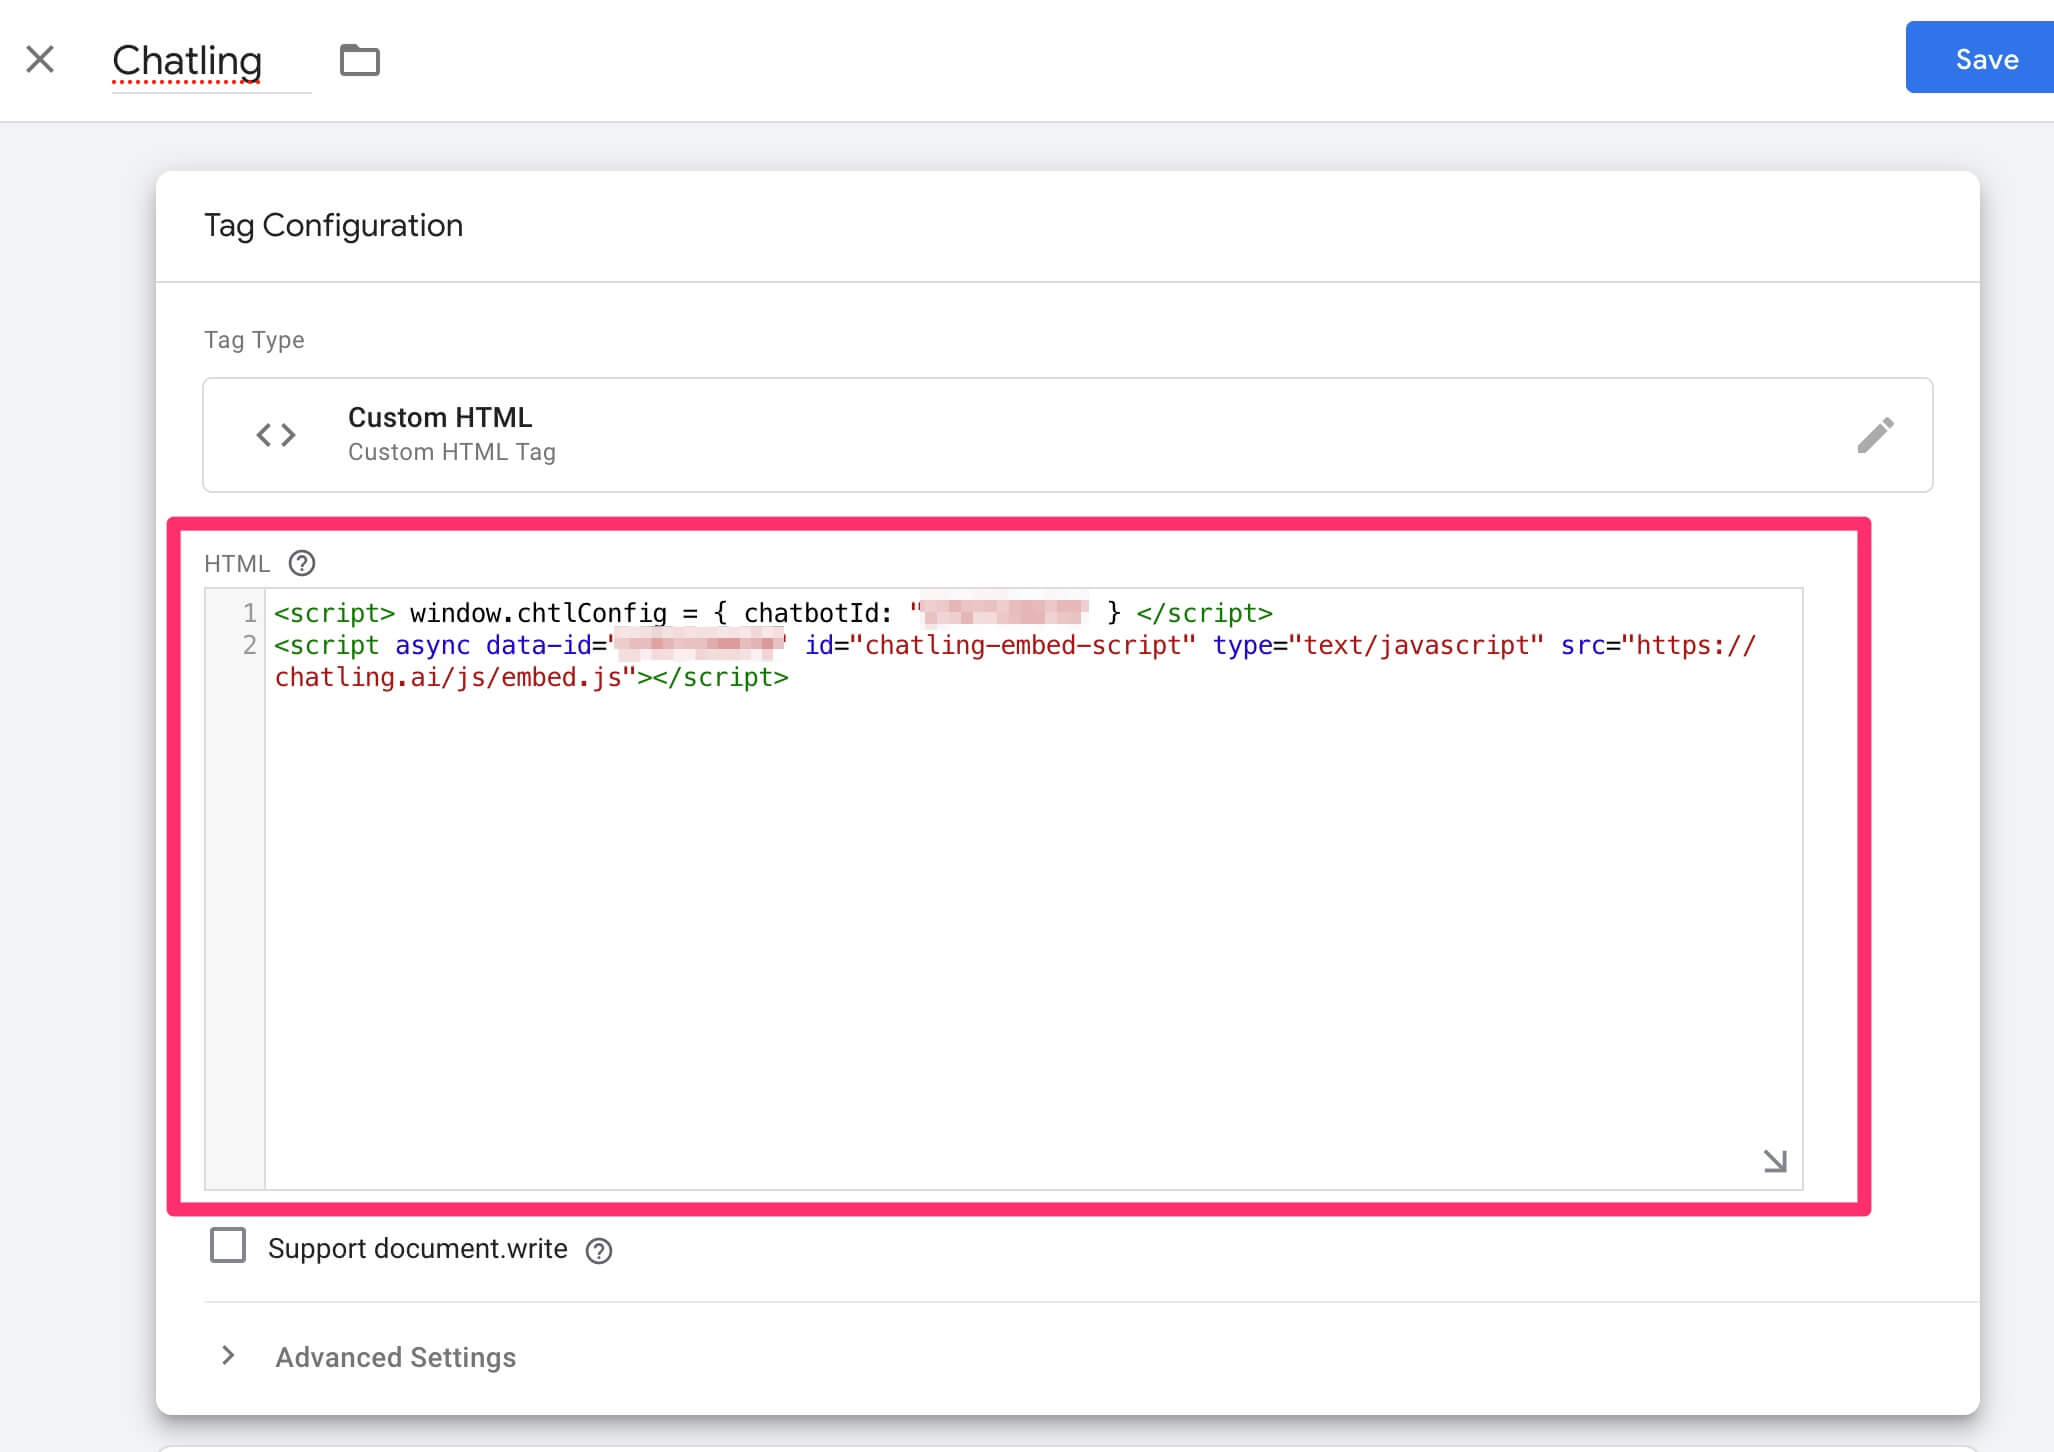 10. Click on `Triggering`.
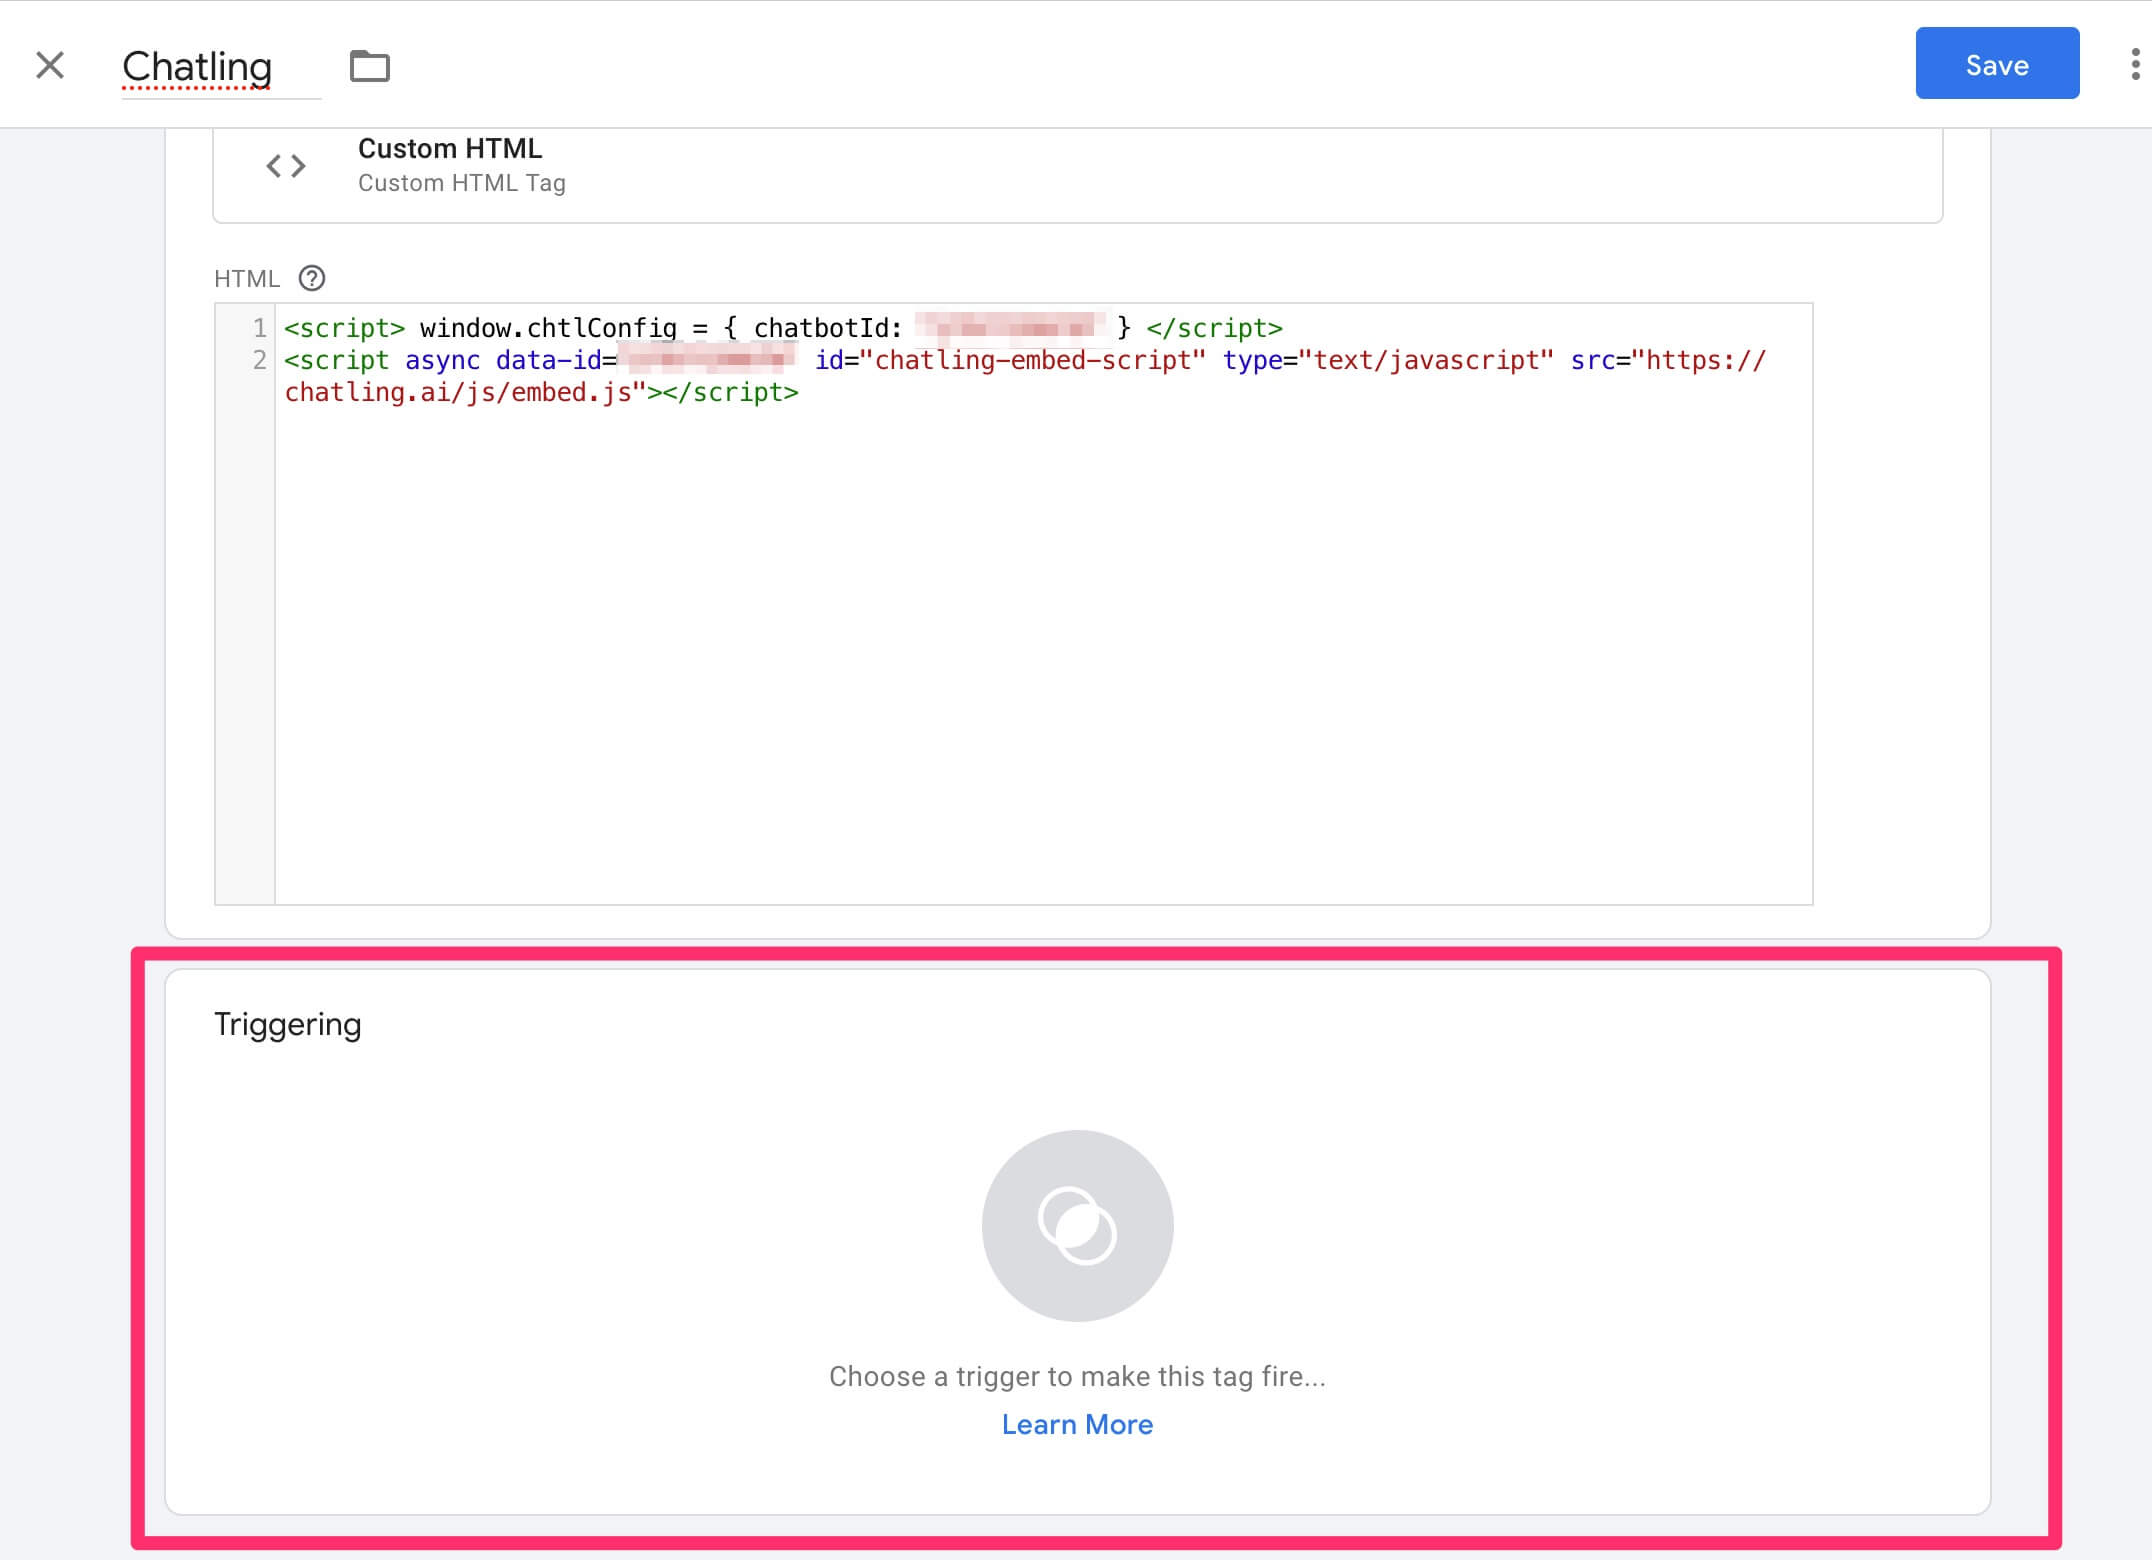 11. Select `All Pages`.
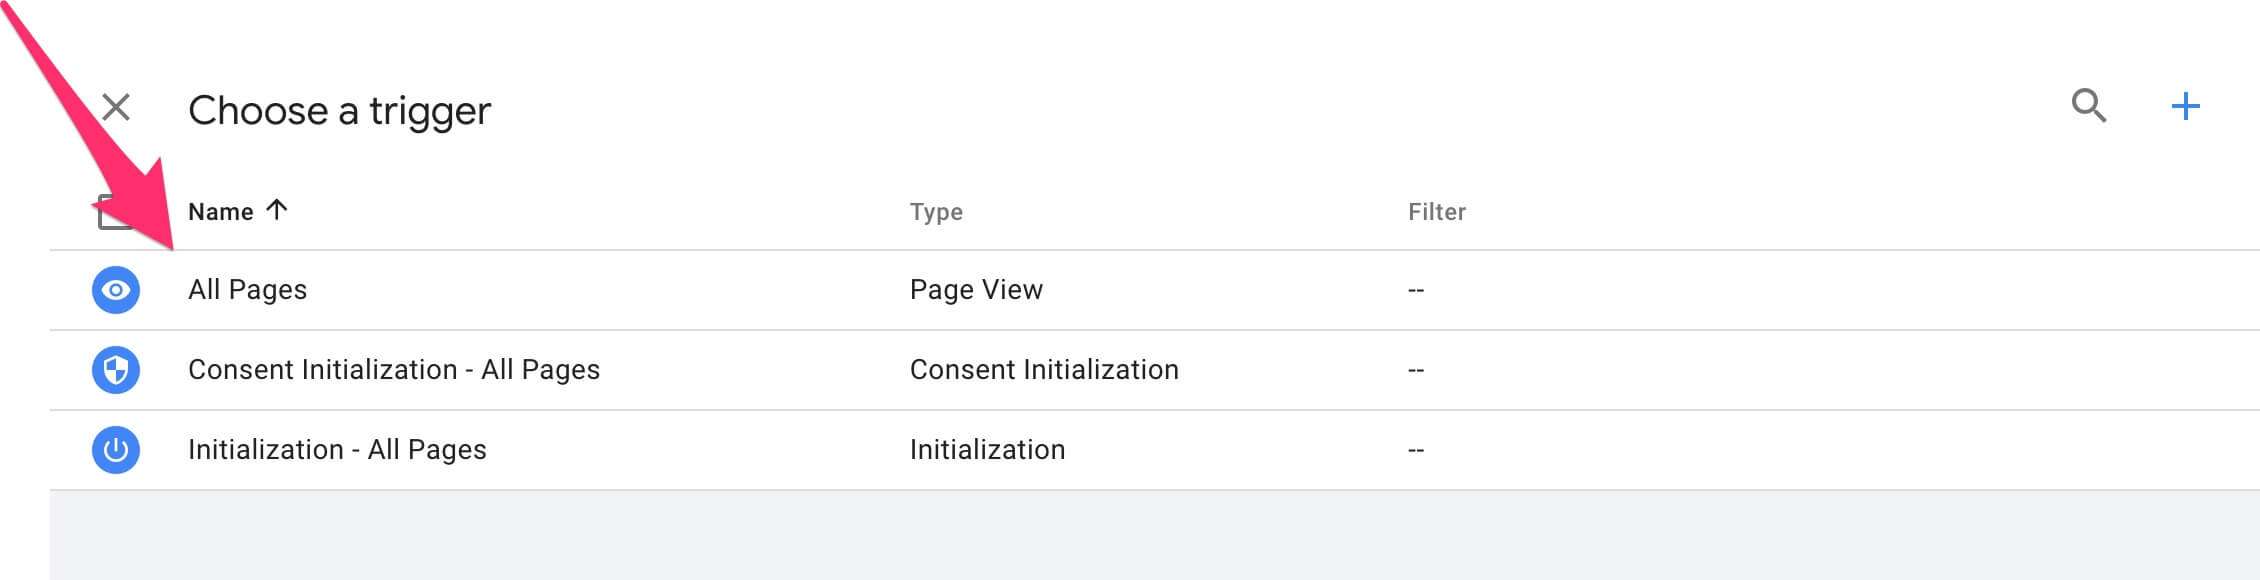 12. Click `Save`.
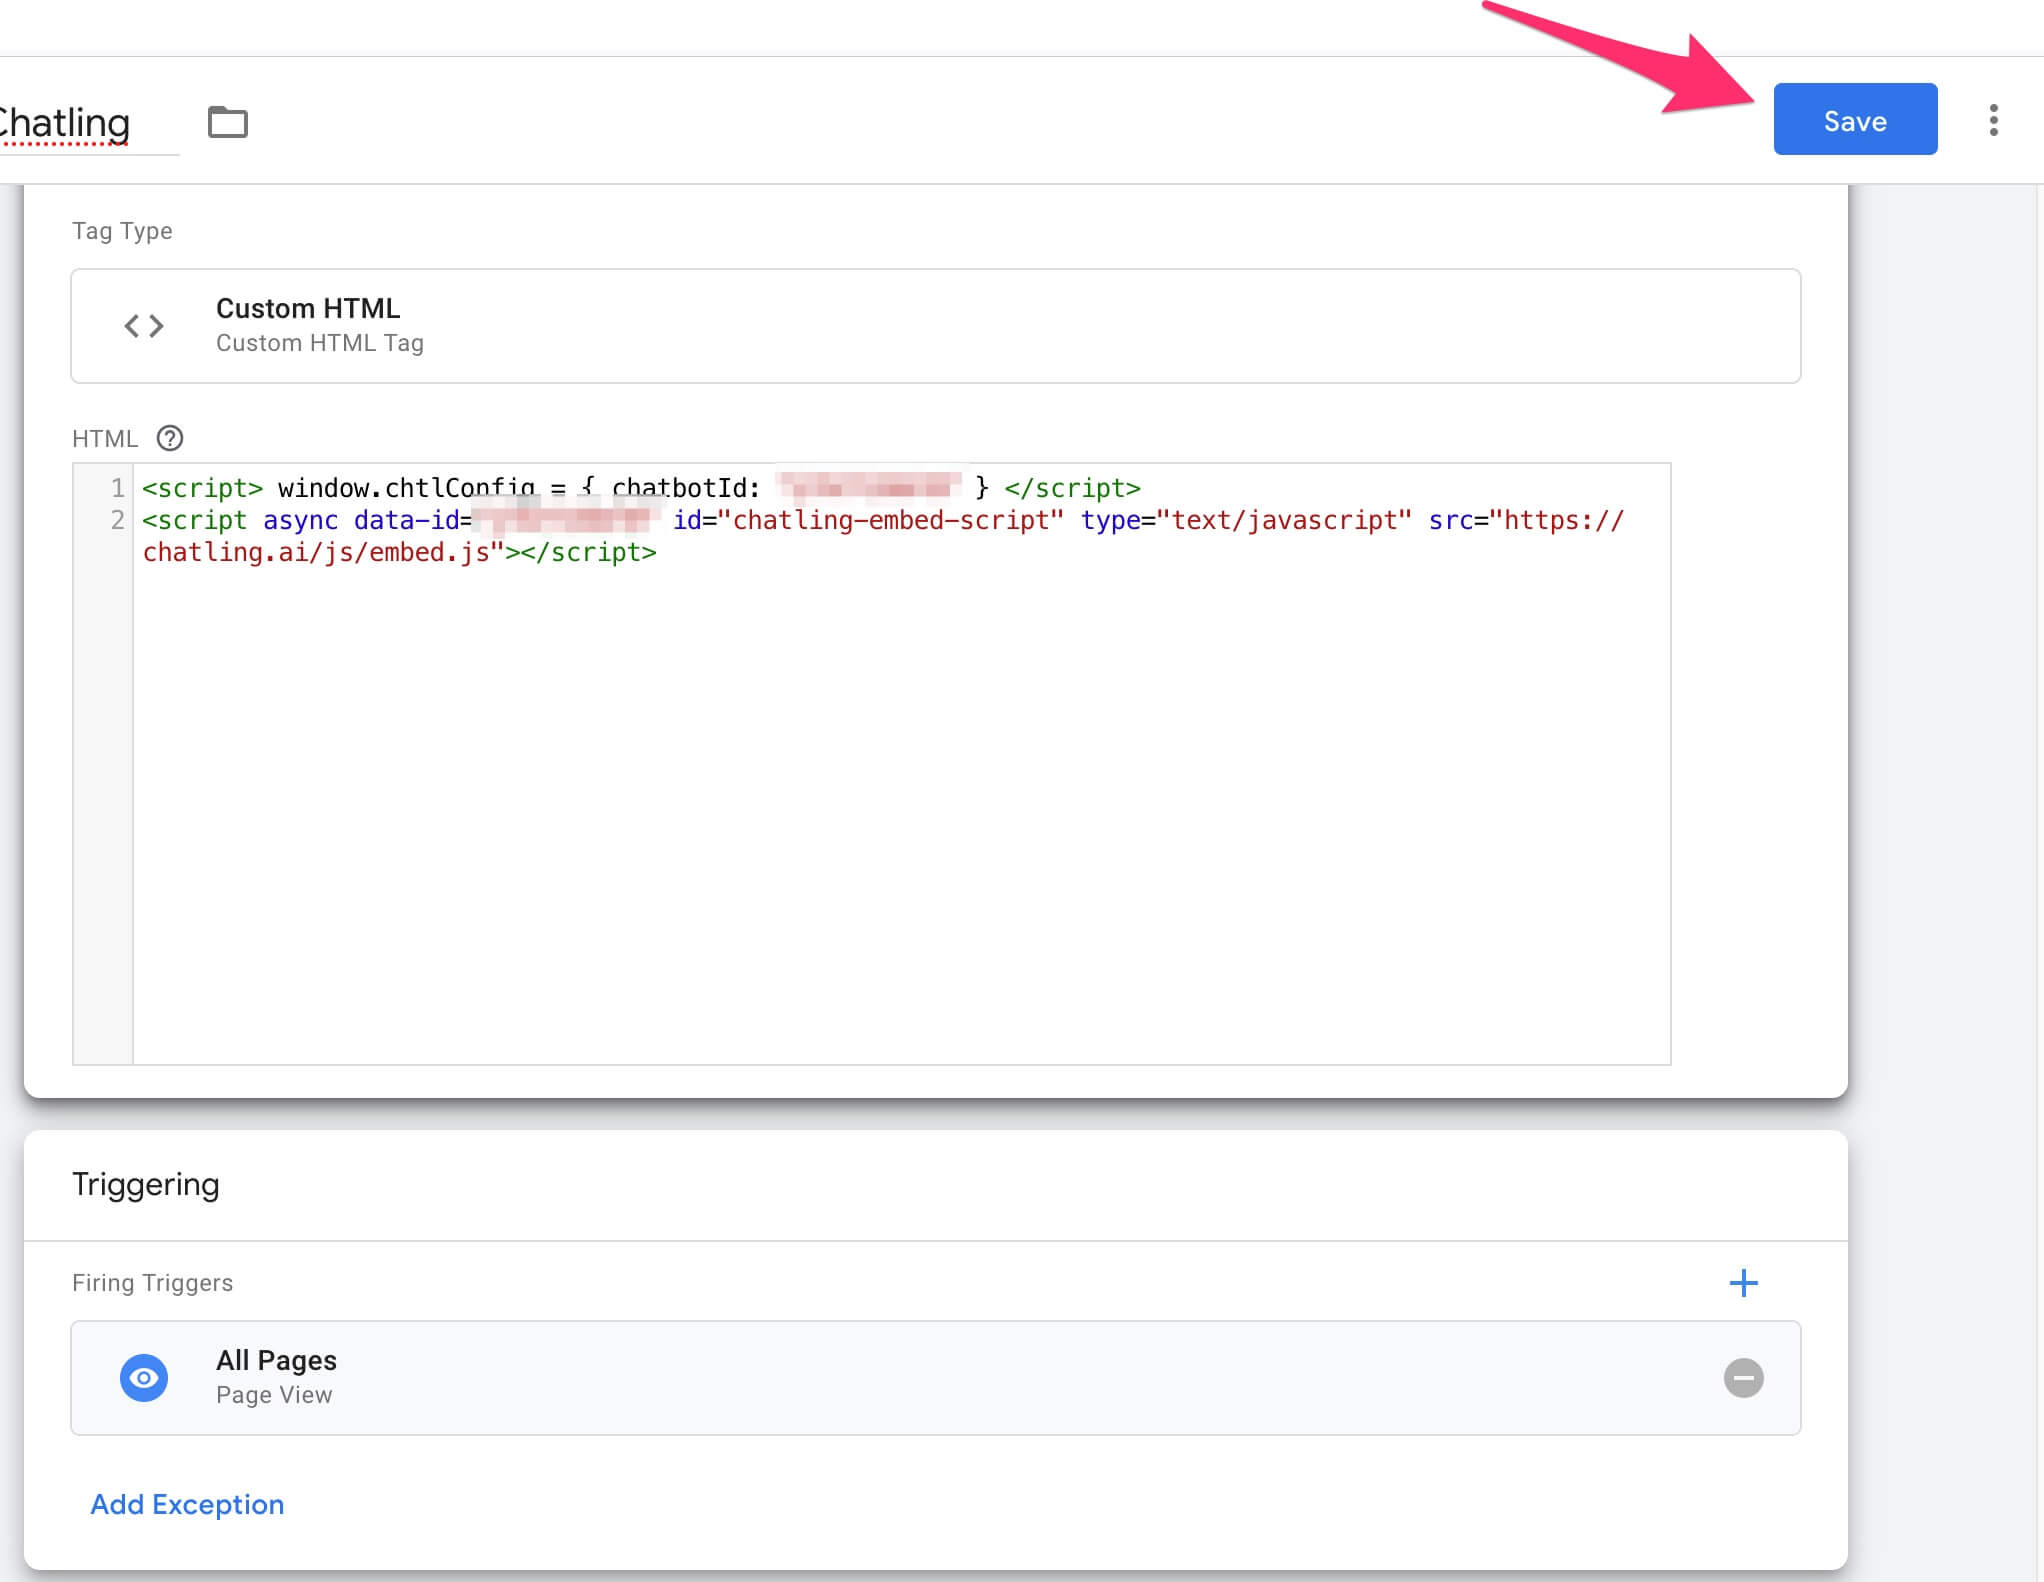 # Overview
Source: https://docs.chatling.ai/install-chatbot/overview
Learn how to add Chatling to your website.
Chatling can be added to any website, whether it's a custom website or a website that's built using a CMS like WordPress, Shopify, or Wix.
Simply copy the widget code from your chatbot's dashboard and add it to your website's header or body section. This will embed the chatbot on your website, allowing visitors to interact with it.
Below are guides on adding Chatling to your custom websites and CMS platforms.
# Overview
Source: https://docs.chatling.ai/install-chatbot/overview
Learn how to add Chatling to your website.
Chatling can be added to any website, whether it's a custom website or a website that's built using a CMS like WordPress, Shopify, or Wix.
Simply copy the widget code from your chatbot's dashboard and add it to your website's header or body section. This will embed the chatbot on your website, allowing visitors to interact with it.
Below are guides on adding Chatling to your custom websites and CMS platforms.
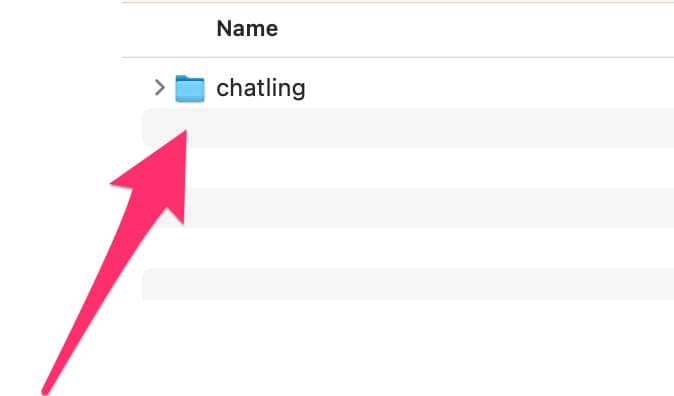 5. Inside the folder, open the `chatling.php` file using a text editor of your choice, such as Notepad on Windows or TextEdit on macOS.
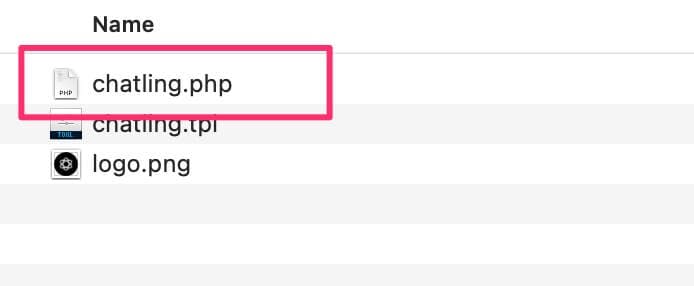 6. Go to the bottom of the file and find the line that says `Paste code snippet here`.
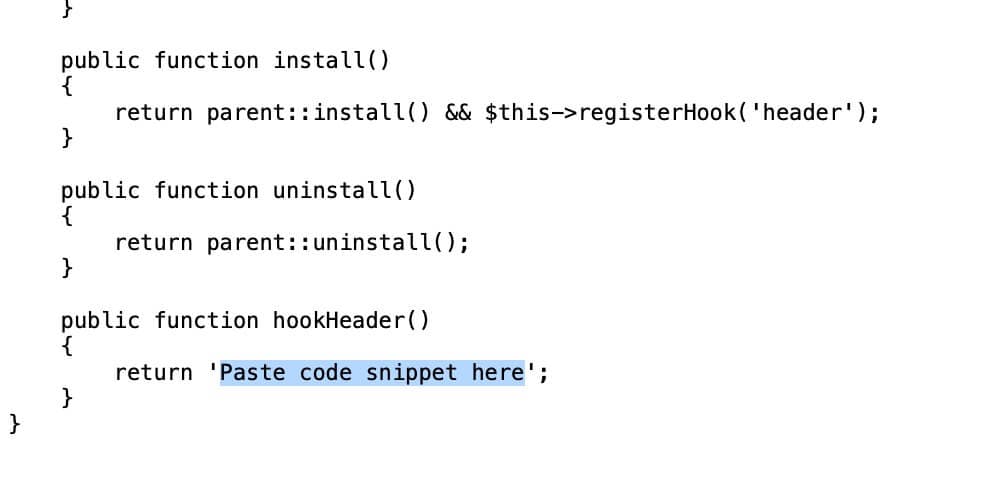 Replace it with the code snippet you copied in step #2, as shown below.
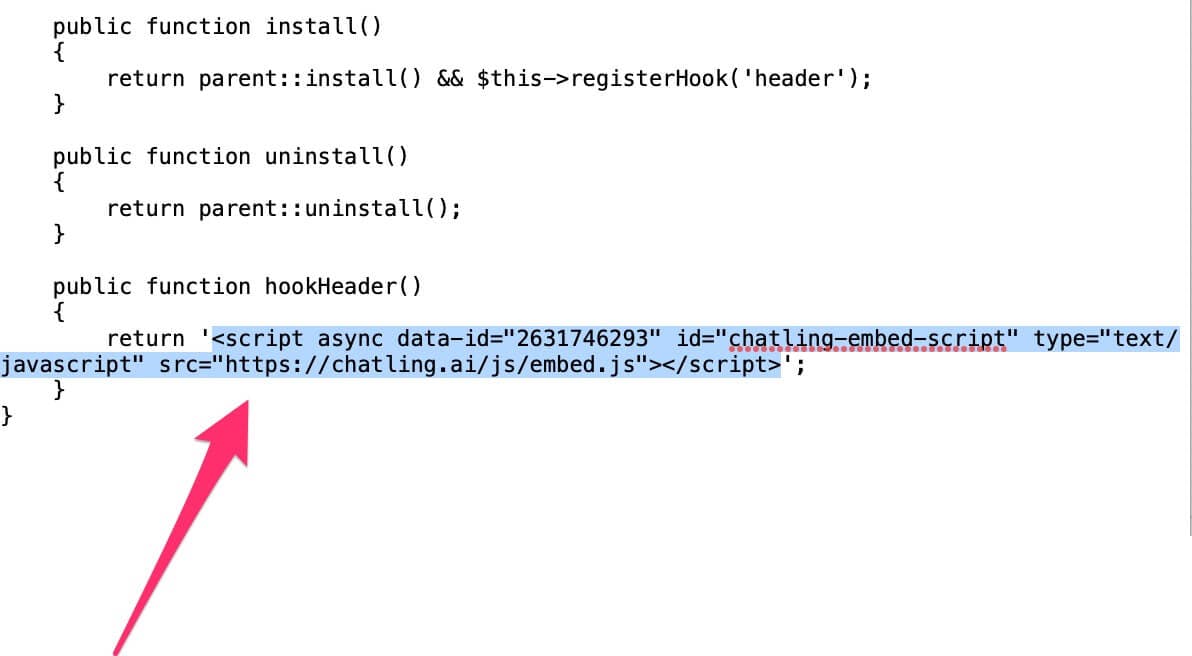 7. Save the file and close it.
8. Zip the `chatling` folder. Do not rename the folder to anything else otherwise the module won't work.
7. Save the file and close it.
8. Zip the `chatling` folder. Do not rename the folder to anything else otherwise the module won't work.
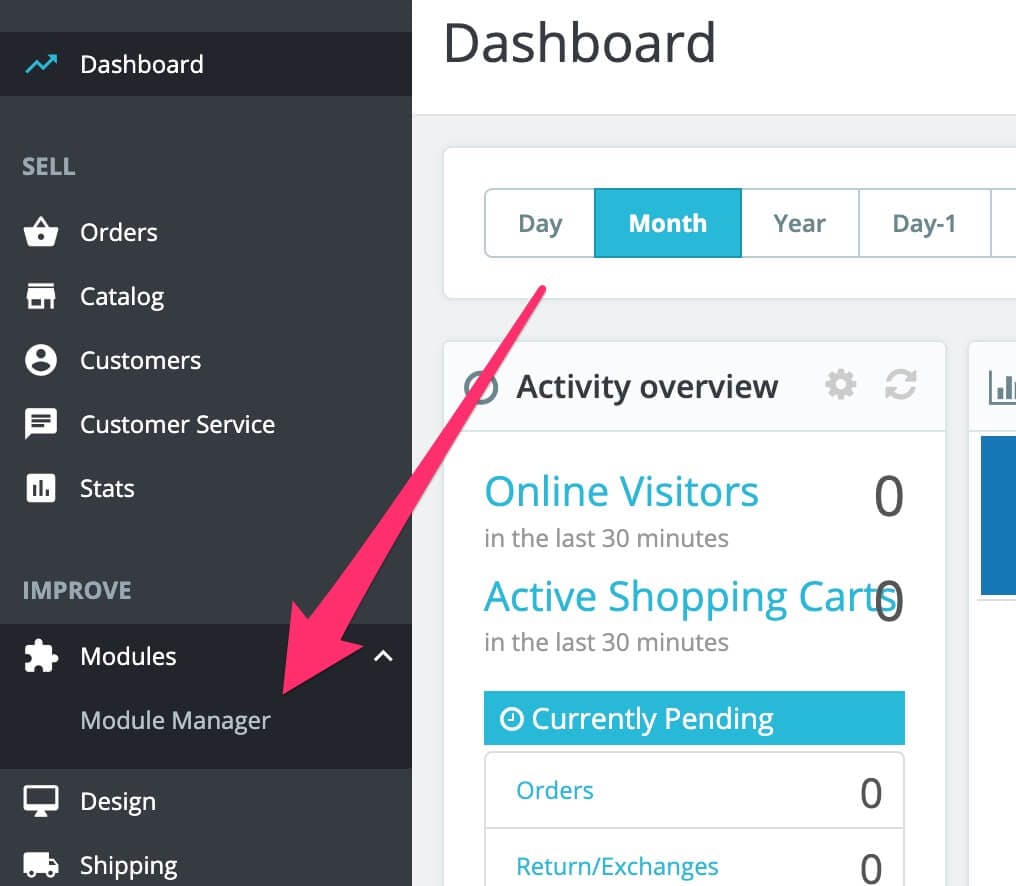 10. Click the `Upload a module` button in the top right. Browse and select the module's zip file.
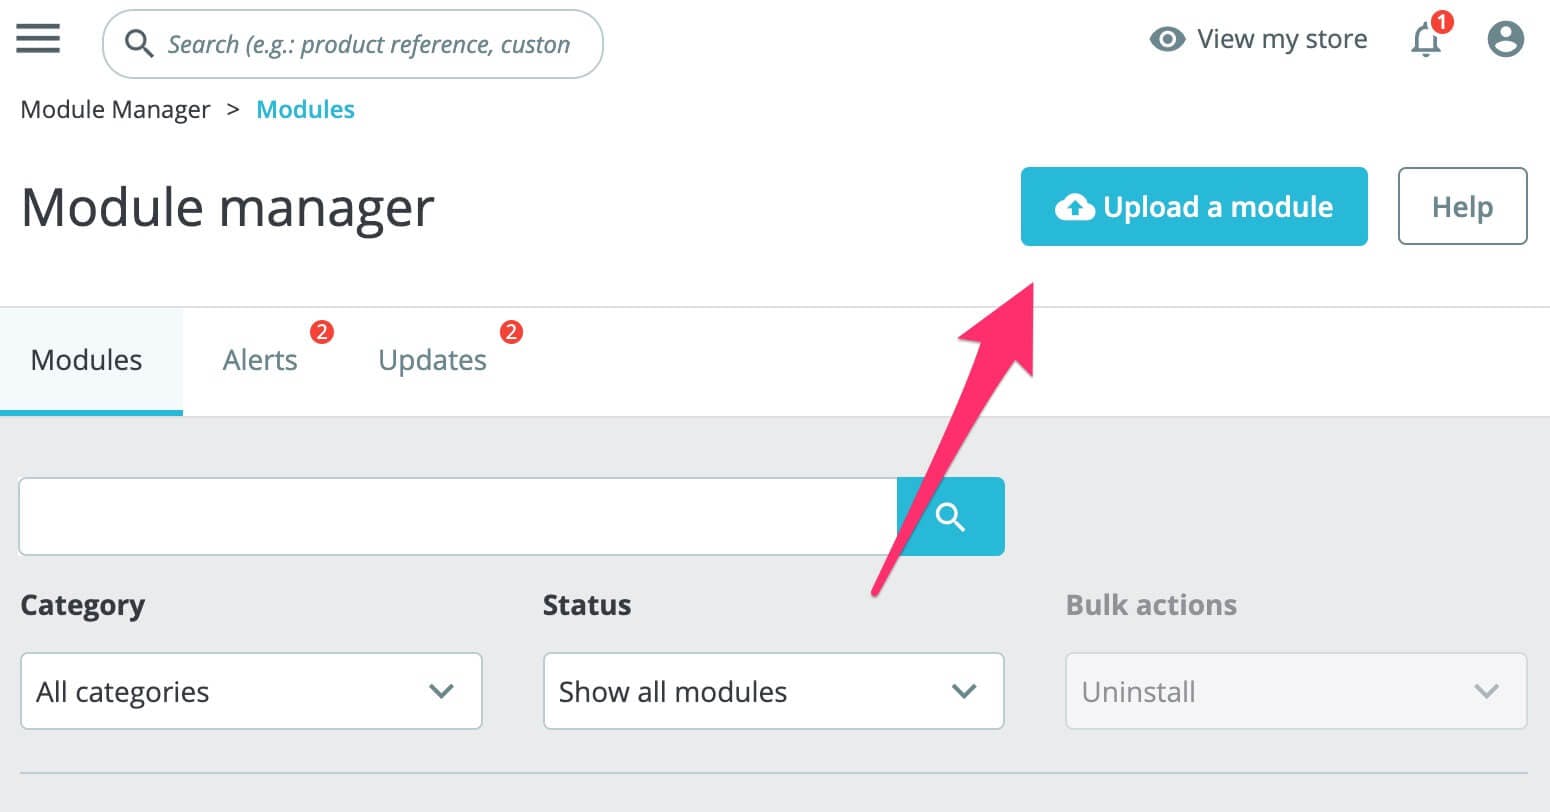 11. Once the module is uploaded, the chatbot will be live on your website.
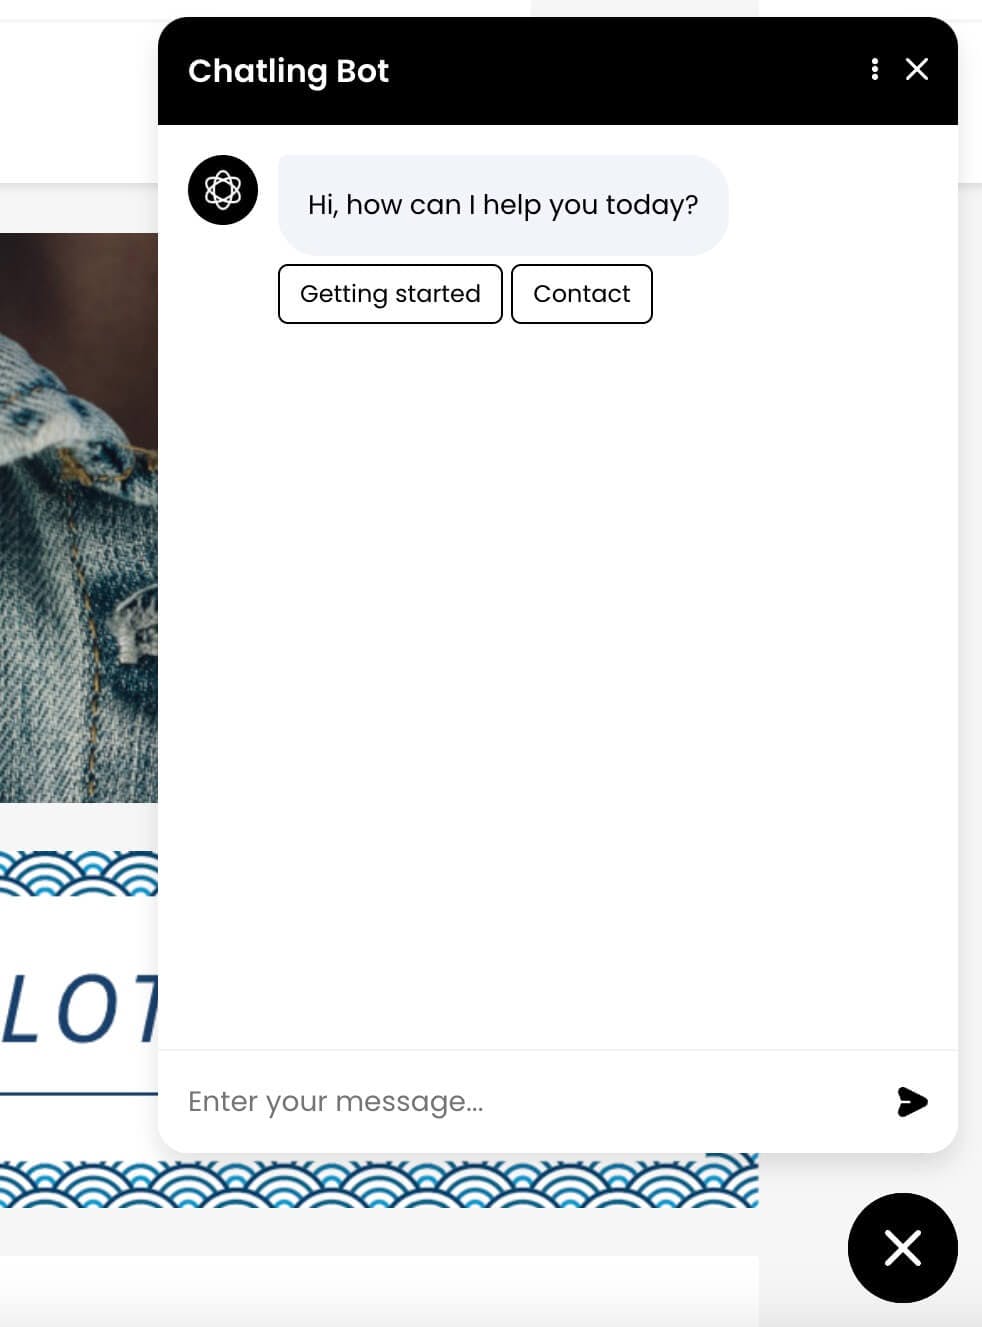 # Shopify
Source: https://docs.chatling.ai/install-chatbot/shopify
Learn how to add Chatling to your Shopify store
## Method 1: Using theme.liquid
1. Go to your chatbot's dashboard.
2. Click on `Website widget` in the sidebar.
# Shopify
Source: https://docs.chatling.ai/install-chatbot/shopify
Learn how to add Chatling to your Shopify store
## Method 1: Using theme.liquid
1. Go to your chatbot's dashboard.
2. Click on `Website widget` in the sidebar.
 5. Edit your theme by clicking the ellipsis icon next to your current theme and choosing `Edit code`.
 6. Find and open the `theme.liquid` file From the sidebar where the list of files is displayed.
 7. Paste the embed code in the `` section. You can paste it anywhere between the opening `` tag and the closing `` tag.
 8. Click the Save button.
The chatbot will be live on your website and should appear across all your store's pages.
8. Click the Save button.
The chatbot will be live on your website and should appear across all your store's pages.
 ## Method 2: Using Customization
1. From your Shopify dashboard, click on `Online Store` and go to `Themes`.
## Method 2: Using Customization
1. From your Shopify dashboard, click on `Online Store` and go to `Themes`.
 2. Click on the `Customize` button next to your current theme.
 3. Under the `Header` section, choose `Add section`. Search for `Custom liquid` and add it.
 4. Open the `Custom liquid` editor and paste your widget code into the `Liquid code` field.
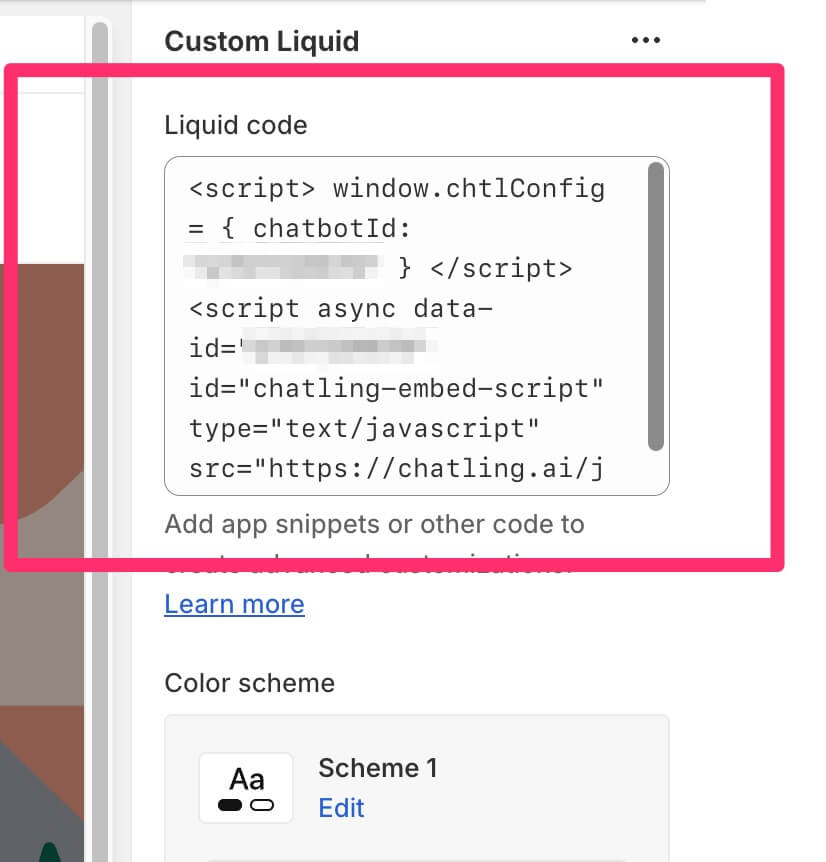 5. Set the `Top padding` and `Bottom padding` to `0` so the section doesn't create a blank space in your site's header.
 6. Click the `Save` button.
The chatbot will be live on your website and should appear across all your store's pages.
6. Click the `Save` button.
The chatbot will be live on your website and should appear across all your store's pages.
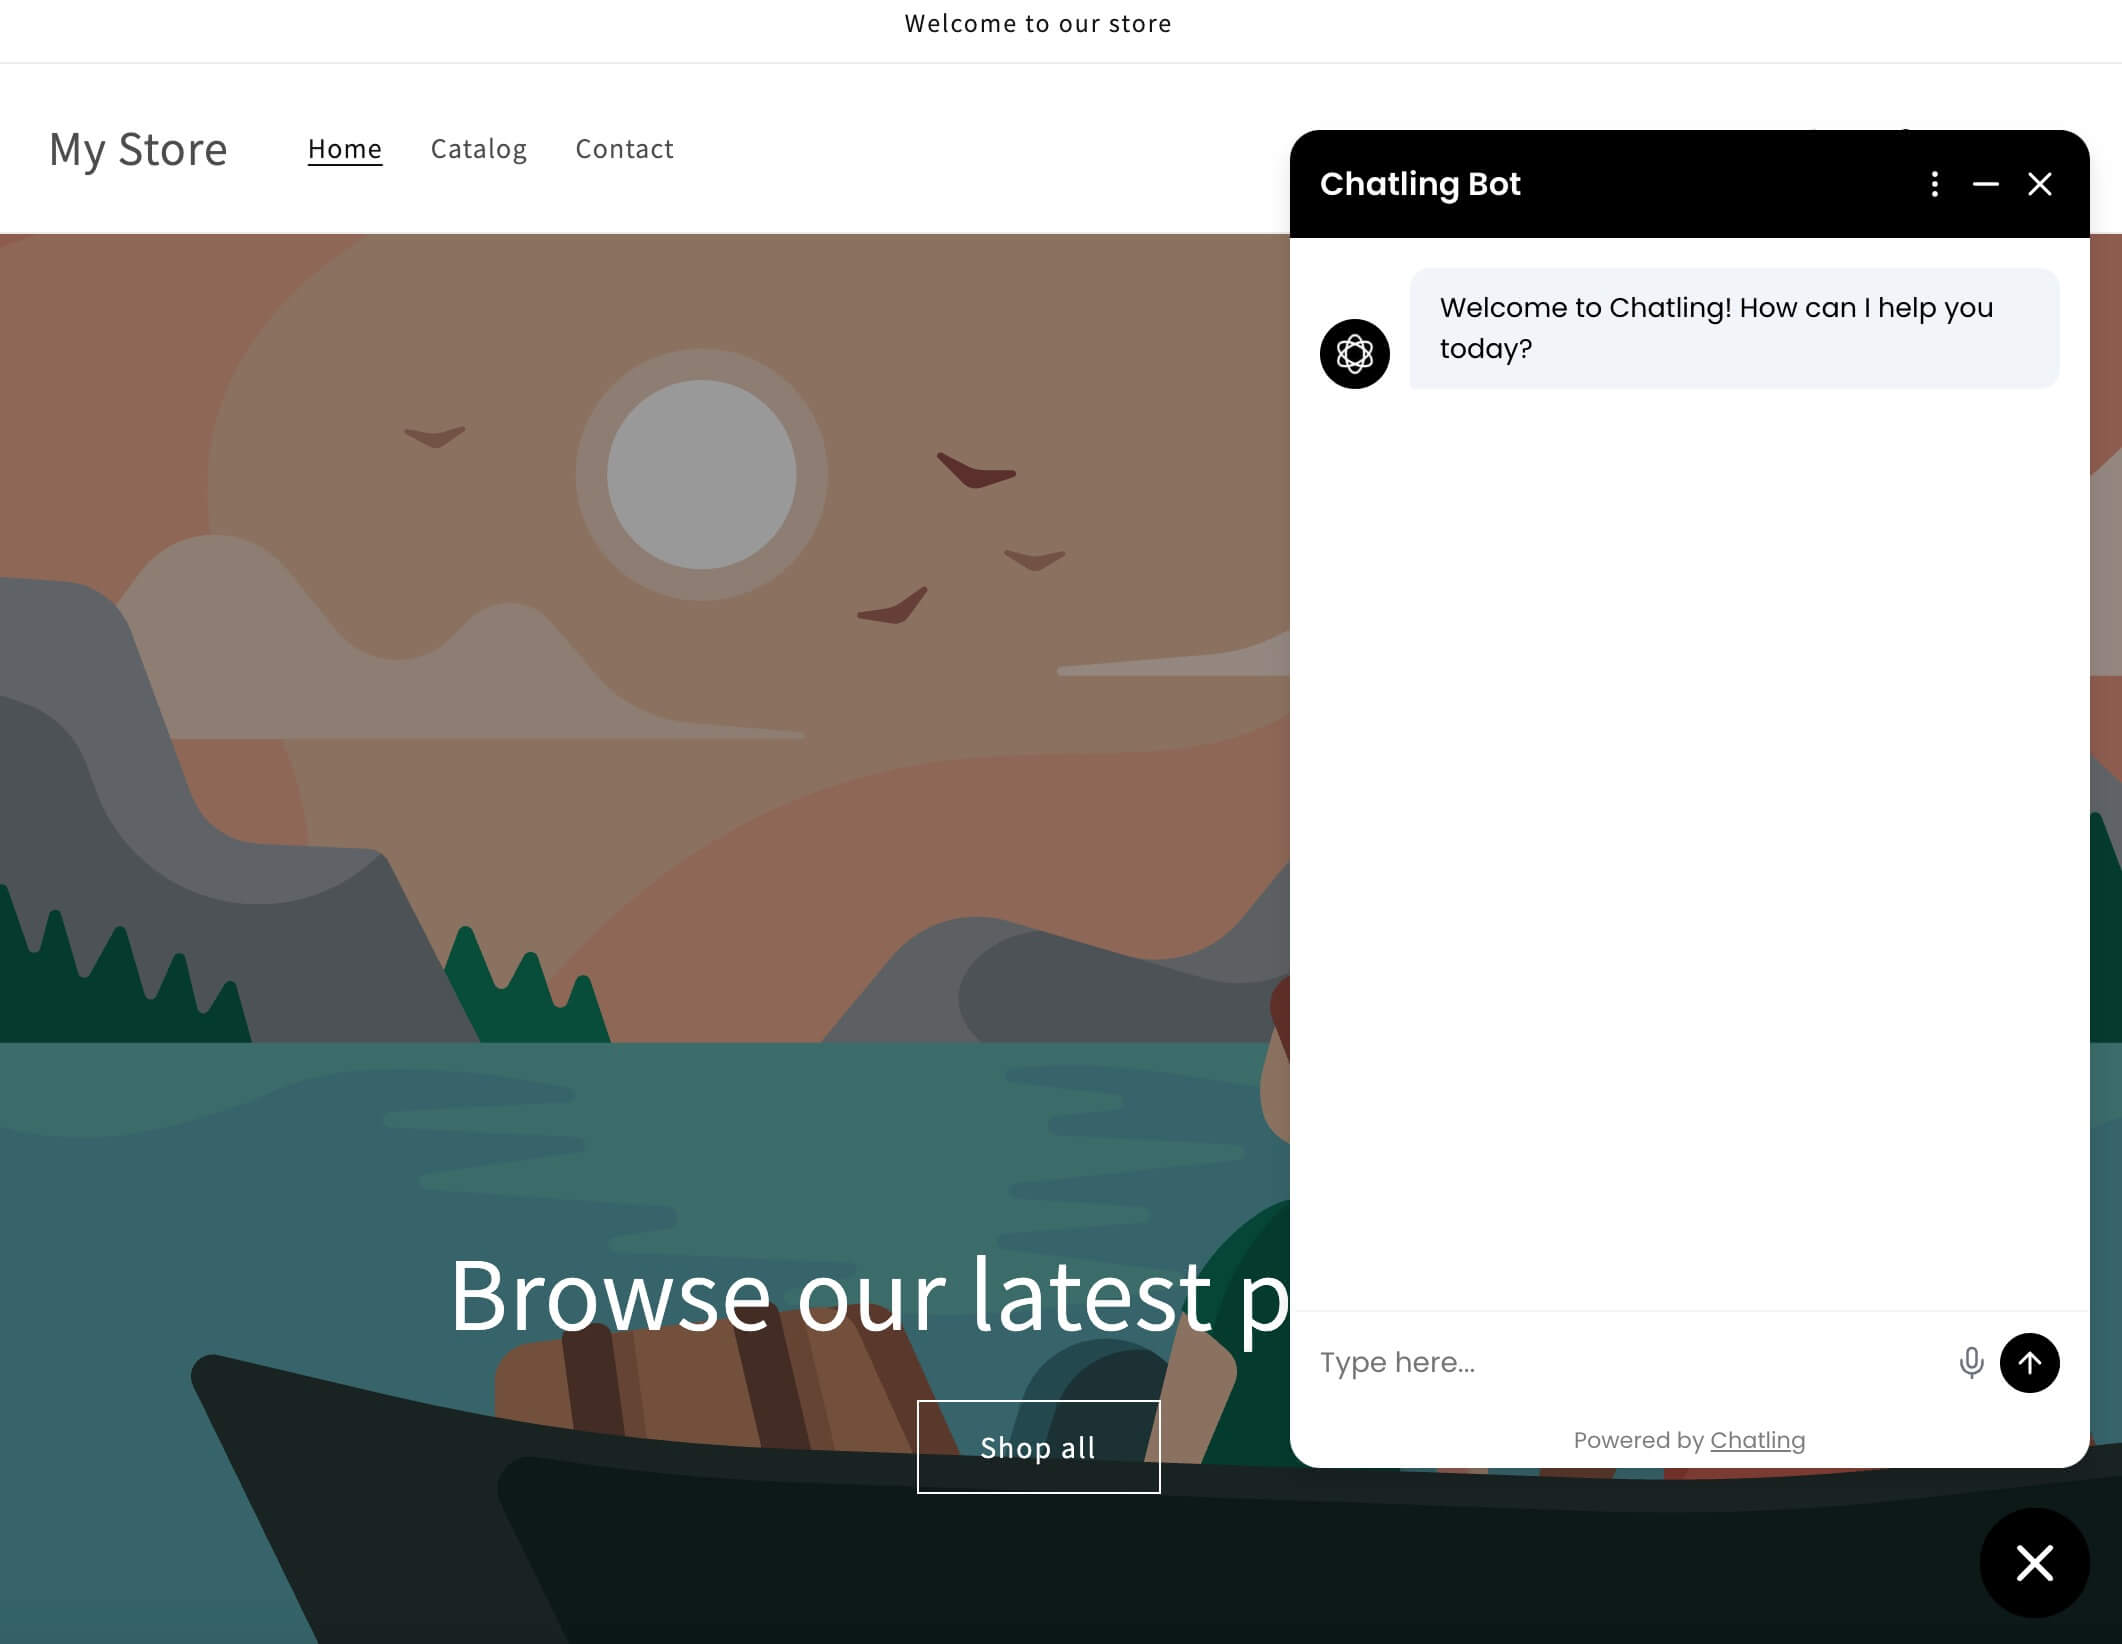 # Squarespace
Source: https://docs.chatling.ai/install-chatbot/squarespace
Learn how to add Chatling to your Squarespace website
1. Go to your chatbot's dashboard.
2. Click on `Website widget` in the sidebar.
# Squarespace
Source: https://docs.chatling.ai/install-chatbot/squarespace
Learn how to add Chatling to your Squarespace website
1. Go to your chatbot's dashboard.
2. Click on `Website widget` in the sidebar.
 5. From the sidebar menu, select `Website`.
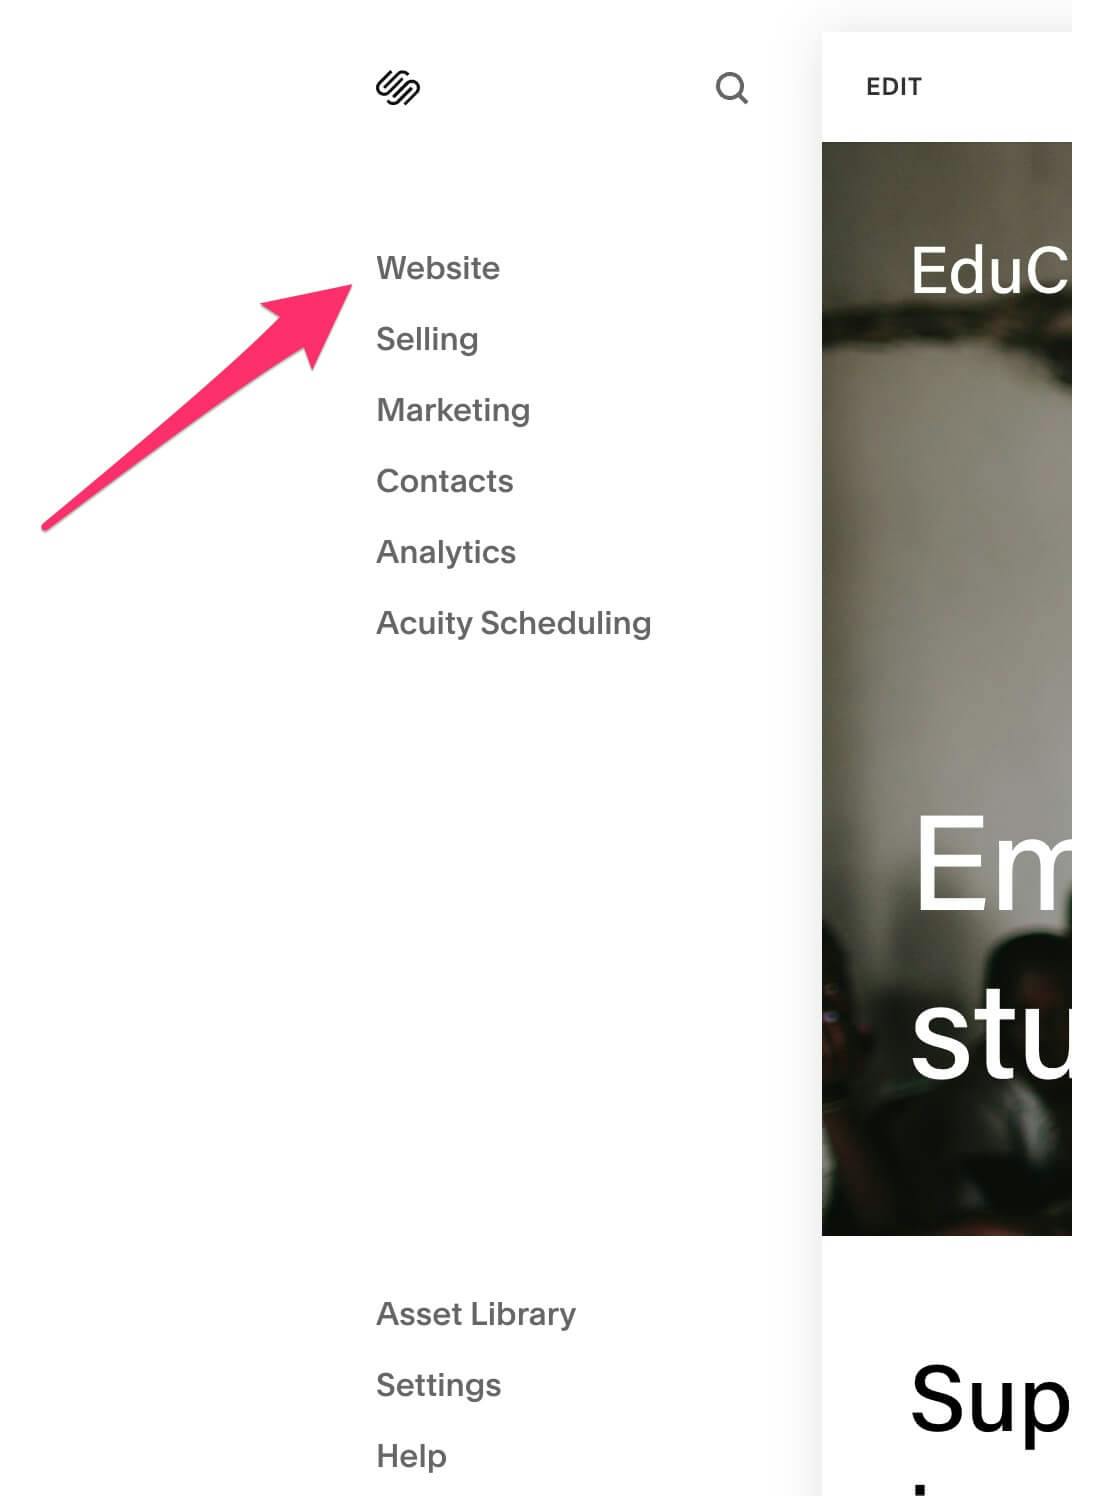 6. Scroll to the bottom of the sidebar menu and choose `Website Tools`.
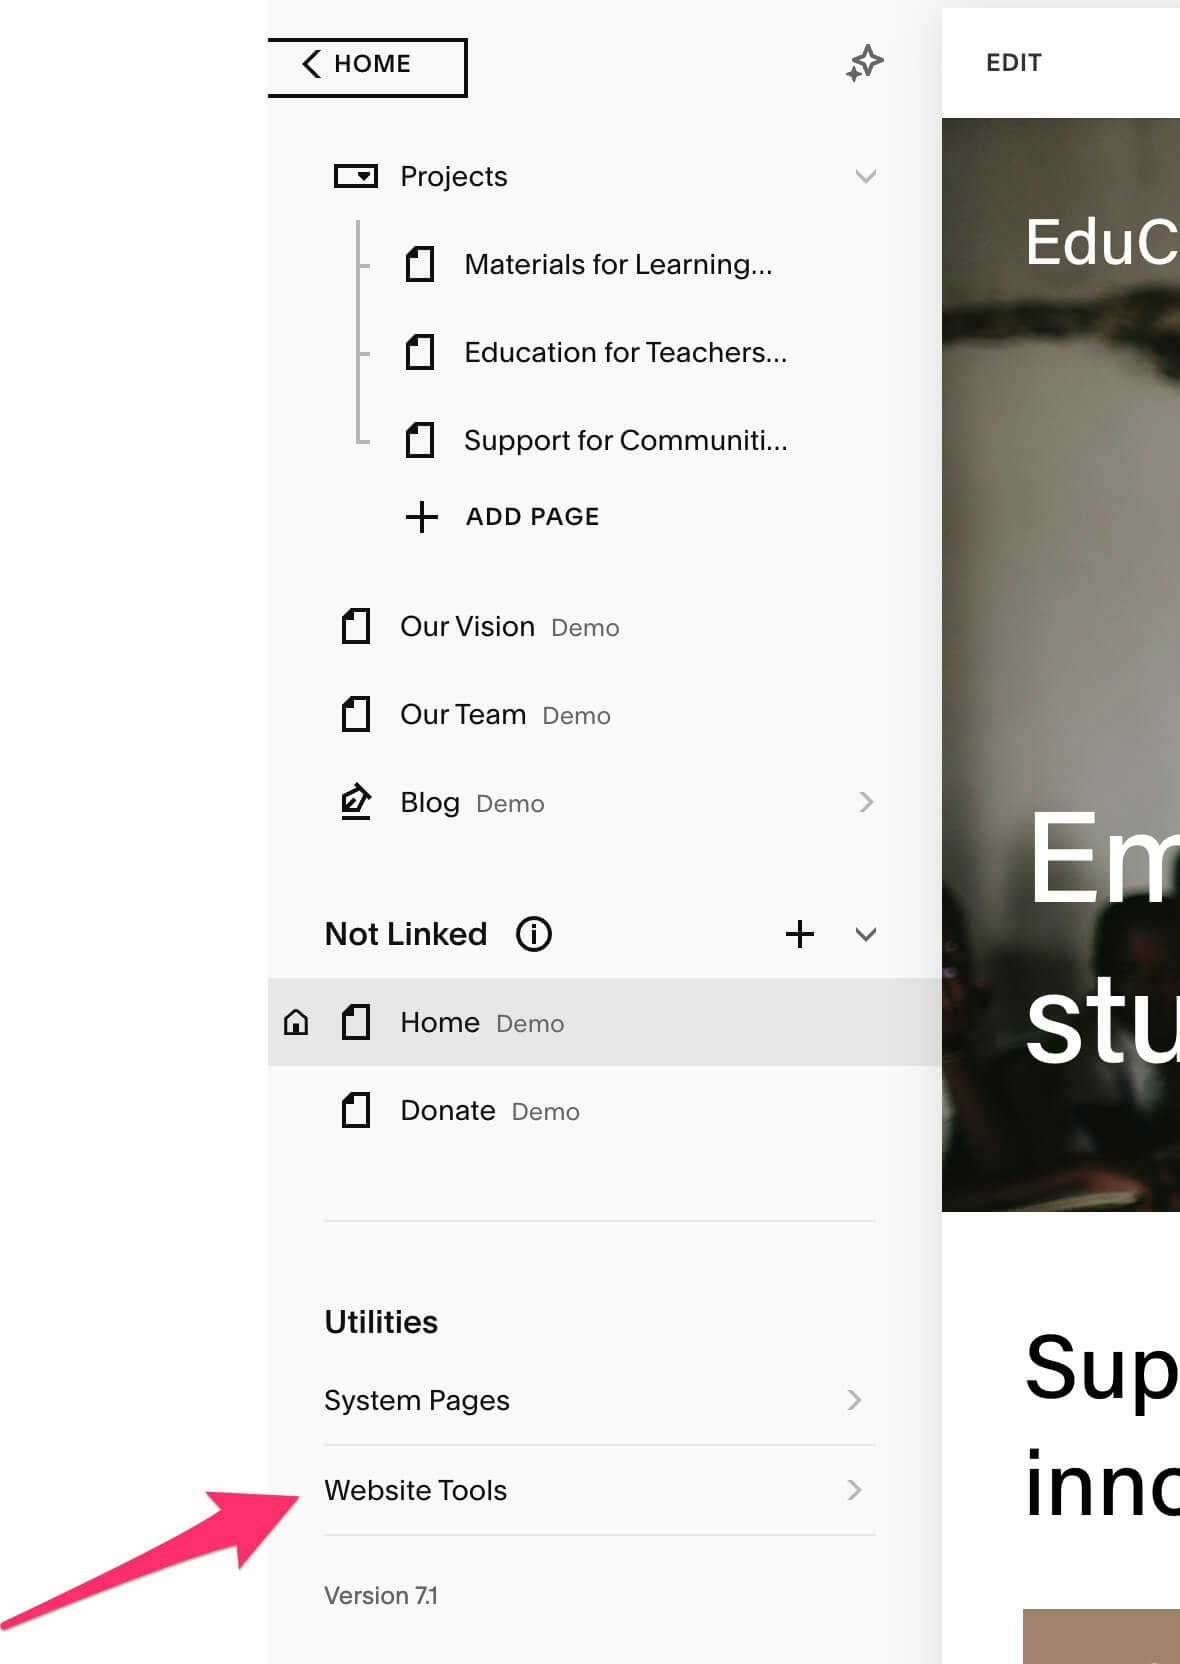 7. Open `Code Injection`.
* If you're on an older version of Squarespace, such as v7.0, code injection is located in `Settings` > `Developer Tools` > `Code Injection`.
7. Open `Code Injection`.
* If you're on an older version of Squarespace, such as v7.0, code injection is located in `Settings` > `Developer Tools` > `Code Injection`.
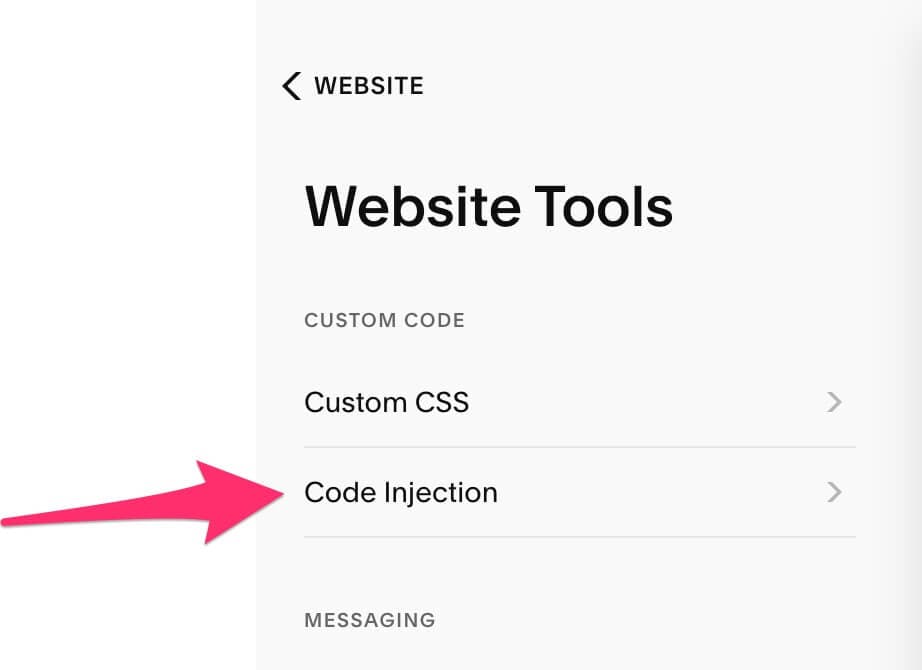 8. Paste the code you copied in step 3 in the `Header` section, and click `Save`.
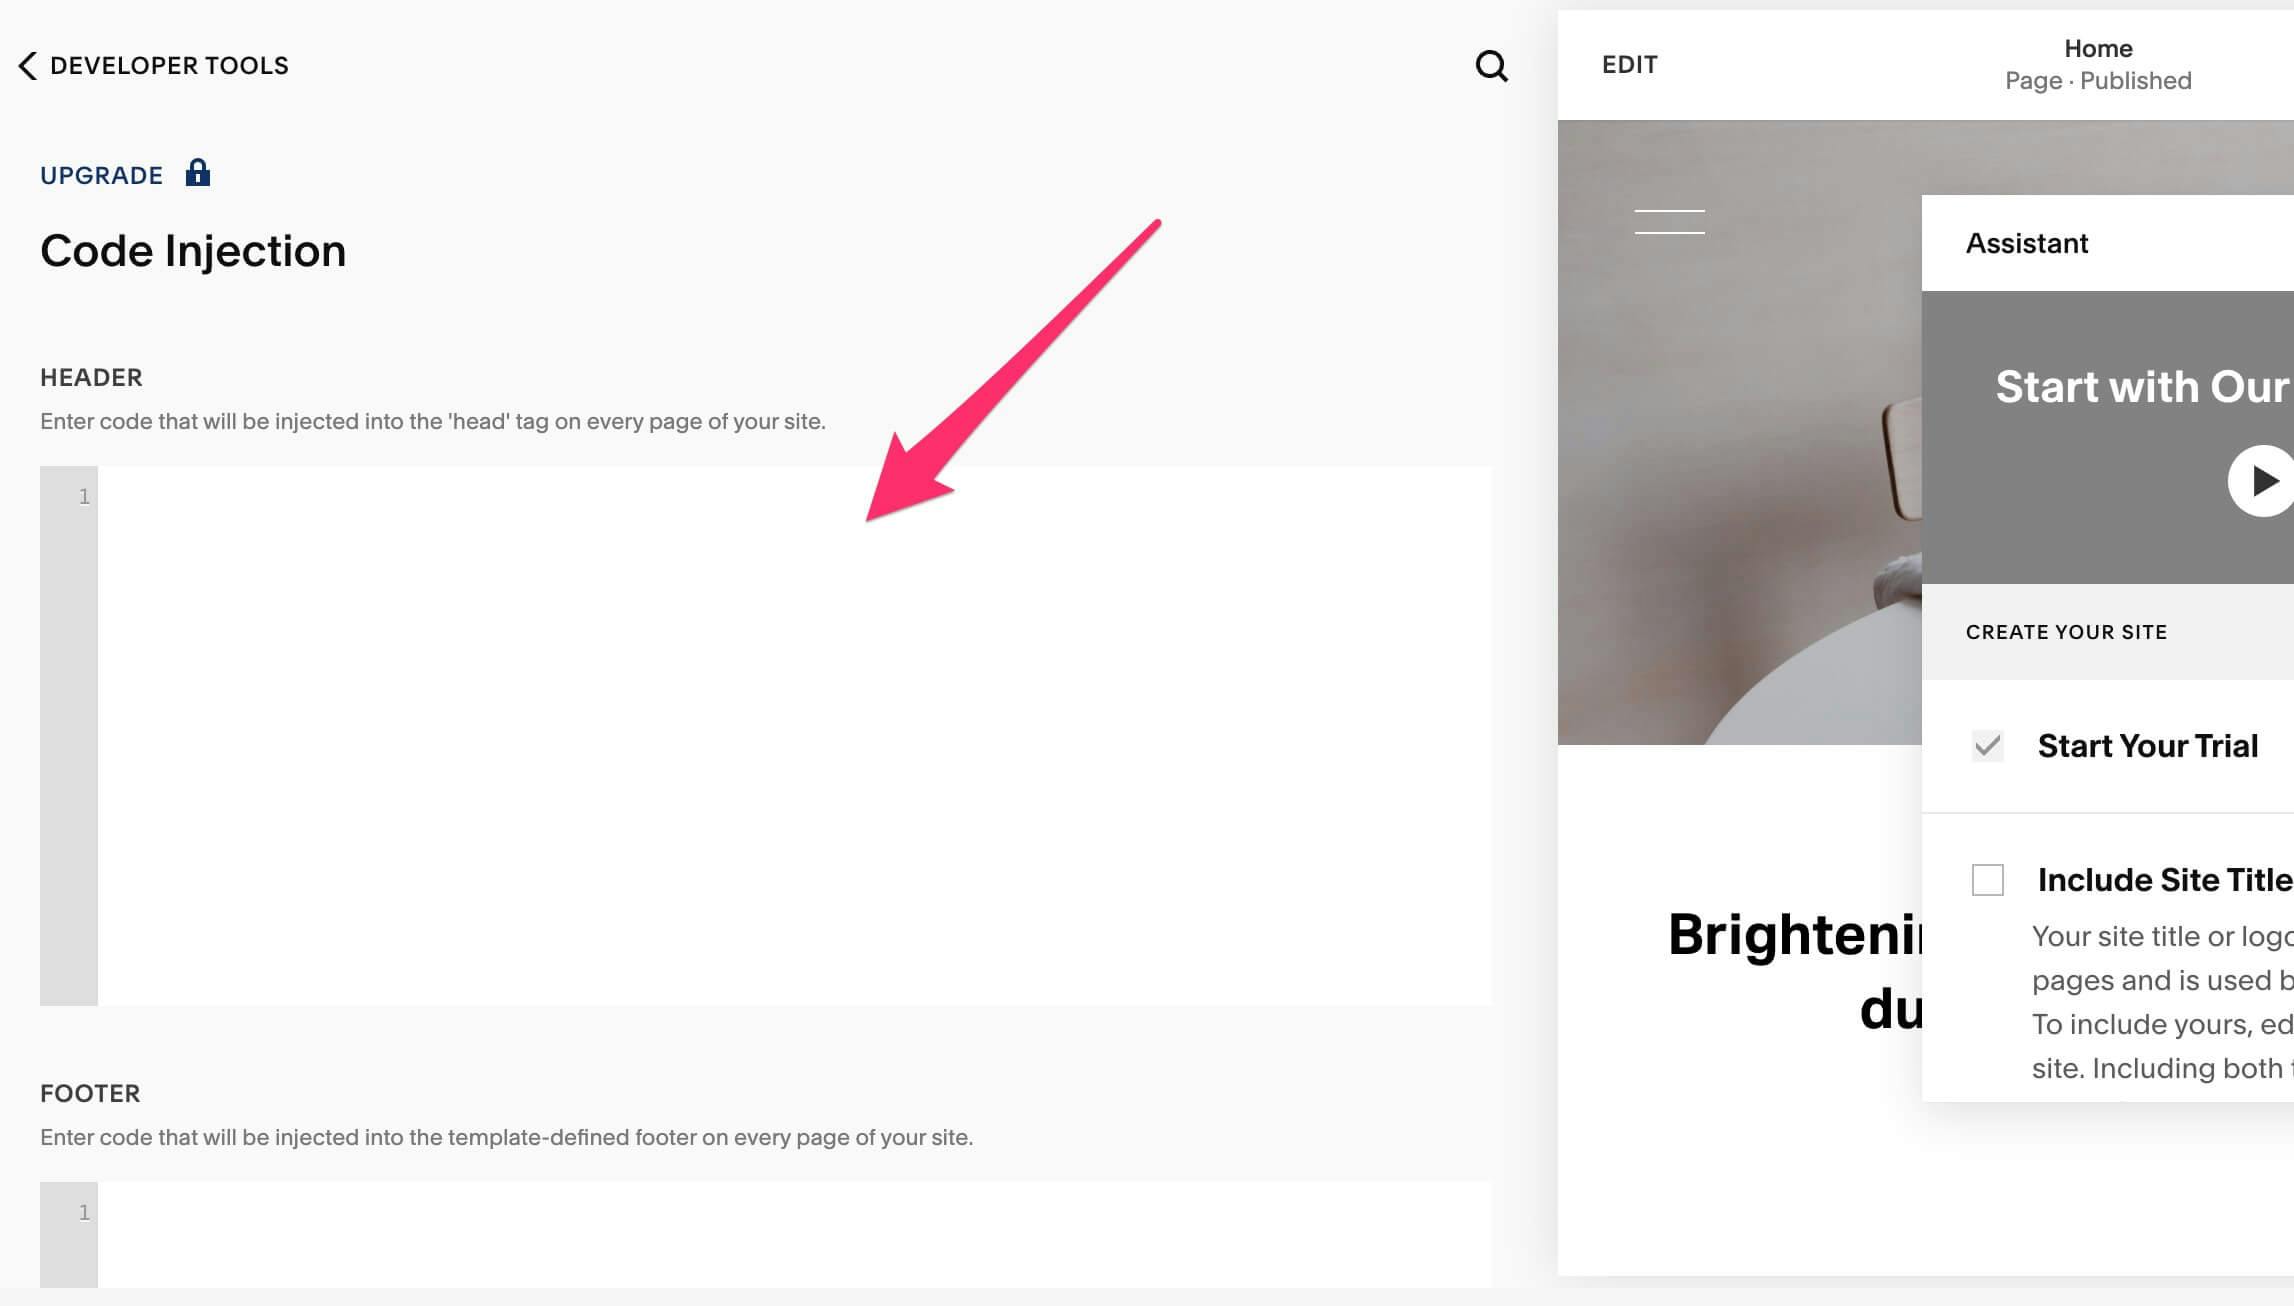 9. The chatbot is now live on your website, and visitors can interact with it.
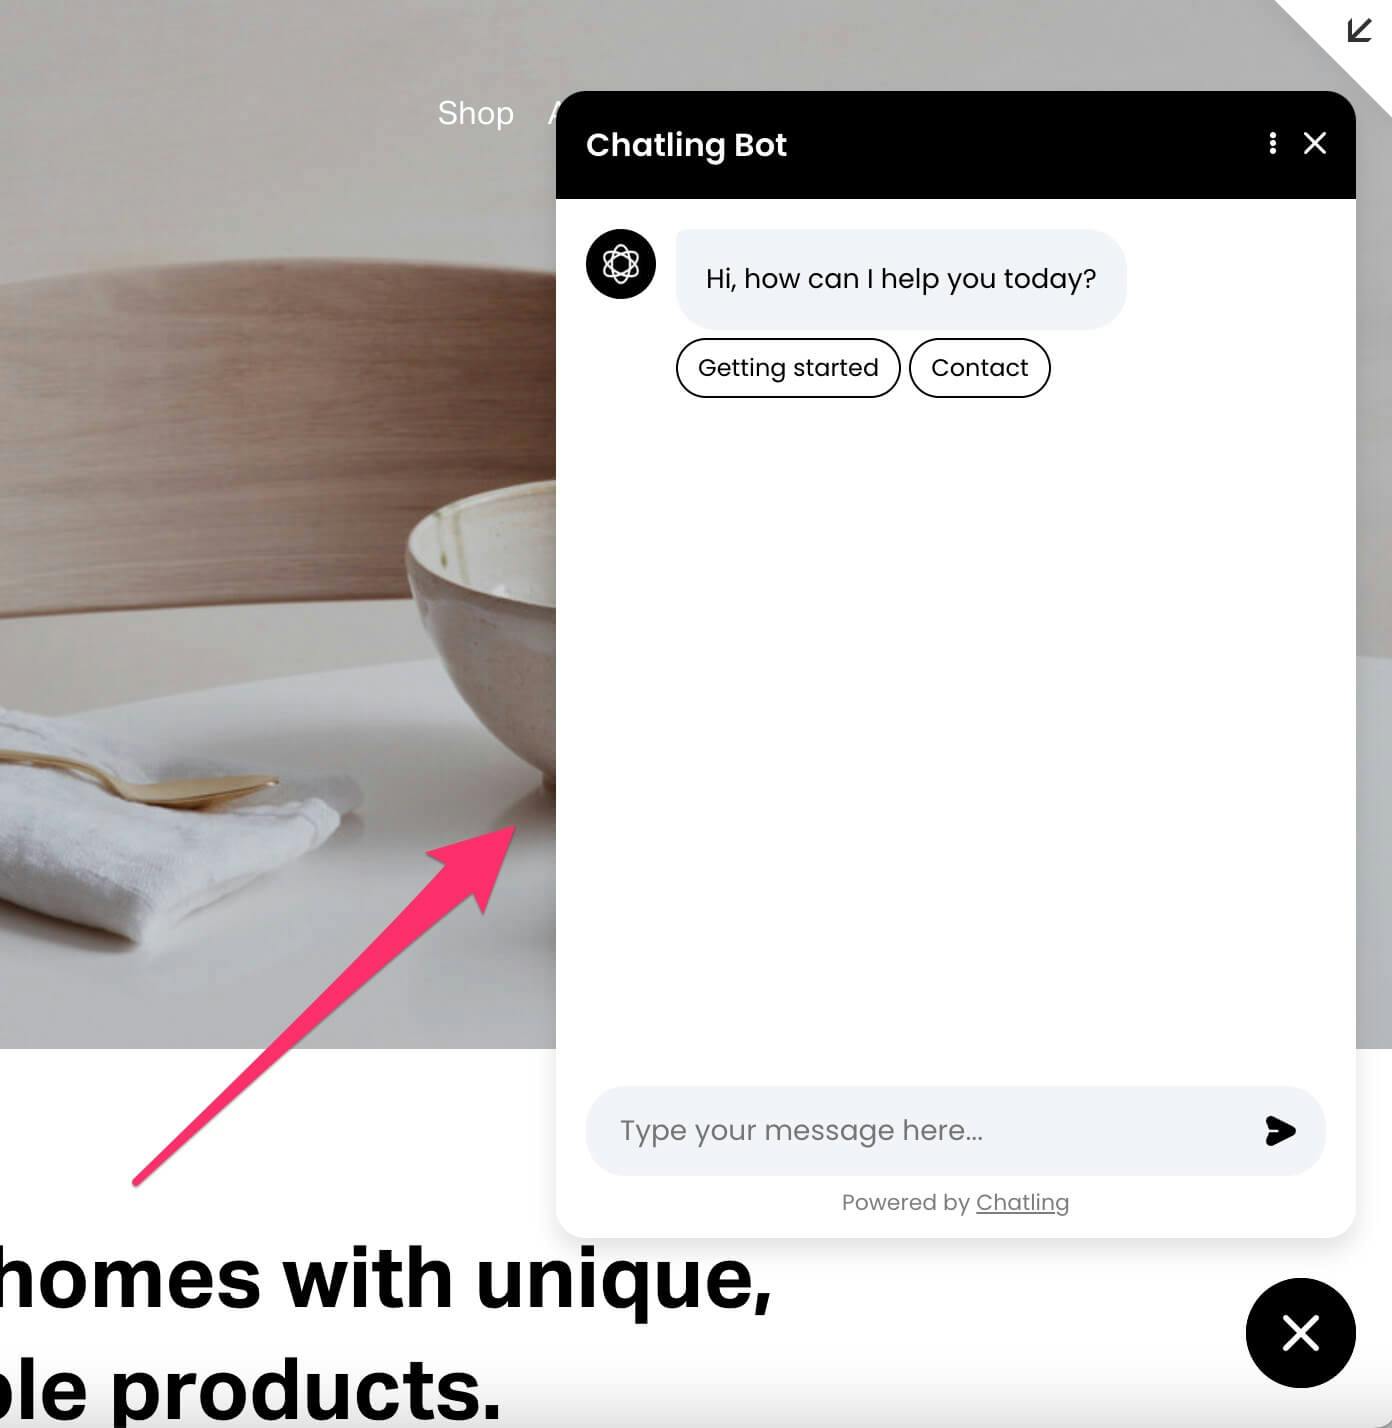 # Webflow
Source: https://docs.chatling.ai/install-chatbot/webflow
Learn how to add Chatling to your Webflow website
1. Go to your chatbot's dashboard.
2. Click on `Website widget` in the sidebar.
# Webflow
Source: https://docs.chatling.ai/install-chatbot/webflow
Learn how to add Chatling to your Webflow website
1. Go to your chatbot's dashboard.
2. Click on `Website widget` in the sidebar.
 5. Click the webflow icon in the top left and select `Site settings`.
 6. Click on `Custom code` from the sidebar.
 7. Paste the chatbot widget code in the `Head code` textbox and click `Save`.
 8. Publish the website so the chatbot can go live on your Webflow website.
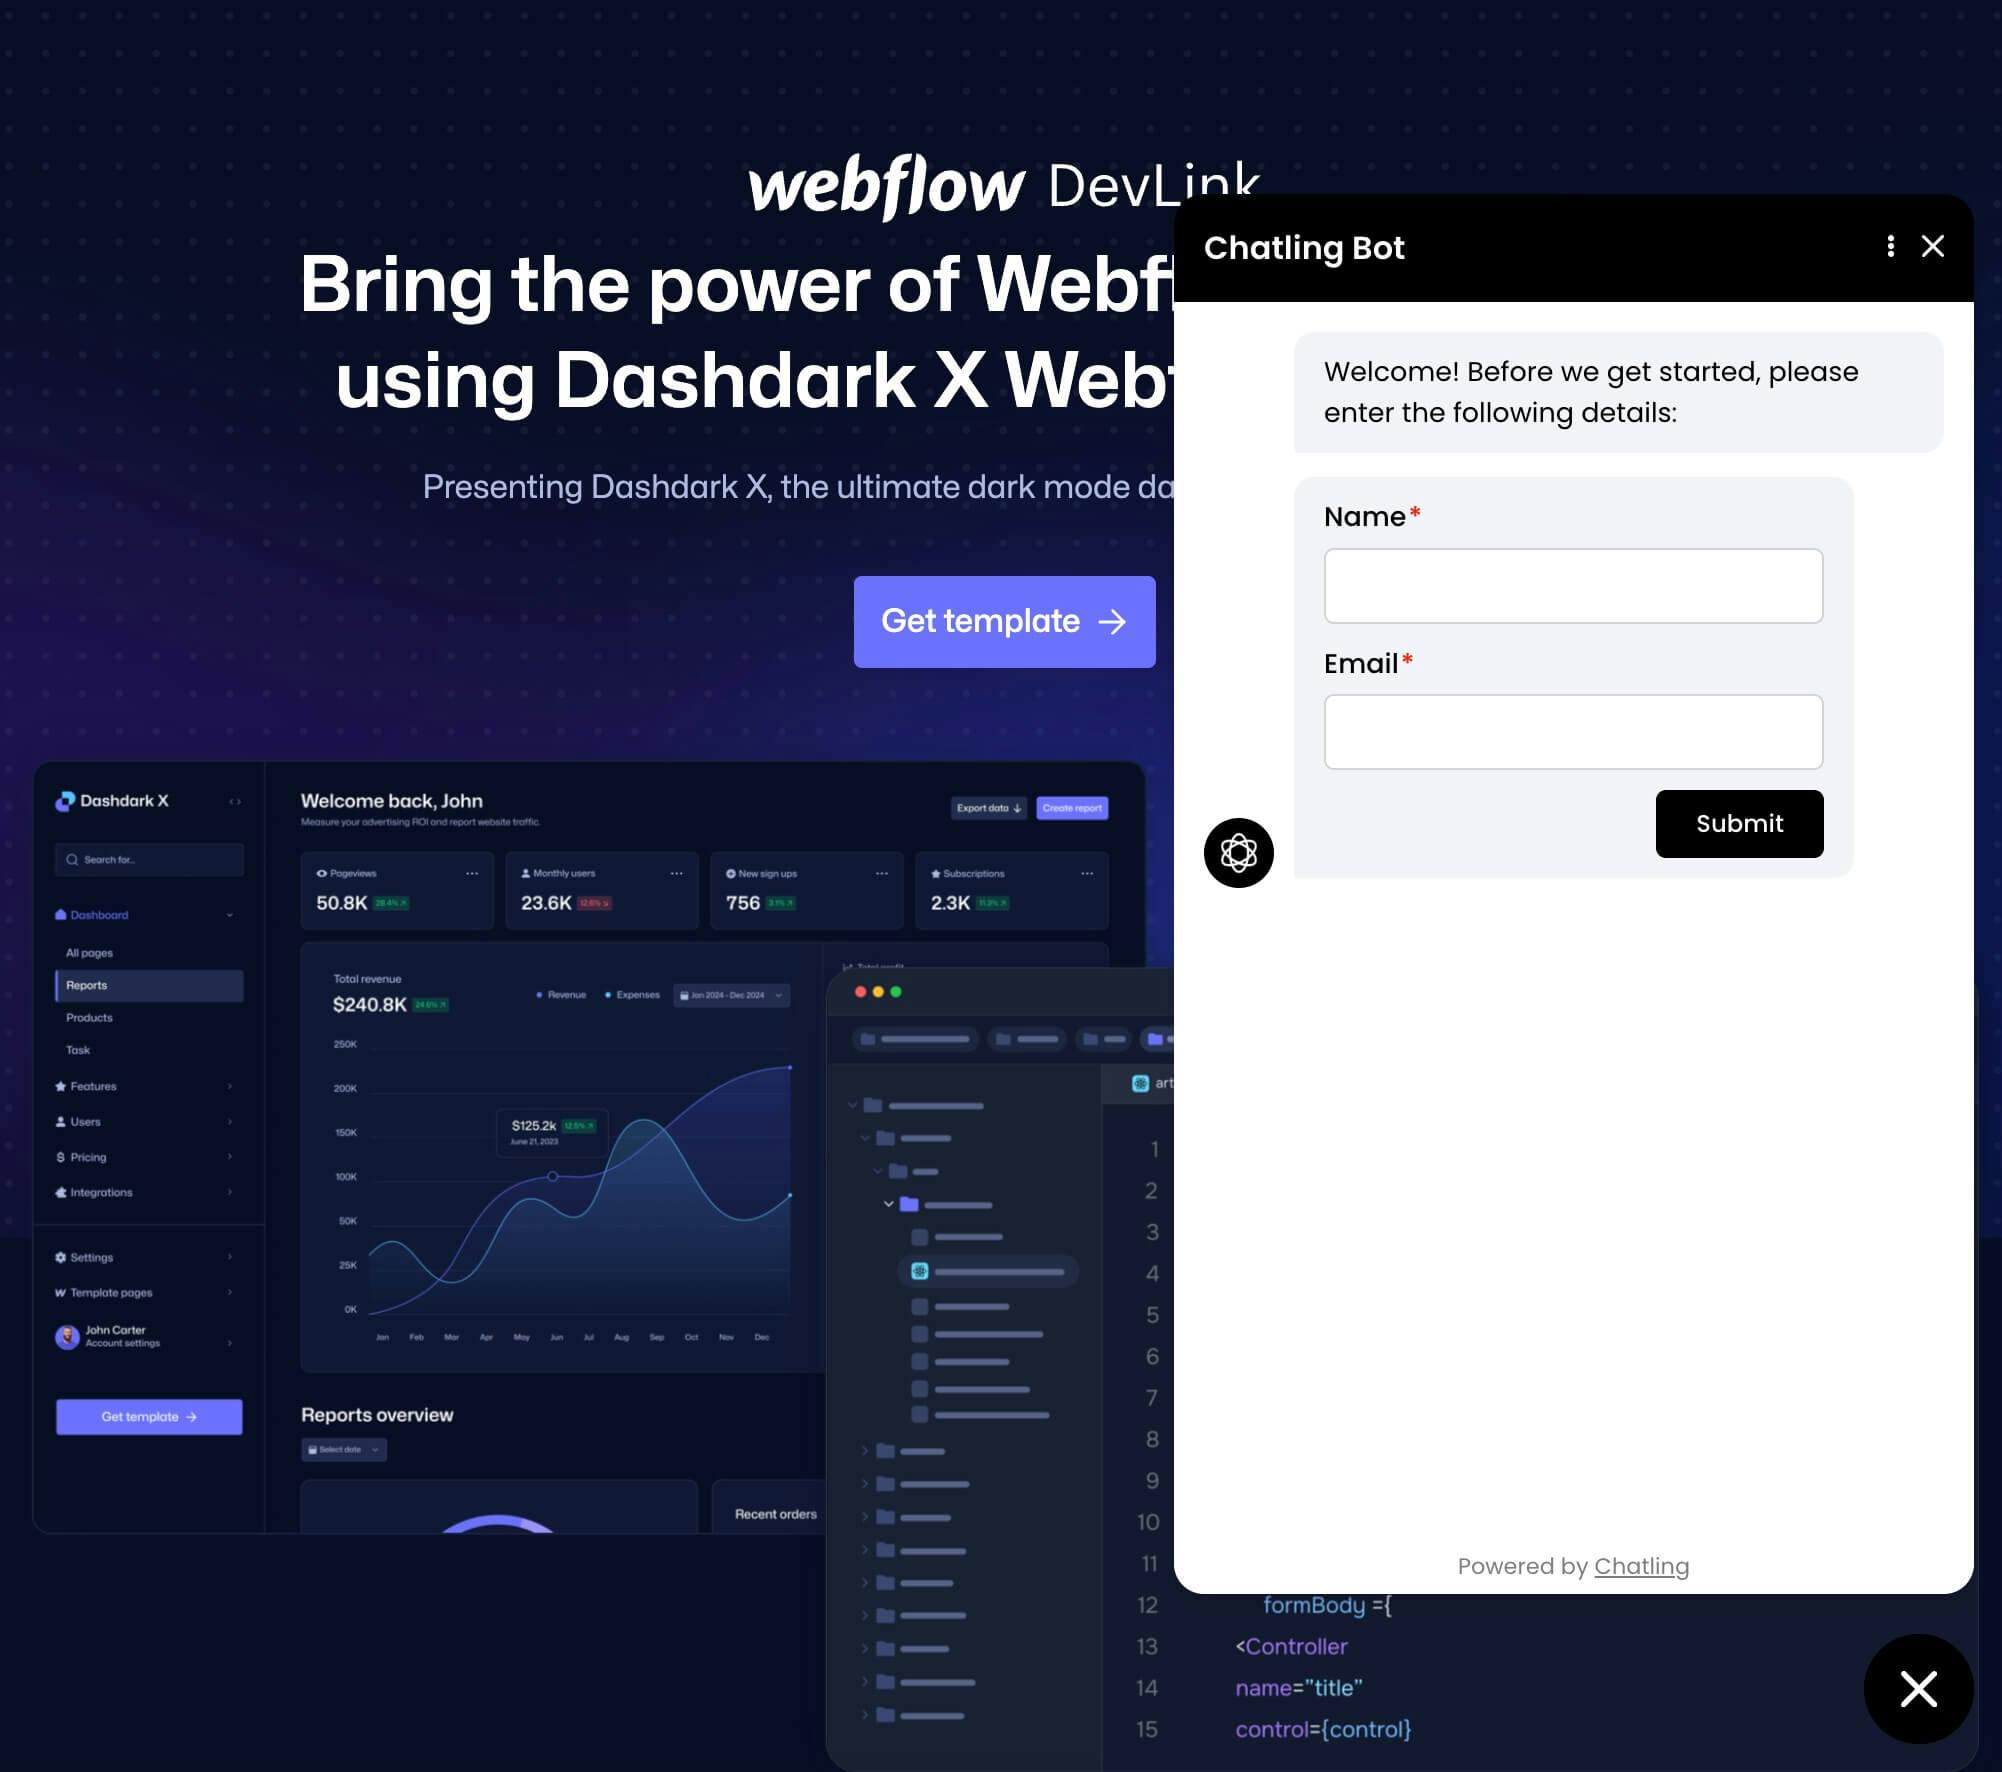 # Wix
Source: https://docs.chatling.ai/install-chatbot/wix
Learn how to add Chatling to your Wix website
1. Go to your chatbot's dashboard.
2. Click on `Website widget` in the sidebar.
# Wix
Source: https://docs.chatling.ai/install-chatbot/wix
Learn how to add Chatling to your Wix website
1. Go to your chatbot's dashboard.
2. Click on `Website widget` in the sidebar.
 5. Scroll down to the Advanced section and click `Custom code`.
 6. Under the Head section, click `Add Code`.
 7. Paste the chatbot's code snippet into the text box that appears and click `Apply`.
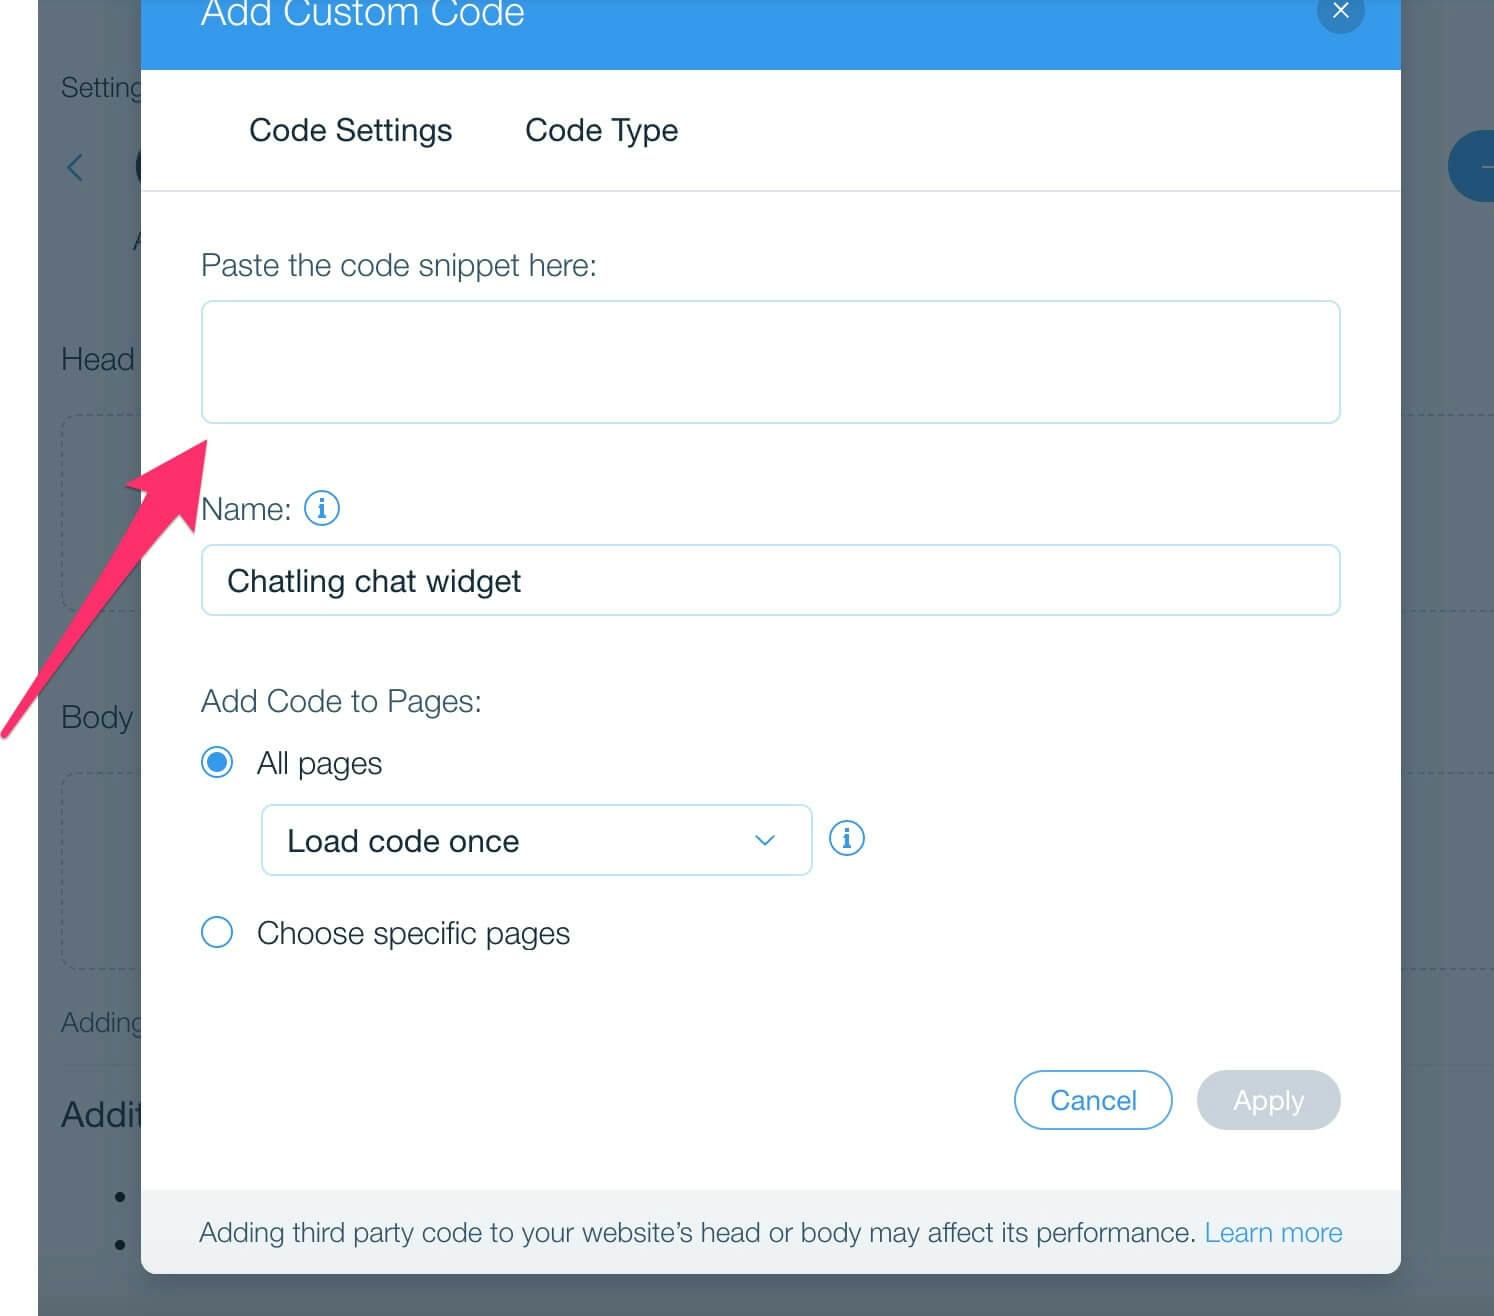 8. The chatbot is now live on your Wix website and visitors can interact with it.
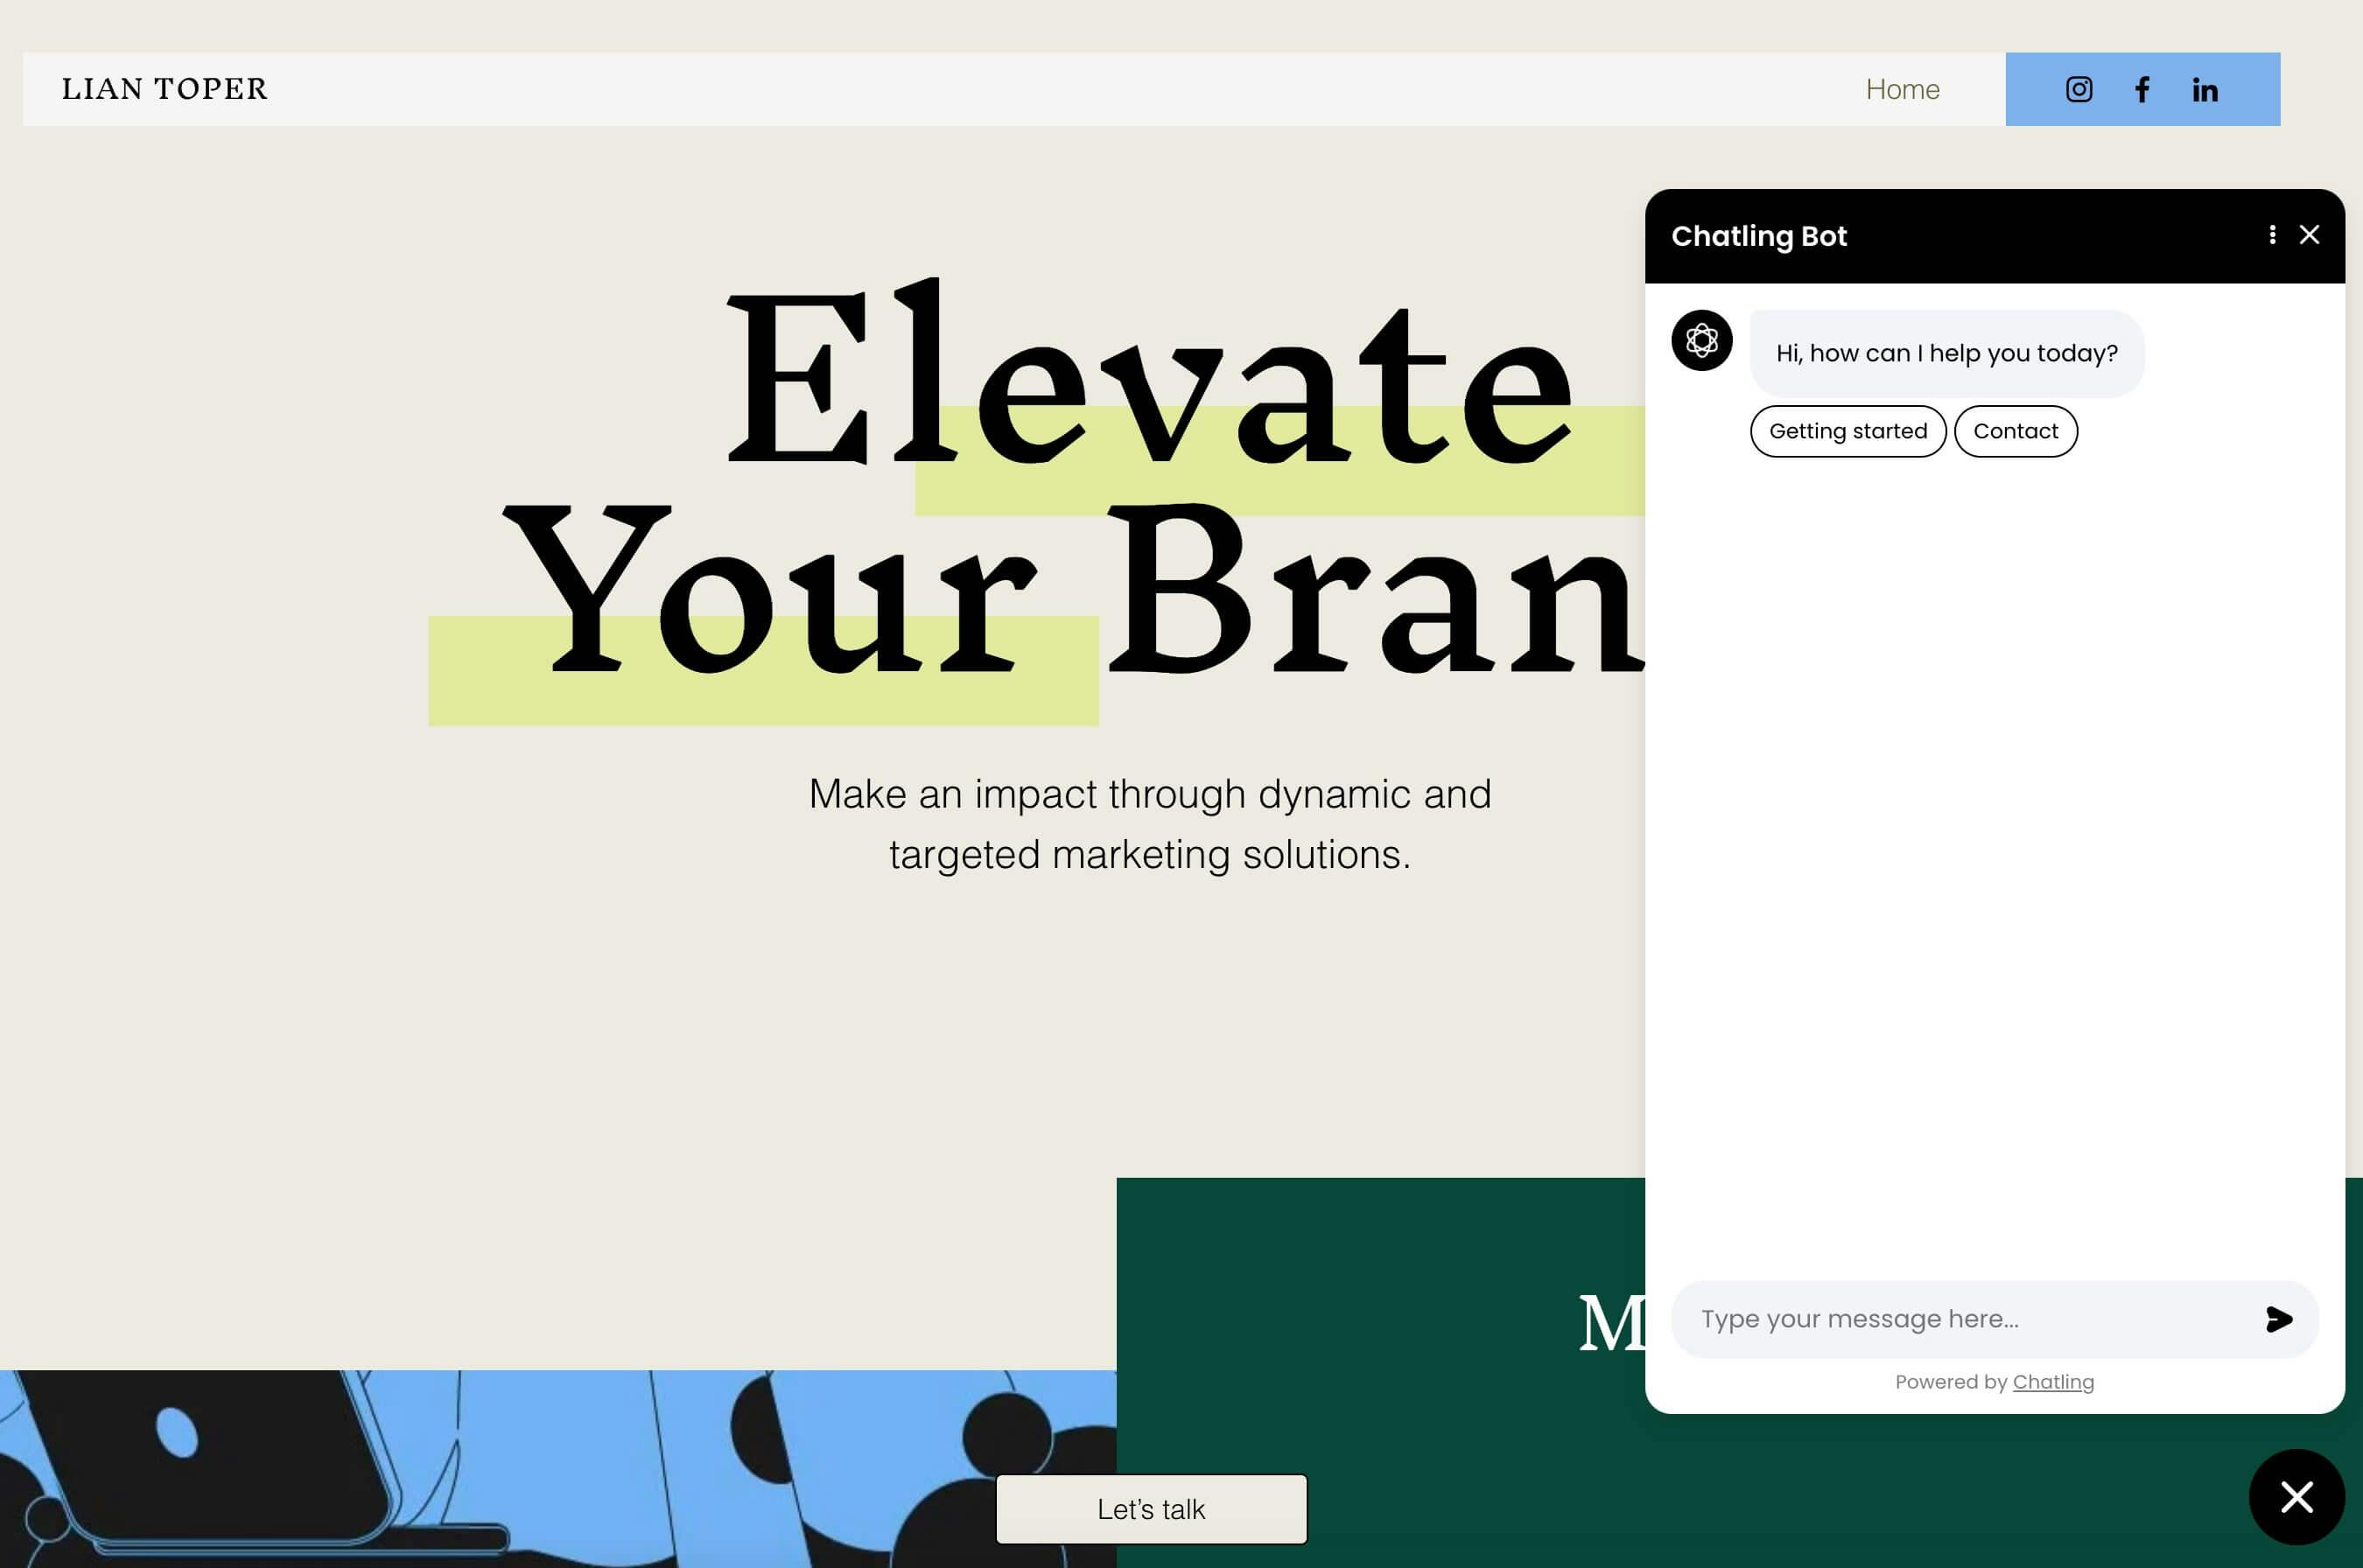 # WordPress
Source: https://docs.chatling.ai/install-chatbot/wordpress
Learn how to add Chatling to your WordPress website
## Method 1: Install using a plugin
1. Go to your chatbot's dashboard.
2. Click on `Website widget` in the sidebar.
# WordPress
Source: https://docs.chatling.ai/install-chatbot/wordpress
Learn how to add Chatling to your WordPress website
## Method 1: Install using a plugin
1. Go to your chatbot's dashboard.
2. Click on `Website widget` in the sidebar.
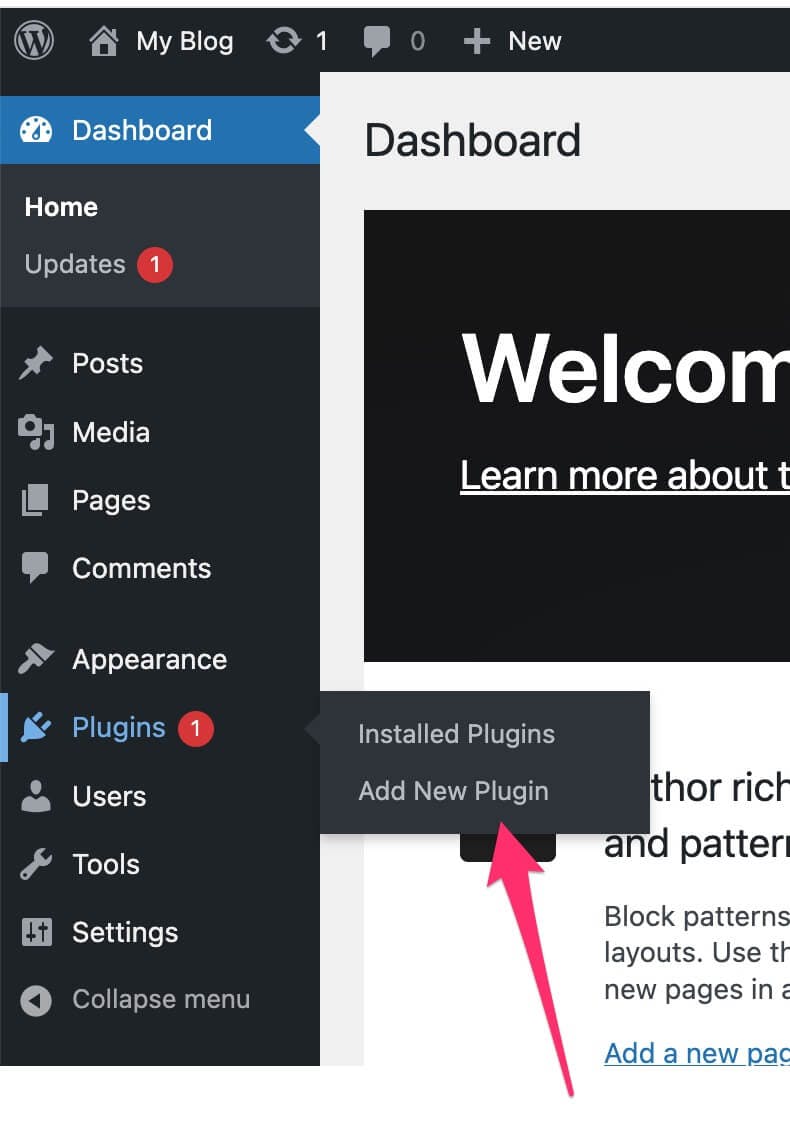 4. Search for the `Insert Headers And Footers` plugin and install the one by WPBrigade.
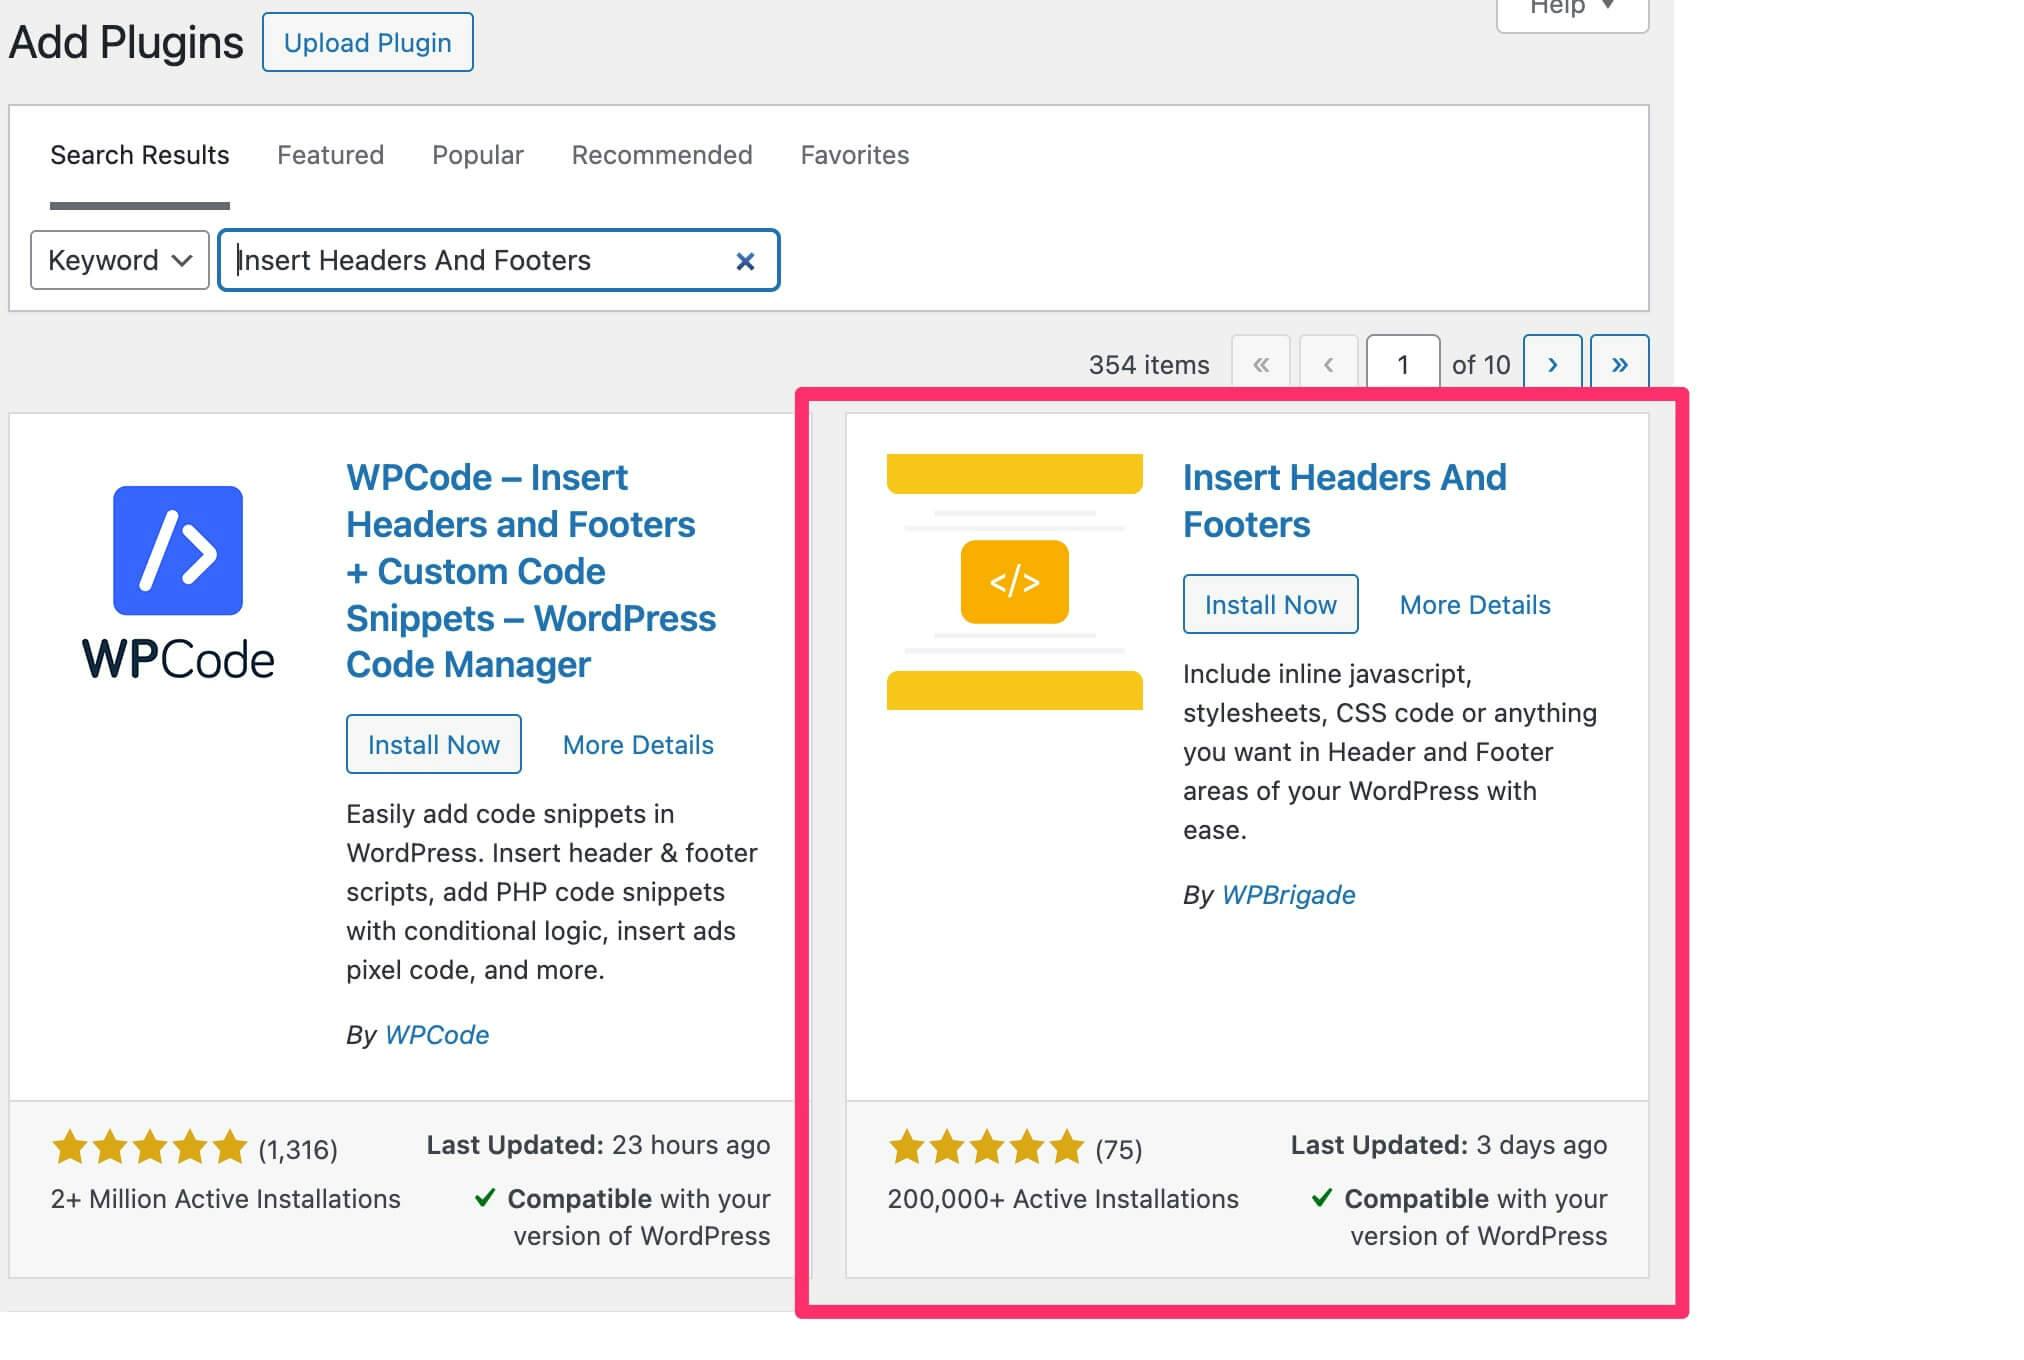 6. Once installed, activate the plugin.
7. Go to `Settings` > `WP Headers and Footers` from the sidebar.
6. Once installed, activate the plugin.
7. Go to `Settings` > `WP Headers and Footers` from the sidebar.
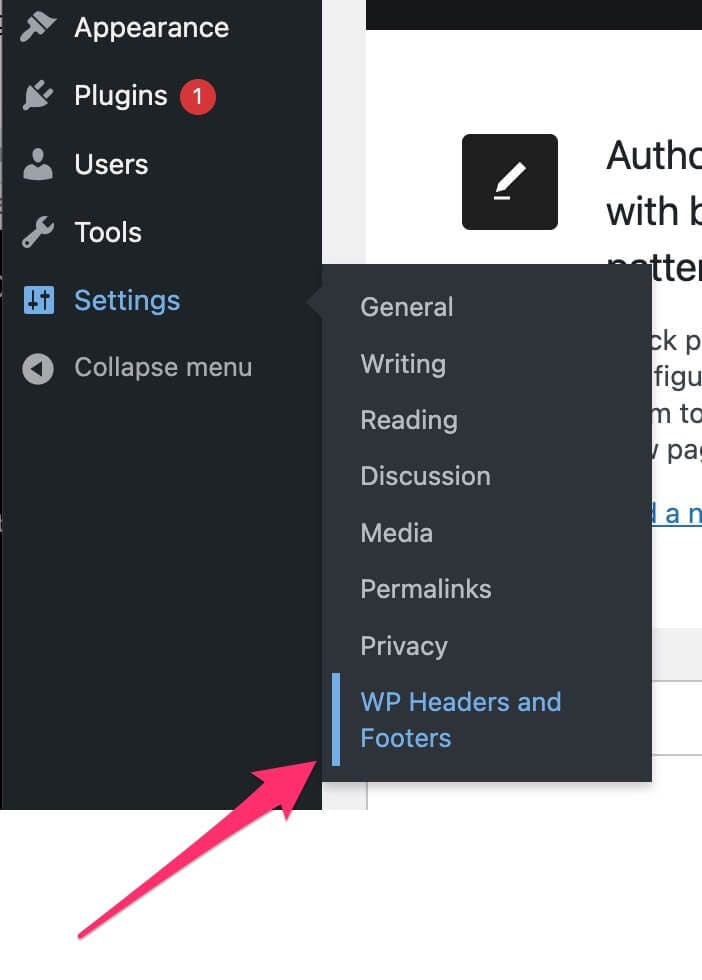 8. Paste the chatbot widget code in the header section.
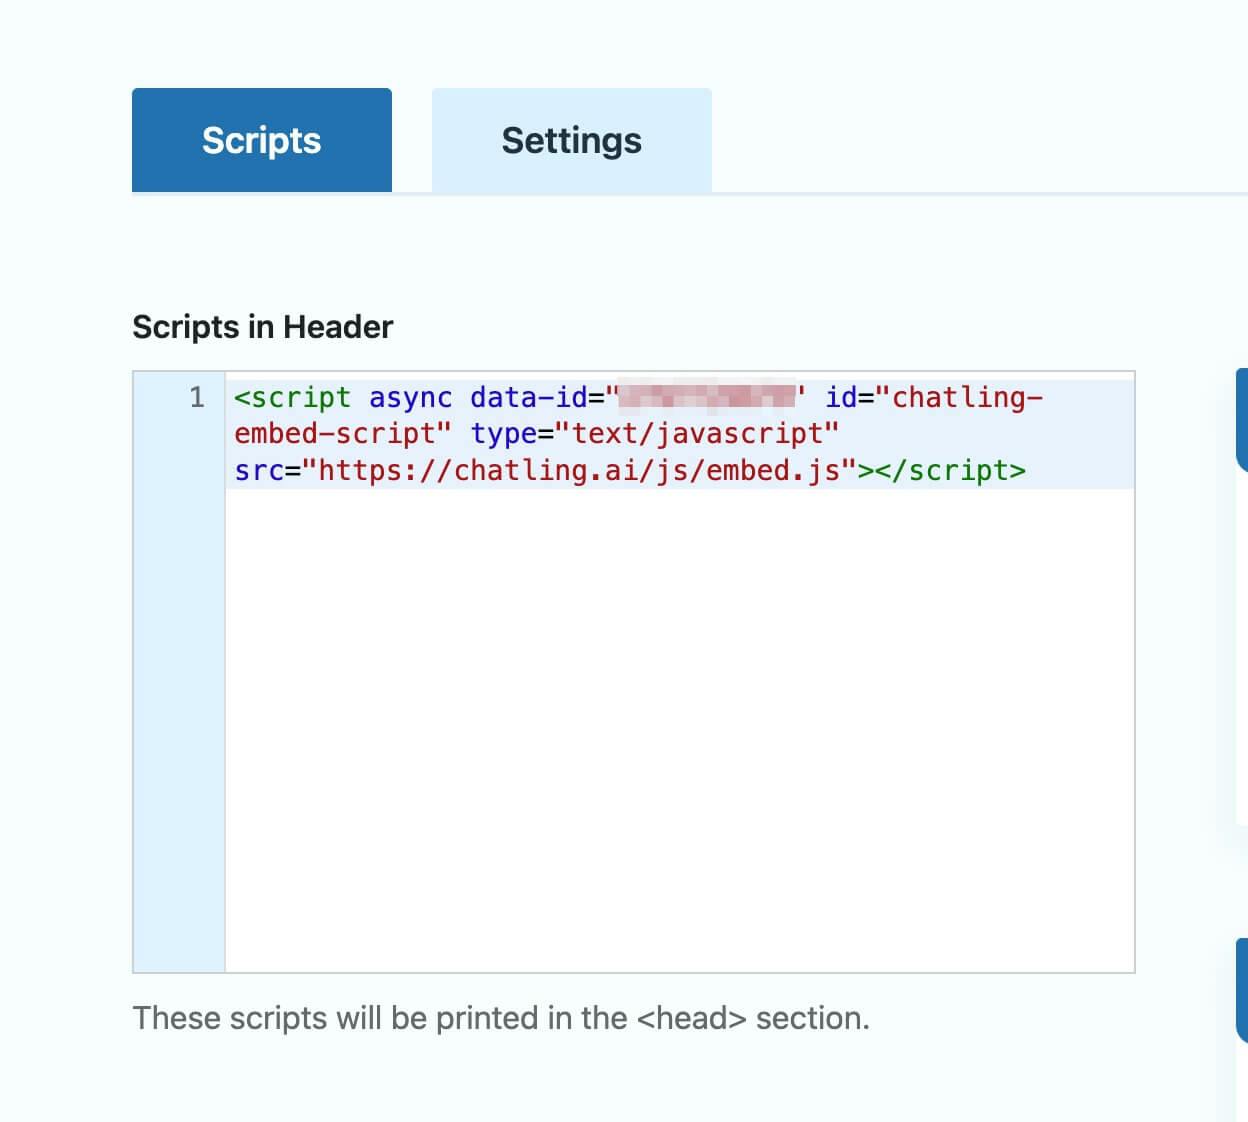 9. Click `Save Changes`.
## Method 2: Install using the theme editor
1. Open your WordPress dashboard.
2. From the sidebar menu, select `Appearance` > `Theme File Editor`.
9. Click `Save Changes`.
## Method 2: Install using the theme editor
1. Open your WordPress dashboard.
2. From the sidebar menu, select `Appearance` > `Theme File Editor`.
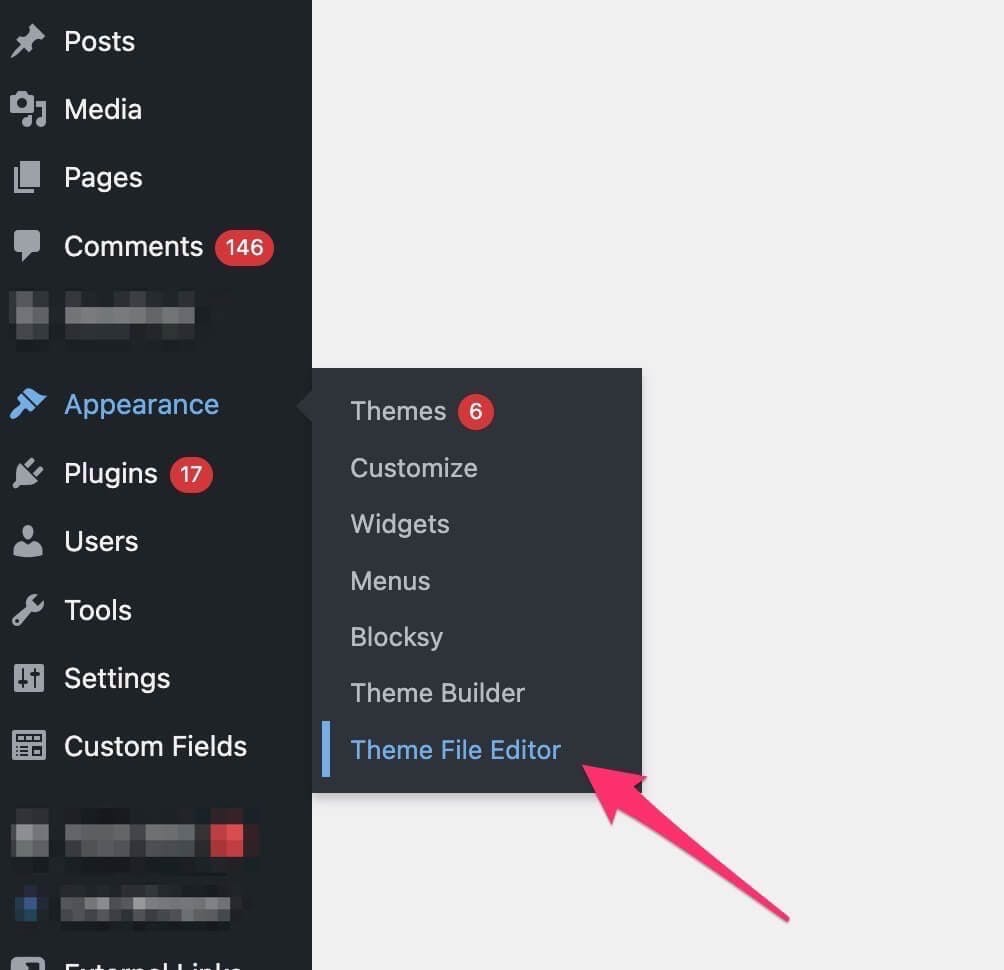 3. Under the `Theme Files` section (right side of the screen), search and open the `header.php` file.
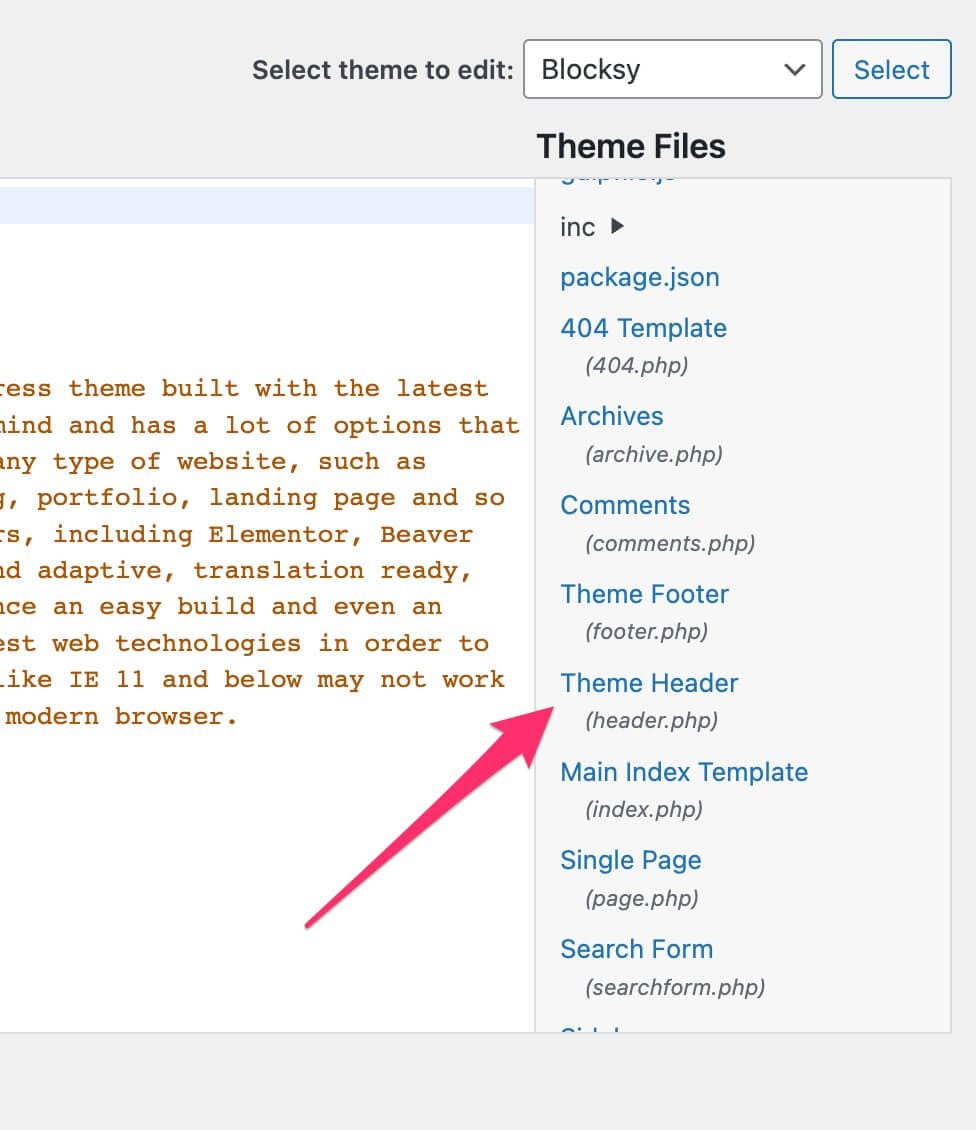 4. Paste the chatbot widget code before the closing `` tag.
 5. Click `Update File` to save.
# Introduction
Source: https://docs.chatling.ai/intents/introduction
Learn about intents and how they work in Chatling
5. Click `Update File` to save.
# Introduction
Source: https://docs.chatling.ai/intents/introduction
Learn about intents and how they work in Chatling
 ## What are Intents?
Intents identify what users are trying to accomplish and capture the meaning behind their messages, regardless of how they phrase them.
For example, when users ask "Where's my order?" or "Track package", they share the same underlying goal - to locate their order.
Intents can be used to define how your chatbot should respond when it recognizes these user goals. Each intent can be linked to specific conversation flows, data collection requirements, and response templates, enabling the chatbot to take appropriate action.
{/* This combination of intent recognition and behavior definition allows your chatbot to provide consistent, meaningful responses while handling the natural variations in how users express themselves. */}
## How Intents Work
Intents are defined in the `Intents` section of your chatbot's builder. Each intent consists of:
* **Name**: A clear, descriptive identifier (e.g., "Order Tracking", "Submit ticket").
* **Description**: Explains the user's goal or purpose this intent represents.
* **Sample phrases**: Collection of sample messages that would trigger this intent. This helps the chatbot understand the intent and accurately match it to user messages.
# Manage intents
Source: https://docs.chatling.ai/intents/manage
A guide on how to create and manage your chatbot's intents
## Accessing the Intent page
The Intents page is located inside your chatbot's builder. To access it:
1. Open the Builder.
2. Click on the `Intents` button in the top left.
## What are Intents?
Intents identify what users are trying to accomplish and capture the meaning behind their messages, regardless of how they phrase them.
For example, when users ask "Where's my order?" or "Track package", they share the same underlying goal - to locate their order.
Intents can be used to define how your chatbot should respond when it recognizes these user goals. Each intent can be linked to specific conversation flows, data collection requirements, and response templates, enabling the chatbot to take appropriate action.
{/* This combination of intent recognition and behavior definition allows your chatbot to provide consistent, meaningful responses while handling the natural variations in how users express themselves. */}
## How Intents Work
Intents are defined in the `Intents` section of your chatbot's builder. Each intent consists of:
* **Name**: A clear, descriptive identifier (e.g., "Order Tracking", "Submit ticket").
* **Description**: Explains the user's goal or purpose this intent represents.
* **Sample phrases**: Collection of sample messages that would trigger this intent. This helps the chatbot understand the intent and accurately match it to user messages.
# Manage intents
Source: https://docs.chatling.ai/intents/manage
A guide on how to create and manage your chatbot's intents
## Accessing the Intent page
The Intents page is located inside your chatbot's builder. To access it:
1. Open the Builder.
2. Click on the `Intents` button in the top left.
 ## Creating an intent
1. Open the Intents page.
2. Click the `New` button.
## Creating an intent
1. Open the Intents page.
2. Click the `New` button.
 3. Enter the details for the intent.
* **Name**: A clear, descriptive identifier (e.g., "Order Tracking", "Submit ticket").
* **Description**: Explains the user's goal or purpose this intent represents.
* **Sample phrases**: Examples of user messages that should trigger this intent. This helps the chatbot understand and match the intent.
3. Enter the details for the intent.
* **Name**: A clear, descriptive identifier (e.g., "Order Tracking", "Submit ticket").
* **Description**: Explains the user's goal or purpose this intent represents.
* **Sample phrases**: Examples of user messages that should trigger this intent. This helps the chatbot understand and match the intent.
 4. Click the `Create intent` button.
## Editing an intent
1. Open the Intents page to view all the existing intents.
2. Find and click on the intent you want to edit.
3. Make changes to the intent's details, such as name, description, and sample phrases.
4. Click the `Create intent` button.
## Editing an intent
1. Open the Intents page to view all the existing intents.
2. Find and click on the intent you want to edit.
3. Make changes to the intent's details, such as name, description, and sample phrases.
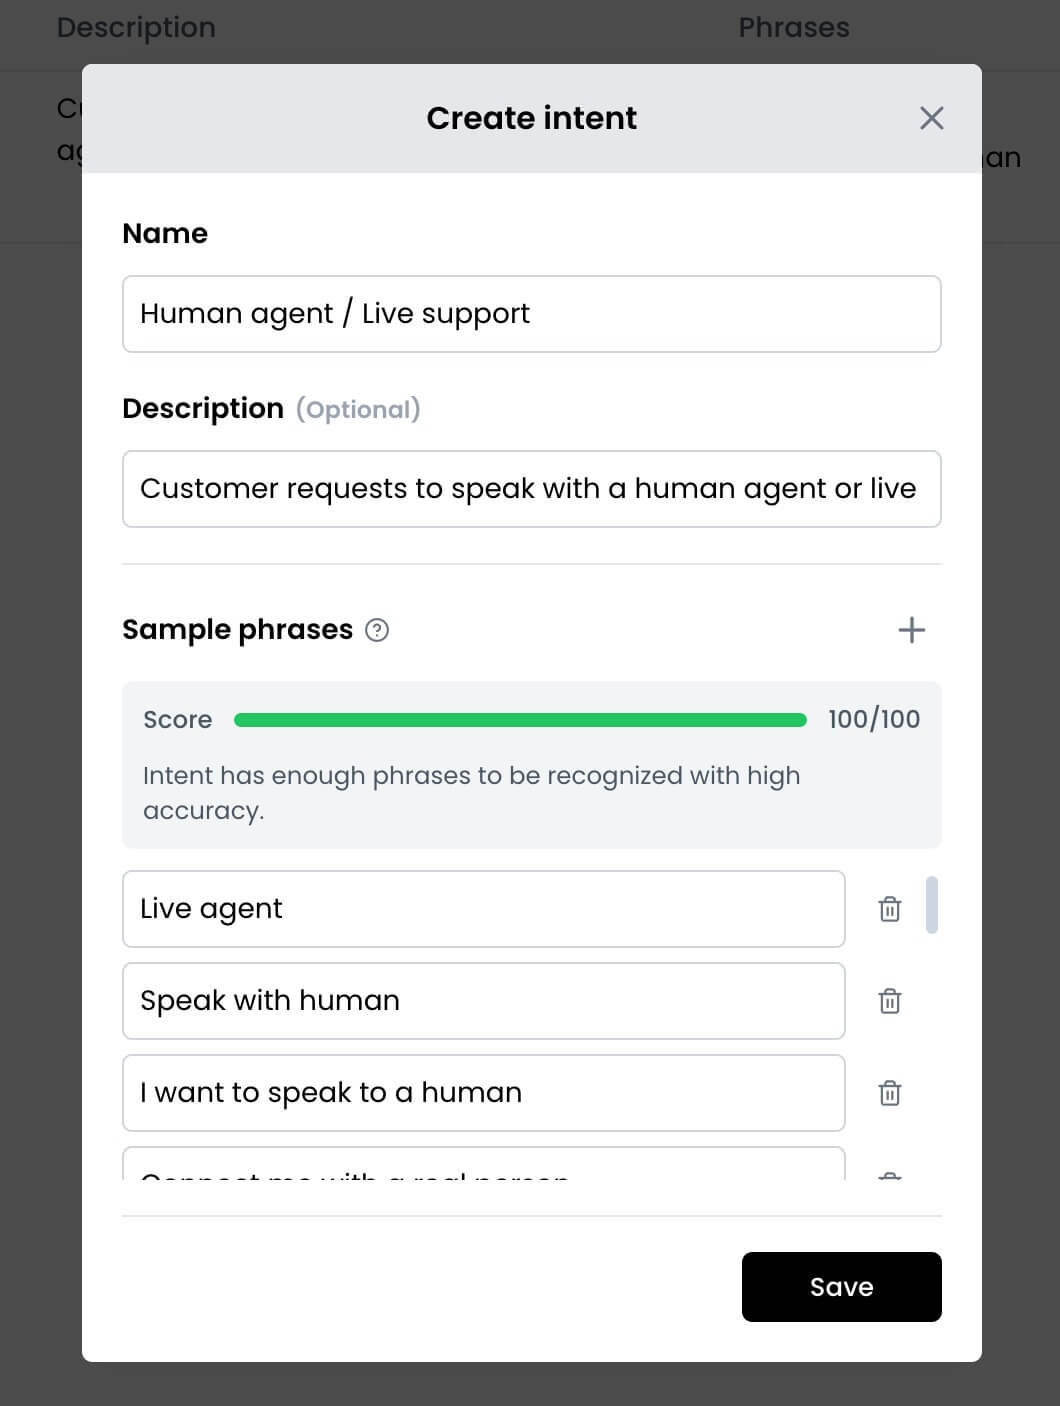 4. Click the `Save` button to save your changes.
## Deleting intents
1. Open the Intents page to view all the existing intents.
2. Click the checkbox next to one or more intents you want to delete.
4. Click the `Save` button to save your changes.
## Deleting intents
1. Open the Intents page to view all the existing intents.
2. Click the checkbox next to one or more intents you want to delete.
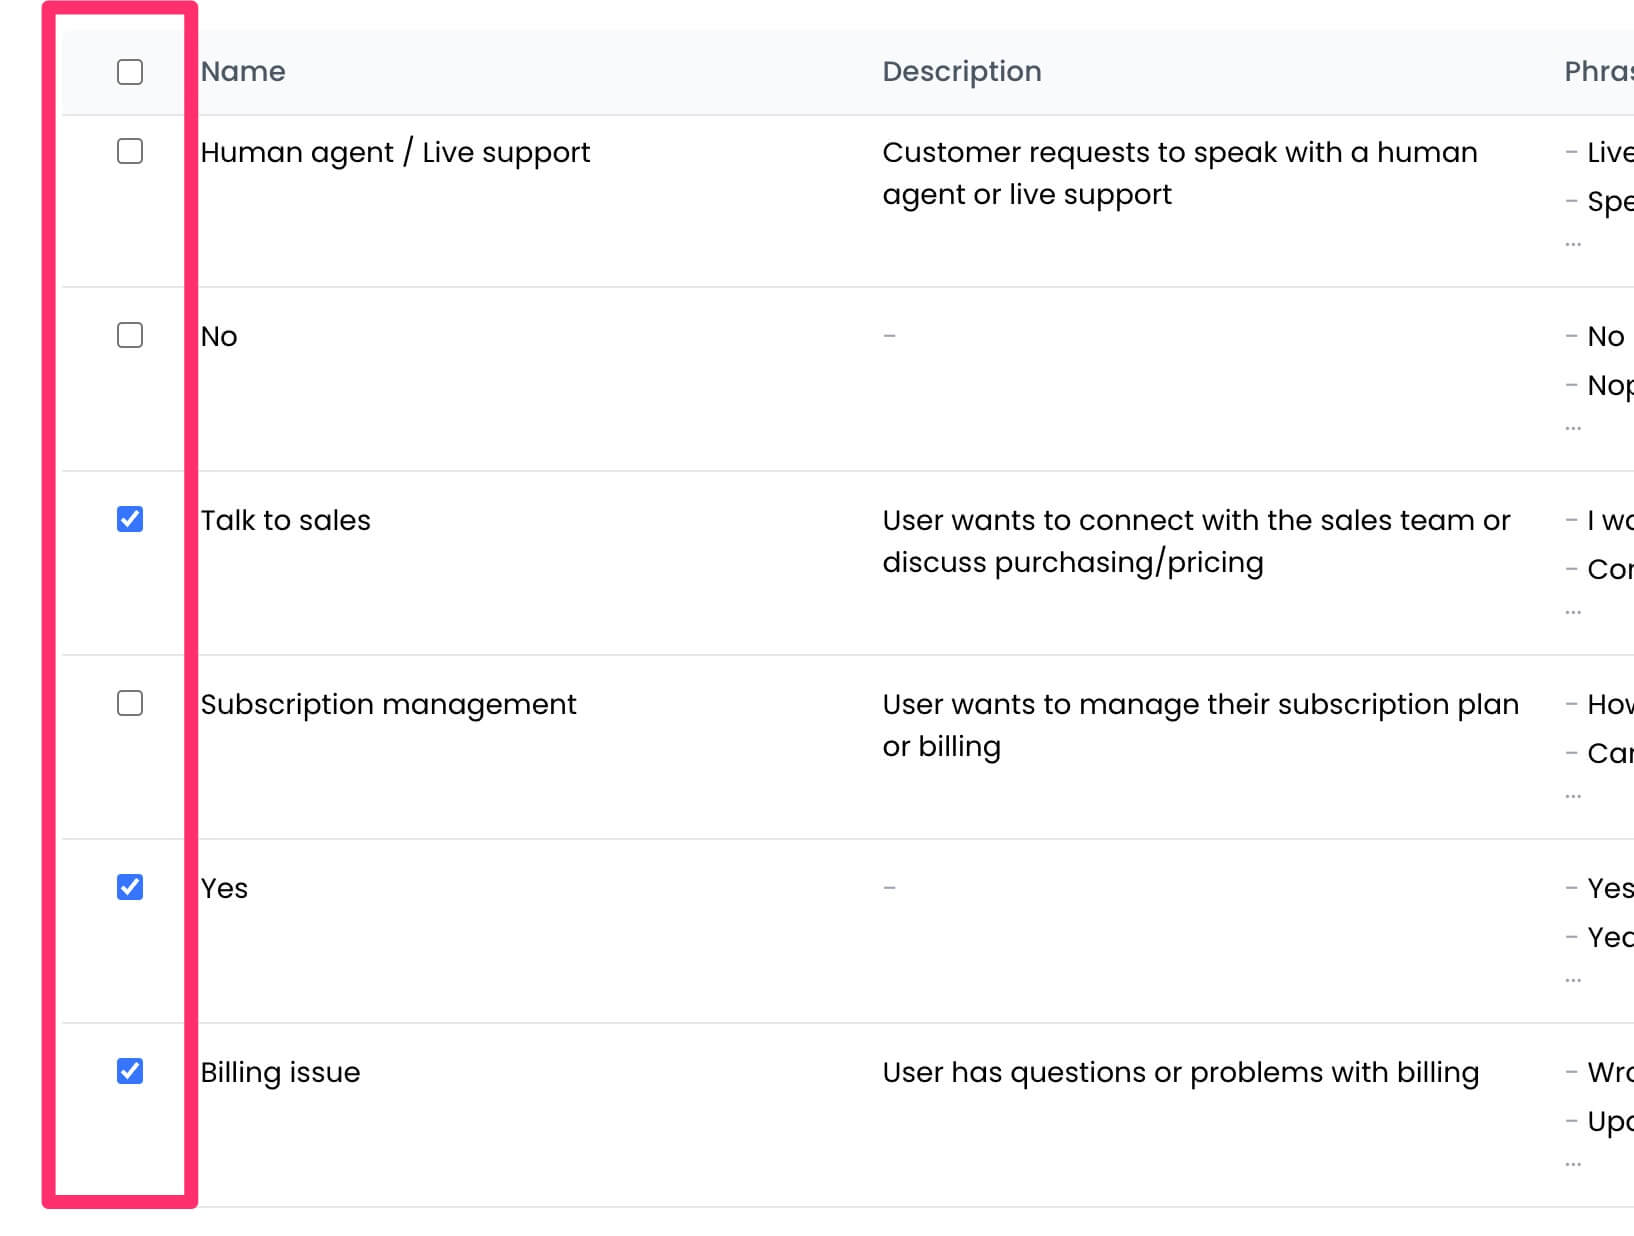 3. Click the `Delete` button in the top left.
 # Using intents
Source: https://docs.chatling.ai/intents/using-intents
Learn how to use intents to create more complex chatbot flows
To make your intents work, there are two essential steps:
1. Enable intent matching in blocks to tell the chatbot which intents to look for in user messages.
2. Define the flow of the chatbot when an intent is matched.
## 1. Intent matching
Currently, intent matching can be enabled in [Text input blocks](/builder/blocks/inputs/text).
When users send messages using the Text block, you can configure whether these messages should be checked against one or more defined intents. This allows you to control when intent matching occurs and trigger appropriate flows based on the matches.
### Enabling intent matching
1. Open the editor for a text block.
2. Next to the `Match intent` option, click the `+` button.
# Using intents
Source: https://docs.chatling.ai/intents/using-intents
Learn how to use intents to create more complex chatbot flows
To make your intents work, there are two essential steps:
1. Enable intent matching in blocks to tell the chatbot which intents to look for in user messages.
2. Define the flow of the chatbot when an intent is matched.
## 1. Intent matching
Currently, intent matching can be enabled in [Text input blocks](/builder/blocks/inputs/text).
When users send messages using the Text block, you can configure whether these messages should be checked against one or more defined intents. This allows you to control when intent matching occurs and trigger appropriate flows based on the matches.
### Enabling intent matching
1. Open the editor for a text block.
2. Next to the `Match intent` option, click the `+` button.
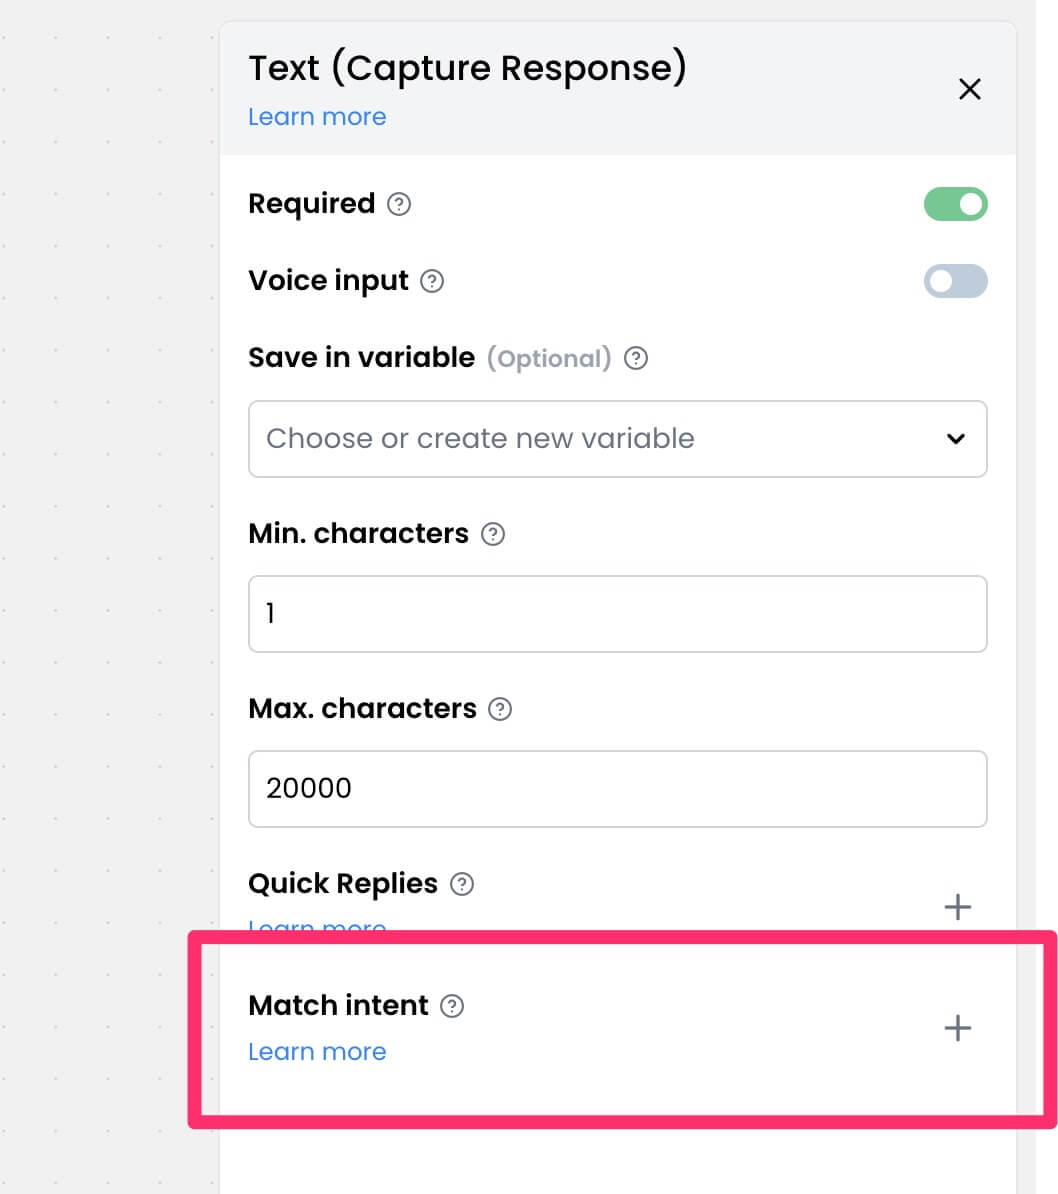 3. Select the intents you want user messages to be checked against.
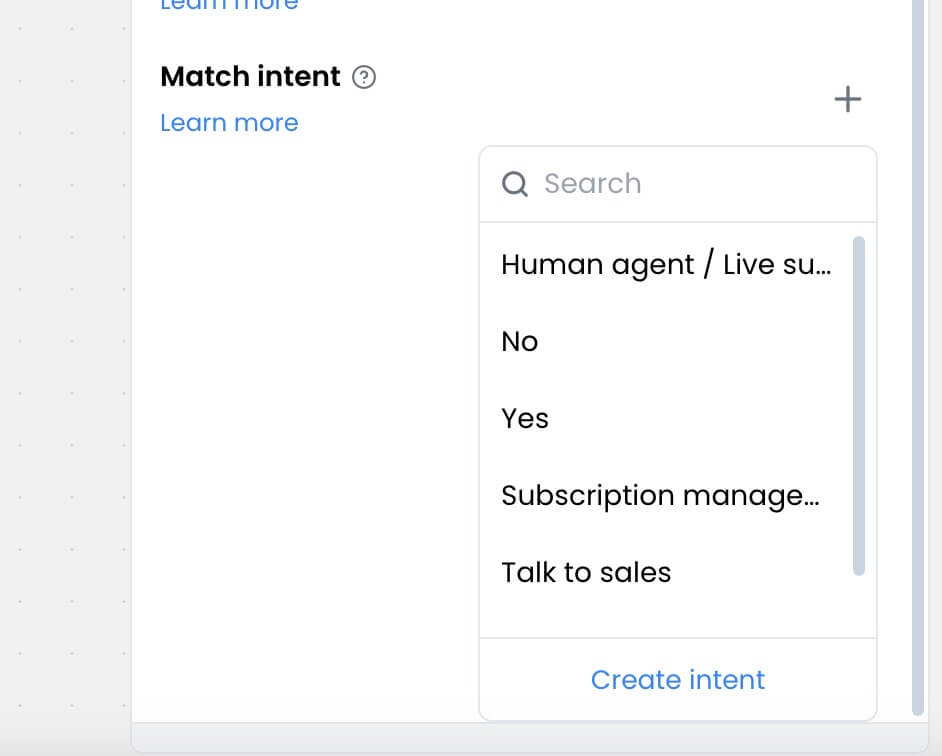 When a user sends a message, the chatbot will check if the message matches any of the selected intents and trigger the appropriate flow. If there are no matches, the flow will continue normally.
## 2. Defining intent flows
There are two ways to define the actions for an intent:
1. Intent trigger block (global)
2. Local trigger
### Intent trigger block
Intent triggers are flows that will be executed when an intent is matched. These triggers are global, meaning that they will be executed by any block that matches the intent. This is useful if you want to create a standard response for an intent that can be used in multiple places in your chatbot.
For example, if you create an Intent trigger for `Order Tracking`:
* Any block that matches this intent will start this flow.
* The same flow runs whether matched in a welcome message or support conversation.
* Flow can include actions like fetching order status, asking for order number, etc.
This provides a consistent response when users ask about order tracking anywhere in your chatbot.
**To add the trigger:**
1. Open `Blocks` from the sidebar.
When a user sends a message, the chatbot will check if the message matches any of the selected intents and trigger the appropriate flow. If there are no matches, the flow will continue normally.
## 2. Defining intent flows
There are two ways to define the actions for an intent:
1. Intent trigger block (global)
2. Local trigger
### Intent trigger block
Intent triggers are flows that will be executed when an intent is matched. These triggers are global, meaning that they will be executed by any block that matches the intent. This is useful if you want to create a standard response for an intent that can be used in multiple places in your chatbot.
For example, if you create an Intent trigger for `Order Tracking`:
* Any block that matches this intent will start this flow.
* The same flow runs whether matched in a welcome message or support conversation.
* Flow can include actions like fetching order status, asking for order number, etc.
This provides a consistent response when users ask about order tracking anywhere in your chatbot.
**To add the trigger:**
1. Open `Blocks` from the sidebar.
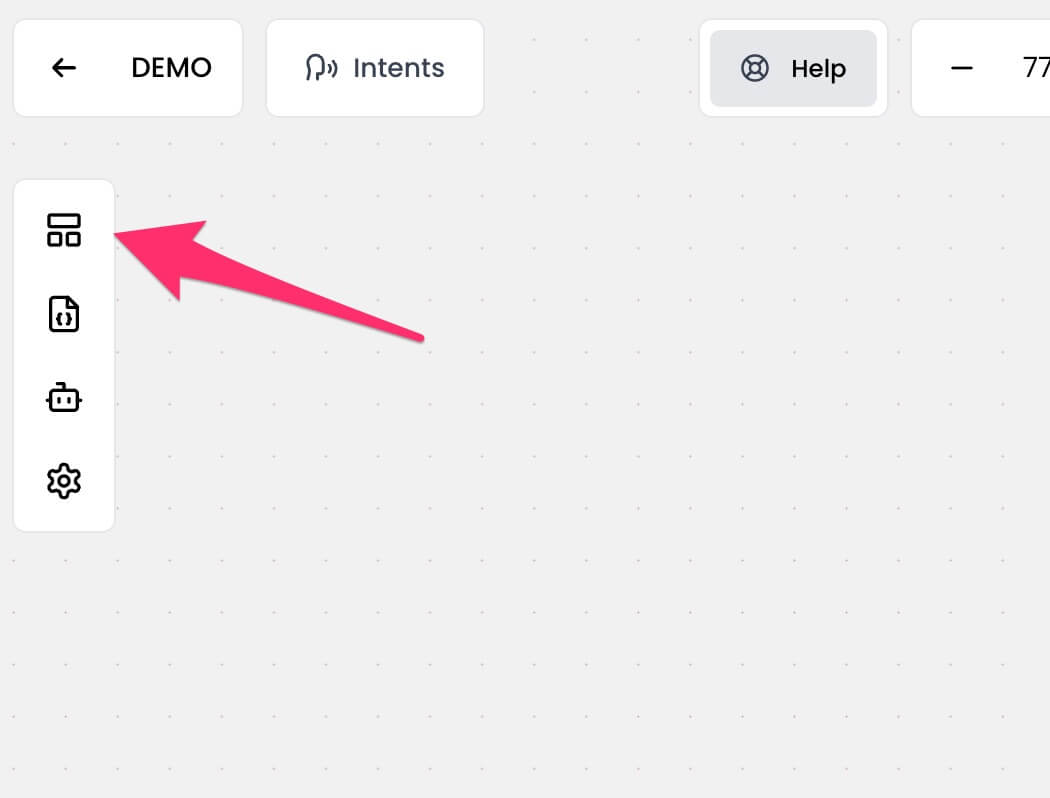 2. Under the `Triggers` section, drag and drop the `Intent` block onto the canvas.
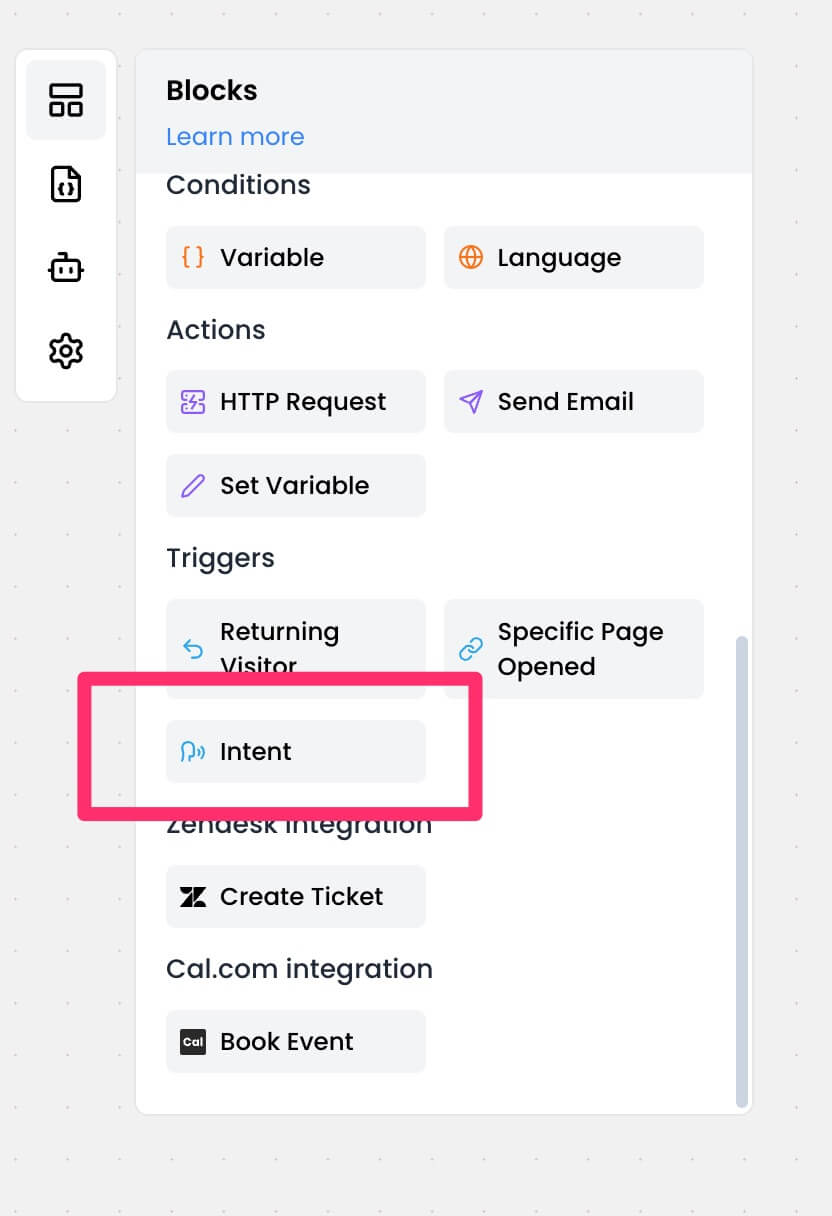 3. Click on the block to open the editor.
4. Select an intent this trigger belongs to.
3. Click on the block to open the editor.
4. Select an intent this trigger belongs to.
 5. Define the flow to run when the intent is triggered.
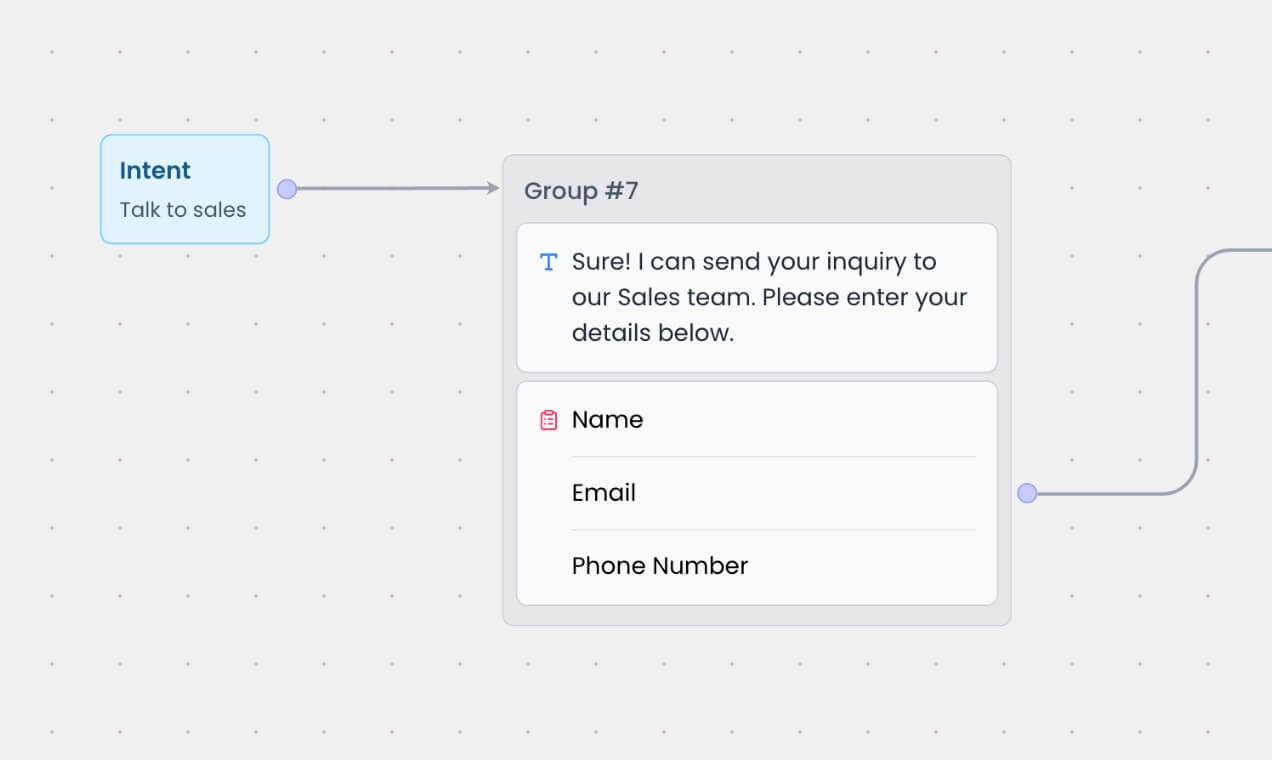 ### Local trigger
Sometimes you want different flows for the same intent depending on where in the conversation it was matched. This is where local triggers come in.
* Open the block where you want to enable local trigger for an intent.
* Find the intent under the `Match intent` option and click the `Local trigger` icon as shown below. For example, we will enable local trigger for the `Order status` intent.
### Local trigger
Sometimes you want different flows for the same intent depending on where in the conversation it was matched. This is where local triggers come in.
* Open the block where you want to enable local trigger for an intent.
* Find the intent under the `Match intent` option and click the `Local trigger` icon as shown below. For example, we will enable local trigger for the `Order status` intent.
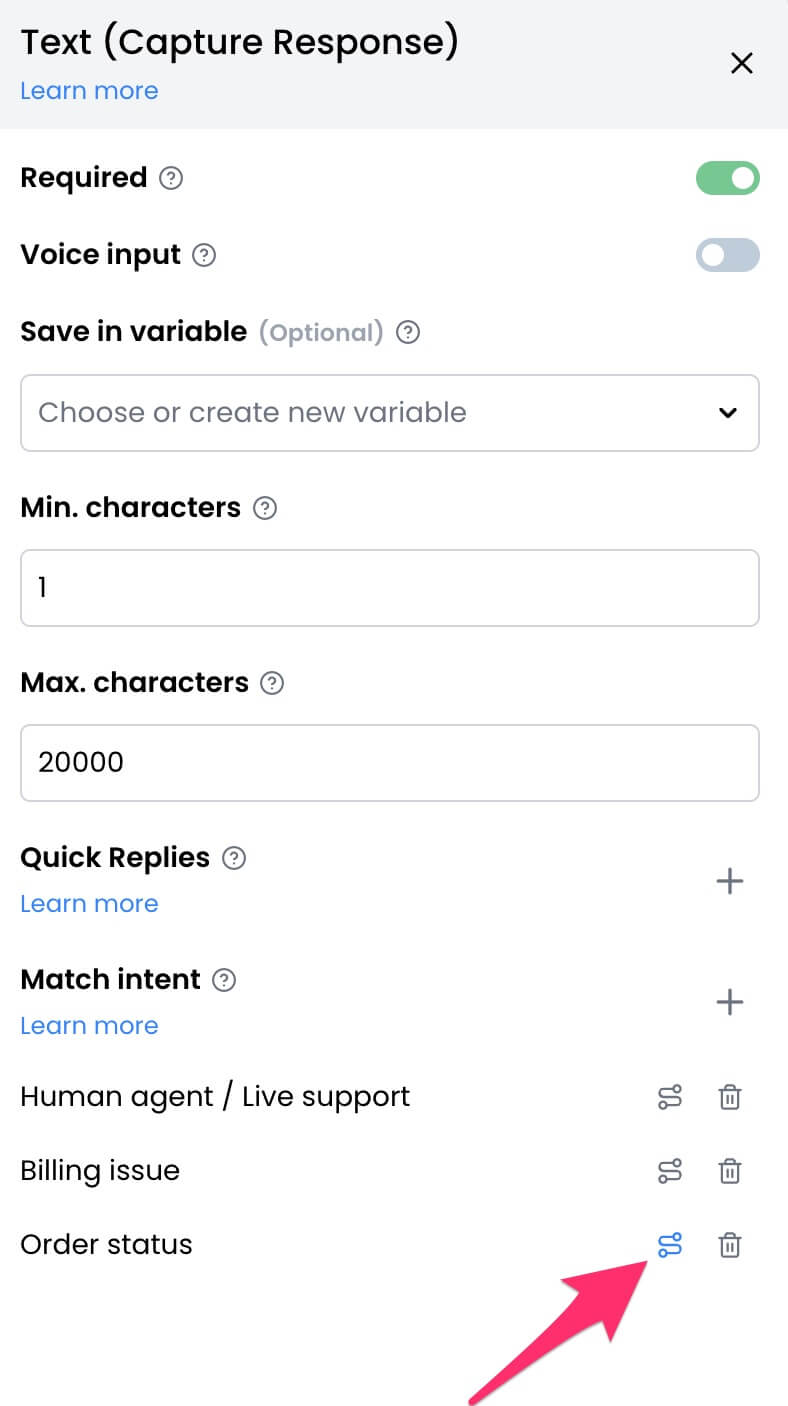 * Define the specific flow for this intent. For example, we will ask the user for their order number before fetching the order status. As such, whenever the input in this block matches the `Order status` intent, the flow defined here will be executed instead of the global trigger.
 Note that the local trigger takes precedence over the global trigger when enabled.
### Using both triggers
You can have both global and local triggers for intents:
* Use global triggers for standard responses
* Override with local triggers where context-specific flows are needed
This flexibility allows you to:
* Maintain consistent base responses
* Customize flows for specific conversation stages
* Create more dynamic user experiences
## What happens when no intents match?
If no intent is matched, the chatbot will continue with the flow as normal.
# Add data source
Source: https://docs.chatling.ai/knowledge-base/add-data-source
A guide on adding data sources to the Knowledge Base.
Note that the local trigger takes precedence over the global trigger when enabled.
### Using both triggers
You can have both global and local triggers for intents:
* Use global triggers for standard responses
* Override with local triggers where context-specific flows are needed
This flexibility allows you to:
* Maintain consistent base responses
* Customize flows for specific conversation stages
* Create more dynamic user experiences
## What happens when no intents match?
If no intent is matched, the chatbot will continue with the flow as normal.
# Add data source
Source: https://docs.chatling.ai/knowledge-base/add-data-source
A guide on adding data sources to the Knowledge Base.
 ## How to add data to the knowledge base
To add data to the Knowledge Base, follow these steps:
1. From the dashboard, go to `Knowledge Base`.
## How to add data to the knowledge base
To add data to the Knowledge Base, follow these steps:
1. From the dashboard, go to `Knowledge Base`.
 2. Click on the `Add new` or `New Data Source` button.
 3. Select the type of data source you want to add.
 4. Follow the on-screen instructions to add the data source to the knowledge base.
Once added, it will take a few minutes for the data to be processed. The status of the data source will be displayed in the Knowledge Base page and will change to "Processed" once the AI has extracted the information.
4. Follow the on-screen instructions to add the data source to the knowledge base.
Once added, it will take a few minutes for the data to be processed. The status of the data source will be displayed in the Knowledge Base page and will change to "Processed" once the AI has extracted the information.
 # Auto-sync data sources
Source: https://docs.chatling.ai/knowledge-base/auto-sync-data-sources
Learn how to auto-sync data sources in the Knowledge Base.
Auto-syncing allows you to automatically sync your knowledge base sources at specified intervals, such as daily, weekly, or monthly, to fetch the latest data. This ensures that your knowledge base is always up to date with the latest information.
## How to enable auto-syncing
1. Go to the `Knowledge Base` page.
2. From the `Auto-sync` column, you can select an interval for each data source.
# Auto-sync data sources
Source: https://docs.chatling.ai/knowledge-base/auto-sync-data-sources
Learn how to auto-sync data sources in the Knowledge Base.
Auto-syncing allows you to automatically sync your knowledge base sources at specified intervals, such as daily, weekly, or monthly, to fetch the latest data. This ensures that your knowledge base is always up to date with the latest information.
## How to enable auto-syncing
1. Go to the `Knowledge Base` page.
2. From the `Auto-sync` column, you can select an interval for each data source.
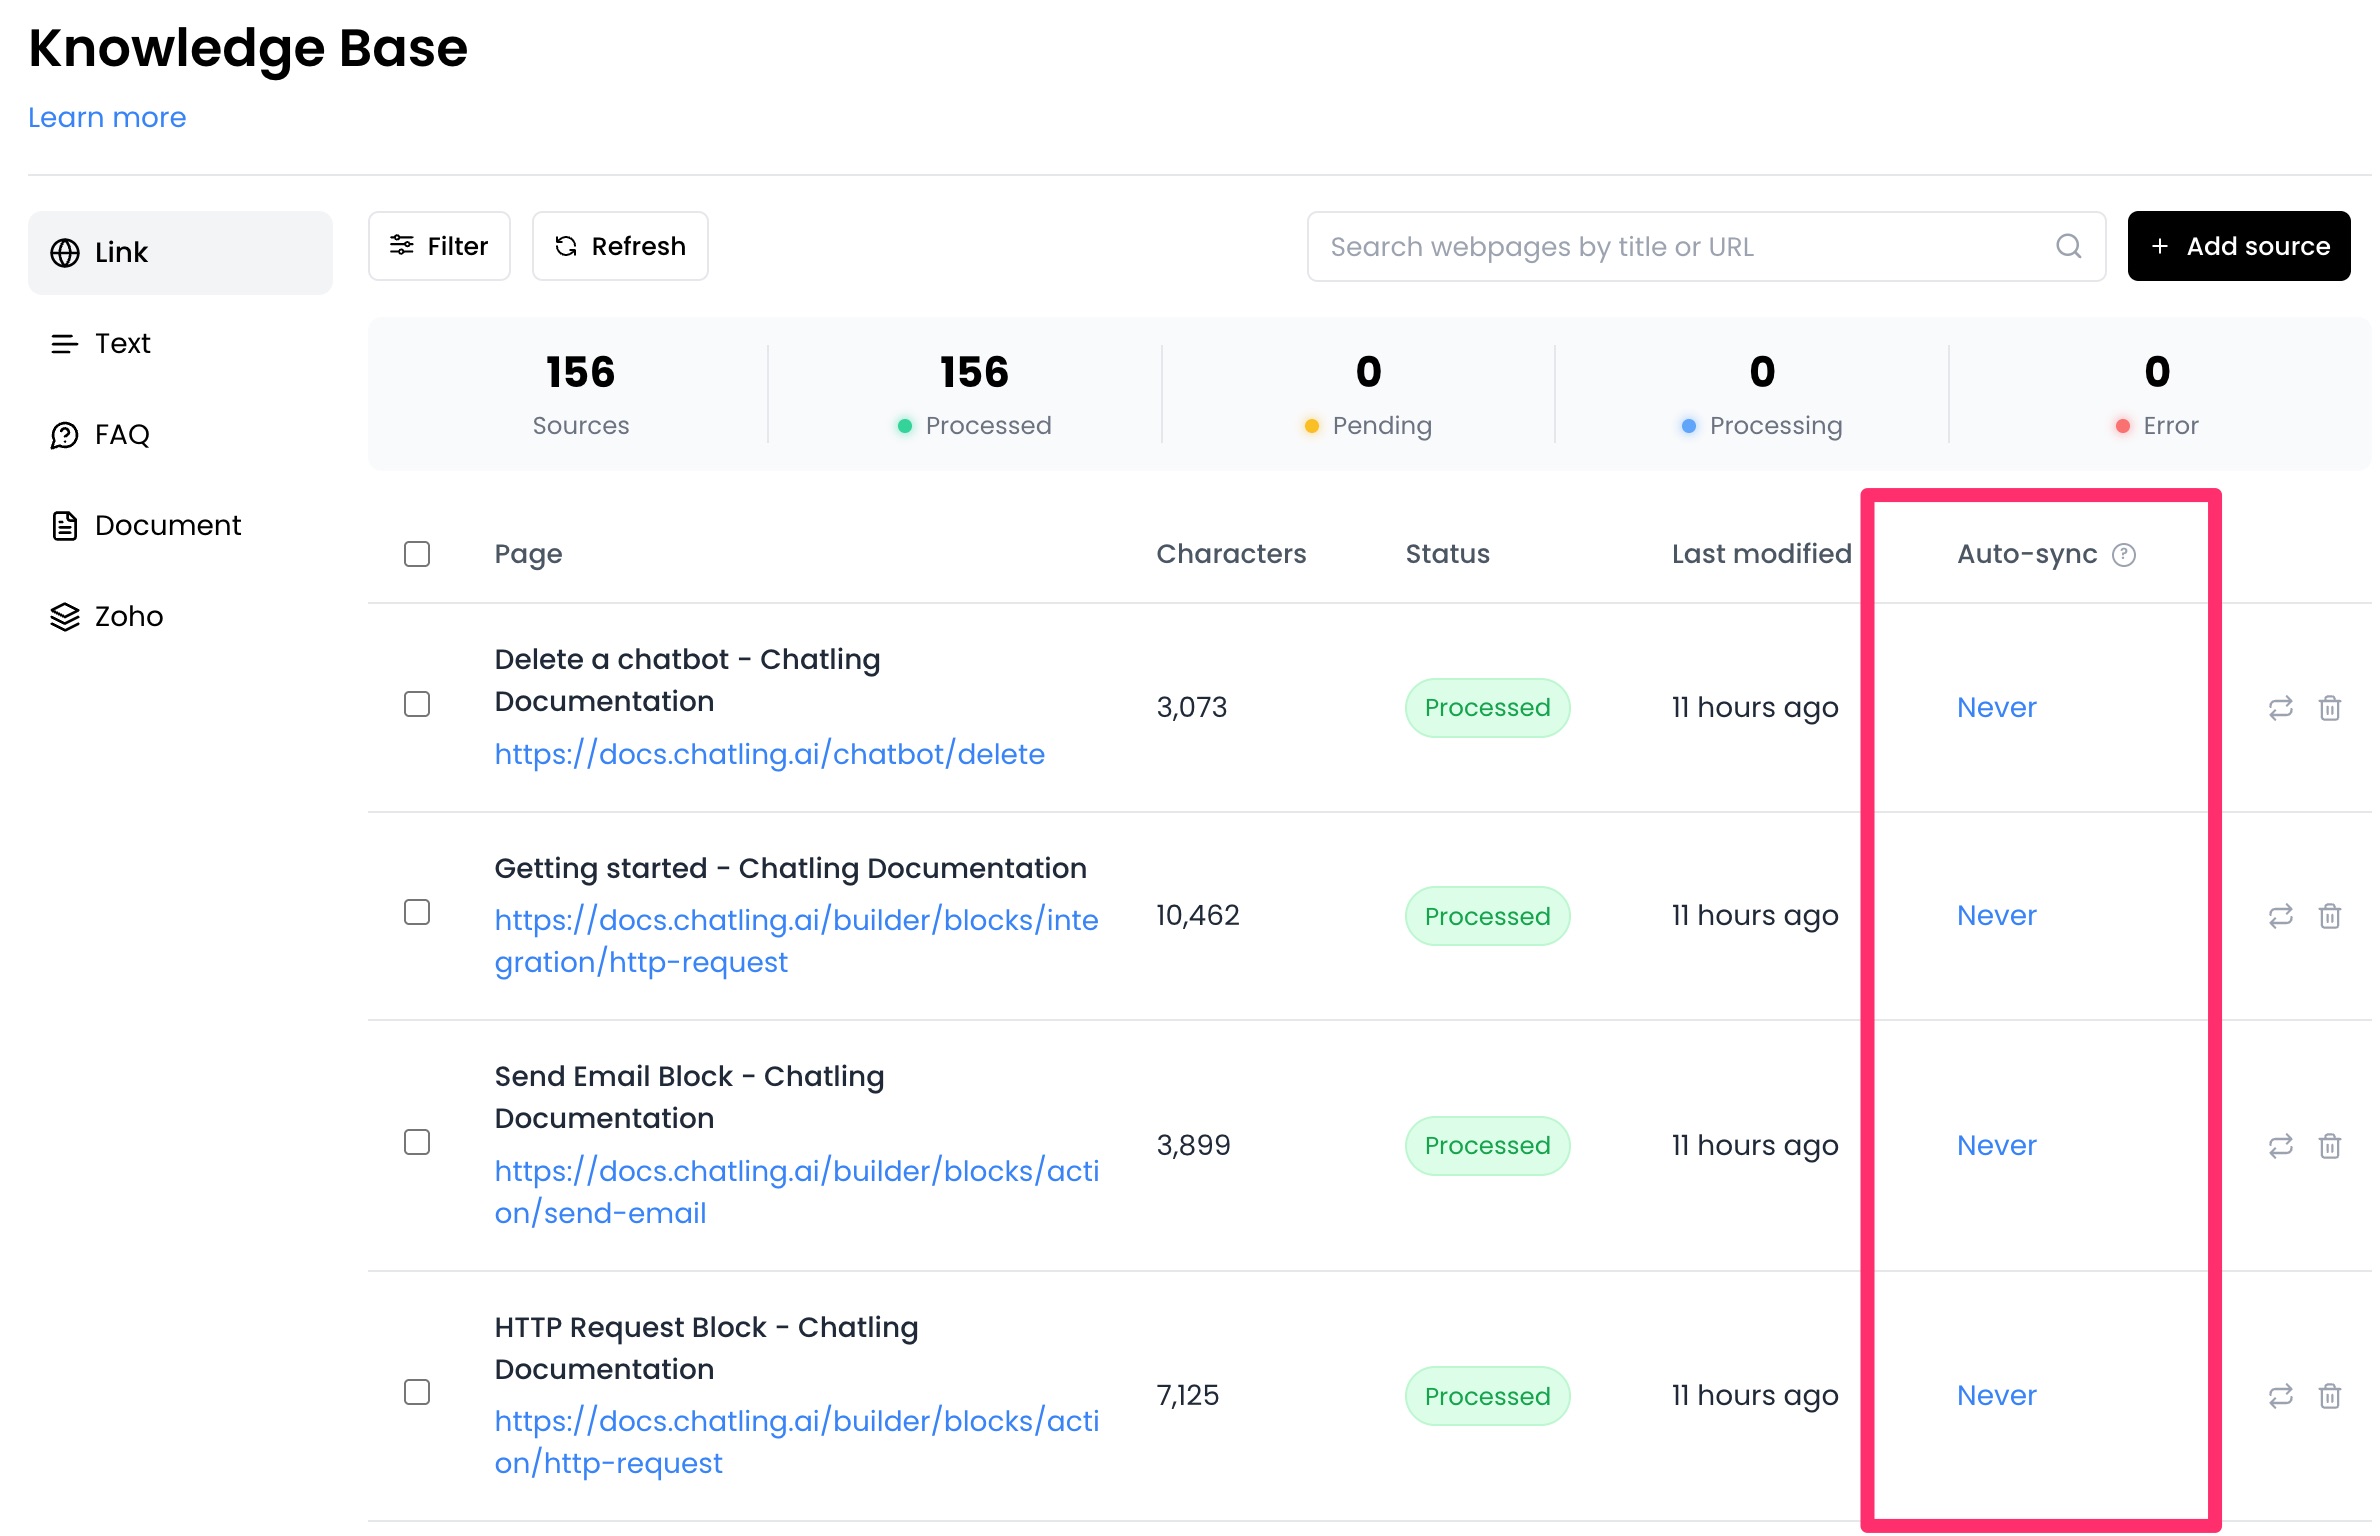 3. Click on the auto-sync value for a specific source and choose an interval.
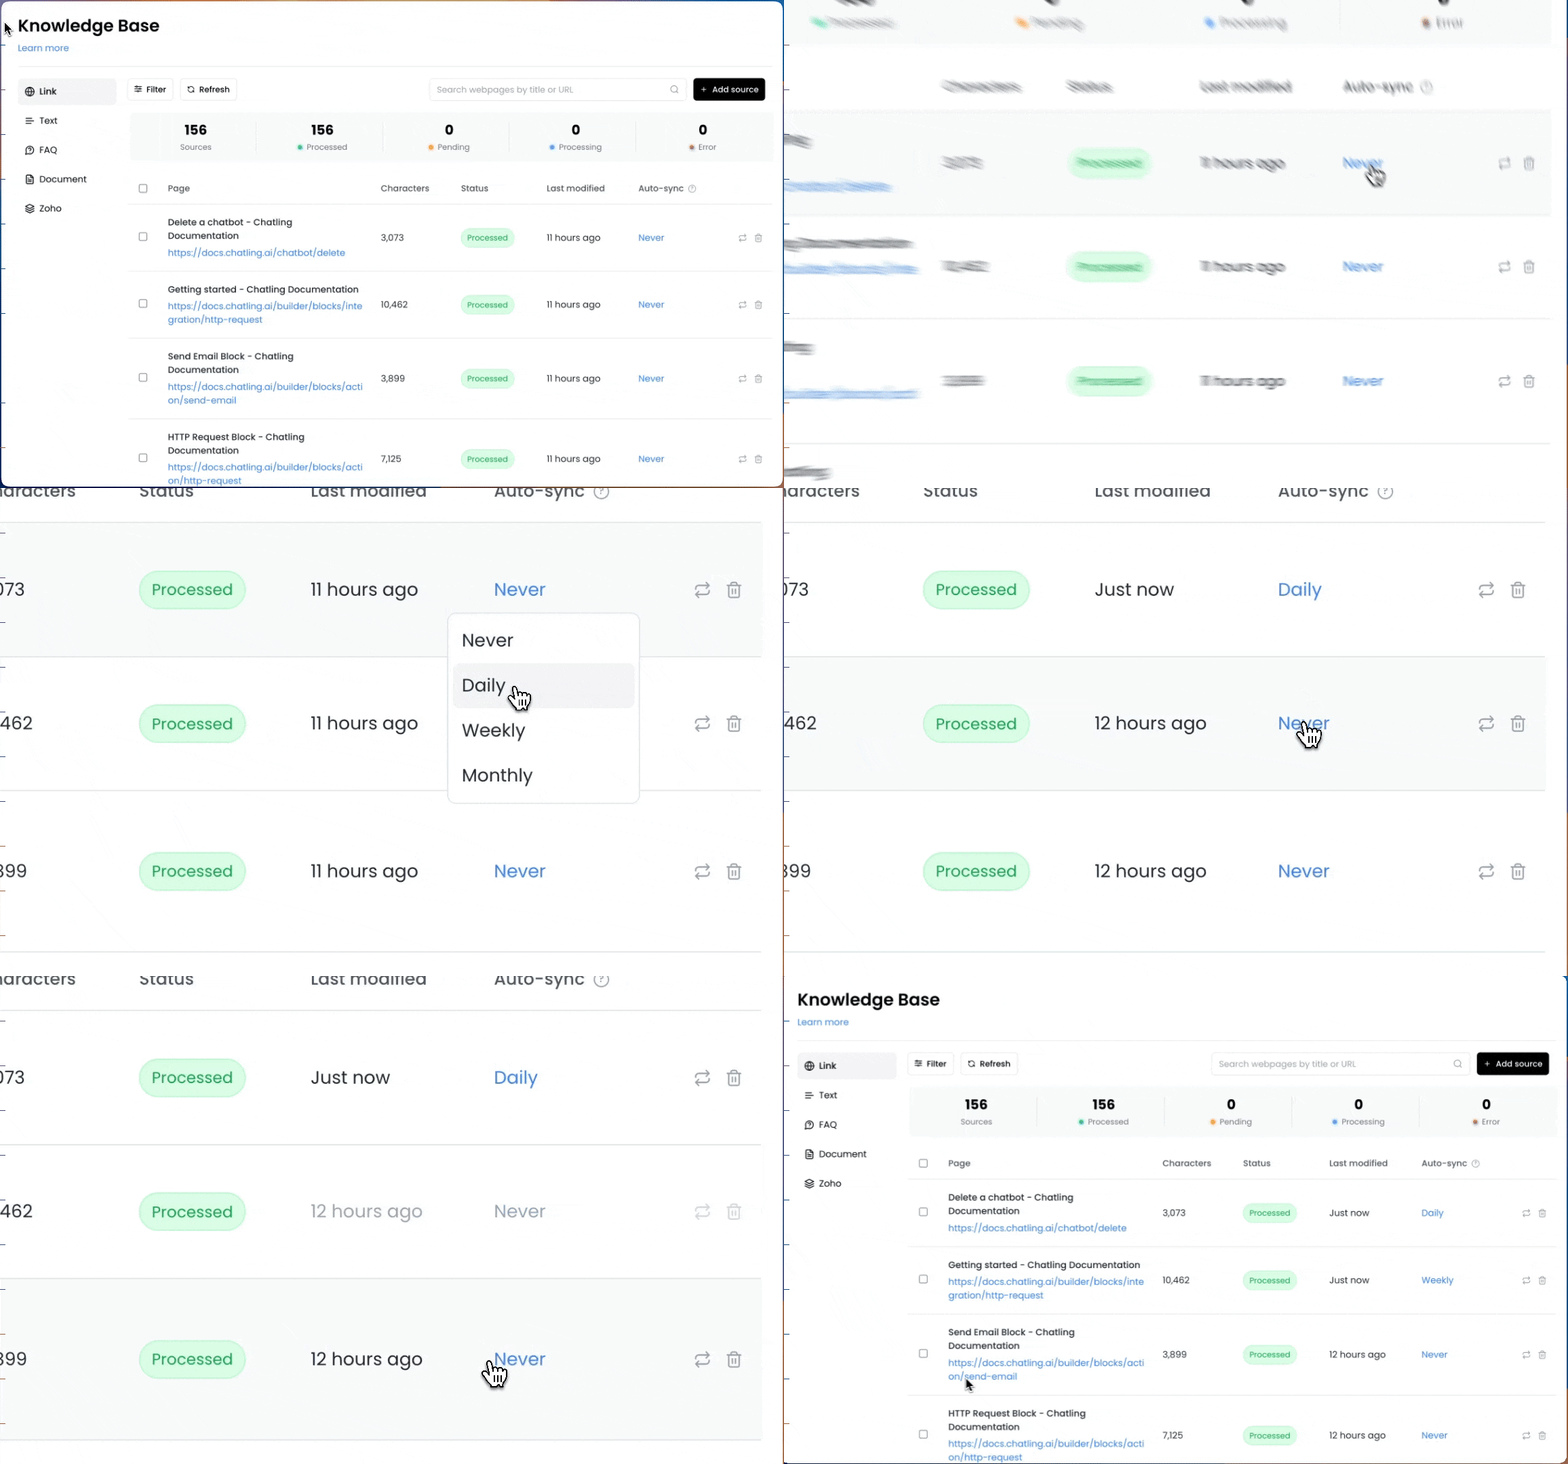 4. If you want to enable auto-syncing for multiple sources, you can select the sources and click the `Change auto-sync frequency` button to update all selected sources at once.
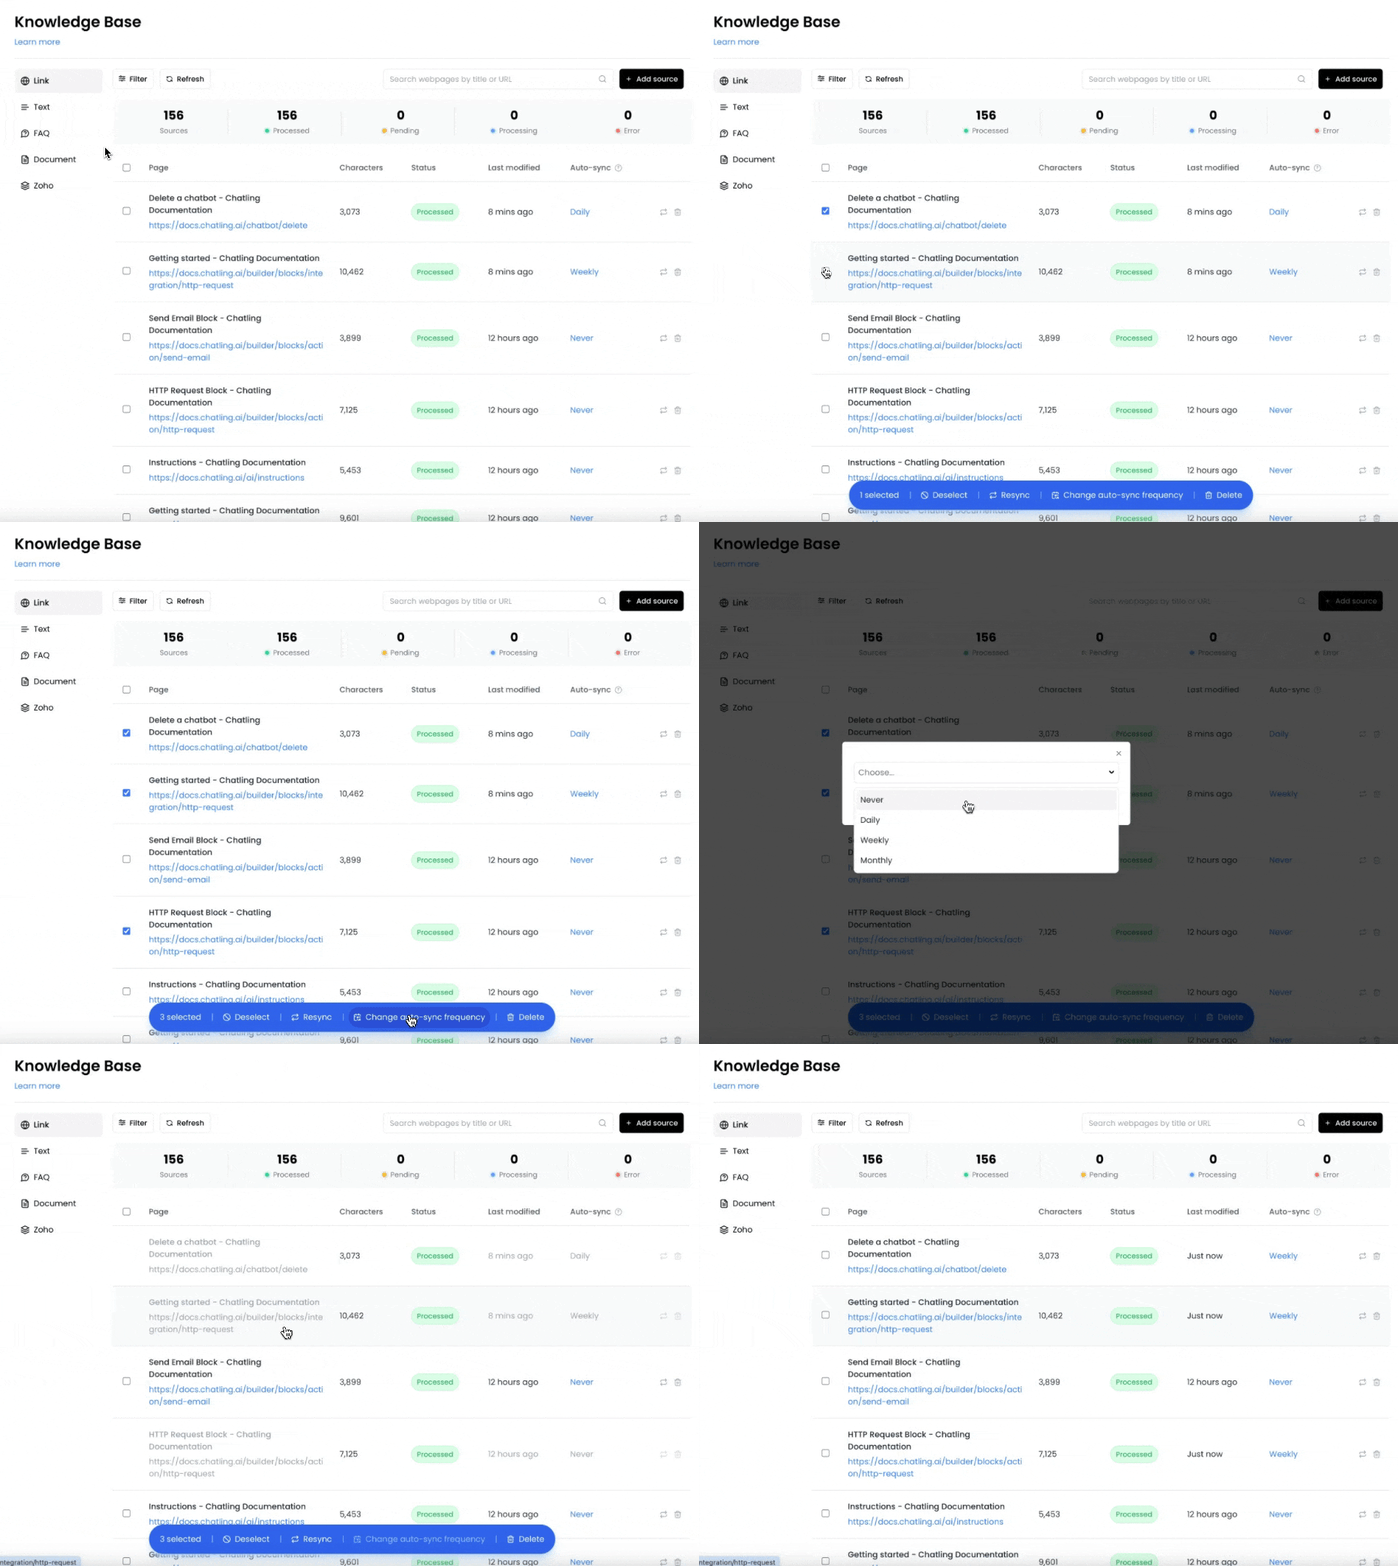 # Types of data sources
Source: https://docs.chatling.ai/knowledge-base/data-source-types
Learn about the different types of data sources you can add to the Knowledge Base.
Data sources are the sources of information you can add to the Knowledge Base. Together, they provide information the AI needs to respond accurately to user queries.
You can add the following types of data sources to the Knowledge Base:
* **Website**: When you add a website, our crawler will visit and extract all the pages from the website. You can then select the pages you want to add to the Knowledge Base.
* The website crawler can extract up to 1,000 pages from a website. If your site contains more pages, you must use the Sitemap data source.
* **Sitemap**: Add a sitemap URL to fetch all the pages of your website. The sitemap is suitable when your website has more than 1,000 pages. Once the sitemap is fetched, you can select the pages to add to the Knowledge Base.
* **Document**: Upload documents such as PDF, DOCX, and TXT. The AI will extract the text from the document and use it to generate responses.
* **Text**: You can add text directly to the Knowledge Base. This is useful when you want to add custom information that isn't available on your website or documents.
* **FAQs**: You can add a list of questions and answers that users frequently ask. This is useful when the information is not available through other data sources. You can also use it for fine-tuning the AI responses, such as when it responds incorrectly to certain questions.
* **Zoho**: Import all or select articles from your Zoho account into the Chatling knowledge base.
# Delete data sources
Source: https://docs.chatling.ai/knowledge-base/delete-data-sources
Learn how to delete data sources in the Knowledge Base.
If you no longer need a data source or want to prevent the AI from using it, you can delete it from the Knowledge Base. The information associated with the deleted data source will be purged permanently and cannot be recovered.
## How to delete a data source
1. Go to the `Knowledge Base`.
2. Next to every data source is a delete icon, as shown below. Click on the icon to delete the data source.
# Types of data sources
Source: https://docs.chatling.ai/knowledge-base/data-source-types
Learn about the different types of data sources you can add to the Knowledge Base.
Data sources are the sources of information you can add to the Knowledge Base. Together, they provide information the AI needs to respond accurately to user queries.
You can add the following types of data sources to the Knowledge Base:
* **Website**: When you add a website, our crawler will visit and extract all the pages from the website. You can then select the pages you want to add to the Knowledge Base.
* The website crawler can extract up to 1,000 pages from a website. If your site contains more pages, you must use the Sitemap data source.
* **Sitemap**: Add a sitemap URL to fetch all the pages of your website. The sitemap is suitable when your website has more than 1,000 pages. Once the sitemap is fetched, you can select the pages to add to the Knowledge Base.
* **Document**: Upload documents such as PDF, DOCX, and TXT. The AI will extract the text from the document and use it to generate responses.
* **Text**: You can add text directly to the Knowledge Base. This is useful when you want to add custom information that isn't available on your website or documents.
* **FAQs**: You can add a list of questions and answers that users frequently ask. This is useful when the information is not available through other data sources. You can also use it for fine-tuning the AI responses, such as when it responds incorrectly to certain questions.
* **Zoho**: Import all or select articles from your Zoho account into the Chatling knowledge base.
# Delete data sources
Source: https://docs.chatling.ai/knowledge-base/delete-data-sources
Learn how to delete data sources in the Knowledge Base.
If you no longer need a data source or want to prevent the AI from using it, you can delete it from the Knowledge Base. The information associated with the deleted data source will be purged permanently and cannot be recovered.
## How to delete a data source
1. Go to the `Knowledge Base`.
2. Next to every data source is a delete icon, as shown below. Click on the icon to delete the data source.
 ## How to delete data sources in bulk
To delete multiple data sources at once, click on the checkbox next to the data sources you want to delete. Then, click the `Bulk action` dropdown and select `Delete`.
## How to delete data sources in bulk
To delete multiple data sources at once, click on the checkbox next to the data sources you want to delete. Then, click the `Bulk action` dropdown and select `Delete`.
 # Exclude webpage sections
Source: https://docs.chatling.ai/knowledge-base/exclude-webpage-sections
Learn how to exclude certain sections of a webpage when adding a data source.
Websites often contain a lot of information that may not be relevant to the AI. When you add webpages to the knowledge base, you can exclude certain sections of the page from being crawled and indexed by the AI.
This can be useful for removing irrelevant information as well as preventing unnecessary characters from being counted towards your plan's limit.
## How to exclude sections of a webpage
1. Go to the `Knowledge Base`.
2. Click the `New Data Source` or `Add new` button.
# Exclude webpage sections
Source: https://docs.chatling.ai/knowledge-base/exclude-webpage-sections
Learn how to exclude certain sections of a webpage when adding a data source.
Websites often contain a lot of information that may not be relevant to the AI. When you add webpages to the knowledge base, you can exclude certain sections of the page from being crawled and indexed by the AI.
This can be useful for removing irrelevant information as well as preventing unnecessary characters from being counted towards your plan's limit.
## How to exclude sections of a webpage
1. Go to the `Knowledge Base`.
2. Click the `New Data Source` or `Add new` button.
 5. You can exclude sections by entering the HTML classes or IDs of the elements you want to exclude. You must press Enter after each class or ID to add it to the list.
You can also select the HTML tags you want to remove, such as `header` or `footer`.
5. You can exclude sections by entering the HTML classes or IDs of the elements you want to exclude. You must press Enter after each class or ID to add it to the list.
You can also select the HTML tags you want to remove, such as `header` or `footer`.
 You can now go ahead with entering the website, sitemap, or list of URLs that you want to add to the knowledge base. The crawler will exclude the sections you specified.
# What is the Knowledge Base?
Source: https://docs.chatling.ai/knowledge-base/overview
Learn about the Knowledge Base and how it works.
You can now go ahead with entering the website, sitemap, or list of URLs that you want to add to the knowledge base. The crawler will exclude the sections you specified.
# What is the Knowledge Base?
Source: https://docs.chatling.ai/knowledge-base/overview
Learn about the Knowledge Base and how it works.
 ## Re-sync data sources in bulk
To re-sync multiple data sources at once, click on the checkbox next to the links you want to re-sync. Then, click on the `Bulk action` dropdown and select `Re-sync links`.
## Re-sync data sources in bulk
To re-sync multiple data sources at once, click on the checkbox next to the links you want to re-sync. Then, click on the `Bulk action` dropdown and select `Re-sync links`.
 # Got other questions?
Source: https://docs.chatling.ai/missing-topics
If there are any topics you'd like to see covered in the documentation, please let us know! We're always looking to improve our documentation and make it as helpful as possible for our users.
Please reach out to us at [support@chatling.ai](mailto:support@chatling.ai) with your suggestions and any questions you have.
# Invite Team Members
Source: https://docs.chatling.ai/team-members/invite
Learn about the different roles and permissions that can be assigned to team members in a project.
You can invite team members to your project if you are an Owner or Admin. Here's how:
1. From the Project menu, go to **Members**.
# Got other questions?
Source: https://docs.chatling.ai/missing-topics
If there are any topics you'd like to see covered in the documentation, please let us know! We're always looking to improve our documentation and make it as helpful as possible for our users.
Please reach out to us at [support@chatling.ai](mailto:support@chatling.ai) with your suggestions and any questions you have.
# Invite Team Members
Source: https://docs.chatling.ai/team-members/invite
Learn about the different roles and permissions that can be assigned to team members in a project.
You can invite team members to your project if you are an Owner or Admin. Here's how:
1. From the Project menu, go to **Members**.
 2. Click the **Invite** button.
 3. Enter the email address of the member you want to invite and select one or more roles to assign to them.
 4. Click **Send invite**.
The user will receive an email invitation to join the project. Once they accept the invitation, they will be added to the project with the assigned roles.
# Overview
Source: https://docs.chatling.ai/team-members/overview
A guide on how to manage team members in your project.
As you build chatbots, you may need to collaborate with other team members to create, manage, and maintain them. Chatling allows you to invite team members and collaborate with them on your projects.
Team members can be added to each project and assigned different roles and permissions based on their responsibilities. This allows you to control what they can access and modify within the project.
Every project has an Owner who has full access and cannot be removed from the project.
As an Owner or Admin of a project, you can invite members and manage their roles and permissions. You can assign multiple roles to a team member, and each role has different permissions.
# Remove Team Members
Source: https://docs.chatling.ai/team-members/remove
Learn how to remove team members from your project.
To remove team members from your project:
1. From the Project menu, go to **Members**.
4. Click **Send invite**.
The user will receive an email invitation to join the project. Once they accept the invitation, they will be added to the project with the assigned roles.
# Overview
Source: https://docs.chatling.ai/team-members/overview
A guide on how to manage team members in your project.
As you build chatbots, you may need to collaborate with other team members to create, manage, and maintain them. Chatling allows you to invite team members and collaborate with them on your projects.
Team members can be added to each project and assigned different roles and permissions based on their responsibilities. This allows you to control what they can access and modify within the project.
Every project has an Owner who has full access and cannot be removed from the project.
As an Owner or Admin of a project, you can invite members and manage their roles and permissions. You can assign multiple roles to a team member, and each role has different permissions.
# Remove Team Members
Source: https://docs.chatling.ai/team-members/remove
Learn how to remove team members from your project.
To remove team members from your project:
1. From the Project menu, go to **Members**.
 3. Click **Remove member**.
The member will be removed from the project immediately and will no longer have access to it.
# Roles & Permissions
Source: https://docs.chatling.ai/team-members/roles
Learn how to invite team members to your project and assign them different roles.
Members can be assigned one or more roles, each having different permissions.
Here are the available roles and their permissions:
1. **Admin**: Full access to all settings and features, including inviting members, creating chatbots and API keys, and managing billing.
3. Click **Remove member**.
The member will be removed from the project immediately and will no longer have access to it.
# Roles & Permissions
Source: https://docs.chatling.ai/team-members/roles
Learn how to invite team members to your project and assign them different roles.
Members can be assigned one or more roles, each having different permissions.
Here are the available roles and their permissions:
1. **Admin**: Full access to all settings and features, including inviting members, creating chatbots and API keys, and managing billing.
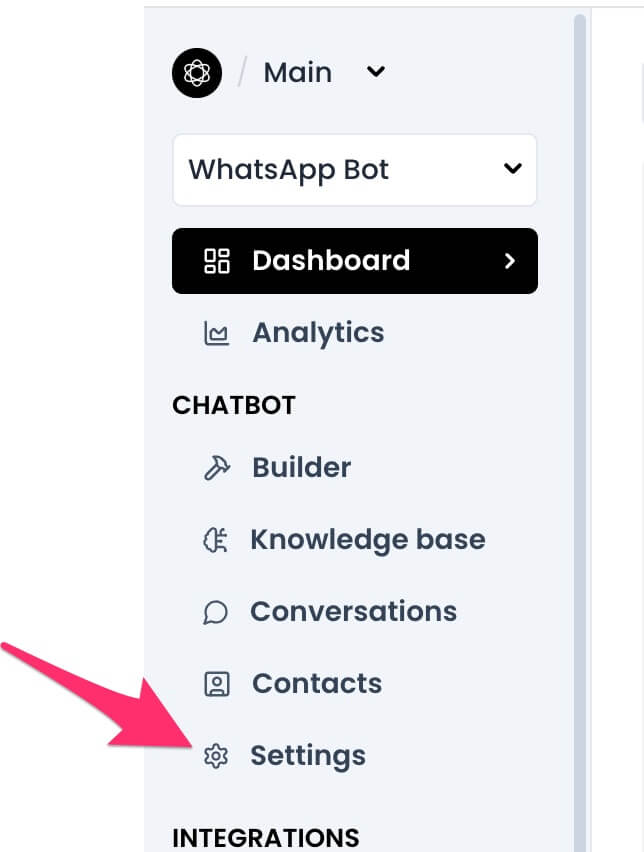 2. Under the `General` tab, you will see the `Language` setting. Select the language you want to use.
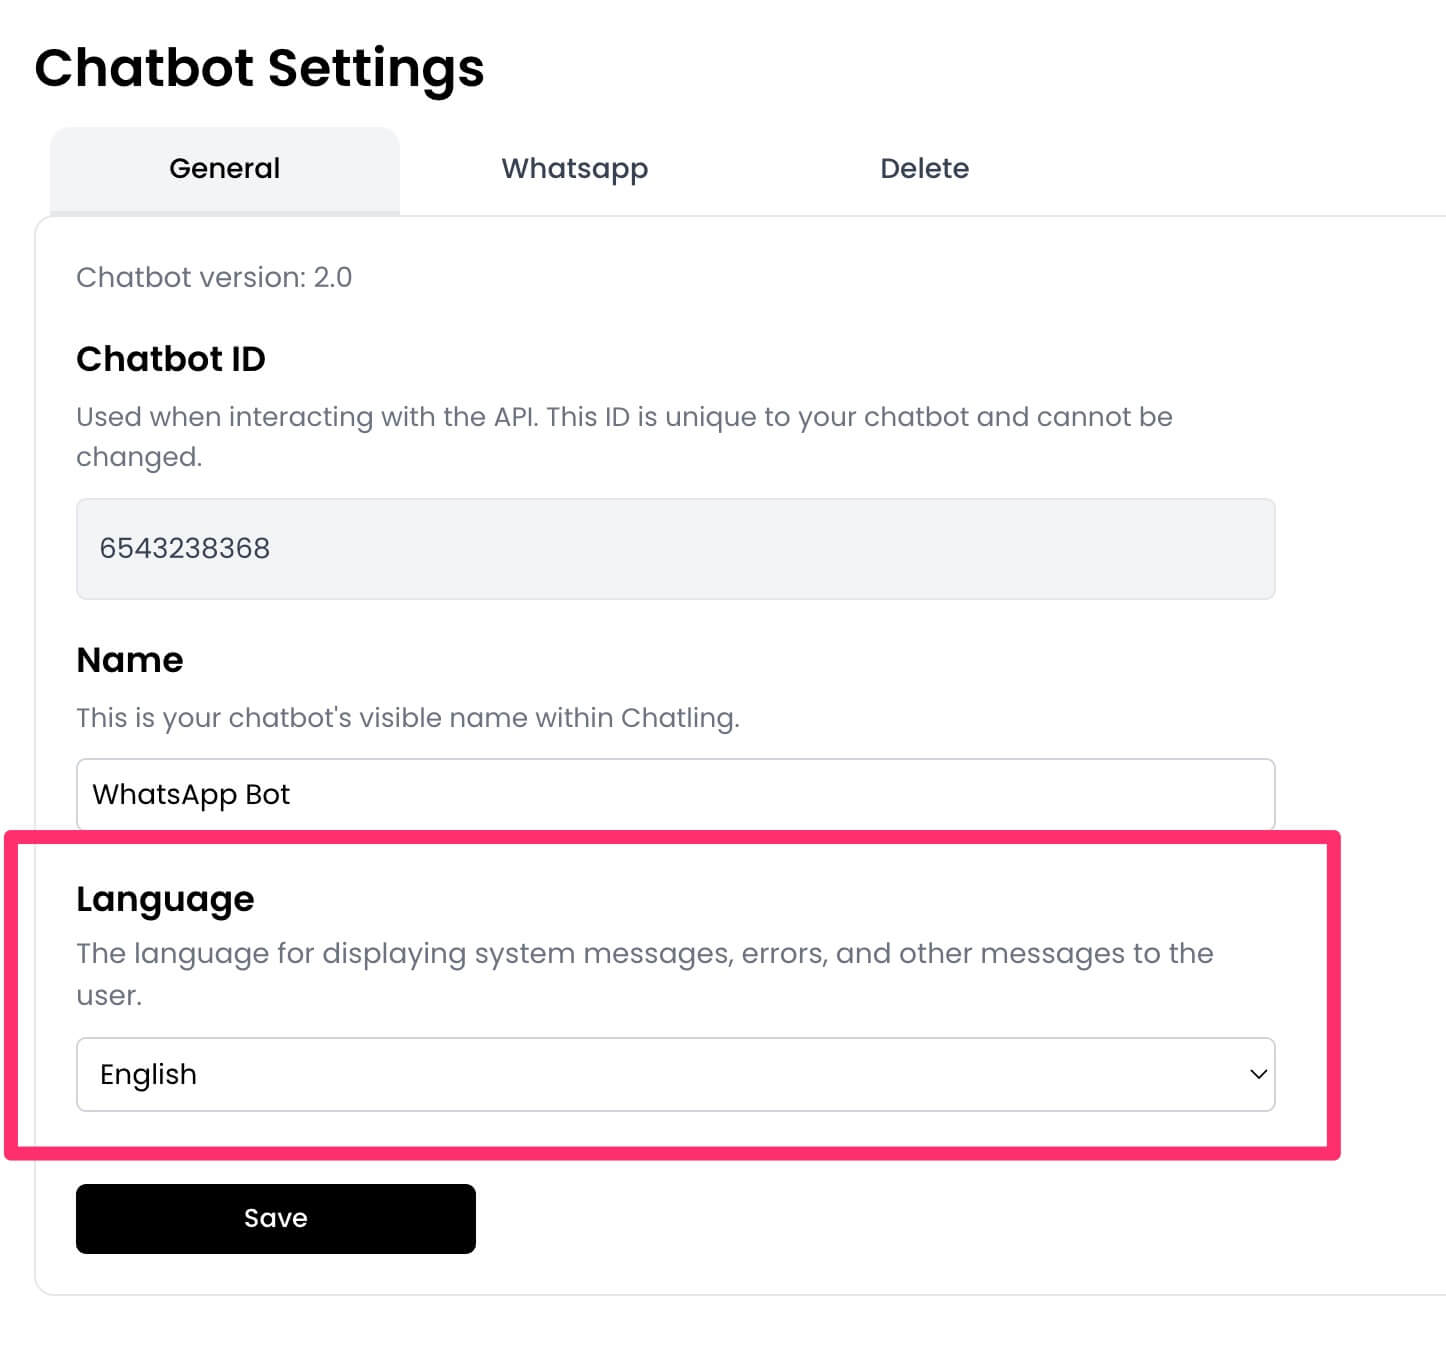 3. Click `Save` to save the changes.
# Create a WhatsApp Chatbot
Source: https://docs.chatling.ai/whatsapp/create
Learn how to create a WhatsApp chatbot in Chatling.
To create a WhatsApp chatbot, follow these steps:
1. Login to your [Chatling account](https://app.chatling.ai).
2. From the "My chatbots" page, click on the `Create chatbot` button.
3. Click `Save` to save the changes.
# Create a WhatsApp Chatbot
Source: https://docs.chatling.ai/whatsapp/create
Learn how to create a WhatsApp chatbot in Chatling.
To create a WhatsApp chatbot, follow these steps:
1. Login to your [Chatling account](https://app.chatling.ai).
2. From the "My chatbots" page, click on the `Create chatbot` button.
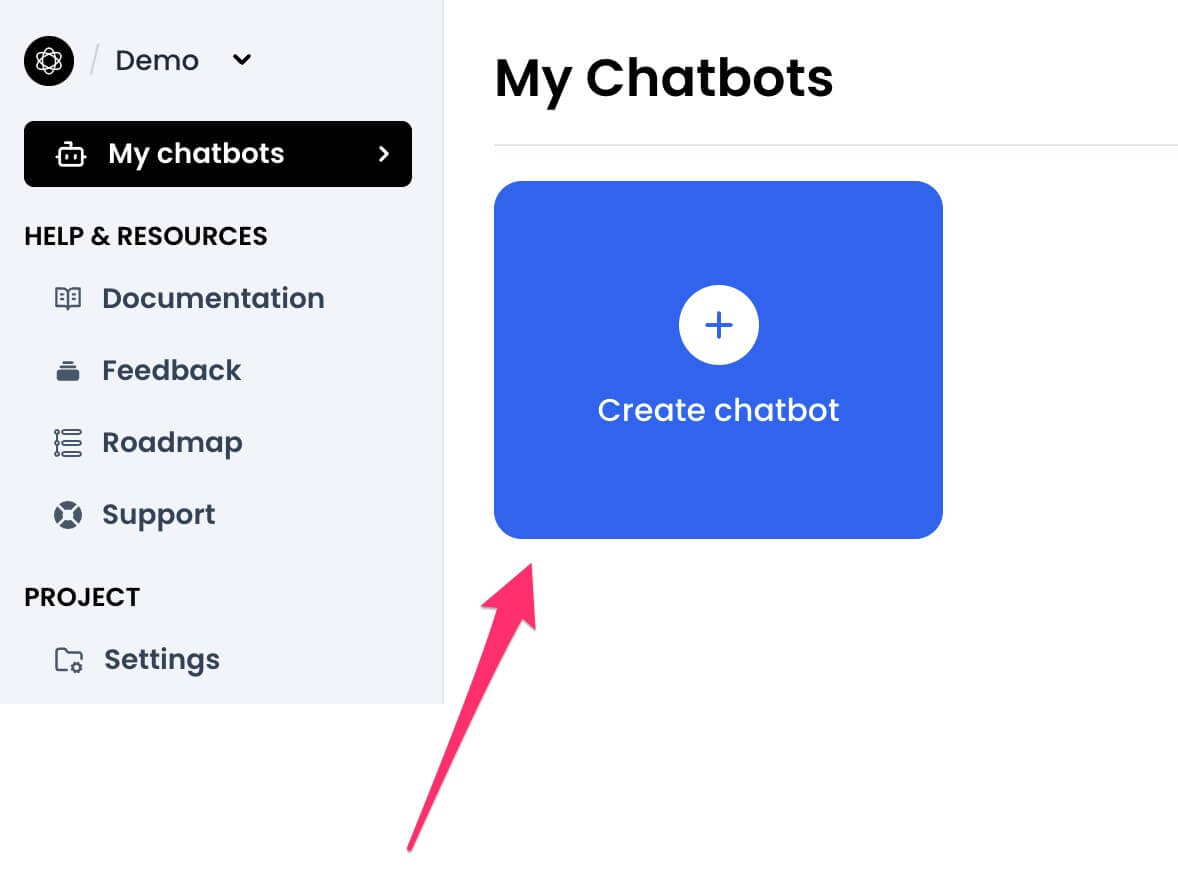 3. Select `WhatsApp` as the platform.
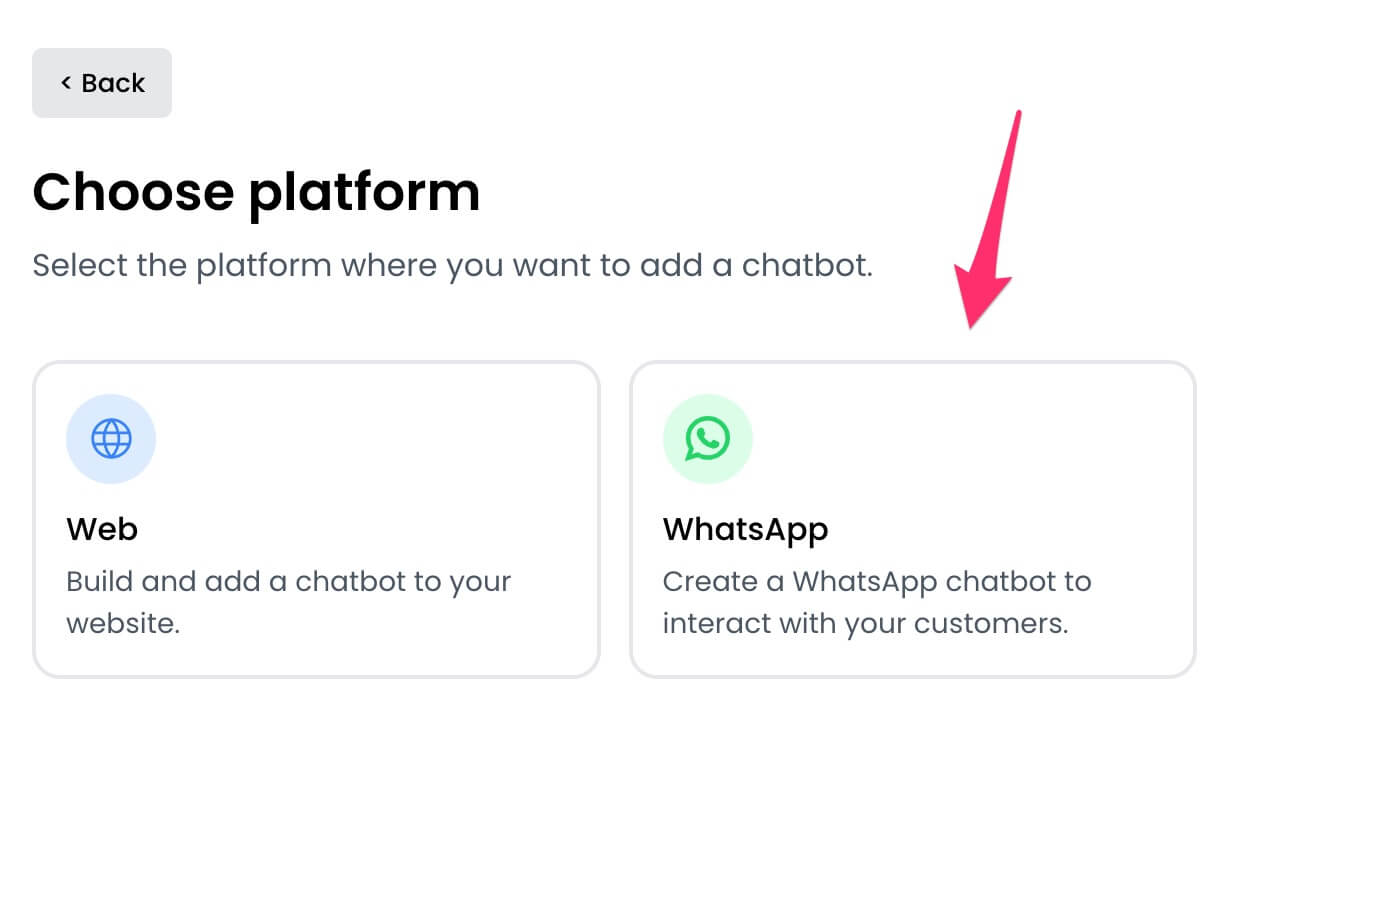 4. Choose a template or start from scratch.
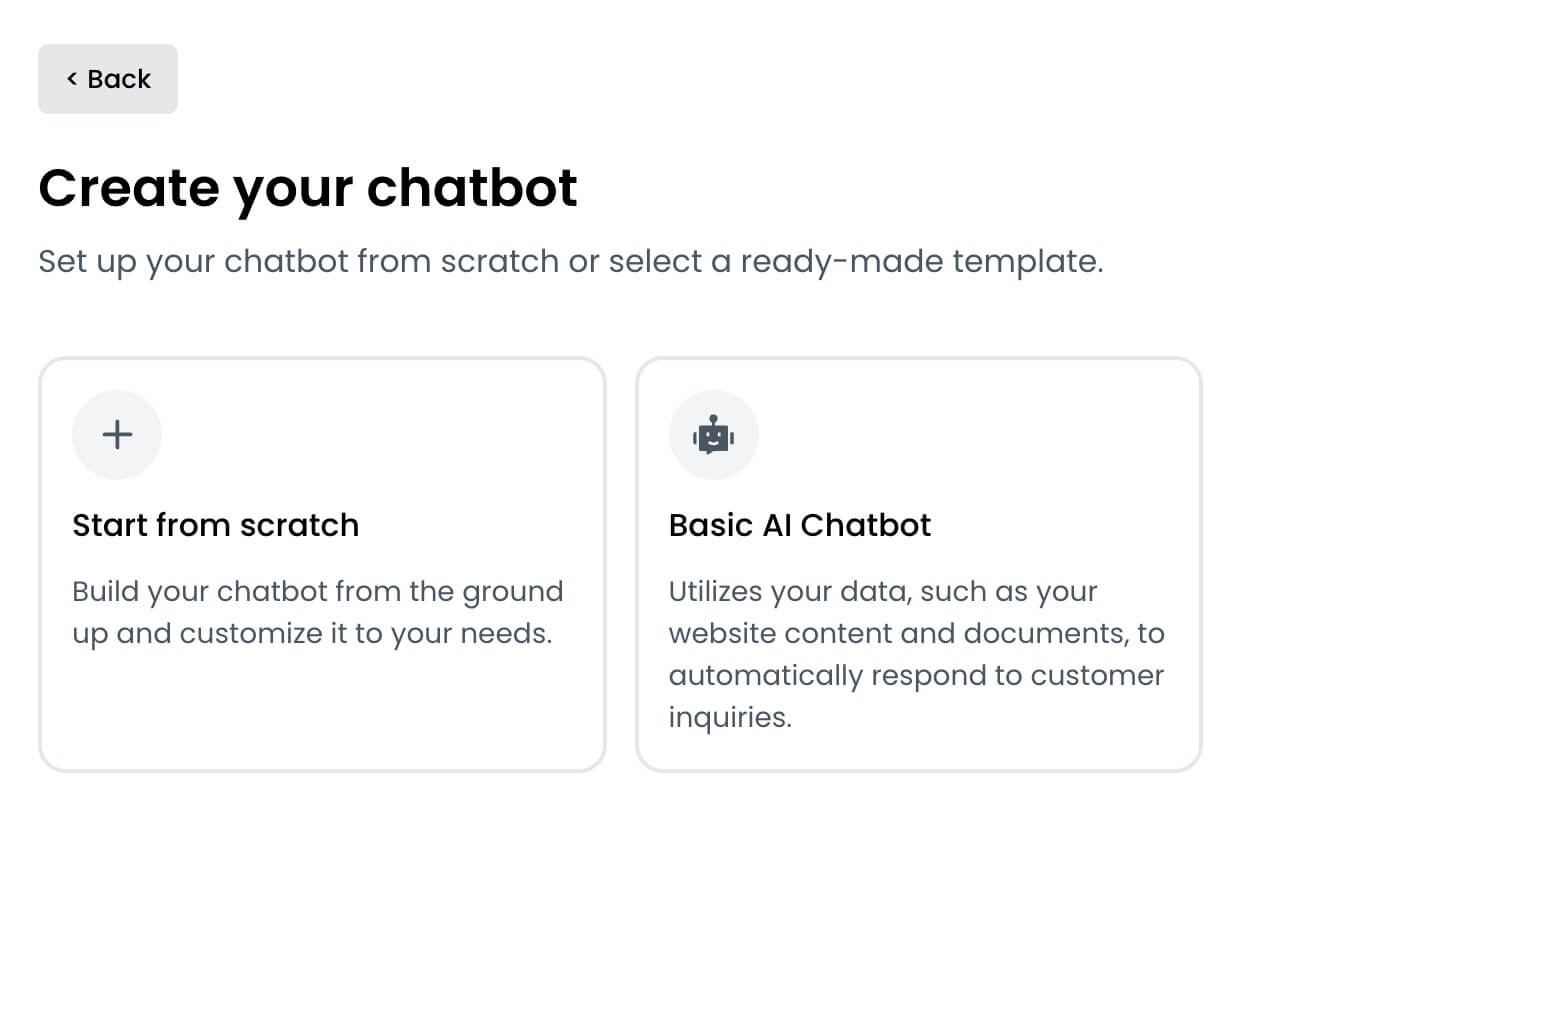 5. Enter a name for your chatbot and click on the `Create chatbot` button.
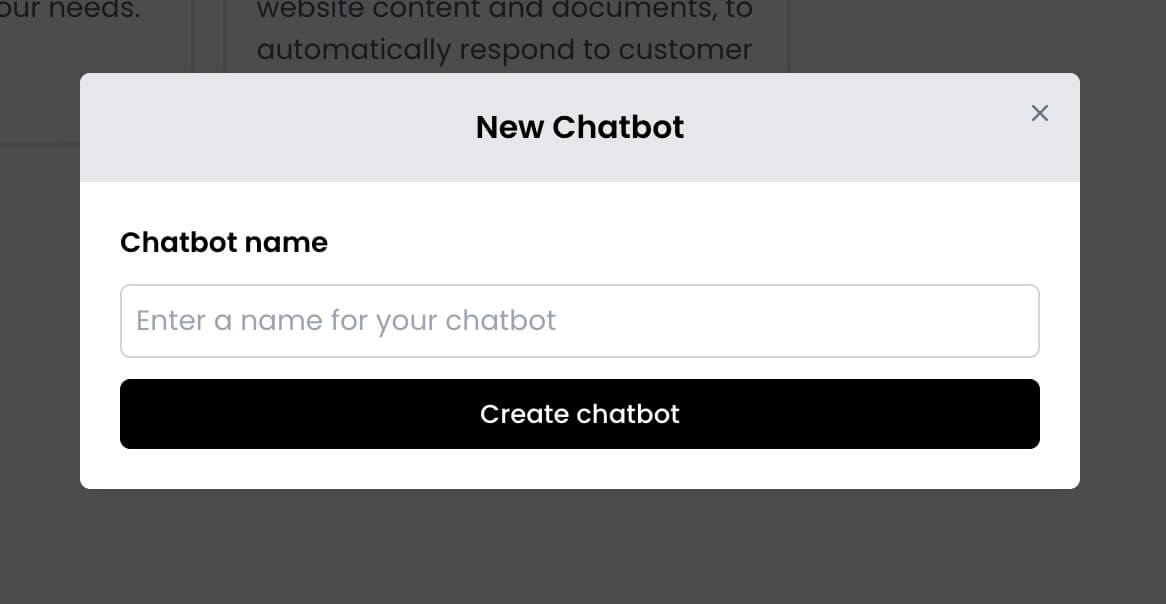 Your WhatsApp chatbot is now created, but there's a few more steps to complete before it's ready to use.
Read the next section to learn how to connect your WhatsApp Business account to Chatling.
# Customize profile
Source: https://docs.chatling.ai/whatsapp/customize-profile
Learn how to change your profile picture, name, bio, and more.
You can visit the [WhatsApp Manager](https://business.facebook.com/latest/whatsapp_manager) on Facebook to change your profile picture, display name, and business details such as description, address, email, and website.
## How to customize your WhatsApp Business profile
1. Go to the [WhatsApp Manager](https://business.facebook.com/latest/whatsapp_manager) on Facebook.
2. From the sidebar, click on the `Phone numbers` tab.
Your WhatsApp chatbot is now created, but there's a few more steps to complete before it's ready to use.
Read the next section to learn how to connect your WhatsApp Business account to Chatling.
# Customize profile
Source: https://docs.chatling.ai/whatsapp/customize-profile
Learn how to change your profile picture, name, bio, and more.
You can visit the [WhatsApp Manager](https://business.facebook.com/latest/whatsapp_manager) on Facebook to change your profile picture, display name, and business details such as description, address, email, and website.
## How to customize your WhatsApp Business profile
1. Go to the [WhatsApp Manager](https://business.facebook.com/latest/whatsapp_manager) on Facebook.
2. From the sidebar, click on the `Phone numbers` tab.
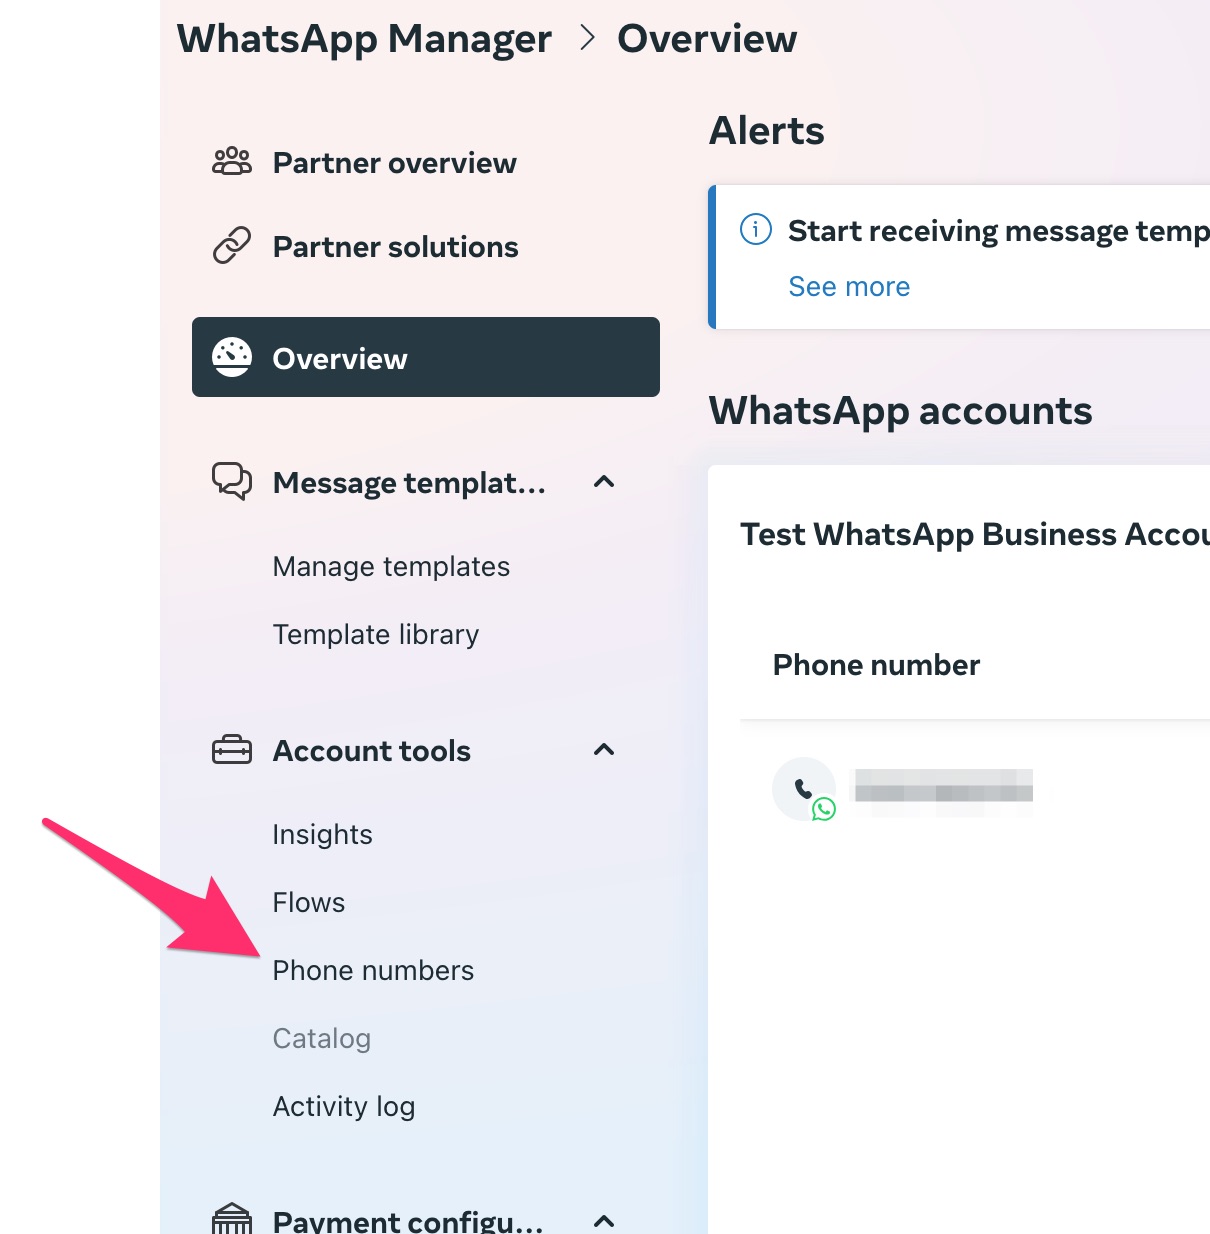 3. Find your phone number from the list and click on the settings icon next to it.
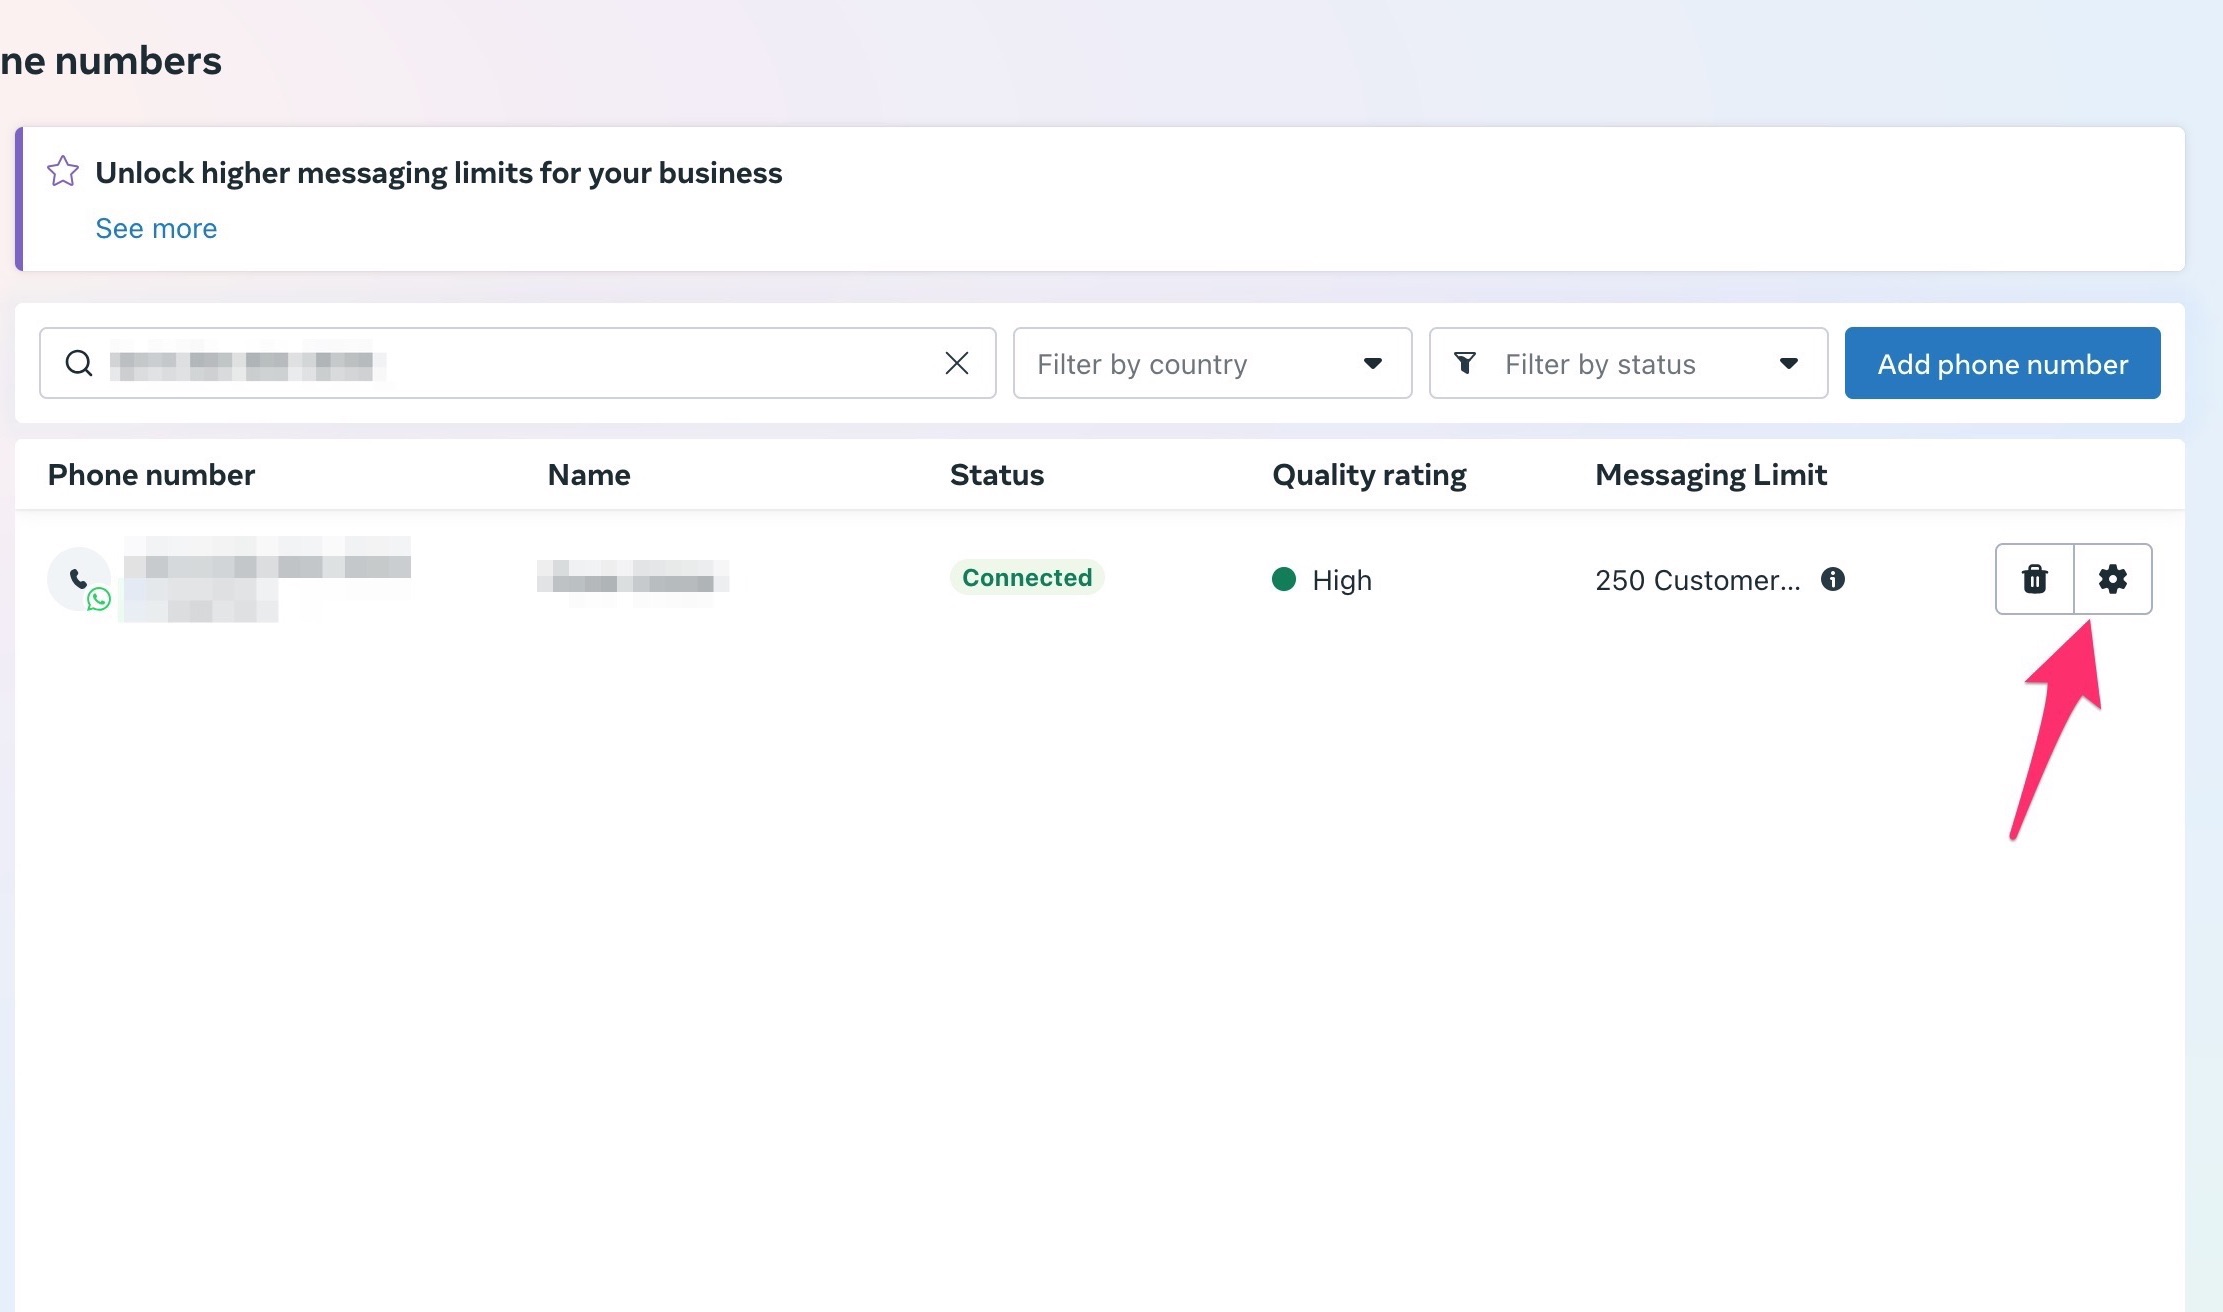 4. From here, you can update the profile information for your WhatsApp Business account.
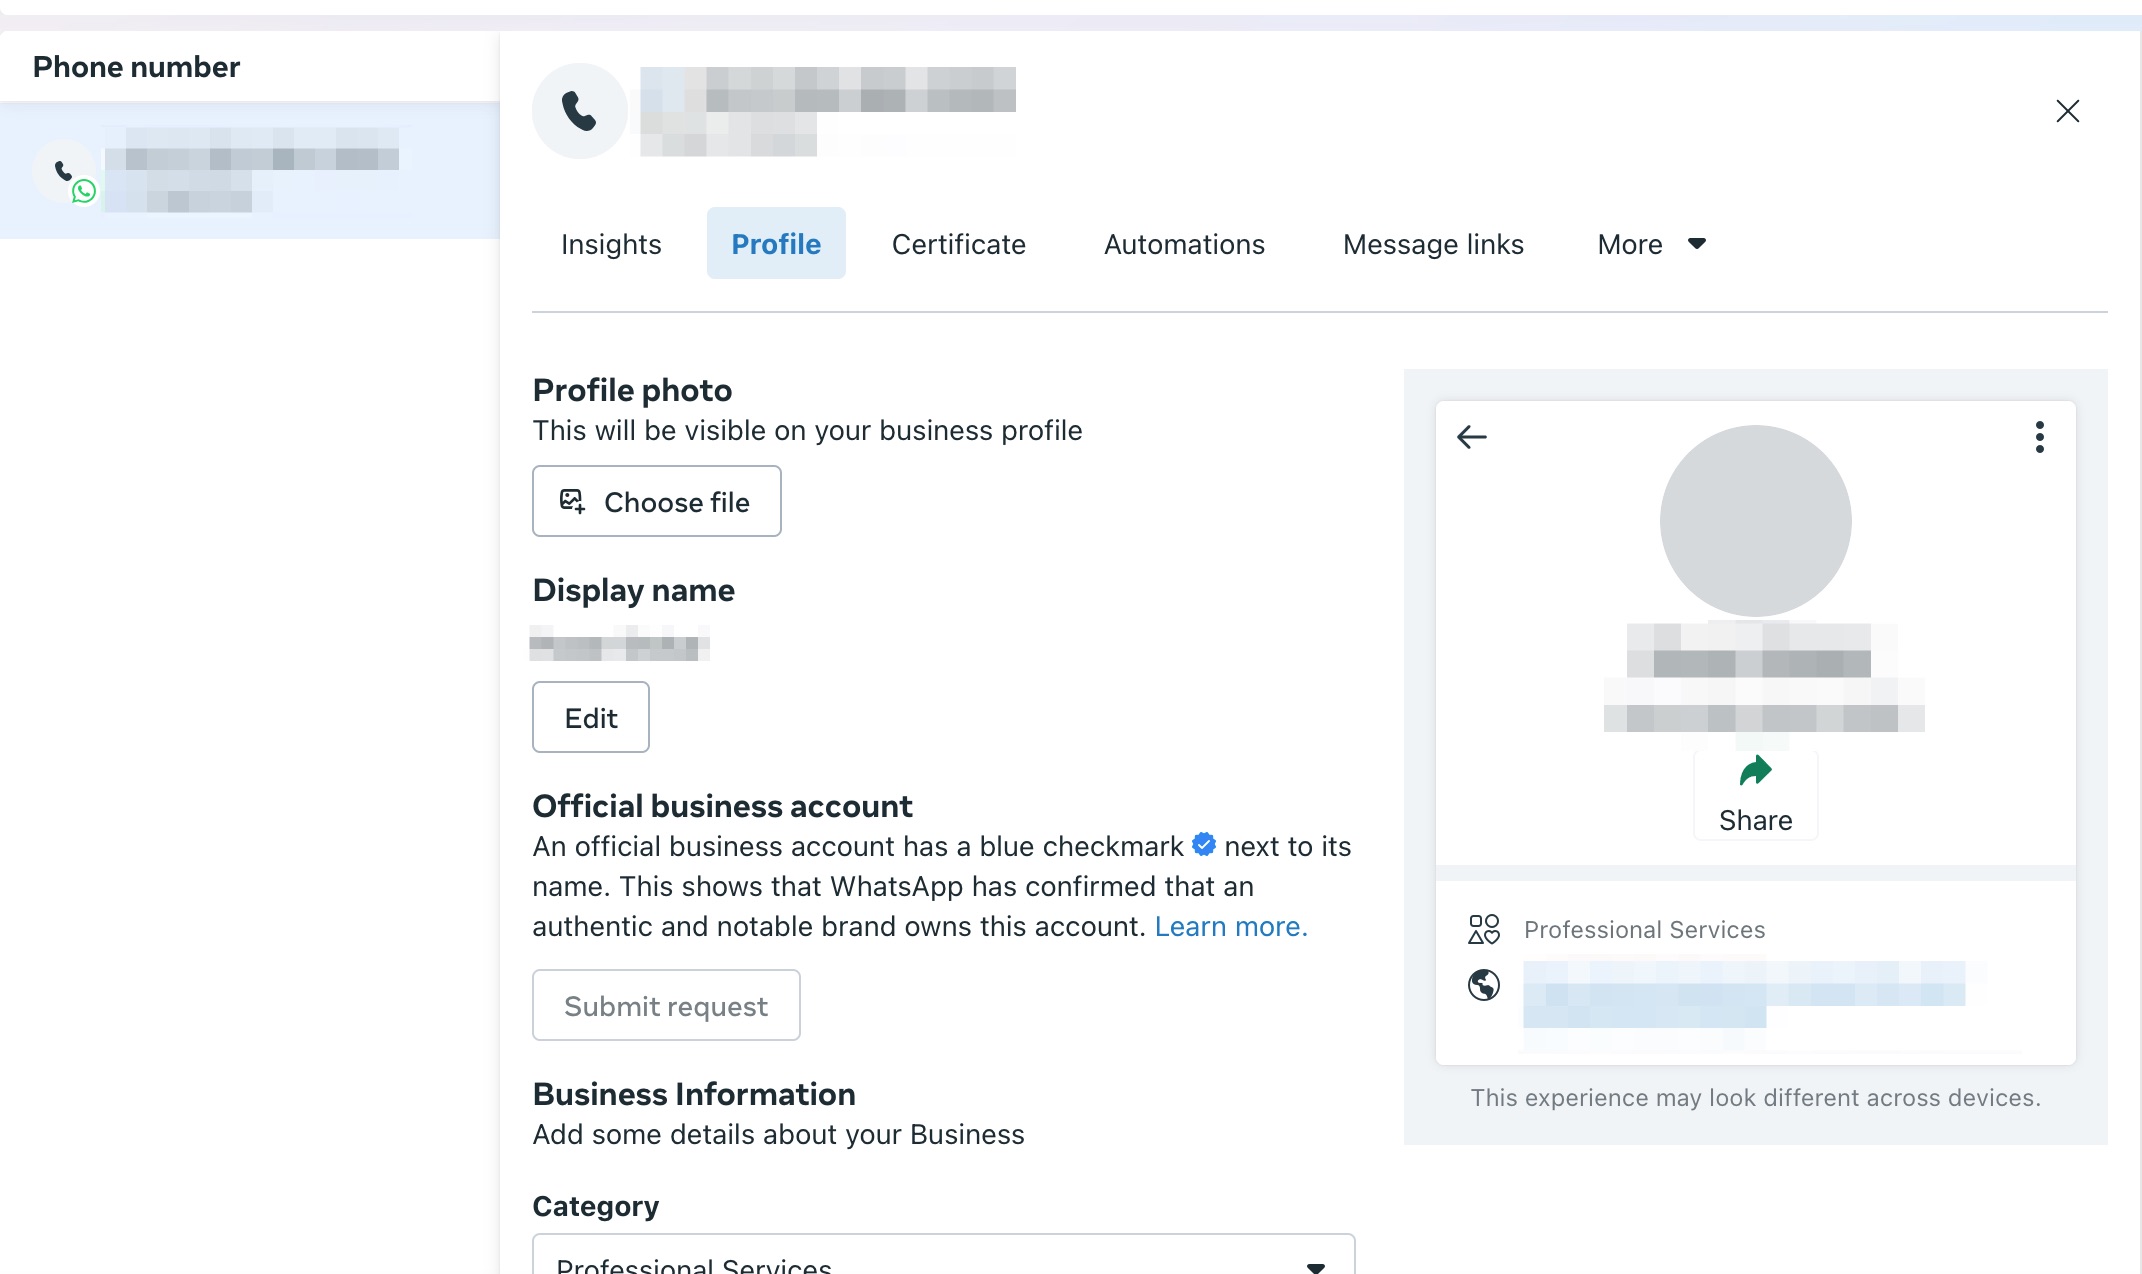 # Disconnect WhatsApp account
Source: https://docs.chatling.ai/whatsapp/disconnect-account
Learn how to disconnect your WhatsApp account from your chatbot in Chatling.
1. From your chatbot's dashboard, click the `Settings` button under the Chatbot menu.
# Disconnect WhatsApp account
Source: https://docs.chatling.ai/whatsapp/disconnect-account
Learn how to disconnect your WhatsApp account from your chatbot in Chatling.
1. From your chatbot's dashboard, click the `Settings` button under the Chatbot menu.
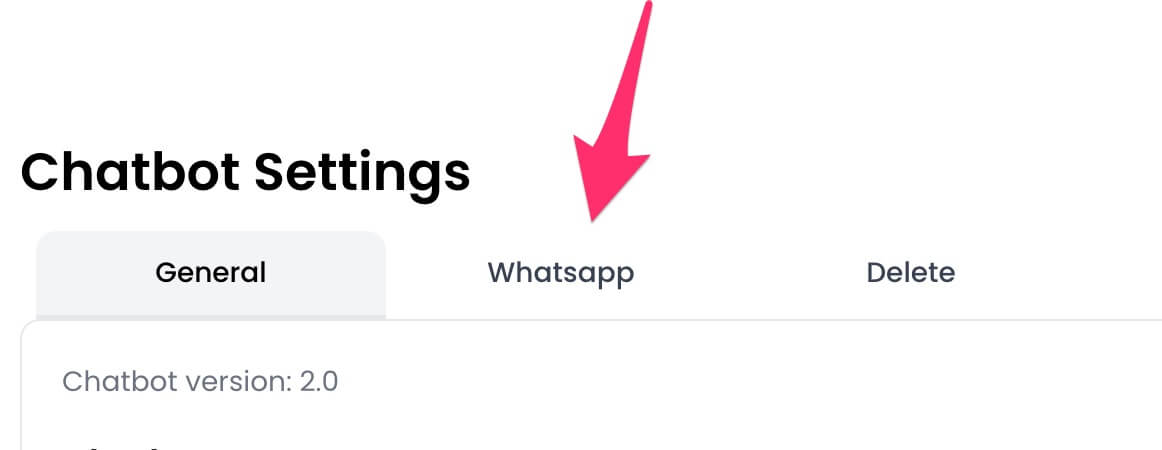 3. Click the `Disconnect` button.
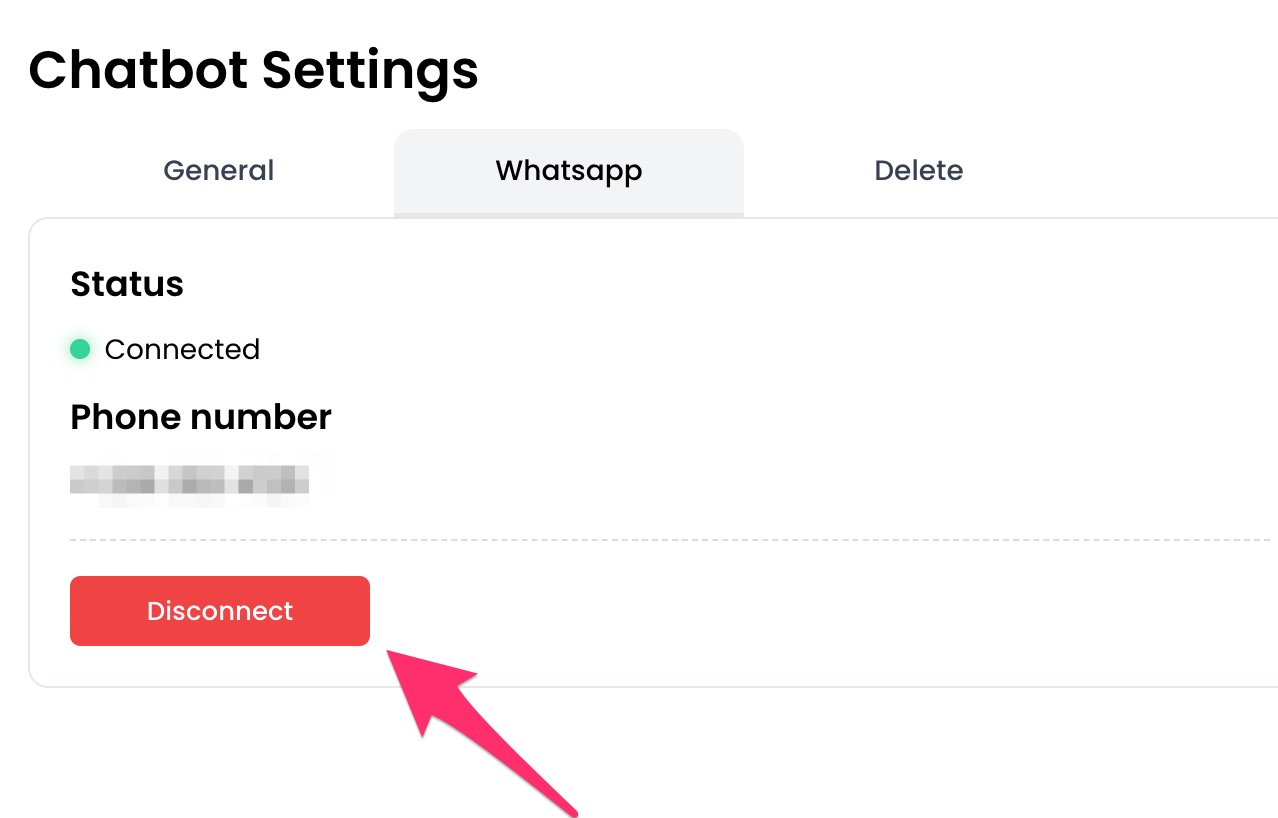
 3. Click the `Start verification` button.
 4. Follow the on-screen instructions to verify your business.
5. Once you complete the process, your business will either be verified immediately or placed under review.
6. After your business is verified, Facebook will begin reviewing your display name. To view the status of the review:
* Go to [WhatsApp Manager](https://business.facebook.com/latest/whatsapp_manager/overview).
* Click `Phone numbers` in the left sidebar.
* You will see the status of the review under the display name as shown below.
4. Follow the on-screen instructions to verify your business.
5. Once you complete the process, your business will either be verified immediately or placed under review.
6. After your business is verified, Facebook will begin reviewing your display name. To view the status of the review:
* Go to [WhatsApp Manager](https://business.facebook.com/latest/whatsapp_manager/overview).
* Click `Phone numbers` in the left sidebar.
* You will see the status of the review under the display name as shown below.
 7. Once the review is complete, you'll receive an email notification from Facebook and you can begin using your WhatsApp bot to send and receive messages.
# WhatsApp Integration
Source: https://docs.chatling.ai/whatsapp/overview
Learn how to create chatbots for WhatsApp.
With the WhatsApp integration, you can create and deploy AI-powered chatbots directly on WhatsApp.
This integration helps businesses automate customer support, handle inquiries, and engage with leads on one of the world's most popular messaging platforms.
{/* Follow the next sections to learn how to set up and connect your WhatsApp Business account to Chatling. */}
7. Once the review is complete, you'll receive an email notification from Facebook and you can begin using your WhatsApp bot to send and receive messages.
# WhatsApp Integration
Source: https://docs.chatling.ai/whatsapp/overview
Learn how to create chatbots for WhatsApp.
With the WhatsApp integration, you can create and deploy AI-powered chatbots directly on WhatsApp.
This integration helps businesses automate customer support, handle inquiries, and engage with leads on one of the world's most popular messaging platforms.
{/* Follow the next sections to learn how to set up and connect your WhatsApp Business account to Chatling. */}
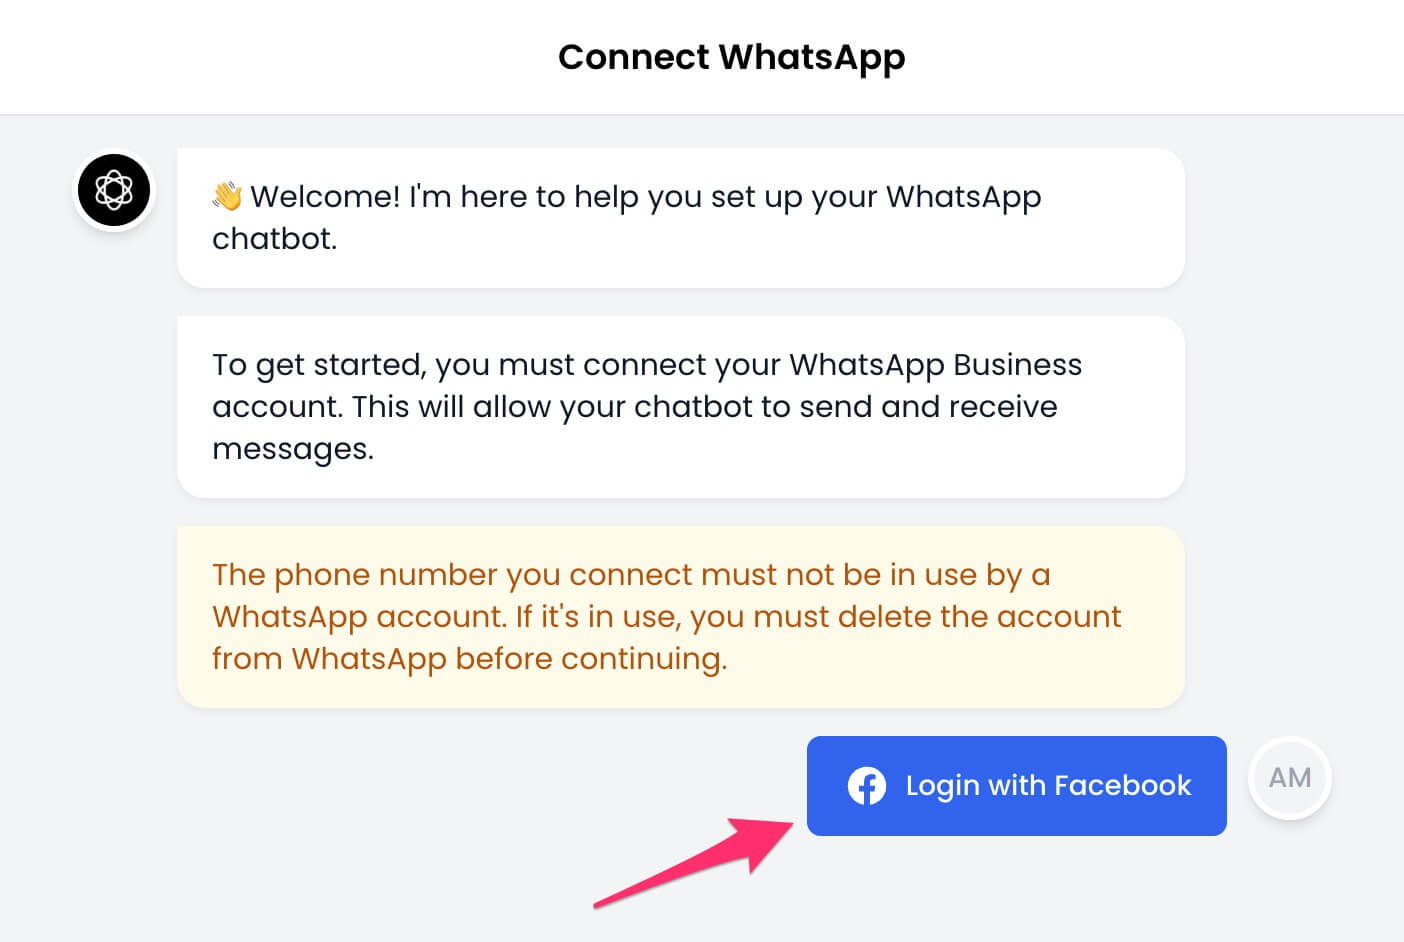 2. A Facebook authentication window will open. Click the `Continue` button.
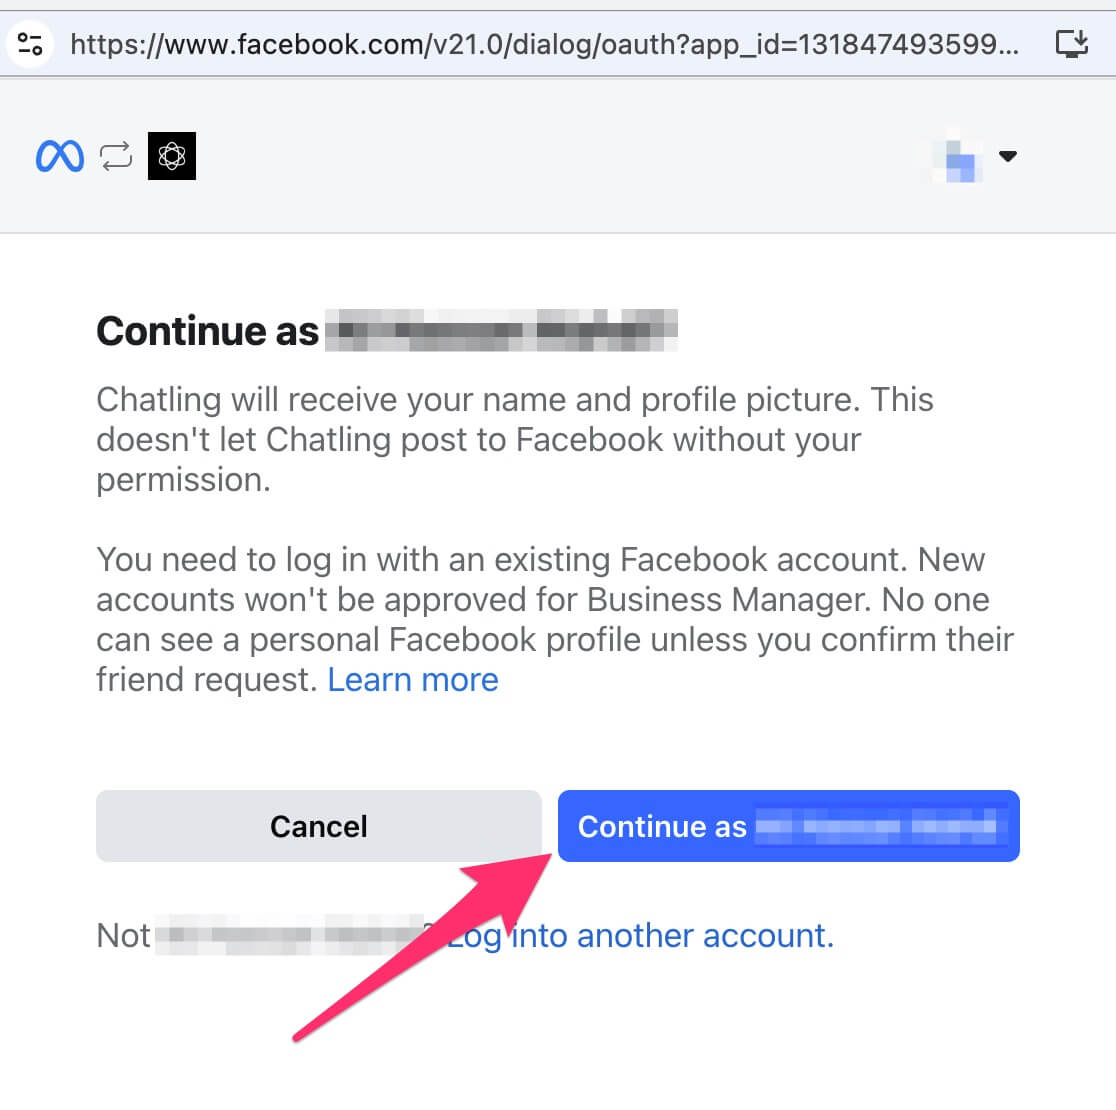 3. Select `Get started` to continue.
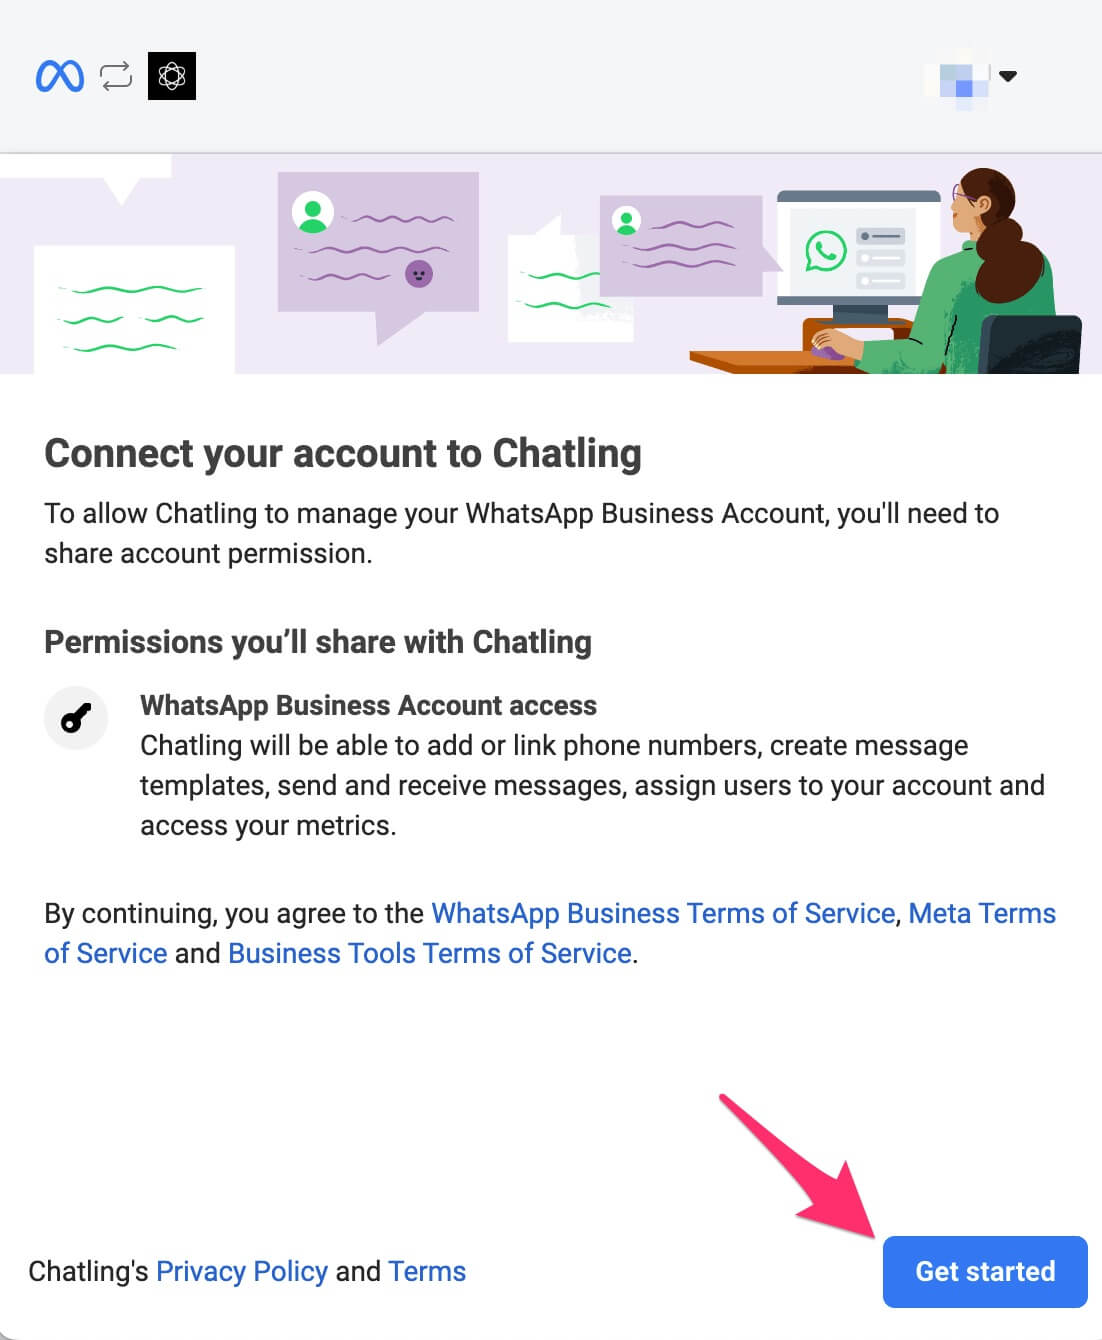 4. Select a business profile or create a new one.
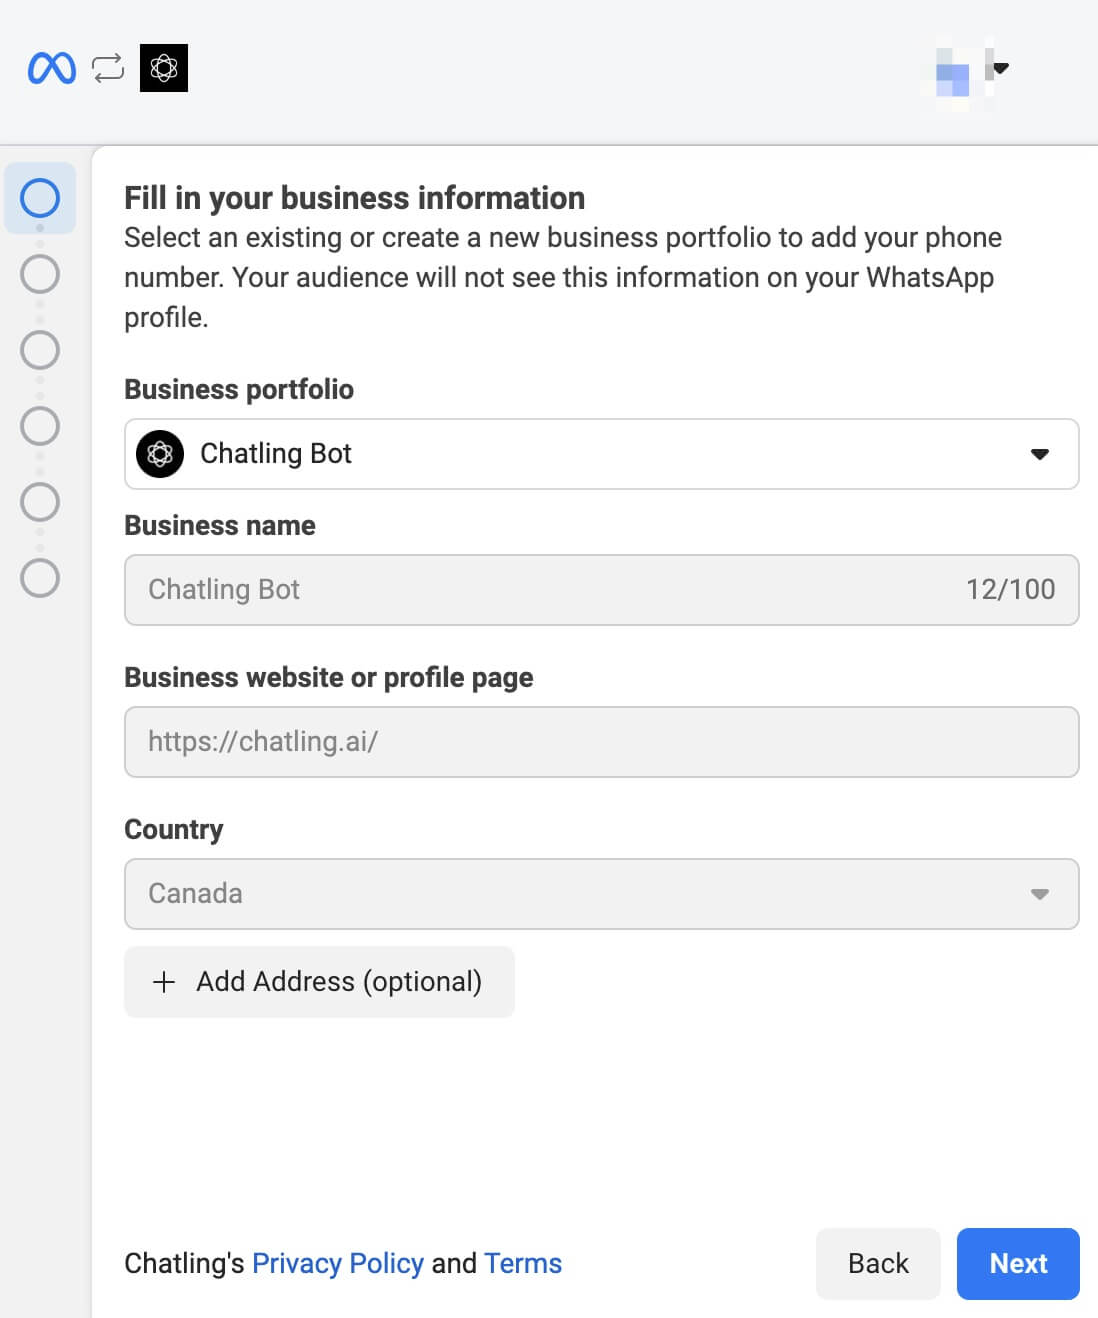 5. Choose or create a new WhatsApp Business account and profile.
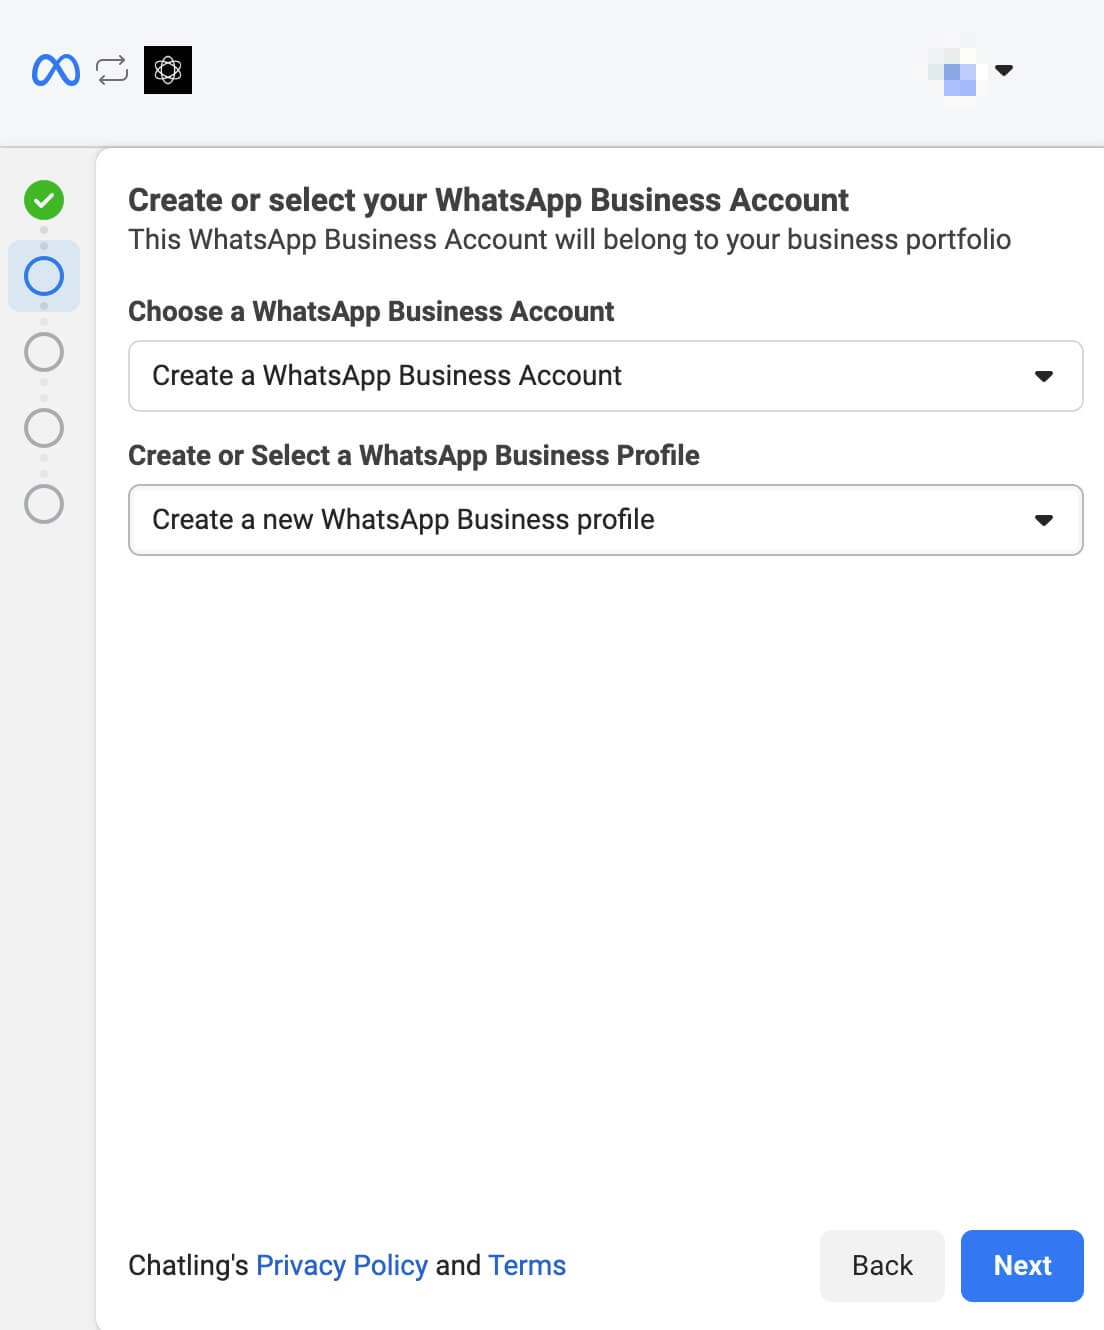 6. Enter the required information to create a new business profile.
* *Skip this step if you selected an existing business profile.*
{/*
6. Enter the required information to create a new business profile.
* *Skip this step if you selected an existing business profile.*
{/* 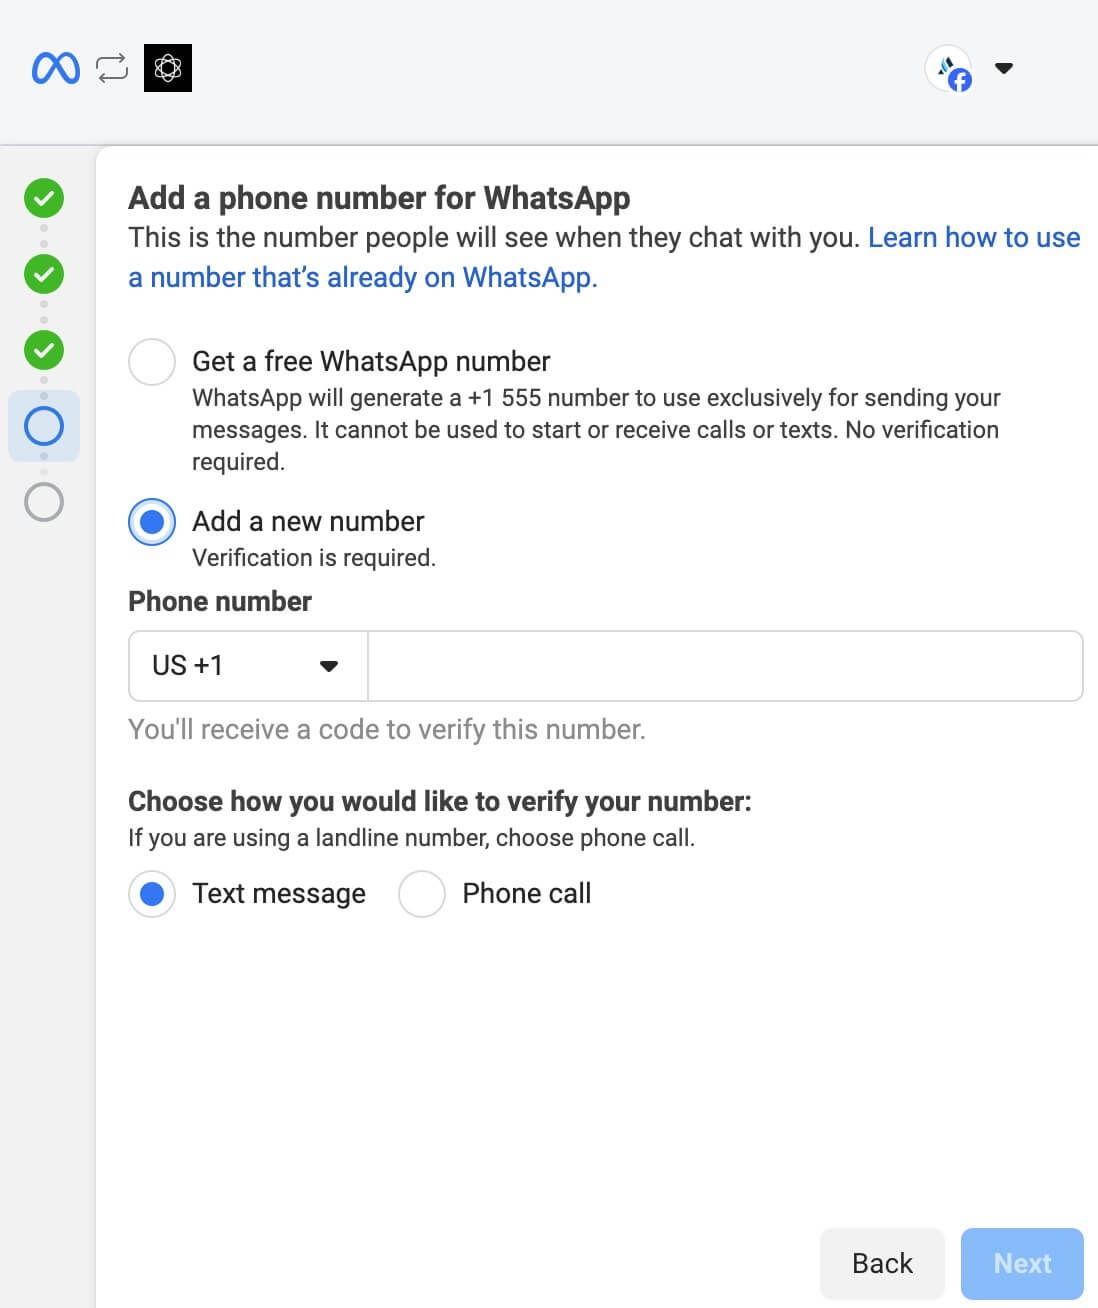 */}
7. Add and verify your phone number.
* *Skip this step if you selected an existing business profile.*
*/}
7. Add and verify your phone number.
* *Skip this step if you selected an existing business profile.*
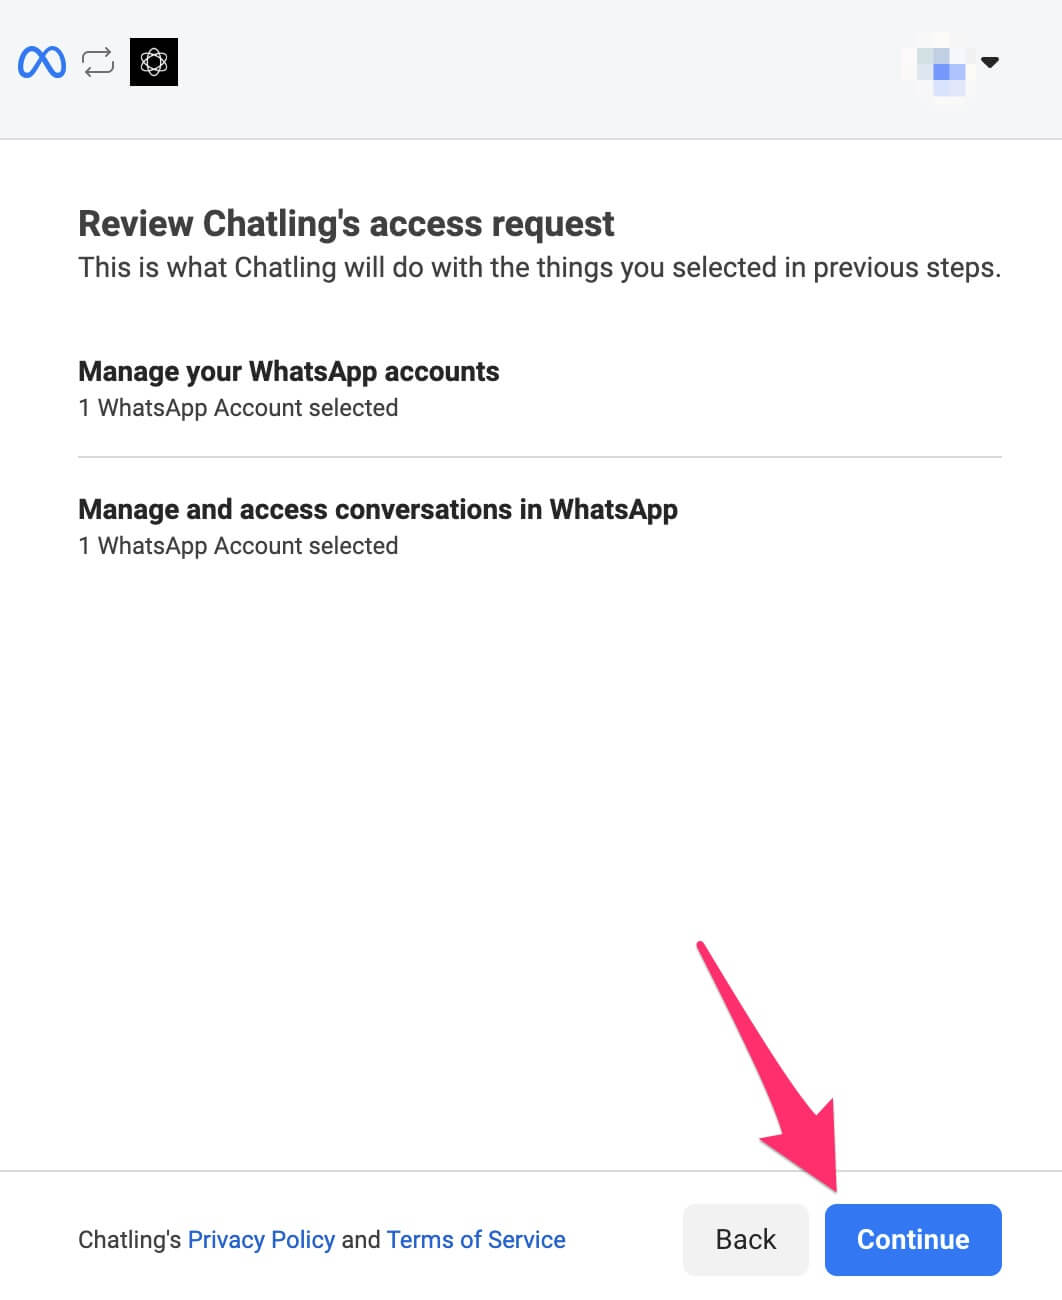 9. Facebook begins verifying the information you provided. Once it's completed successfully, you should see a message similar to below. Click the `Finish` button.
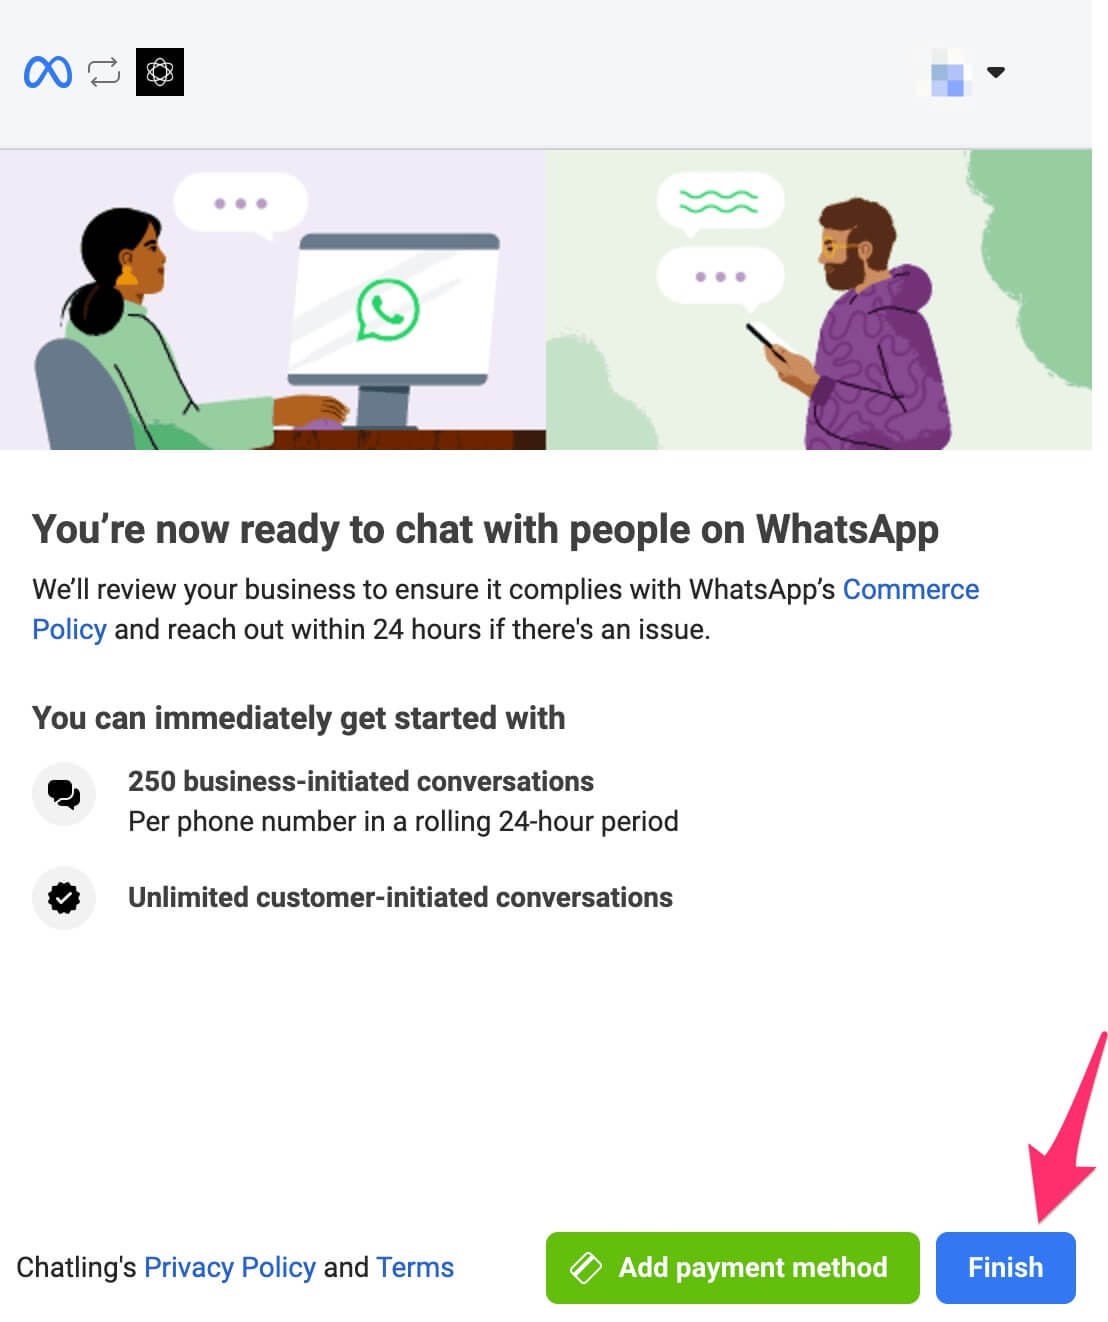 10. Go back to Chatling and a message will be displayed that your authentication is being processed. If successful, you should see a message similar to below.
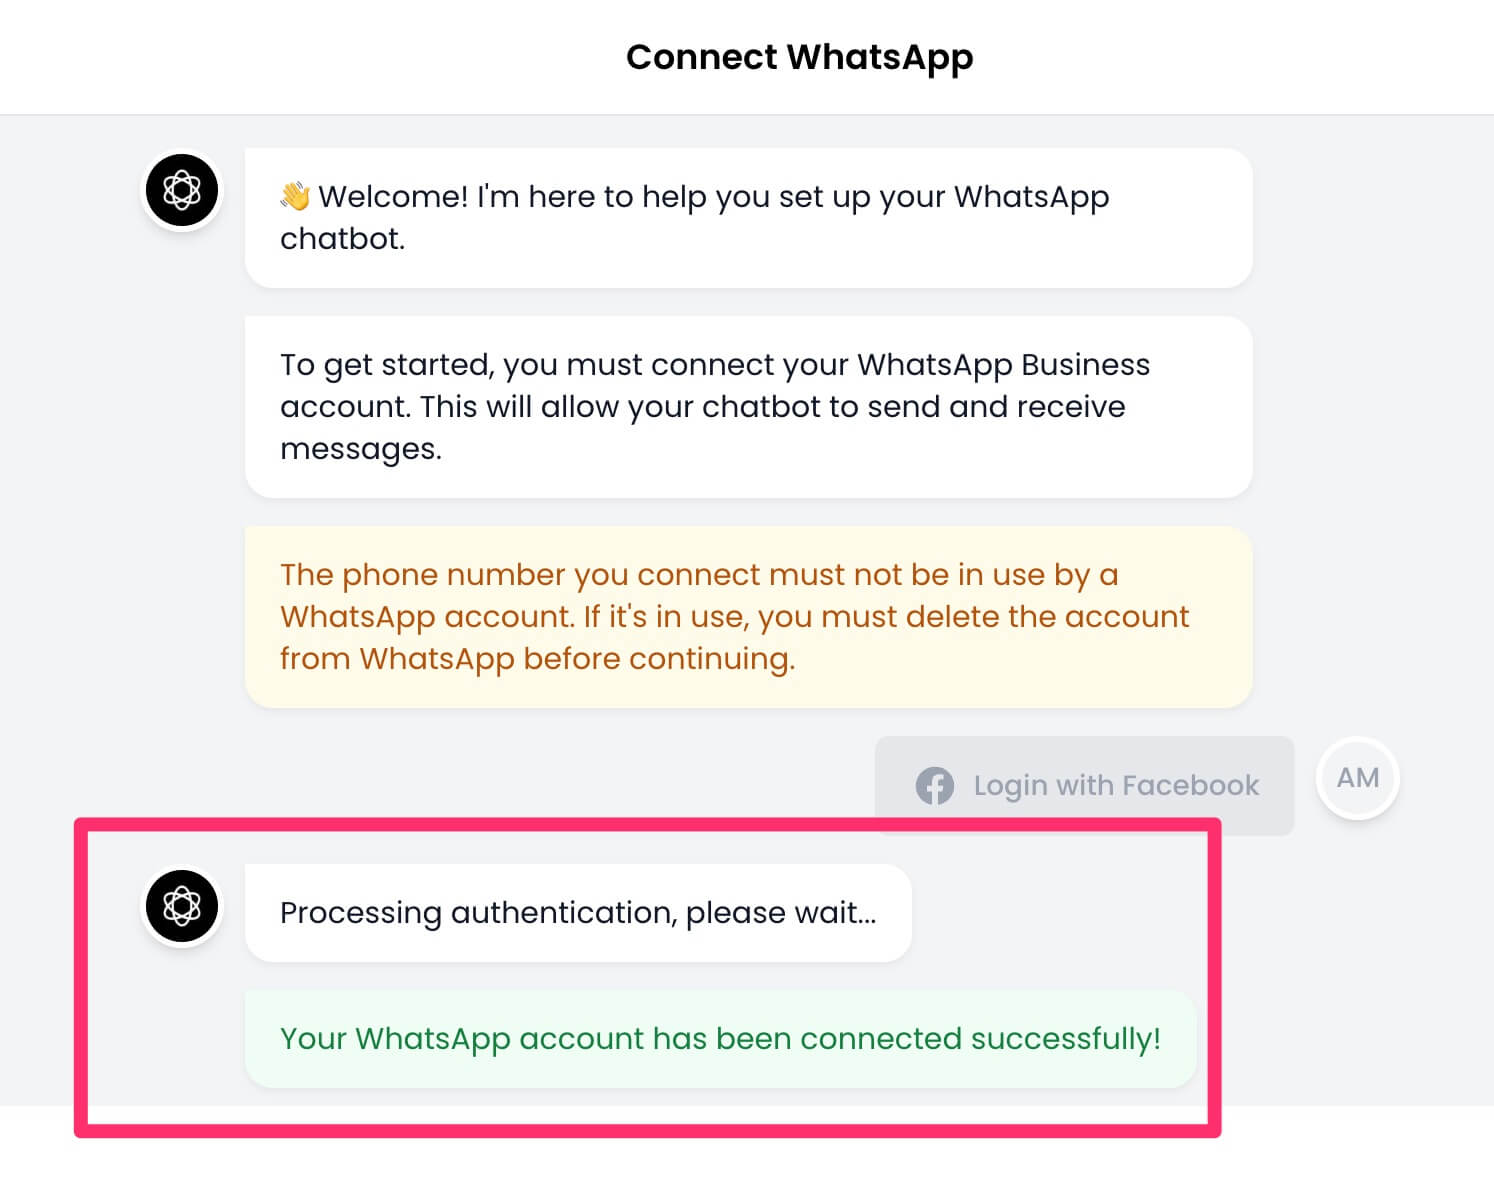 11. Next, you must enter a six digit code for two-factor authentication so that your phone number can be registered with WhatsApp. If the number already has 2FA enabled, enter the same code you had set up.
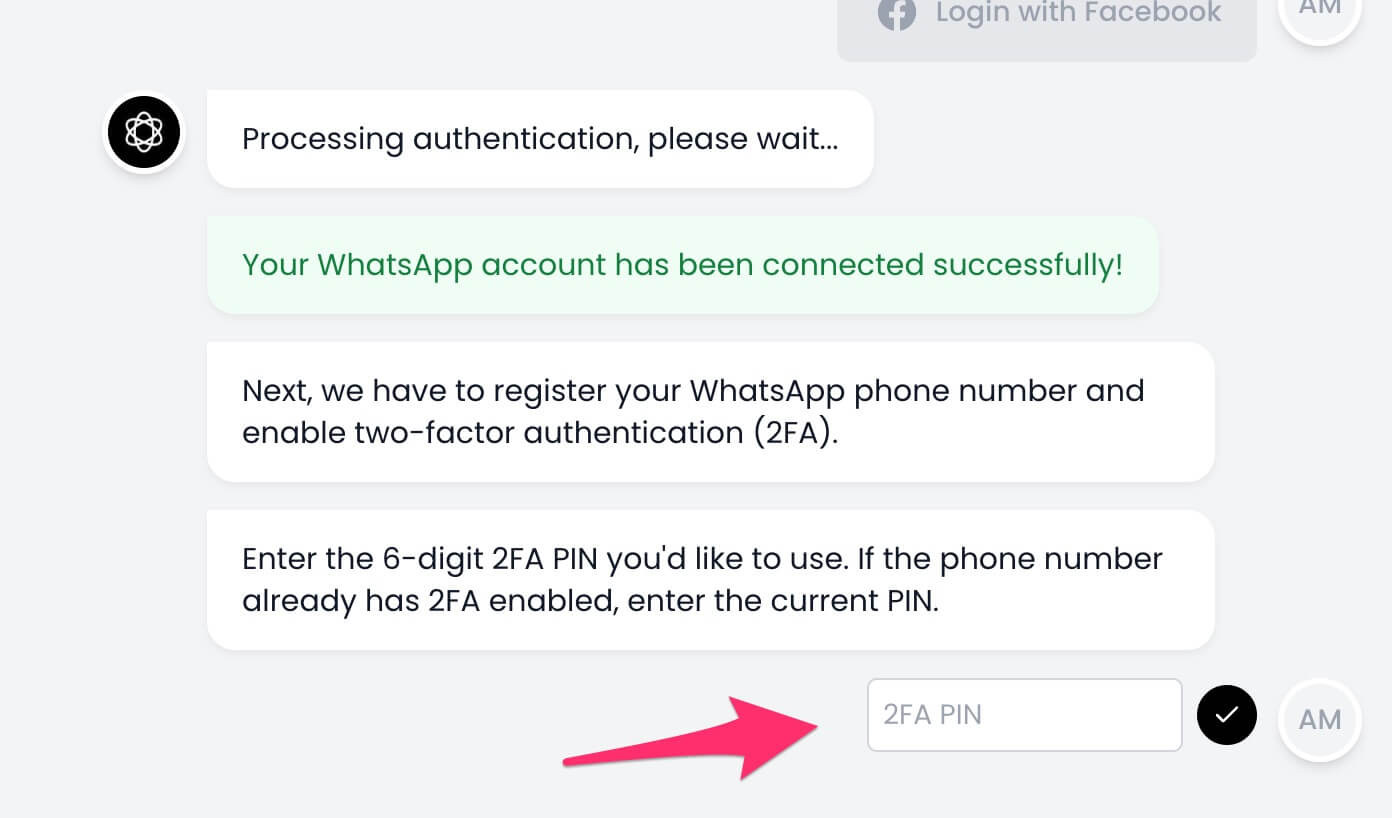 12. Once the phone number is registered successfully, you're all set and your WhatsApp Business account is connected to Chatling. Click the `Open Dashboard` button to continue.