> ## Documentation Index
> Fetch the complete documentation index at: https://docs.chatling.ai/llms.txt
> Use this file to discover all available pages before exploring further.
# Set up handoff for Chatbot
> Learn how to configure human handoff for your AI Chatbot using the Builder.
With the AI Chatbot, you have full control over how and when conversations are handed off to a human agent. Using the Builder, you can design a flow that determines the exact conditions for triggering a handoff.
The two key components are:
* **Human Handoff block** — An action block that transfers the conversation to a human agent when reached in the flow.
* **Intent trigger** — Detects when a user's message matches a specific intent (e.g. requesting human support) and routes the conversation to the handoff block.
This guide is for setting up handoff for a Chatbot. For AI Agent, see [Set up handoff for AI Agent](/live-chat/human-handoff/ai-agent).
If you're unfamiliar with the Builder, refer to the [Builder introduction](/chatbot/builder/introduction) first. For intents, see [Introduction to Intents](/chatbot/intents/introduction).
## Set up automatic handoff
This guide walks you through setting up an automatic handoff that triggers when the AI detects the user wants to speak with a human agent.
### Step 1: Create a handoff intent
First, create an intent that defines when the conversation should be handed off.
1. Go to your chatbot's dashboard and open the **Builder** page from the sidebar.
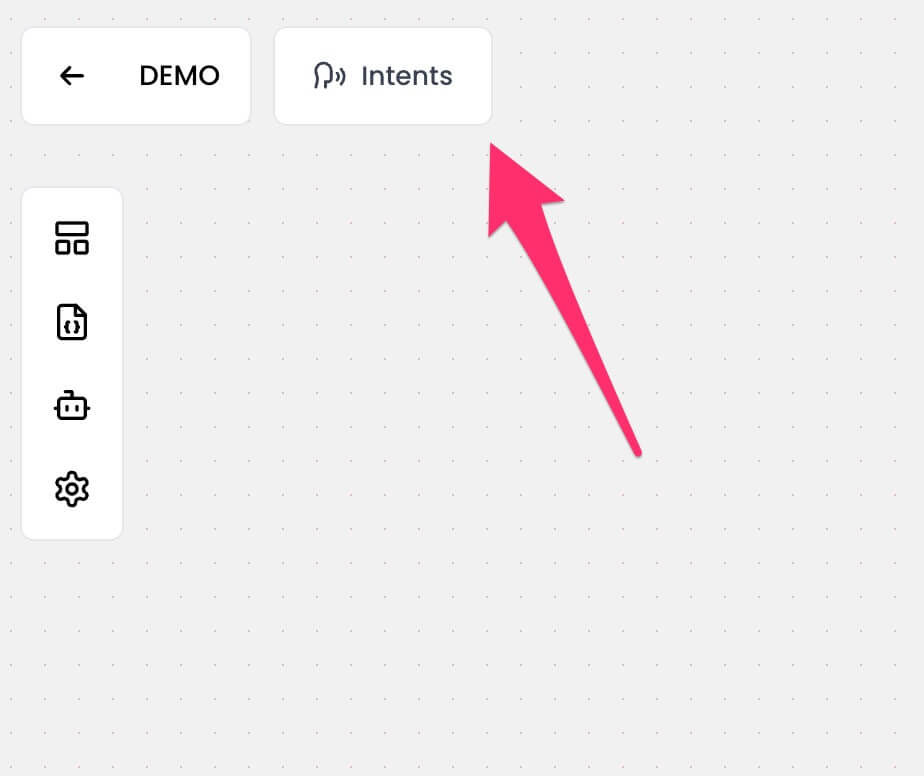
 2. Click on the `Intents` button in the top left.
 3. Click the `Templates` button in the top right.
4. Select the **Human agent / Live support** template. This creates a pre-configured intent with common phrases like "live agent" and "speak with human".
You can customize the intent's description and phrases to match your use case. For more details on managing intents, see [Manage Intents](/chatbot/intents/manage).
3. Click the `Templates` button in the top right.
4. Select the **Human agent / Live support** template. This creates a pre-configured intent with common phrases like "live agent" and "speak with human".
You can customize the intent's description and phrases to match your use case. For more details on managing intents, see [Manage Intents](/chatbot/intents/manage).
 5. Click the `Create intent` button.
The template includes common handoff phrases, but you should add any phrases specific to your business or industry to improve detection accuracy.
### Step 2: Add an Intent trigger block
Next, add an Intent trigger block to the canvas so the chatbot knows what to do when the handoff intent is detected.
1. Open **Blocks** from the sidebar.
2. Under the **Triggers** section, drag and drop the **Intent** block onto the canvas.
5. Click the `Create intent` button.
The template includes common handoff phrases, but you should add any phrases specific to your business or industry to improve detection accuracy.
### Step 2: Add an Intent trigger block
Next, add an Intent trigger block to the canvas so the chatbot knows what to do when the handoff intent is detected.
1. Open **Blocks** from the sidebar.
2. Under the **Triggers** section, drag and drop the **Intent** block onto the canvas.
 4. Click on the intent block to open its editor.
5. Select the **Human agent / Live support** intent from the dropdown.
4. Click on the intent block to open its editor.
5. Select the **Human agent / Live support** intent from the dropdown.
 ### Step 3: Add a Human Handoff block
Now add the block that will actually transfer the conversation to a human agent.
1. Open **Blocks** from the sidebar.
2. Under the **Actions** section, drag and drop the **Human Handoff** block onto the canvas.
### Step 3: Add a Human Handoff block
Now add the block that will actually transfer the conversation to a human agent.
1. Open **Blocks** from the sidebar.
2. Under the **Actions** section, drag and drop the **Human Handoff** block onto the canvas.
 3. Click the block to open its editor and configure the following settings:
* **Auto-assign priority**: Automatically assign a priority level to the conversation.
* **Handoff confirmation message**: Automatically generate and display a confirmation message to the user when the handoff is initiated.
### Step 4: Connect the blocks
Connect the Intent trigger to the Human Handoff block so the handoff is executed when the intent is detected.
1. Drag a connection from the Intent trigger block to the Human Handoff block.
3. Click the block to open its editor and configure the following settings:
* **Auto-assign priority**: Automatically assign a priority level to the conversation.
* **Handoff confirmation message**: Automatically generate and display a confirmation message to the user when the handoff is initiated.
### Step 4: Connect the blocks
Connect the Intent trigger to the Human Handoff block so the handoff is executed when the intent is detected.
1. Drag a connection from the Intent trigger block to the Human Handoff block.
 ### Step 5: Enable intent matching on input blocks
Finally, tell the chatbot to check for the handoff intent when users send messages.
1. Open the input block where users enter their queries (e.g. a **Capture Text** block).
### Step 5: Enable intent matching on input blocks
Finally, tell the chatbot to check for the handoff intent when users send messages.
1. Open the input block where users enter their queries (e.g. a **Capture Text** block).
 2. Under the **Match intent** section, click the **+** icon.
3. Select the **Human agent / Live support** intent.
2. Under the **Match intent** section, click the **+** icon.
3. Select the **Human agent / Live support** intent.
 Now, whenever a user sends a message through that input block, the chatbot will check if it matches the handoff intent. If it does, the Intent trigger fires and the Human Handoff block is executed, transferring the conversation to your team.
If no intent matches, the chatbot continues with its normal flow.
### Complete flow
Your finished flow should look something like this:
Now, whenever a user sends a message through that input block, the chatbot will check if it matches the handoff intent. If it does, the Intent trigger fires and the Human Handoff block is executed, transferring the conversation to your team.
If no intent matches, the chatbot continues with its normal flow.
### Complete flow
Your finished flow should look something like this:
 ## Alternative: Manual placement
You don't have to use intents for handoff. You can place the Human Handoff block anywhere in your chatbot flow and connect it directly to other blocks.
For example, you could:
* Connect it after a **Buttons** block where one option is "Talk to a human".
* Place it at the end of a troubleshooting flow as a fallback when the chatbot can't resolve the issue.
* Trigger it from a **Condition** block based on a variable value.
This gives you full flexibility to design the exact handoff experience you want.
## What happens after handoff
Once the handoff is triggered:
1. The conversation is flagged as **Needs agent intervention** in the [Conversations](/live-chat/managing-conversations) page.
## Alternative: Manual placement
You don't have to use intents for handoff. You can place the Human Handoff block anywhere in your chatbot flow and connect it directly to other blocks.
For example, you could:
* Connect it after a **Buttons** block where one option is "Talk to a human".
* Place it at the end of a troubleshooting flow as a fallback when the chatbot can't resolve the issue.
* Trigger it from a **Condition** block based on a variable value.
This gives you full flexibility to design the exact handoff experience you want.
## What happens after handoff
Once the handoff is triggered:
1. The conversation is flagged as **Needs agent intervention** in the [Conversations](/live-chat/managing-conversations) page.
 2. An [AI summary](/live-chat/managing-conversations#ai-summary) of the conversation is generated for the agent.
 3. If [notifications](/live-chat/notifications) are enabled, your team will be notified.
4. A team member can then pick up the conversation and reply directly.
## Next steps
Set office hours and reply time for your team.
Configure notifications for your team.
Learn how to manage handed-off conversations.
3. If [notifications](/live-chat/notifications) are enabled, your team will be notified.
4. A team member can then pick up the conversation and reply directly.
## Next steps
Set office hours and reply time for your team.
Configure notifications for your team.
Learn how to manage handed-off conversations.